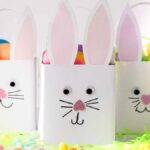
Bunny Tissue Box Easter Basket
You only need a few basic supplies to make a cute bunny tissue box Easter basket. Fill it with chocolate eggs, small toys or your favorite Easter treats!
Servings: 1
Ingredients
- 1 square tissue box approx. 5-inch square
- 3 Sheets white cardstock
- 2 googly eyes
- 1 Small heart-shaped craft foam
Instructions
- Print out the bunny ears printable on white cardstock, cut them out and set aside.
- Remove the top of a tissue box using scissors, begin cutting from the center, and work your way toward each corner. Finally, remove the remaining cardboard.
- For the next step, you'll need two sheets of white cardstock, along with a ruler and a pencil. Use the ruler and pencil to mark each sheet at the 5-inch point. Then, cut both sheets into 5” x 11” strips.
- Take the cardstock strips and glue them to the sides of the tissue box, ensuring full the sides of the box are completely covered.
- To create a handle for your box, cut a 2” x 11” strip from one of the cardstock scraps. Then, staple the strip to the edge of two sides of the box.
- To create the bunny face, measure 1.5” down and 1” in from either side of the box, and secure googly eyes with glue.
- Place a craft foam heart in between the eyes to make a bunny nose.
- Grab a black Sharpie. Write the letter J forward and backward to form the mouth and draw on whiskers.
- Now fill the basket with candy, Easter eggs and Easter grass.
Notes
Let the glue dry: Some kinds of glue take longer to dry. Elmer's glue takes longer than most glue sticks, for example.
Add a tail: A white pompom or cotton ball glued on the back makes a cute bunny tail.
Get artsy: You can use black paint, white paint or even a pipe cleaner for the facial features.
Add a tail: A white pompom or cotton ball glued on the back makes a cute bunny tail.
Get artsy: You can use black paint, white paint or even a pipe cleaner for the facial features.
QR code
Scan this QR code with your phone's camera to view this recipe on your mobile device.
