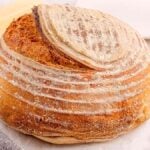
Beginner’s Sourdough Bread
This loaf uses gentle folds and time to build strength and flavor. The Dutch oven creates steam for spring and a crisp shell. With beginner’s sourdough bread you get a tender crumb and a confident first bake.
Servings: 8
Equipment
- Dutch Oven or Heavy Oven-Safe Pot
- Bench Scraper or Dough Scraper, Optional
Ingredients
- 3 ½ Cups all-purpose flour 420 Grams
- 1 Cup active sourdough starter 240 Grams, fed and bubbly at 100% hydration
- 1 ¼ Cups warm water 300ml, at 80 to 85°F
- 2 Teaspoons fine sea salt 10 Grams
To Dust the Proofing Bowl
- all-purpose flour or rice flour
Instructions
Step 1. Mix the Bread Dough (Day 1, Morning or Early Afternoon)
- In a large mixing bowl (or stand mixer with dough hook), add flour, your bubbly starter, warm water and salt. Mix the ingredients with a wooden spoon until everything comes together into a shaggy bread dough. The dough will look rough and feel slightly sticky.
- Let the dough rest in the bowl for 30 minutes, covered with a damp towel or plastic wrap. This step helps hydrate the flour and makes the dough easier to work with.
Step 2. Stretch and Fold (Build Strength without Commercial Yeast)
- After the 30 minute rest, wet your hand and grab one side of the dough, stretch it up gently, and fold it over to the other side.
- Give the bowl a quarter turn and repeat. Do this 4 times total, once for each "side."
- Cover the bowl and then wait for 30 minutes.
- Repeat this stretch-and-fold process 3 more times, every 30 minutes (for about 2 hours total). Your bread dough will feel smoother and tighter each time.
Step 3. Bulk Fermentation (First Rise)
- After your last fold, cover the dough and let it rest in a warm place for 4 to 6 hours. You're looking for about a 50% dough rise. The dough should be jiggly, look puffier and have bubbles on the surface.
- To test: Gently poke the dough. It should spring back slowly.
- Tip: The temperature of your kitchen affects the rise. The ideal room temperature for this step is around 72 to 75°F. On cooler days, place dough near your stove or in your turned-off oven with the light on.
Step 4. Shape the Dough
- On a lightly floured work surface, gently tip the dough onto it, trying not to deflate it too much. Using a bench scraper if you have one, stretch it into a rectangle and fold both sides toward the center. Roll it up from the bottom like a burrito.
Step 5. Final Rise
- Dust a proofing basket or a bowl lined with a towel using rice flour (which prevents sticking). Place the bread dough seam-side up in the basket. Pinch or "stitch" the top seam to build surface tension and then cover it with a damp towel or plastic wrap.
- Let the bread rise at room temperature for 1 to 2 hours, until it is slightly puffy. I like to test it by gently poking the dough. It should spring back slowly but leave a slight indent.
- After that, refrigerate it overnight for 8 to 24 hours. This final rise helps the dough develop flavor and makes it easier to score and bake the next morning.
Step 6. Bake the Fresh Sourdough Bread (Day 2, Morning)
- Preheat your oven to 475°F for at least 30 minutes with your empty Dutch oven inside. Cut a piece of parchment paper and place it on the loaf (now seam-side down).
- Score the top with a razor blade, or lame (I typically make one deep slash about ½ inch deep). Carefully lift the dough with parchment and place it into the hot Dutch oven.
- Bake it covered for 20 minutes. Then uncover and bake it for another 20 to 25 minutes until the crust is golden brown and the loaf sounds hollow when tapped.
Step 7. Cool Completely
- Remove the loaf of bread from the dutch oven and let it cool on a cooling rack for at least 1 or 2 hours. Cutting it too early will result in gummy, undercooked bread. The bread usually continues to cook from residual heat during cooling.
- After it cools, slice and enjoy your sourdough bread.
Notes
Judge by feel: Aim for soft and slightly tacky dough that stretches without tearing.
Heat the vessel: A fully preheated Dutch oven gives strong spring and crisp crust.
Flour smart: Flour in the bowl or basket releases dough cleanly.
Score with intent: One confident slash helps the loaf bloom where you want it to.
Wait to slice: Cooling locks in structure so slices stay tender, not gummy.
Watch hydration levels: This sourdough recipe creates a slightly sticky dough (that's totally normal). If you're new to sourdough, try not to add much flour during shaping; it can make your bread dense. If your bread is too wet when mixing, add flour a tablespoon at a time. If it is too dry, add water a tablespoon at a time.
Let the dough rest: Don't rush the bulk fermentation or proofing stages. Giving the dough enough time to relax and ferment is the secret to great flavor and texture.
Keep it warm: If baking this beginner sourdough bread recipe on a chilly day, keep dough near 72 to 75°F, or use a turned off oven with the light on for gentle warmth.
Heat the vessel: A fully preheated Dutch oven gives strong spring and crisp crust.
Flour smart: Flour in the bowl or basket releases dough cleanly.
Score with intent: One confident slash helps the loaf bloom where you want it to.
Wait to slice: Cooling locks in structure so slices stay tender, not gummy.
Watch hydration levels: This sourdough recipe creates a slightly sticky dough (that's totally normal). If you're new to sourdough, try not to add much flour during shaping; it can make your bread dense. If your bread is too wet when mixing, add flour a tablespoon at a time. If it is too dry, add water a tablespoon at a time.
Let the dough rest: Don't rush the bulk fermentation or proofing stages. Giving the dough enough time to relax and ferment is the secret to great flavor and texture.
Keep it warm: If baking this beginner sourdough bread recipe on a chilly day, keep dough near 72 to 75°F, or use a turned off oven with the light on for gentle warmth.
Nutrition
Calories: 199kcal | Carbohydrates: 42g | Protein: 6g | Fat: 1g | Saturated Fat: 0.1g | Polyunsaturated Fat: 0.2g | Monounsaturated Fat: 0.05g | Sodium: 582mg | Potassium: 59mg | Fiber: 1g | Sugar: 0.1g | Calcium: 9mg | Iron: 3mg
QR code
Scan this QR code with your phone's camera to view this recipe on your mobile device.
