This post may contain affiliate links, please see the privacy policy for details.
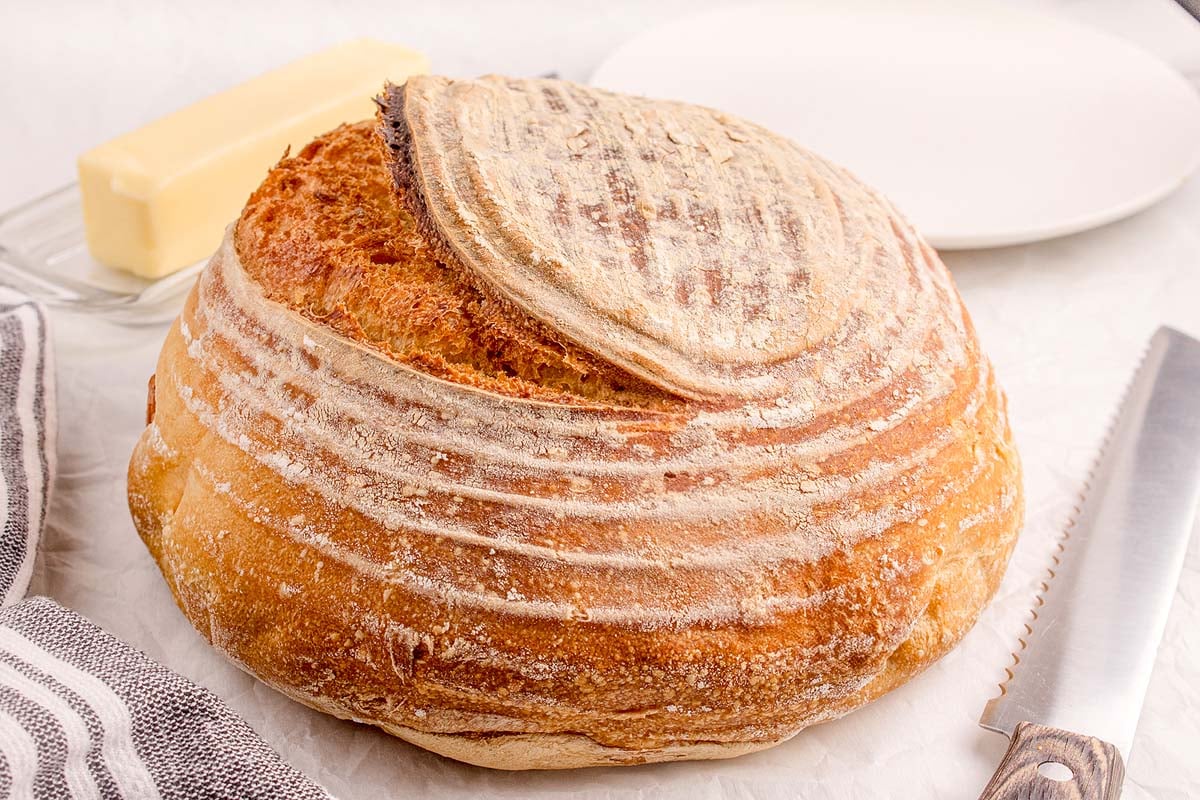
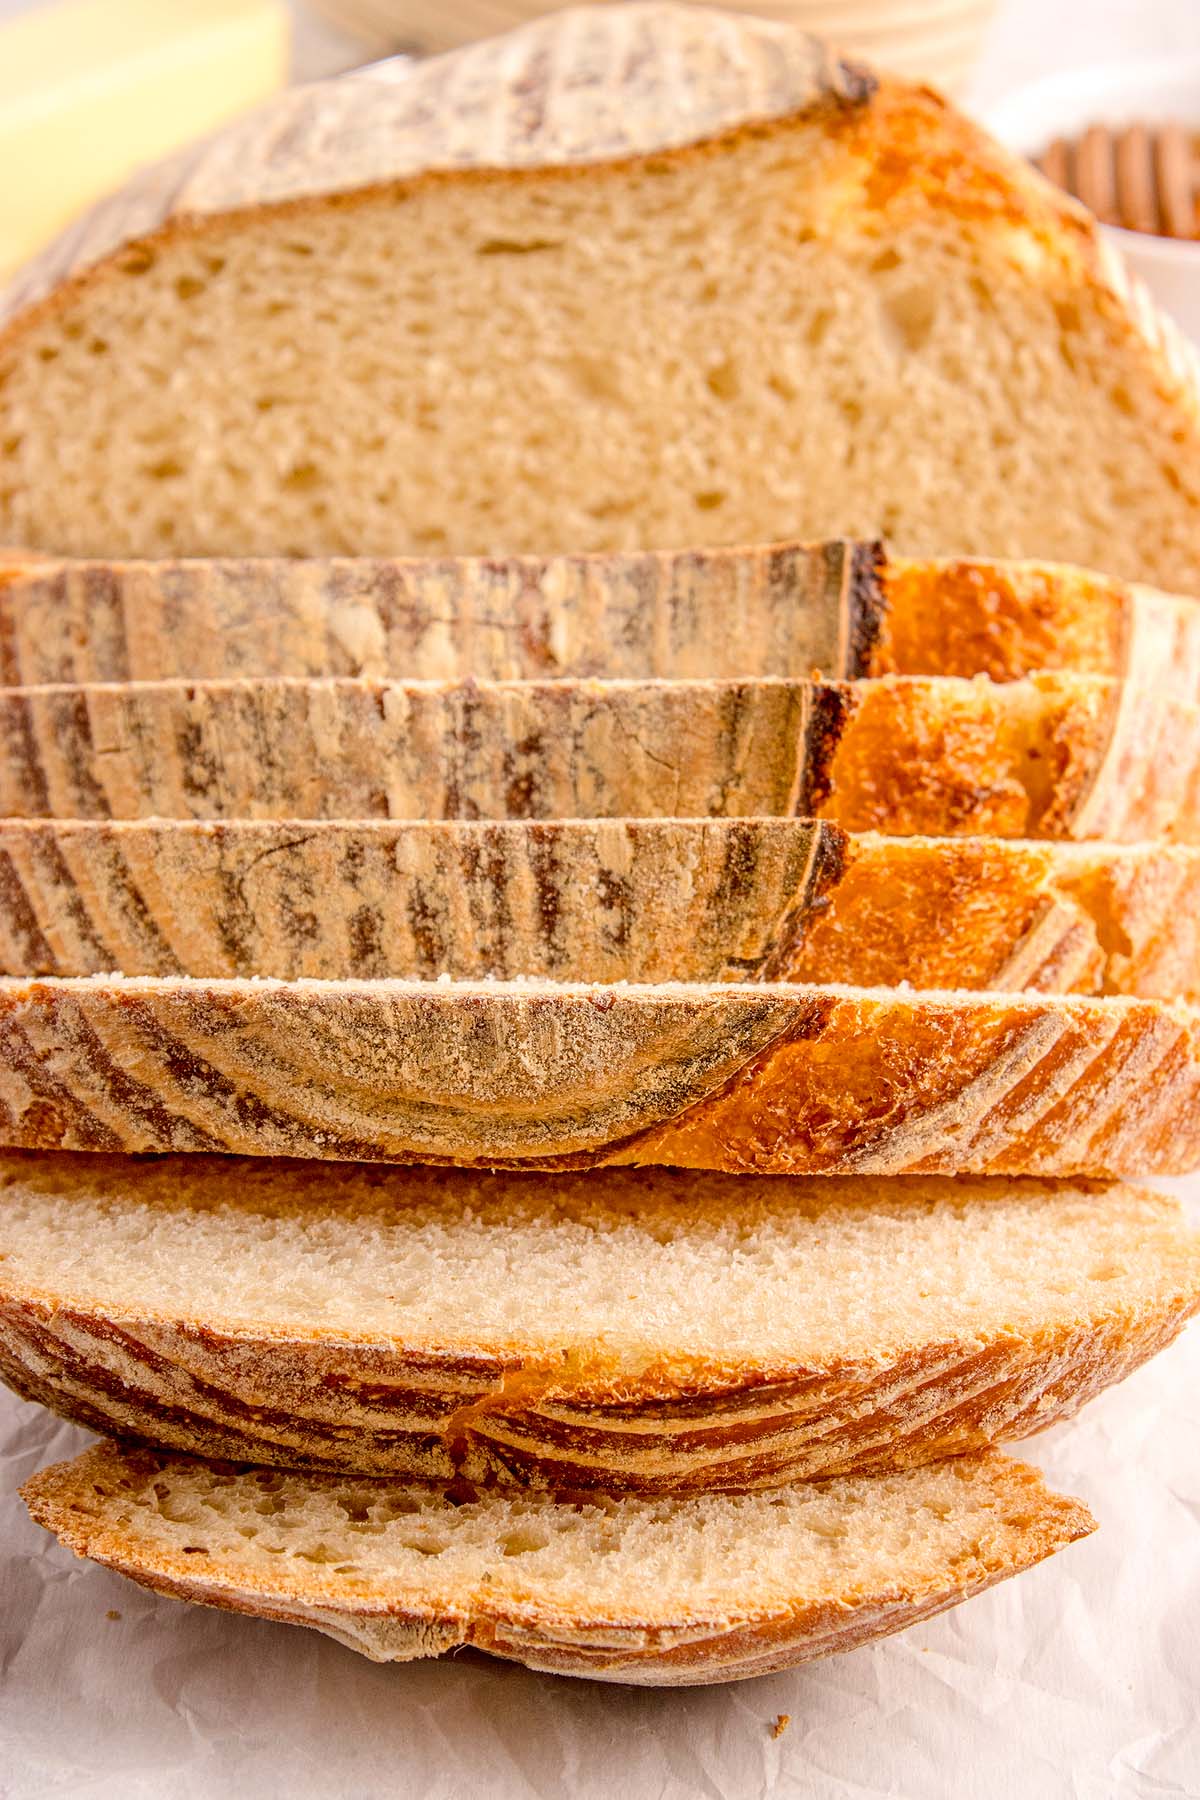
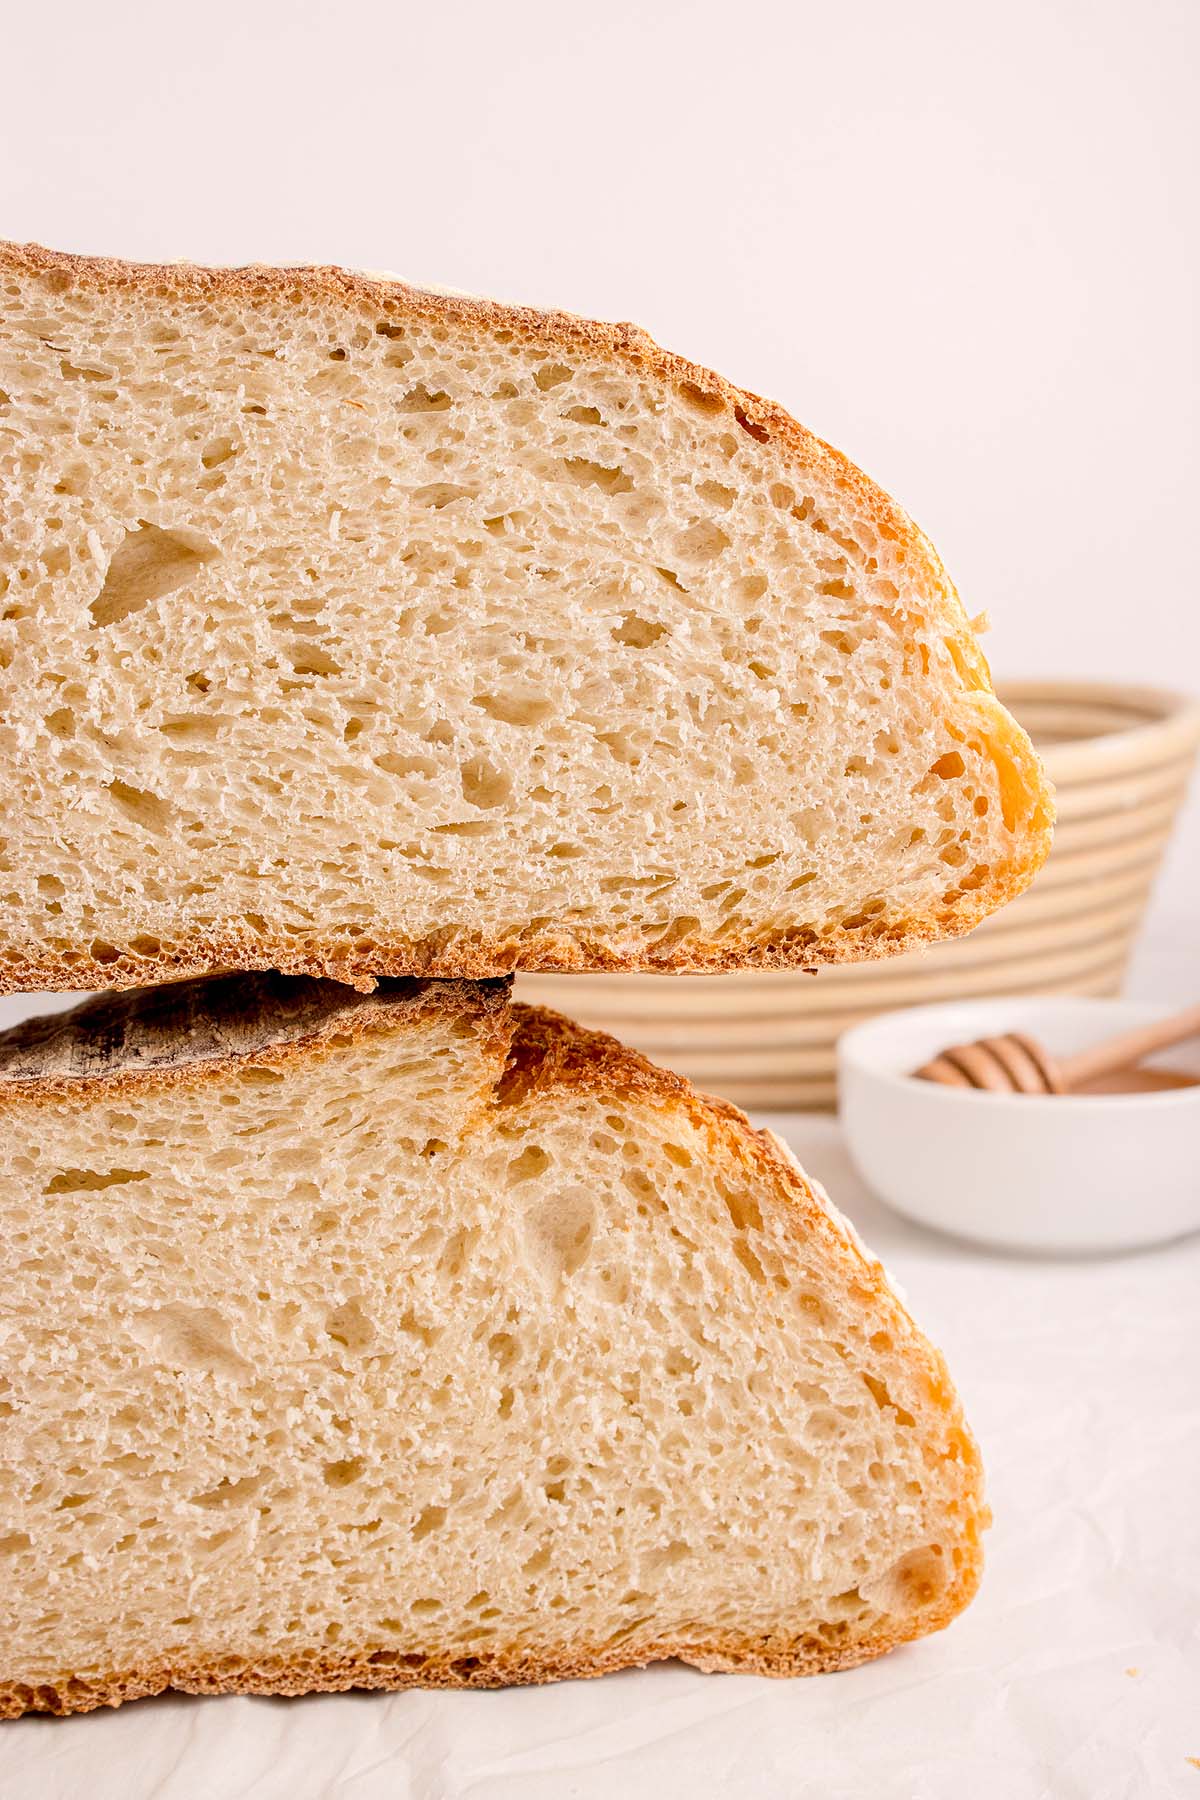
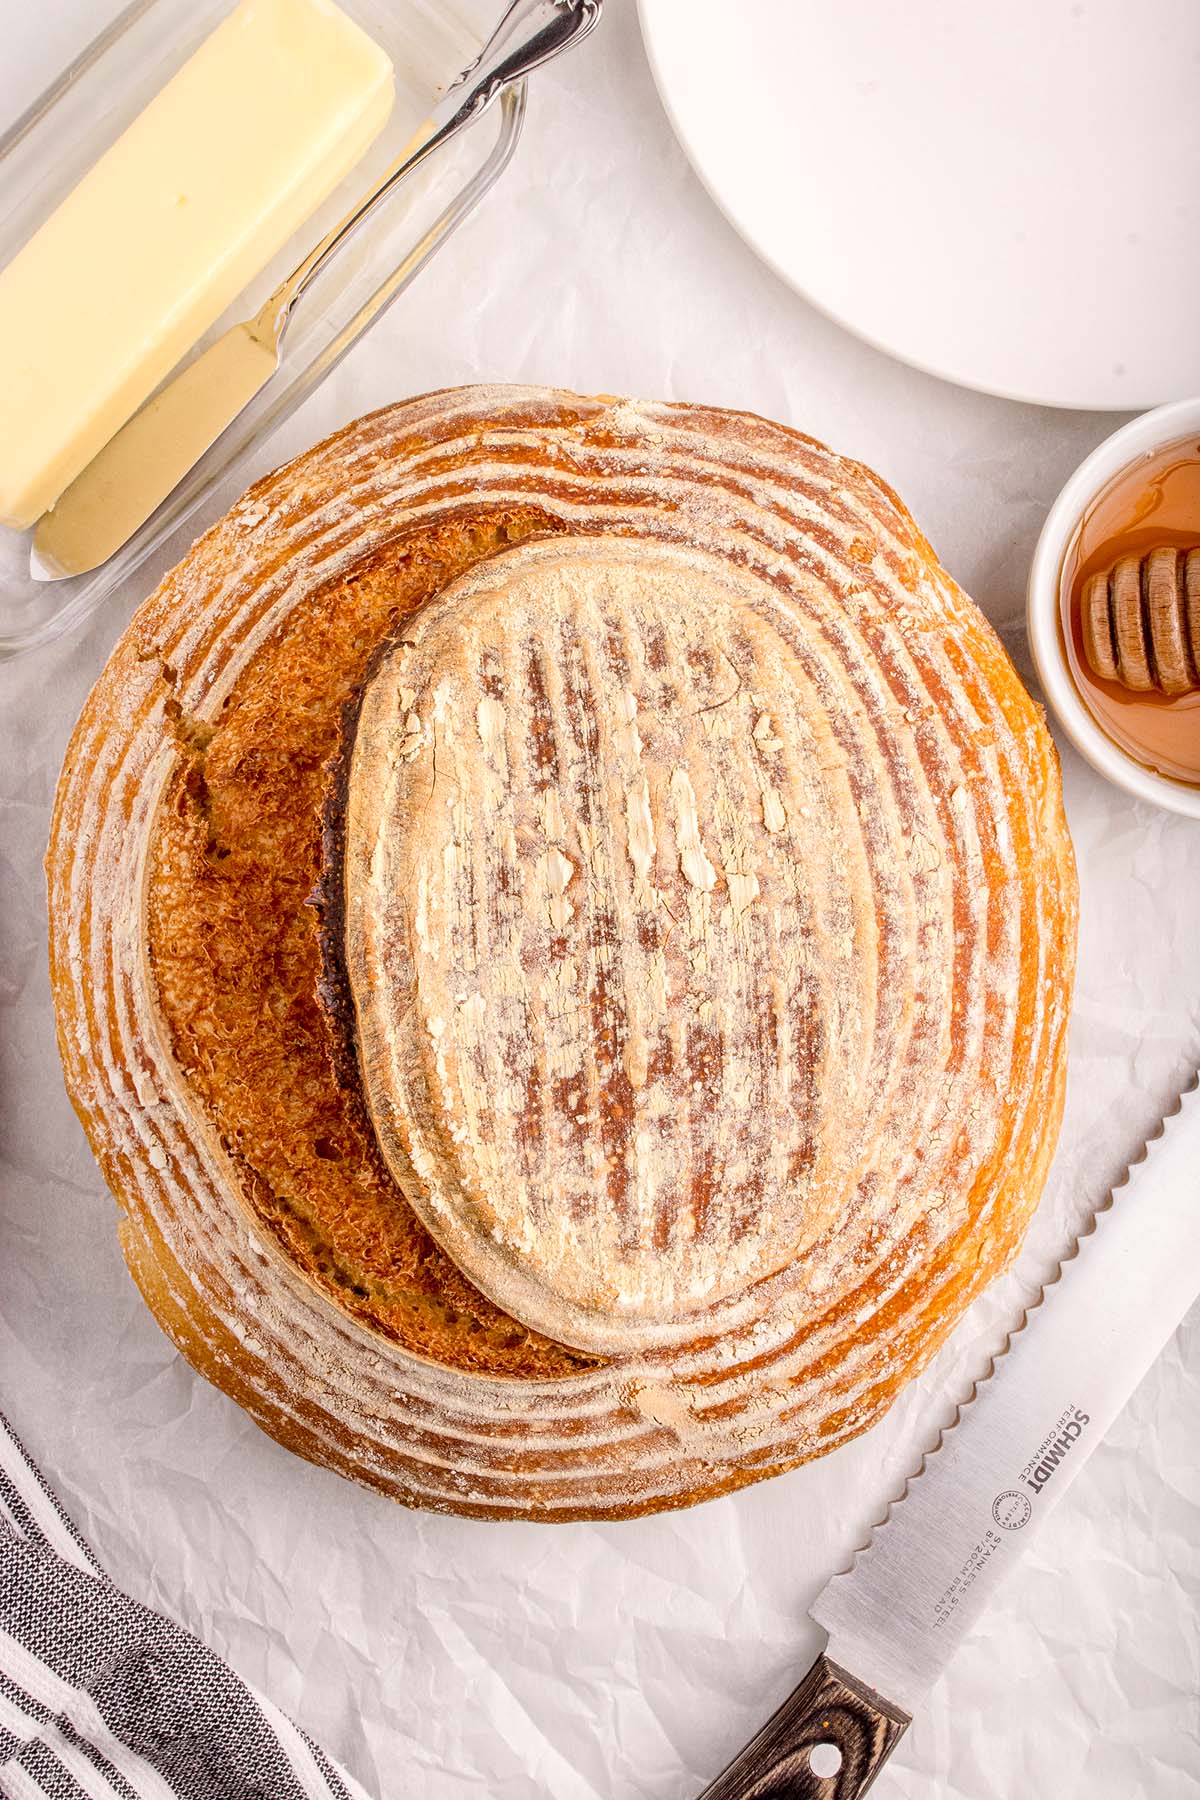
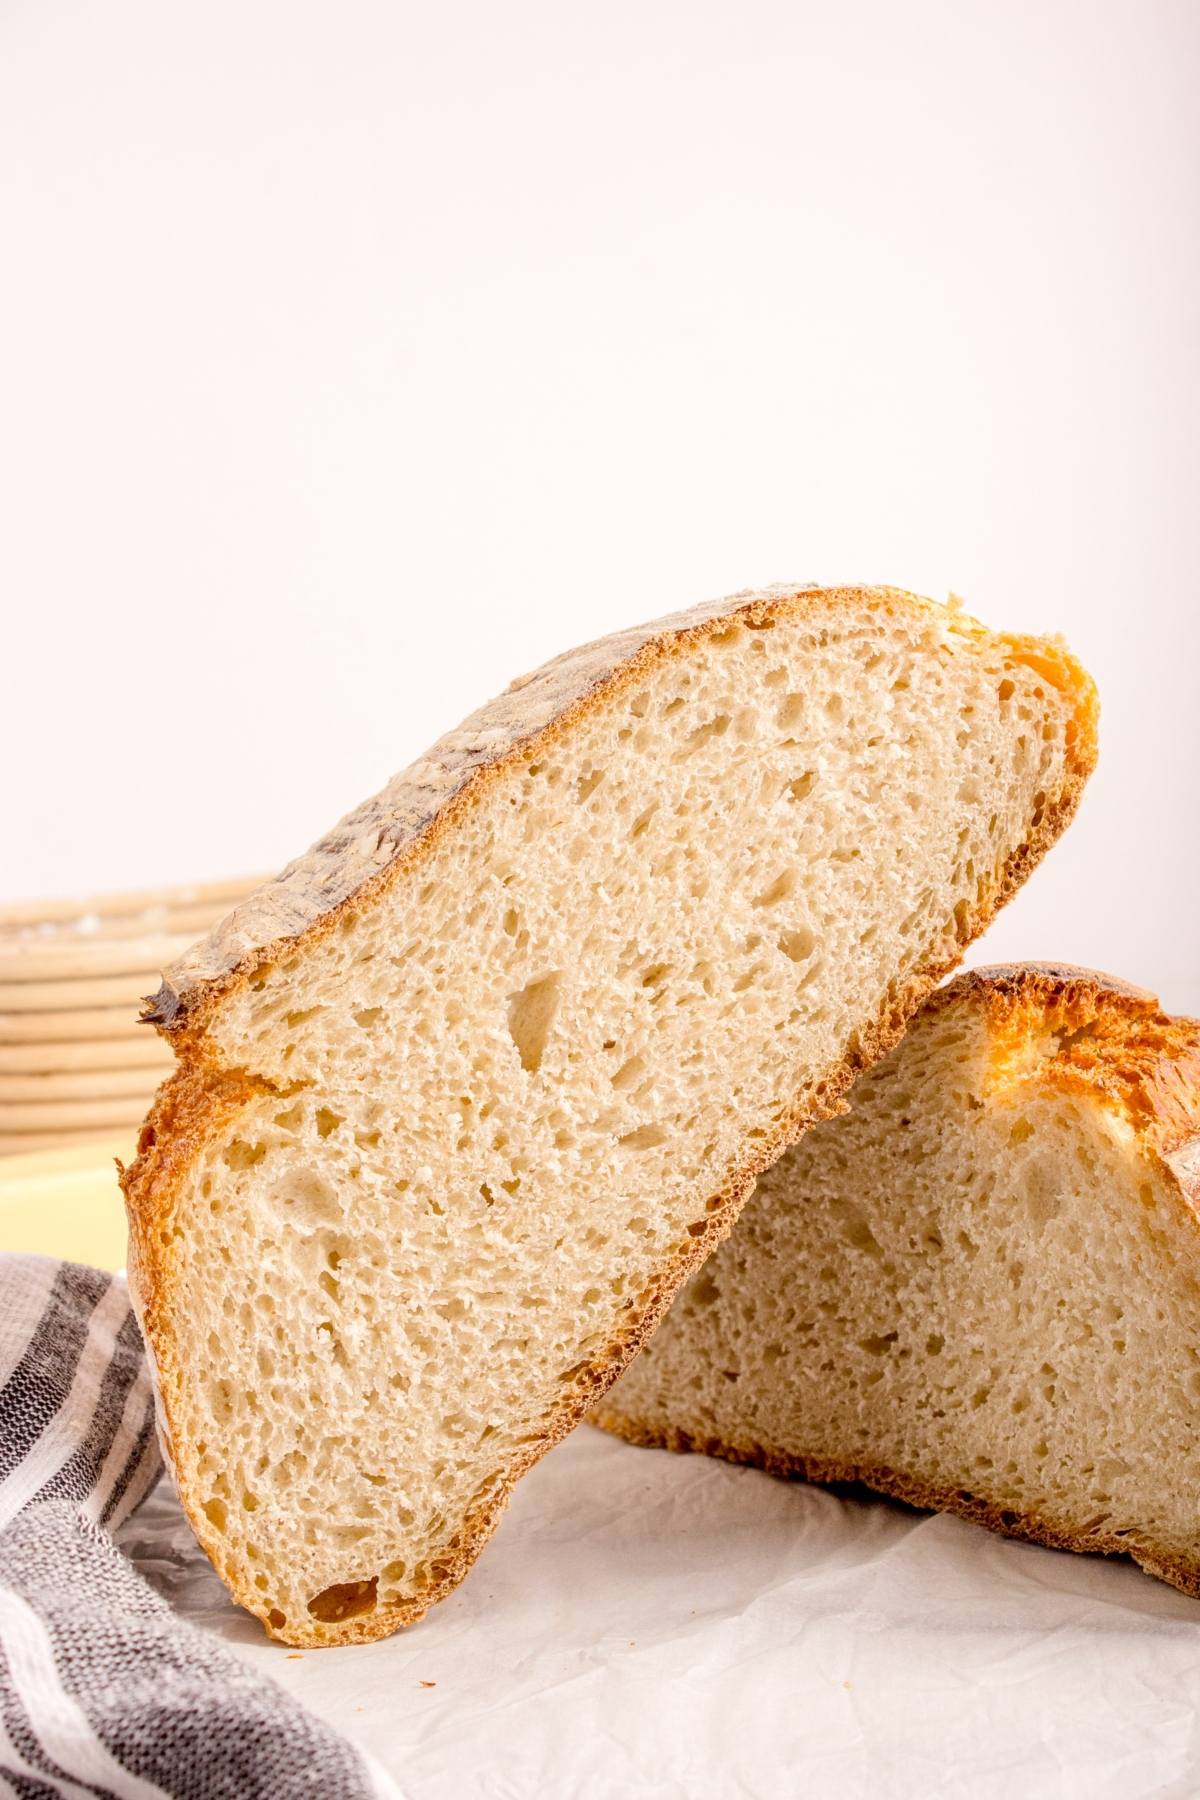
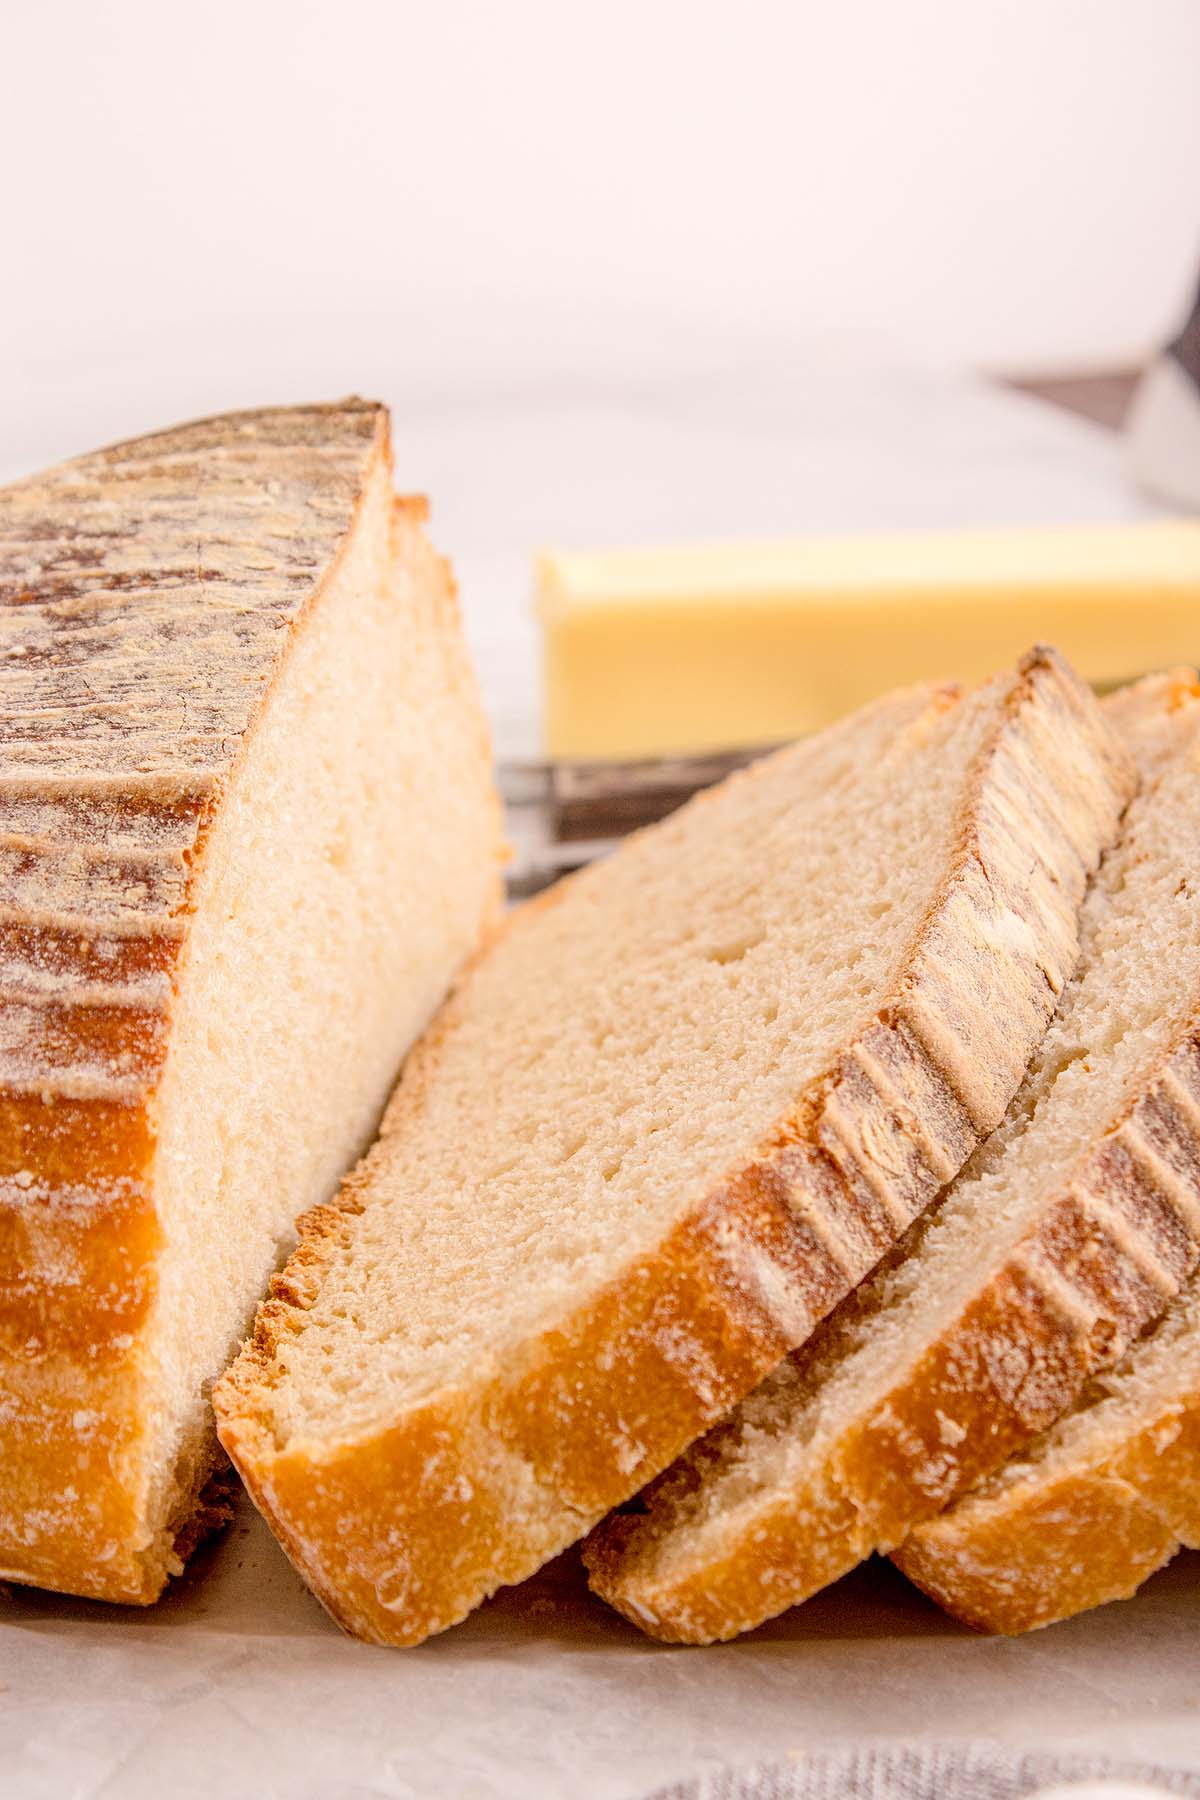
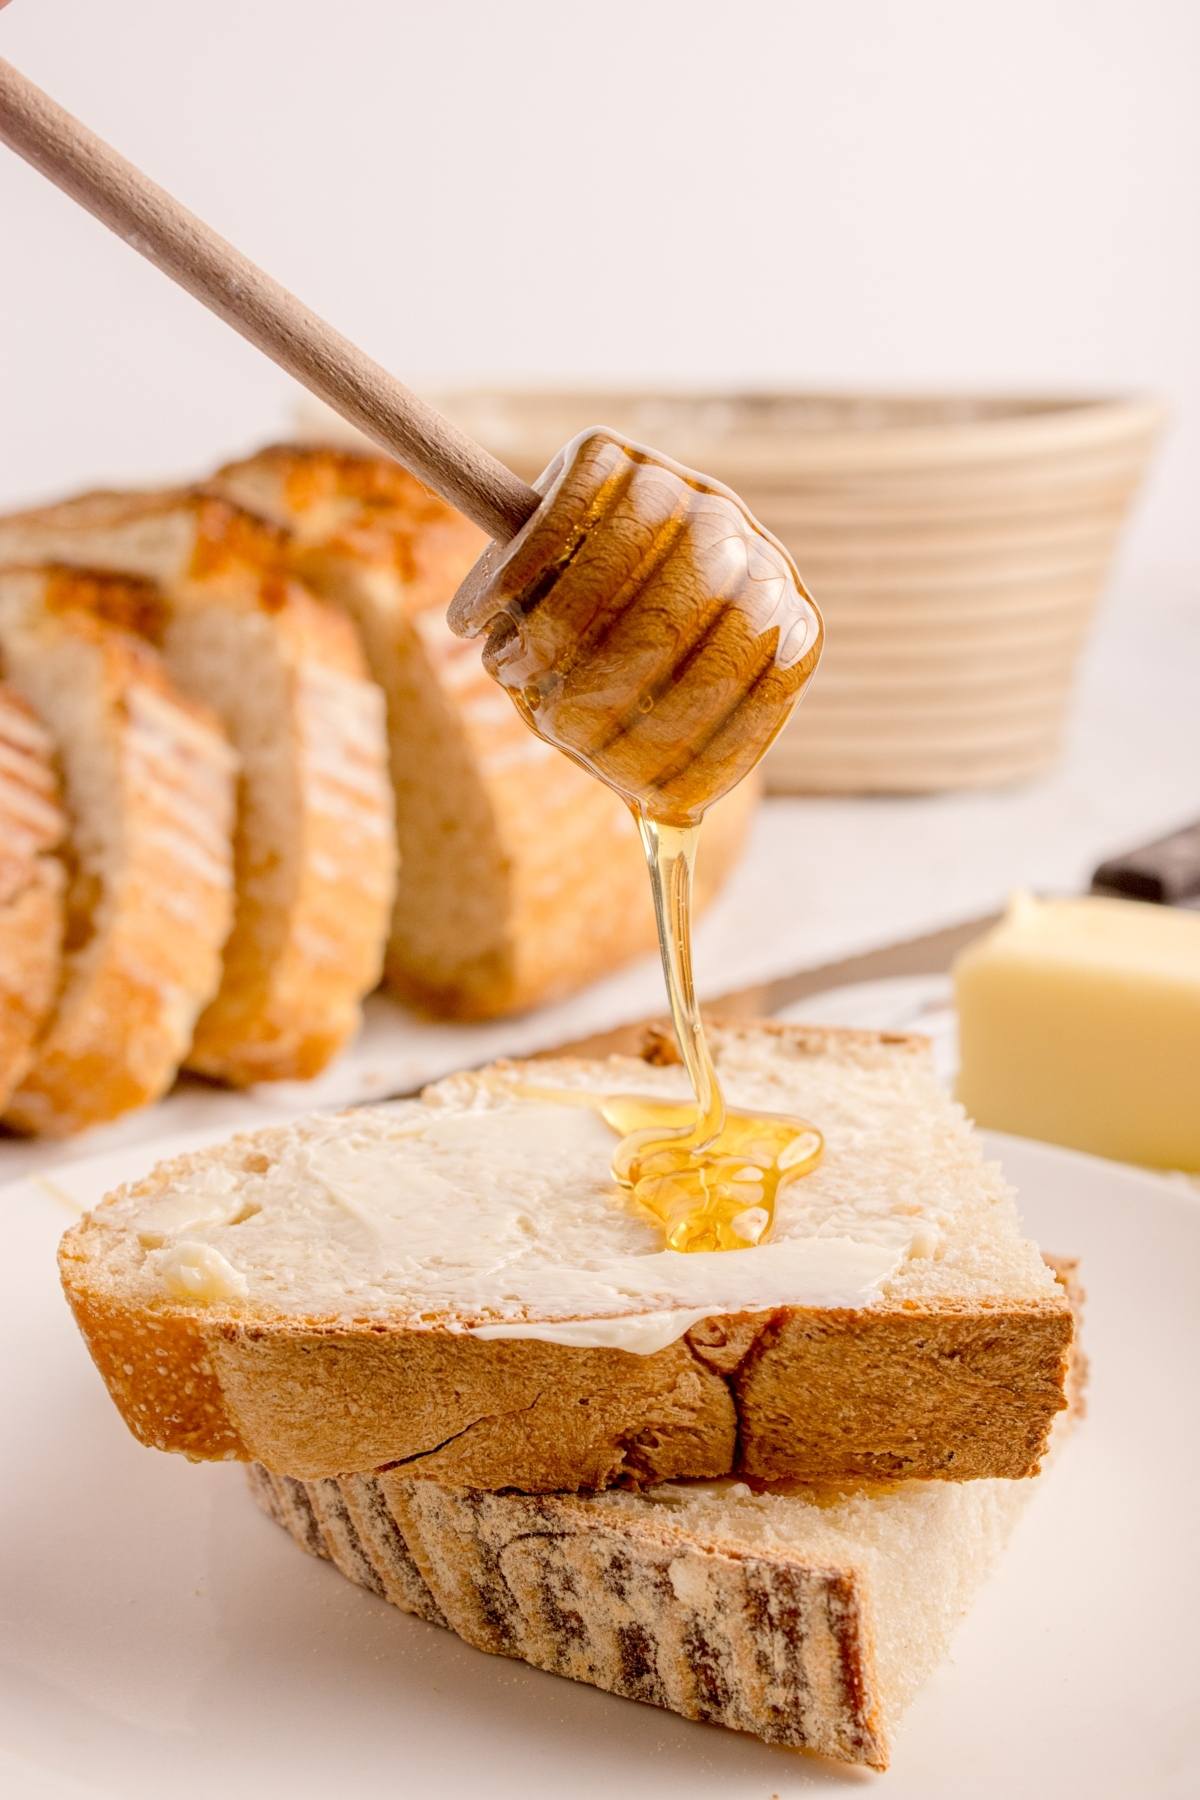
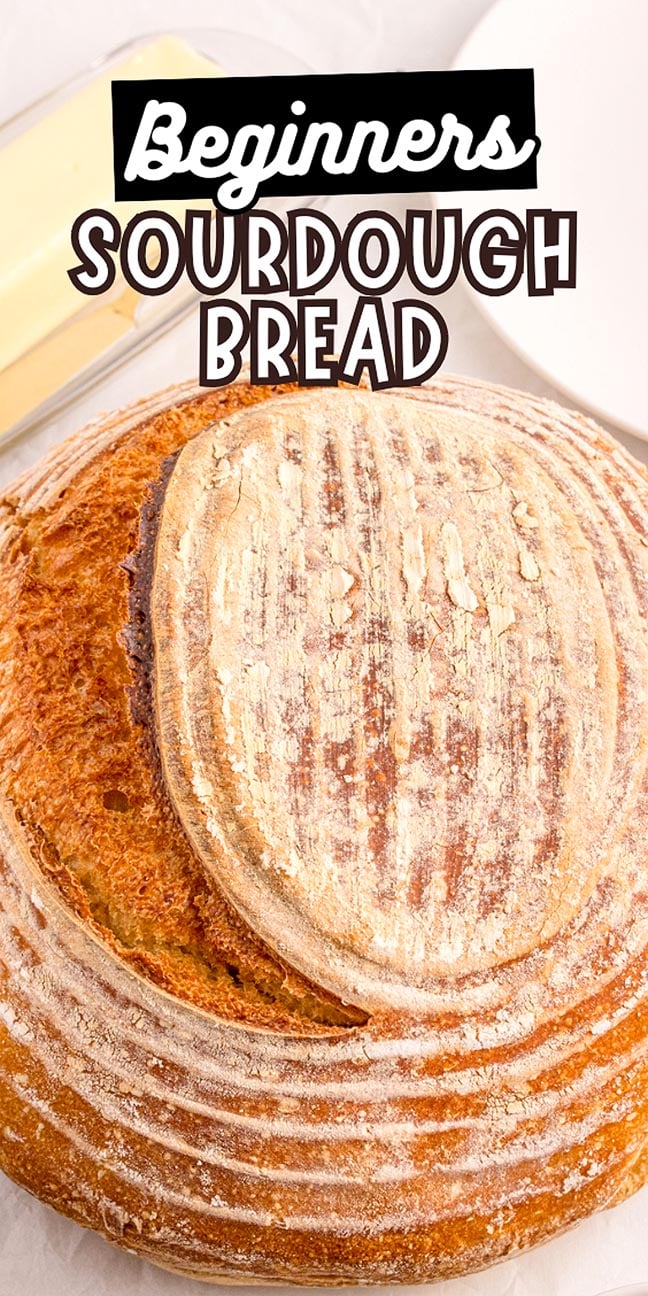
Sourdough recipes can feel intimidating, but beginner’s sourdough bread keeps thnigs simple and forgiving. You’ll mix a soft dough, build strength with easy stretches, then let time do the rest. A hot Dutch oven traps steam so you get lift and a blistered crust from your sourdough baking without any special gear. The crumb is tender with just enough chew, offering a pleasantly tangy, slightly sour flavor. Slice for toast, stack for sandwiches or tear into warm pieces to dunk in soup. You’ll find lots of ways to enjoy this cozy, easy sourdough bread recipe and the aroma of sourdough bread baking in the kitchen is always a joy.
Why You’ll Love It

Bake beginner’s sourdough bread with a simple mix, gentle folds and an overnight rest. A hot Dutch oven gives lift and tender crumb for toast or sandwiches.
Approachable method: Using cups instead of precise weighing makes it more approachable for home baking newbies, while a simple stretch and folds replaces heavy kneading.
Great crust at home: A Dutch oven or heavy pot traps steam for oven spring.
Flexible schedule: The long rests fit busy days and boosts the bread’s flavor.
Everyday uses: A loaf of sourdough bread offers plenty of possibilities. Toast, sandwiches or bowls of soup are just some of your options.
Home bakers may also like this honeycomb bread, chocolate loaf bread, my gluten-free naan bread, Irish soda bread, or this pumpkin crunch bread.
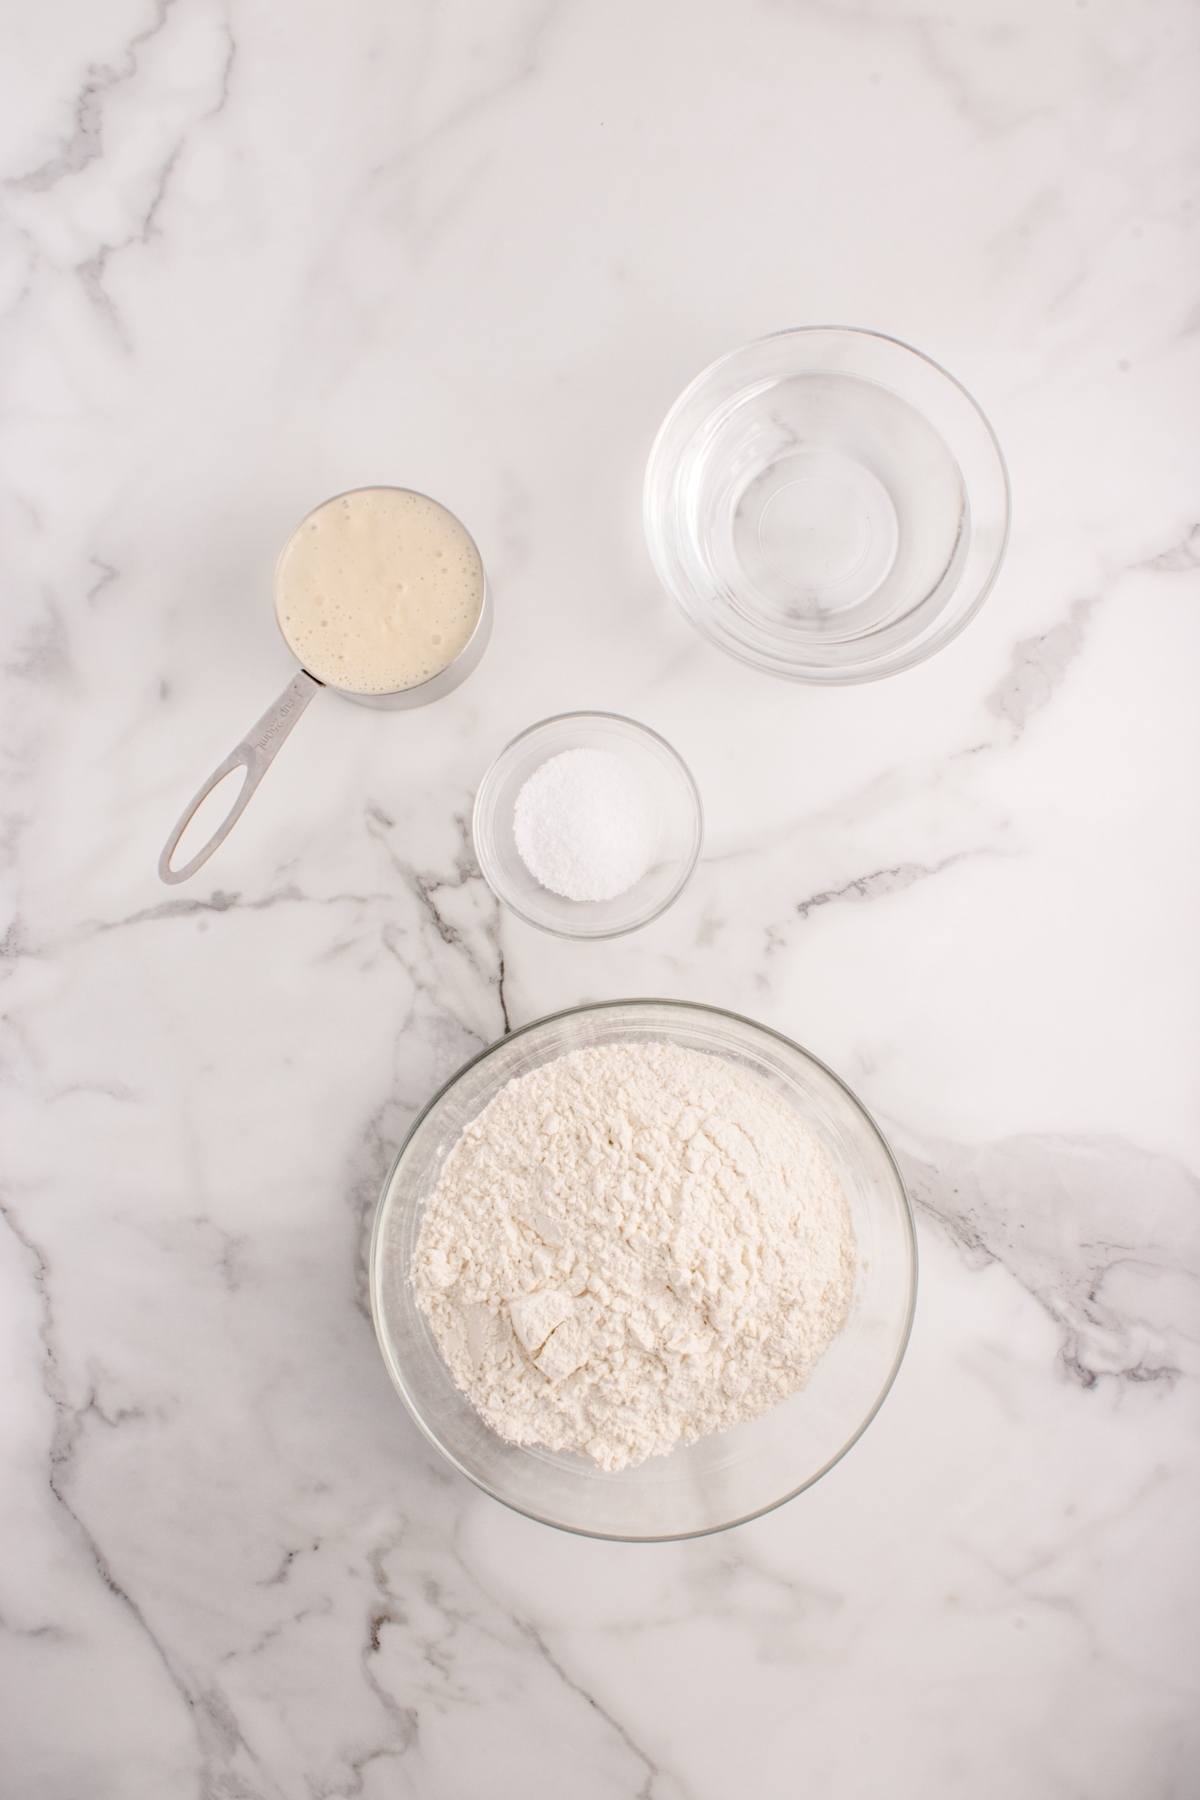
Beginner Sourdough Bread Ingredients
A complete list of ingredients and amounts can be found in the recipe card below.
All purpose flour: Builds structure for a soft crumb and steady rise. Use a little extra flour, or some rice flour, to stop the dough sticking to the bowl.
Ripe sourdough starter: Powers fermentation, adds tang and helps the loaf keep well when lively and recently fed. Feed it 4 to 12 hours before baking this sourdough recipe.
Warm water: Hydrates flour and wakes the starter so gluten forms smoothly.
Sea salt: Balances flavor and reins in fermentation for better texture. I recommend fine sea salt (I used this one!)
How to Make Sourdough Bread Step by Step
For more detailed instructions with weights and measurements, jump to the printable recipe card.
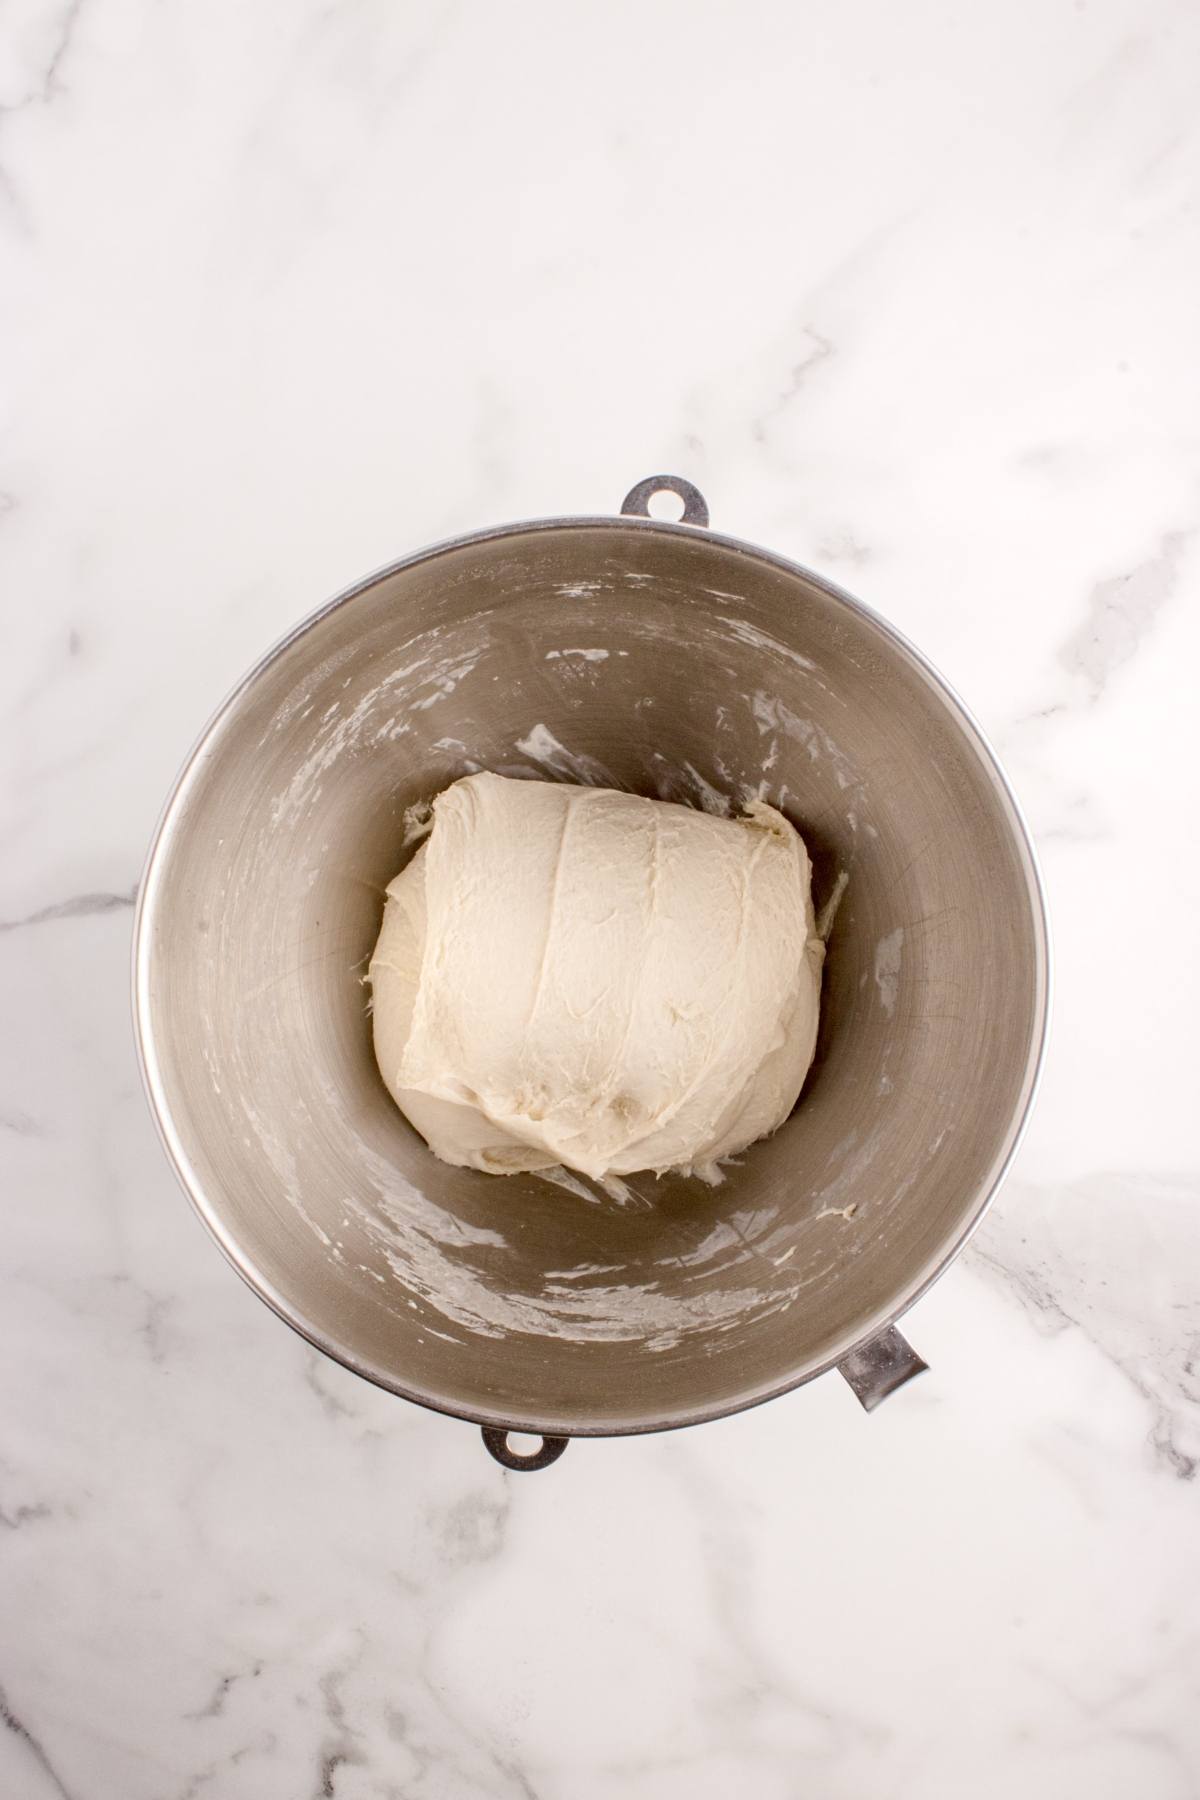
Mix the dough and rest: Bring flour, active starter, water and salt together into a soft dough, then rest to hydrate.
Strengthen gently: Do a few rounds of stretch and fold until the dough feels smoother and holds shape.
Bulk dough rise: Let it ferment until puffy with visible bubbles and a soft jiggle.
Shape the dough: Turn out, create surface tension and nestle seam side up in a floured bowl or basket.
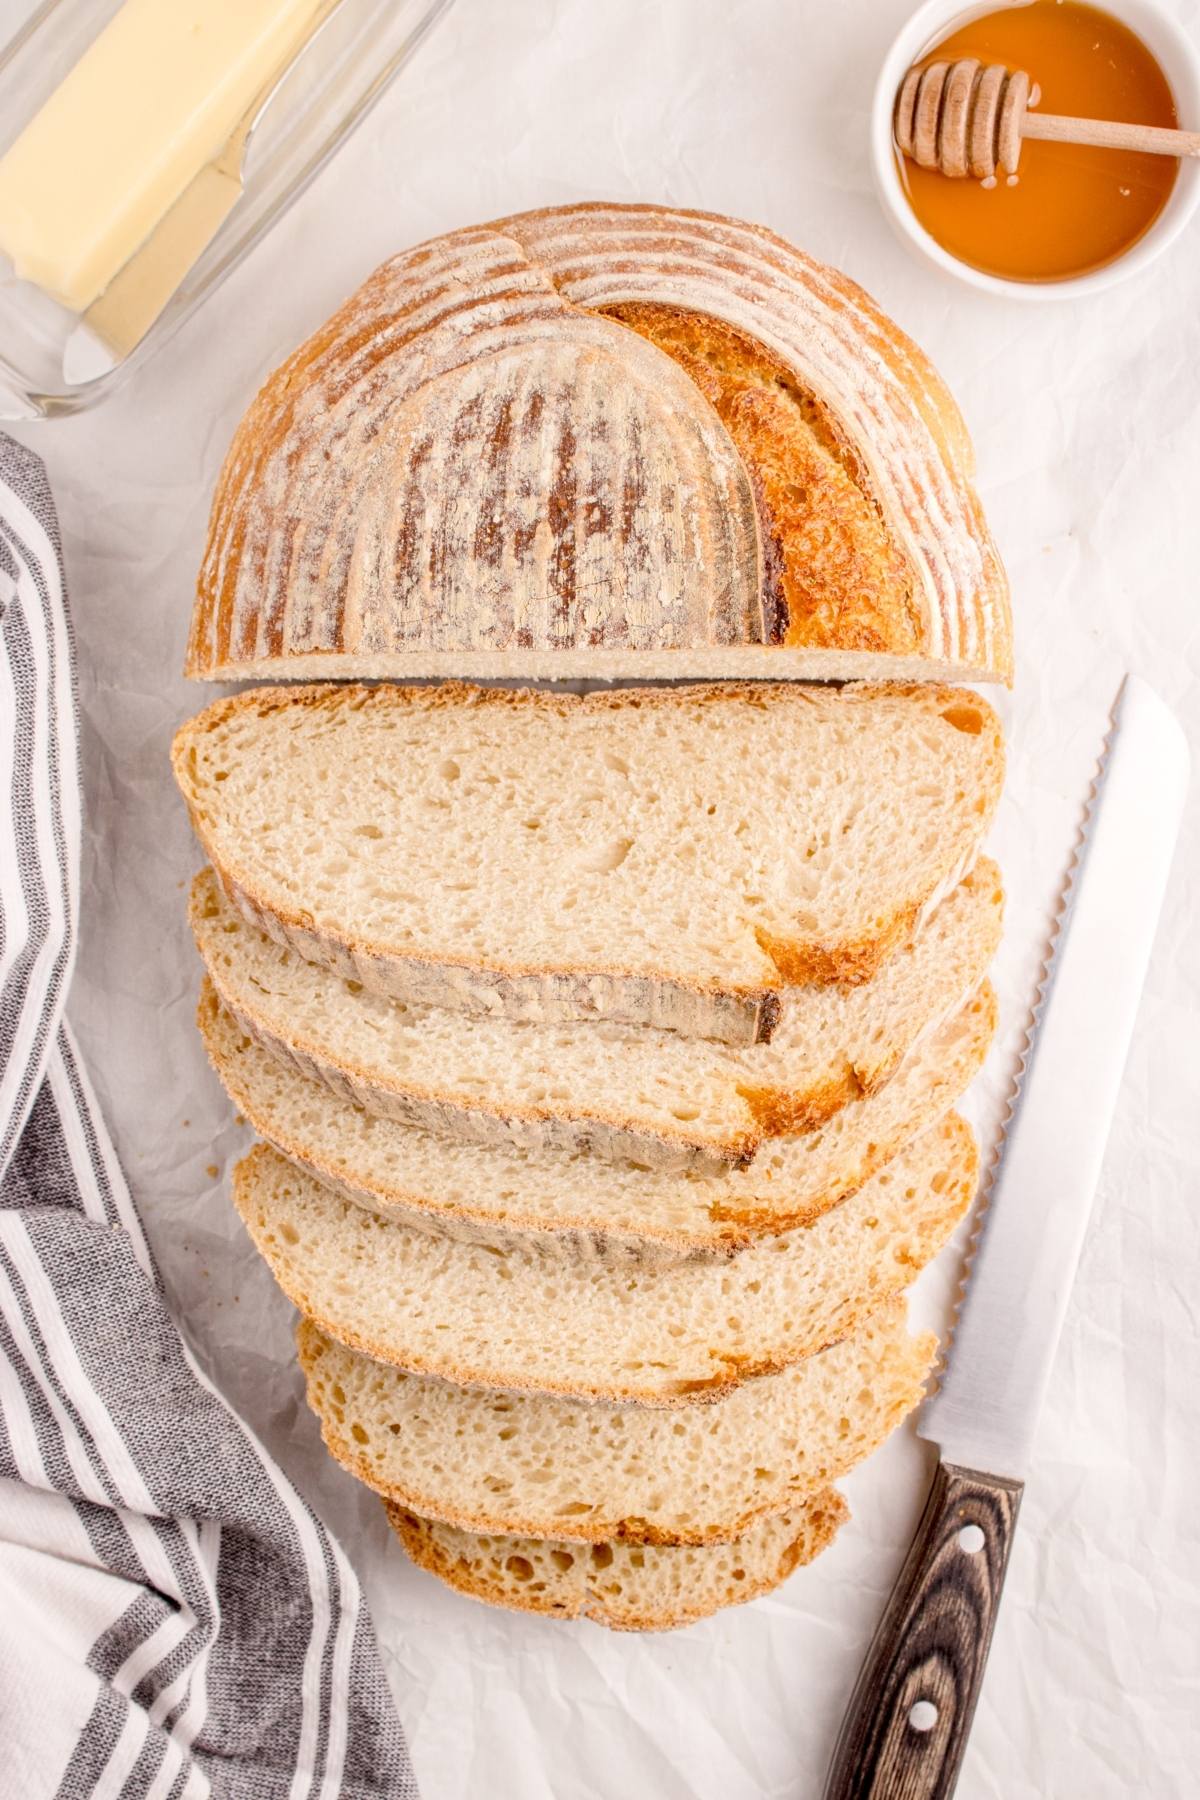
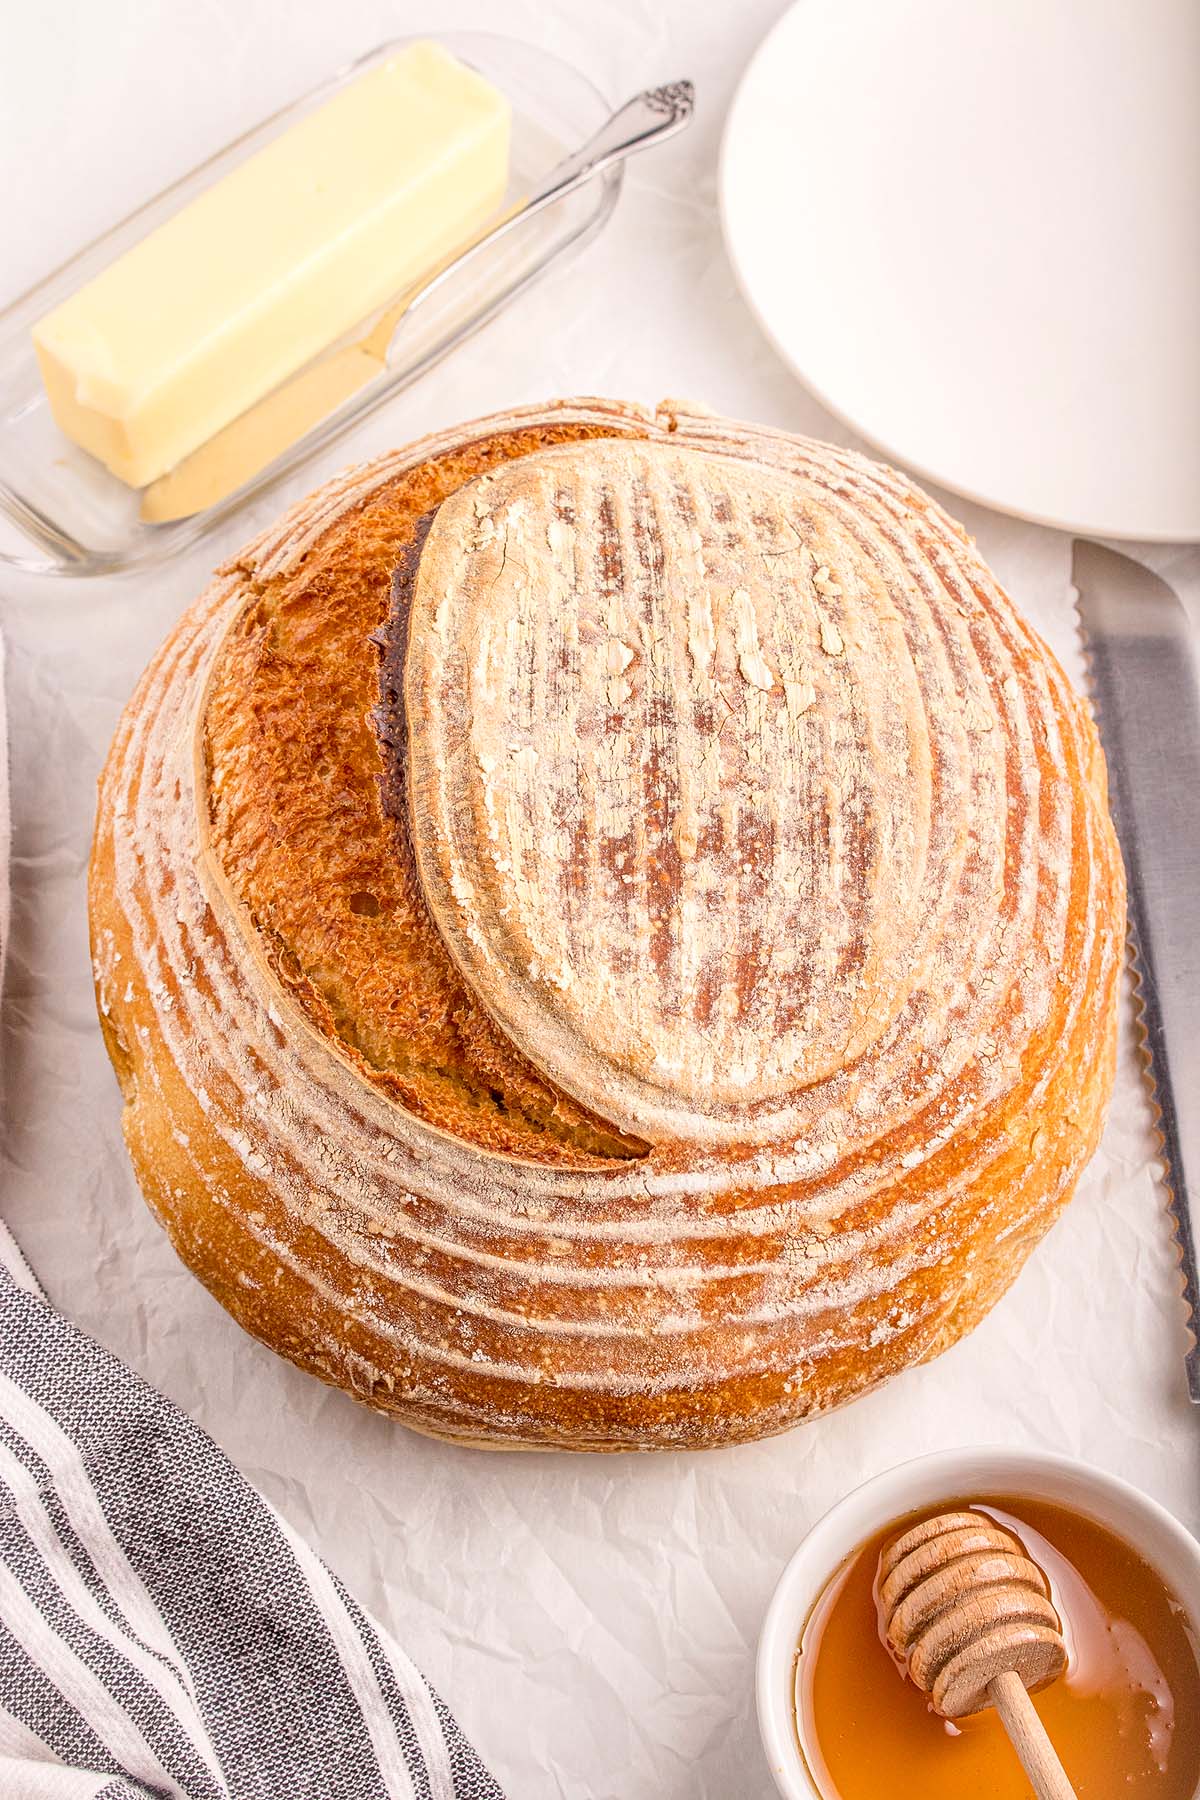
Chill and bake sourdough: Proof until slightly springy, chill to firm, then score and bake sourdough bread in a preheated Dutch oven until golden brown.
Cool well: Rest your simple sourdough bread on a cooling rack before slicing so the crumb sets.
Substitutions and Variations
Whole wheat boost: Use a 50% whole wheat flour and 50% white blend for a heartier crumb. Or try a rye flour or bread flour mix.
Gluten free option: Use a 1:1 gluten free flour with xanthan gum, handle gently and bake in a tin for support.
Seeded crust: Press sesame or poppy seeds onto the surface after shaping for nutty crunch.
Flavor twist: Fold in grated cheddar or roasted garlic during the last round of folding.
Serving Suggestions
With soup: Enjoy dunking this sourdough bread in a bowl of cowboy soup or ham and bean soup.
For sandwiches: This crusty loaf makes a great sandwich bread because it’s sturdy as well as flavorful. Try it with your preferred fillings, perhaps making a fried egg sandwich or a classic reuben.
Other ideas: Use homemade sourdough bread for bruschetta or French toast skillet.
How to Store
Store: Store fresh sourdough bread at room temperature, wrapped in a clean kitchen towel or bread bag to keep the crust nice and crispy but prevent it from drying out. Eat it within 3 or 4 days. I don’t recommend you store sourdough bread in the fridge, as it may dry out faster.
Freeze: Let your round sourdough boule cool completely before freezing to avoid sogginess. Wrap it tightly in plastic wrap and then place it in a freezer bag or airtight container. It will keep nicely for up to 3 months, so you might want to bake a few loaves.
Thaw: When you want to eat it, thaw it at room temperature and refresh the crust in a hot oven for a few minutes.
Reheat: Preheat the oven to 350°F and place the bread directly on the oven rack or on a baking sheet, then heat 10 to 15 minutes until warmed through and the crust feels crisp again. For the stovetop, heat a skillet over medium, butter the slices if you like and toast each side 1 to 2 minutes until golden. Or use a toaster and toast to your liking.
Top Tips
Judge by feel: Aim for soft and slightly tacky dough that stretches without tearing.
Heat the vessel: A fully preheated Dutch oven gives strong spring and crisp crust.
Flour smart: Flour in the bowl or basket releases dough cleanly.
Score with intent: One confident slash helps the loaf bloom where you want it to.
Wait to slice: Cooling locks in structure so slices stay tender, not gummy.
Watch hydration levels: This sourdough recipe creates a slightly sticky dough (that’s totally normal). If you’re new to sourdough, try not to add much flour during shaping; it can make your bread dense. If your bread is too wet when mixing, add flour a tablespoon at a time. If it’s too dry, add water a tablespoon at a time.
Let the dough rest: Don’t rush the bulk fermentation or proofing stages. Giving the dough enough time to relax and ferment is the secret to great flavor and texture.
Keep it warm: If you’re baking this beginner sourdough bread recipe on a chilly day, keep the dough near 72 to 75°F, or use a turned off oven with the light on for gentle warmth.
Sourdough Bread for Beginners FAQs
A mature starter is bubbly, doubles in size after feeding, and has a pleasant tangy smell. If you’re not baking often, keep it in the fridge. Before baking, take it out a day or two early and feed it to reactivate.
Look for a 40% to 60% rise, a bubbly surface and a gentle wobble.
Likely underdeveloped gluten or overproofing. Add one more fold next time and shorten the final rise.
You can experiment with flours if you like. I used all purpose flour and my sourdough loaf came out good.
Beginner’s Sourdough Bread Recipe
Beginner’s Sourdough Bread
Equipment
- Dutch Oven or Heavy Oven-Safe Pot
- Bench Scraper or Dough Scraper, Optional
Ingredients
- 3 ½ Cups all-purpose flour, 420 Grams
- 1 Cup active sourdough starter, 240 Grams, fed and bubbly at 100% hydration
- 1 ¼ Cups warm water, 300ml, at 80 to 85°F
- 2 Teaspoons fine sea salt, 10 Grams
To Dust the Proofing Bowl
- all-purpose flour, or rice flour
Instructions
Step 1. Mix the Bread Dough (Day 1, Morning or Early Afternoon)
- In a large mixing bowl (or stand mixer with dough hook), add flour, your bubbly starter, warm water and salt. Mix the ingredients with a wooden spoon until everything comes together into a shaggy bread dough. The dough will look rough and feel slightly sticky.
- Let the dough rest in the bowl for 30 minutes, covered with a damp towel or plastic wrap. This step helps hydrate the flour and makes the dough easier to work with.
Step 2. Stretch and Fold (Build Strength without Commercial Yeast)
- After the 30 minute rest, wet your hand and grab one side of the dough, stretch it up gently, and fold it over to the other side.
- Give the bowl a quarter turn and repeat. Do this 4 times total, once for each "side."
- Cover the bowl and then wait for 30 minutes.
- Repeat this stretch-and-fold process 3 more times, every 30 minutes (for about 2 hours total). Your bread dough will feel smoother and tighter each time.
Step 3. Bulk Fermentation (First Rise)
- After your last fold, cover the dough and let it rest in a warm place for 4 to 6 hours. You're looking for about a 50% dough rise. The dough should be jiggly, look puffier and have bubbles on the surface.
- To test: Gently poke the dough. It should spring back slowly.
- Tip: The temperature of your kitchen affects the rise. The ideal room temperature for this step is around 72 to 75°F. On cooler days, place dough near your stove or in your turned-off oven with the light on.
Step 4. Shape the Dough
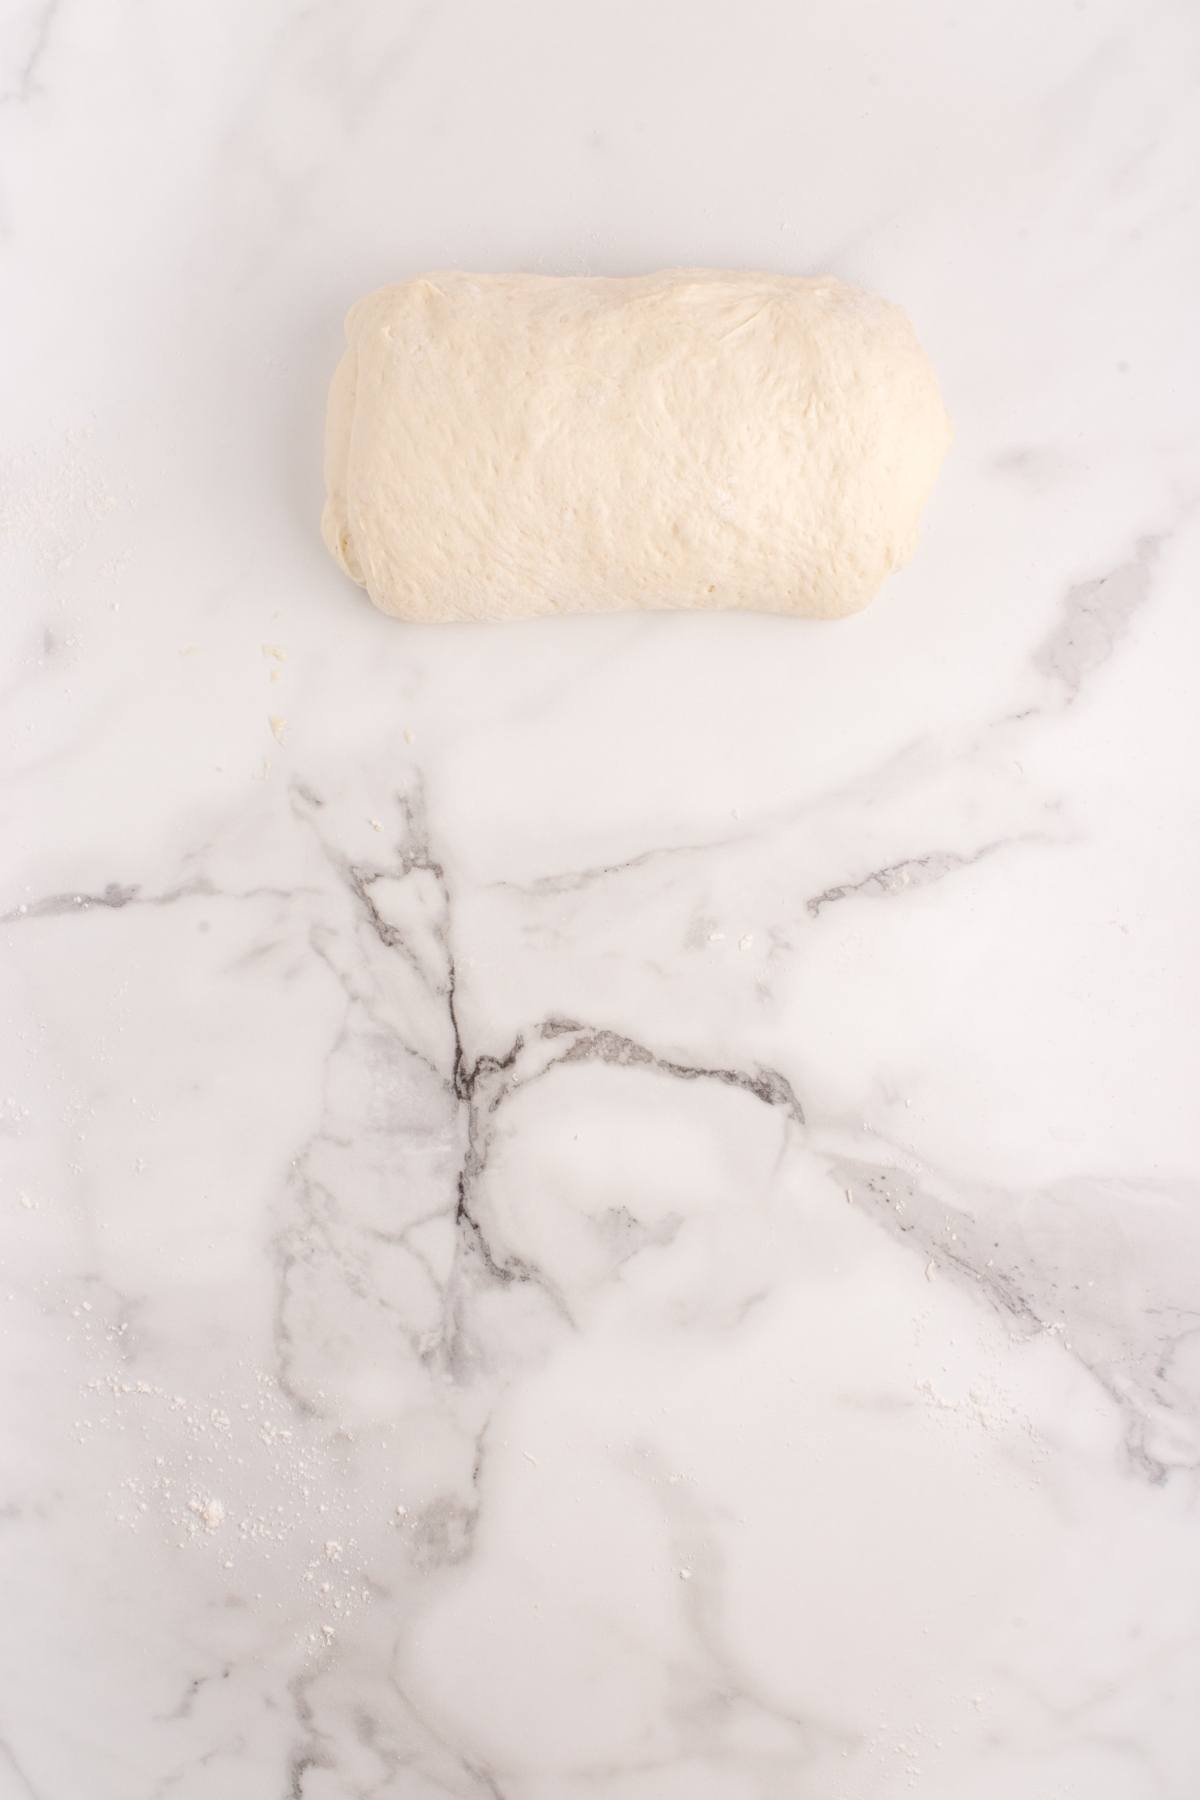
- On a lightly floured work surface, gently tip the dough onto it, trying not to deflate it too much. Using a bench scraper if you have one, stretch it into a rectangle and fold both sides toward the center. Roll it up from the bottom like a burrito.
Step 5. Final Rise
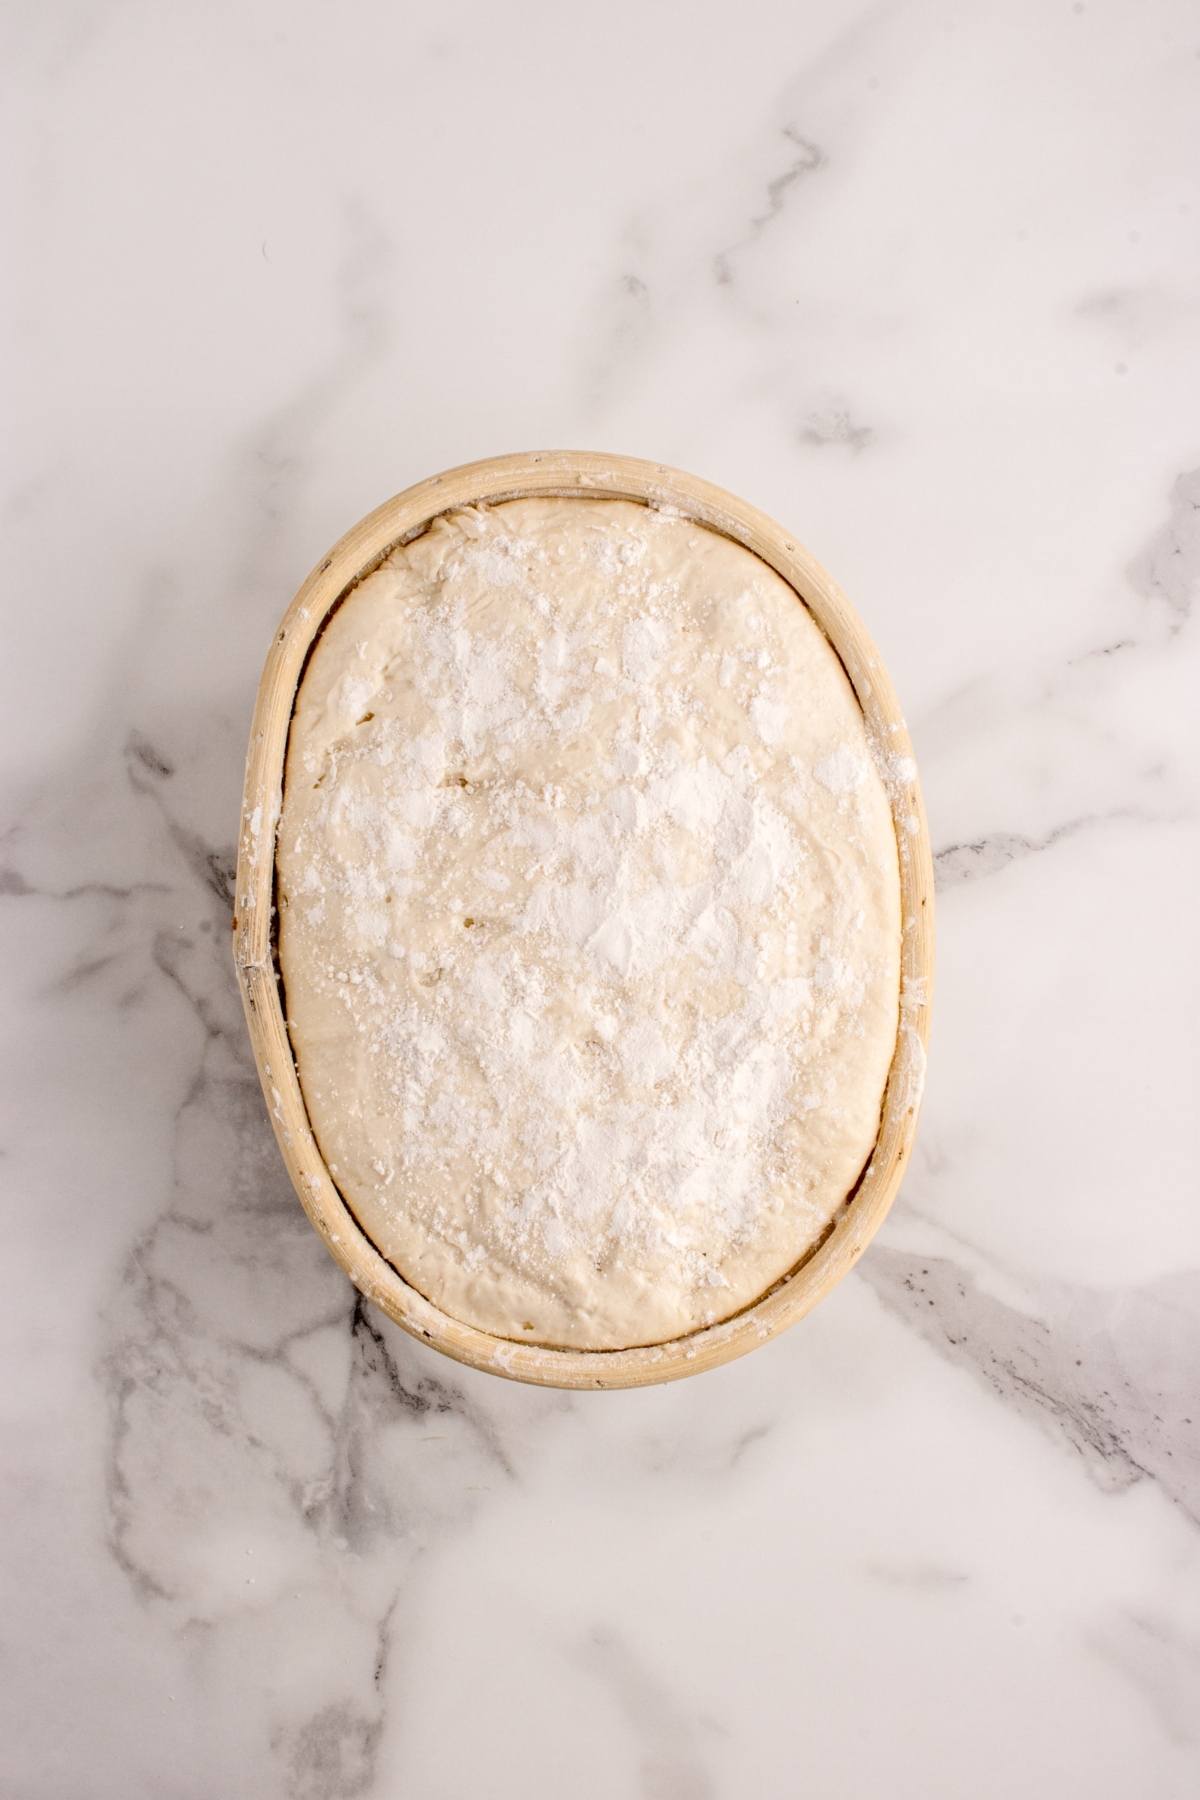
- Dust a proofing basket or a bowl lined with a towel using rice flour (which prevents sticking). Place the bread dough seam-side up in the basket. Pinch or “stitch” the top seam to build surface tension and then cover it with a damp towel or plastic wrap.
- Let the bread rise at room temperature for 1 to 2 hours, until it is slightly puffy. I like to test it by gently poking the dough. It should spring back slowly but leave a slight indent.
- After that, refrigerate it overnight for 8 to 24 hours. This final rise helps the dough develop flavor and makes it easier to score and bake the next morning.
Step 6. Bake the Fresh Sourdough Bread (Day 2, Morning)
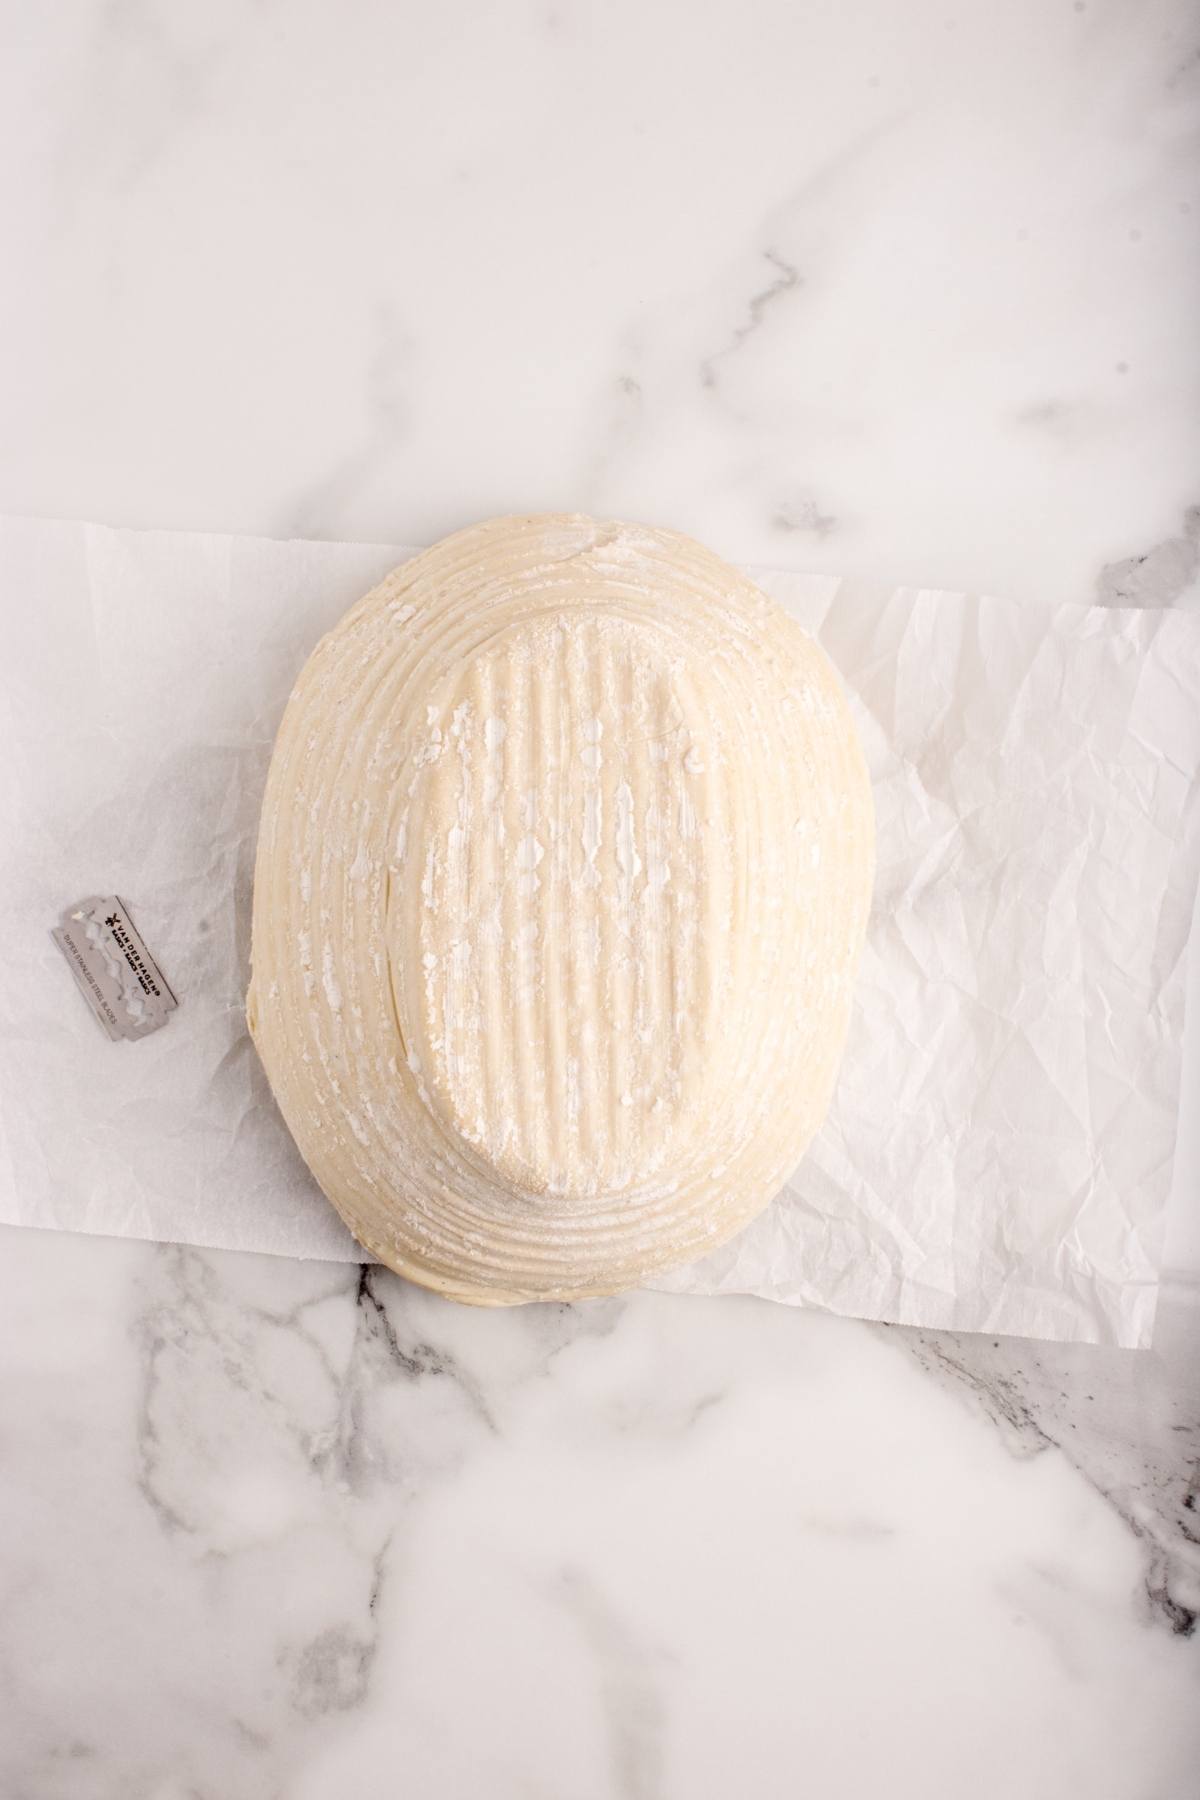
- Preheat your oven to 475°F for at least 30 minutes with your empty Dutch oven inside. Cut a piece of parchment paper and place it on the loaf (now seam-side down).
- Score the top with a razor blade, or lame (I typically make one deep slash about ½ inch deep). Carefully lift the dough with parchment and place it into the hot Dutch oven.
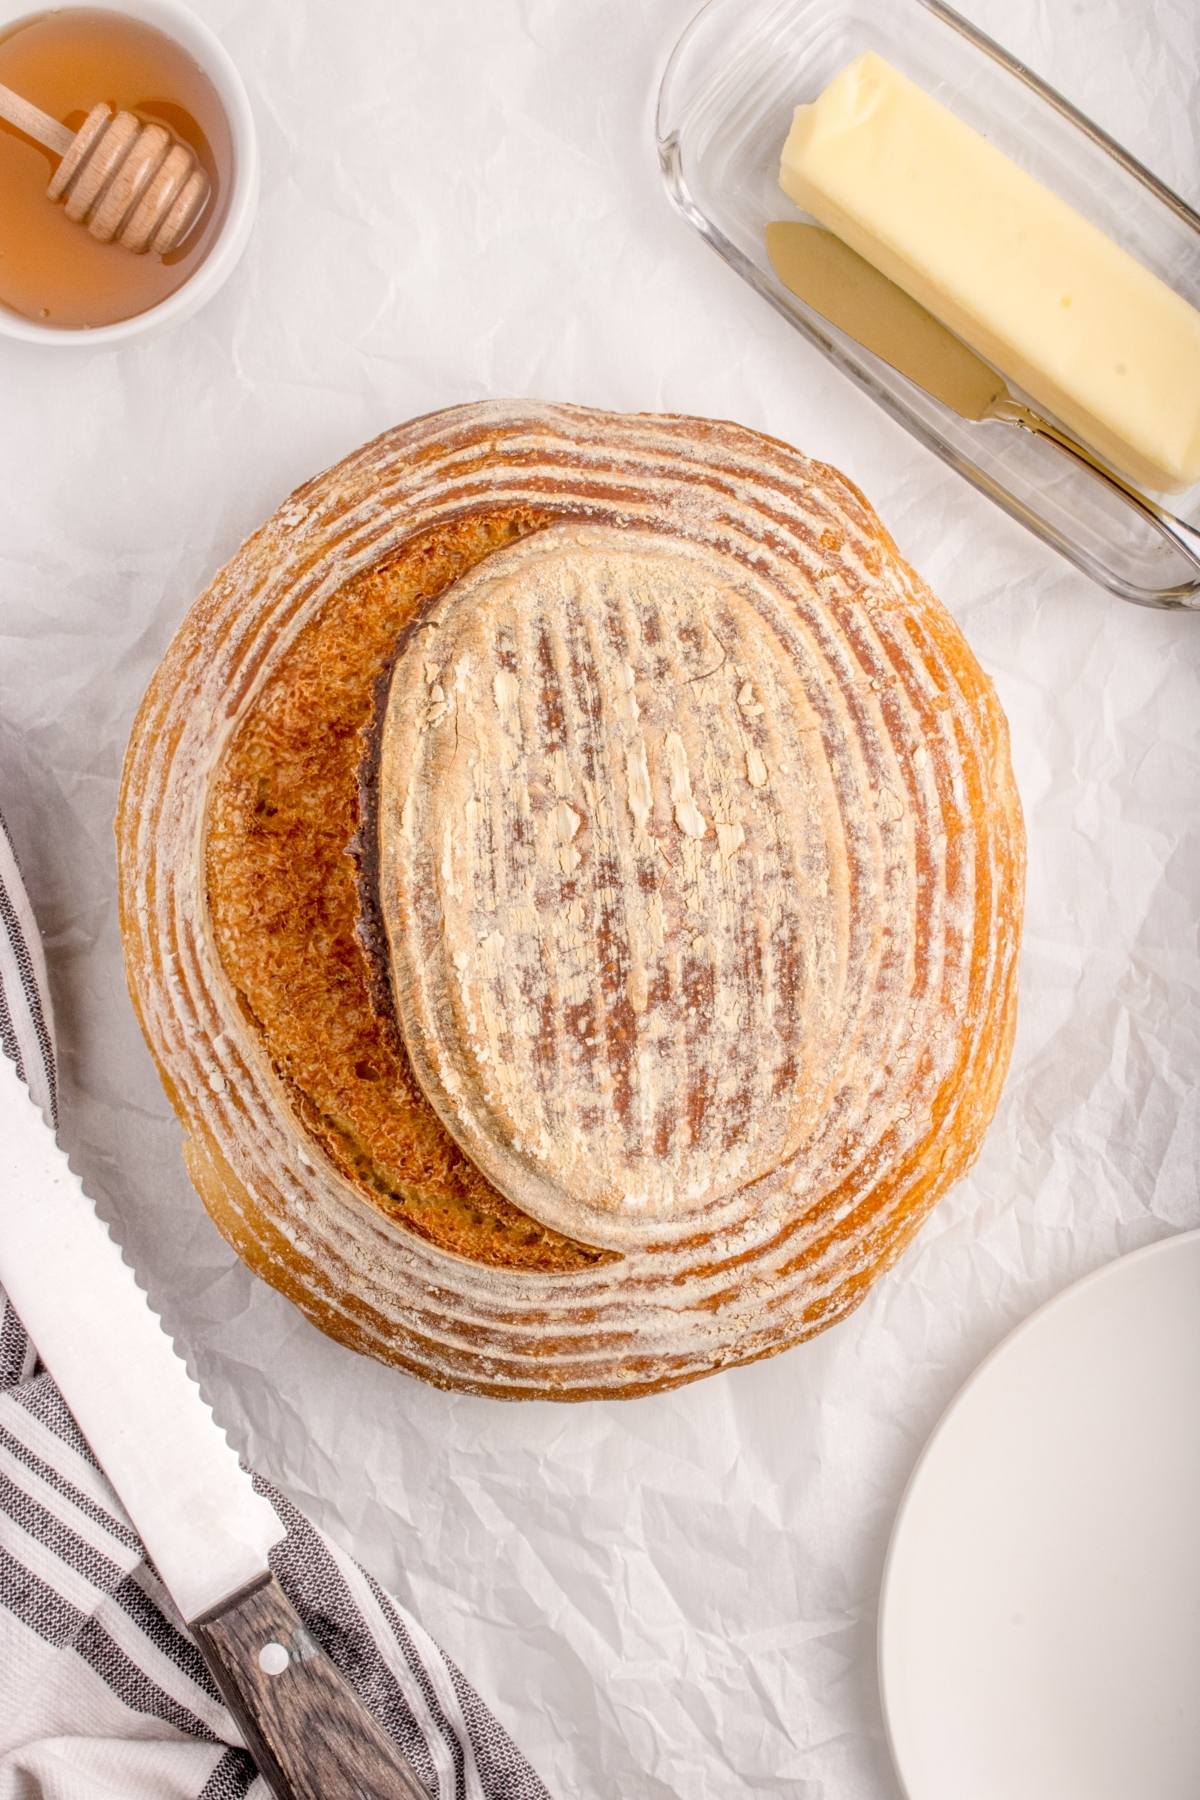
- Bake it covered for 20 minutes. Then uncover and bake it for another 20 to 25 minutes until the crust is golden brown and the loaf sounds hollow when tapped.
Step 7. Cool Completely
- Remove the loaf of bread from the dutch oven and let it cool on a cooling rack for at least 1 or 2 hours. Cutting it too early will result in gummy, undercooked bread. The bread usually continues to cook from residual heat during cooling.
- After it cools, slice and enjoy your sourdough bread.
Notes
Heat the vessel: A fully preheated Dutch oven gives strong spring and crisp crust.
Flour smart: Flour in the bowl or basket releases dough cleanly.
Score with intent: One confident slash helps the loaf bloom where you want it to.
Wait to slice: Cooling locks in structure so slices stay tender, not gummy.
Watch hydration levels: This sourdough recipe creates a slightly sticky dough (that’s totally normal). If you’re new to sourdough, try not to add much flour during shaping; it can make your bread dense. If your bread is too wet when mixing, add flour a tablespoon at a time. If it is too dry, add water a tablespoon at a time.
Let the dough rest: Don’t rush the bulk fermentation or proofing stages. Giving the dough enough time to relax and ferment is the secret to great flavor and texture.
Keep it warm: If baking this beginner sourdough bread recipe on a chilly day, keep dough near 72 to 75°F, or use a turned off oven with the light on for gentle warmth.
Nutrition
A great loaf of sourdough bread starts with a lively starter, steady warmth and patient rests. This method keeps the work light, then lets the oven’s steam give you tall lift and a crisp shell. The crumb in this sourdough bread for beginners stays tender and flavorful so every slice toasts beautifully and stands up to fillings. Keep notes on rise and feel so each bake gets easier. You’re going to enjoy your sourdough journey and soon beginner’s sourdough bread becomes your easy house loaf.
Other Recipes to Try

Bella Bucchiotti
Bella Bucchiotti is a Canadian-based syndicated food, travel, and lifestyle writer, photographer, and creator at xoxoBella. She founded xoxoBella in 2015, where she shares her love for food, dogs, sustainability, fitness, crafts, outdoor adventures, travel, and philanthropy to encourage others to run the extra mile, try new recipes, visit unfamiliar places, and stand for a cause. Bella creates stress-free and family-friendly recipes for weeknight dinners and festive feasts.