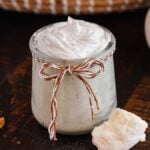
Homemade Diaper Rash Cream
It's simple to whip up your own diaper rash cream using natural ingredients that are kind to baby's skin and highly unlikely to cause any irritation.
Servings: 12 Ounces
Equipment
- Glass Bowl
- Pot Medium
Ingredients
- ½ Cup organic coconut oil
- 1 Tablespoon dried chamomile flowers
- ½ Cup organic raw shea butter 4 Ounces
- ½ Cup organic raw mango butter 4 ounces
- 2 Tablespoons sunflower oil
- 2 Tablespoons lanolin
- 2 Tablespoons non-nano zinc oxide
- 2 Tablespoons bentonite clay
- 2 Tablespoons arrowroot flour
Instructions
- Prepare a chamomile-infused oil by adding the coconut oil and the dried chamomile flowers to a glass bowl or small pot.
- Make a double boiler by filling a medium-large size pot with water and then place the small glass bowl/pot containing the coconut oil and chamomile flowers over it. The glass bowl should hover over the water and not be immersed in it.
- Bring the water to a gentle simmer and let the chamomile infuse into the coconut oil for 3 hours. Once the water beneath the oil begins to boil, reduce the heat to simply keep the water underneath the coconut oil nice and hot.
- After the coconut oil has been infused with chamomile, allow the mixture to cool to a warm room temperature. Strain the flowers from the oil using a cheesecloth.
- Add the shea butter, mango butter, sunflower oil, lanolin, and chamomile-infused (or ½ cup pure) coconut oil to a double boiler. Bring the water underneath to a gentle boil and then reduce the heat slightly. The goal is to gently warm and melt the oils together.
- Whisk gently to help all of the oils and lanolin mix together. Don’t worry if the lanolin is a little clumpy. It will break up and mix in beautifully when we whisk the cooled cream.
- Once the shea butter mixture is melted, remove from heat. Add in the zinc oxide, the bentonite clay, and the arrowroot flour, one at a time. Mix between each added ingredient. Whisk well to break up the clumps. Again, don’t worry if there are a few clumps left or if the powders settle while cooling. The mixture will whip up nicely once cooled.
- Let the mixture cool until it thickens slightly. If you would like to speed up the process, you can place the mixture in the refrigerator for 45 minutes to one hour. The edges will start to set up and thicken first.
- When the mixture begins to cool and thicken slightly, use a hand mixer to whip into a cream. This is the fun part! Whipping the cream gives it a nice, airy consistency and will help it spread like butter! Whip on high for 1 or 2 minutes or until you have a nice, smooth cream. Scrape down the sides of the bowl using a rubber spatula, if needed, and whisk again.
- Spoon or pipe the cream into clean, dry small glass jars. Transferring the cream into jars before it has time to fully set up is ideal because it has a thinner consistency and is very easy to spoon into small jars. Once it totally cools and sets up, it is a little more firm.
- Apply a generous amount to baby’s diaper rash when needed.
Notes
Make the right amount: This recipe makes 3 x 4-ounce jars of cream. You can halve it if you don't need so much. Personally I like to make extra since it keeps for a year or more.
Severe diaper rash: If baby's diaper rash is bad, it might be best to rinse the area with warm water when changing a diaper instead of using wet wipes or a cloth (it won't sting as much).
Warm it before use: If the cream is very cold, you can warm it between your fingers before application.
Try it on other rashes: This cream would also be excellent on small patches of eczema or itchy, irritated skin. It a nice go-to cream for dry eczema patches on elbows and knees or contact dermatitis. Of course, you can also apply it to baby to prevent regular or yeast diaper rash since it's gentle and moisturizing.
Severe diaper rash: If baby's diaper rash is bad, it might be best to rinse the area with warm water when changing a diaper instead of using wet wipes or a cloth (it won't sting as much).
Warm it before use: If the cream is very cold, you can warm it between your fingers before application.
Try it on other rashes: This cream would also be excellent on small patches of eczema or itchy, irritated skin. It a nice go-to cream for dry eczema patches on elbows and knees or contact dermatitis. Of course, you can also apply it to baby to prevent regular or yeast diaper rash since it's gentle and moisturizing.
QR code
Scan this QR code with your phone's camera to view this recipe on your mobile device.
