This post may contain affiliate links, please see the privacy policy for details.
These DIY pressed flower candle jars are pure charm—made with clean-burning soy wax and blooming with beauty. Whether you’re gifting, crafting for spring or summer, or just diving into a new hobby, they’re as beginner-friendly as they are stunning. I love how no two candles are ever the same—each one is a little work of art. Get creative with colors, textures, and scents to match your vibe. Want to go festive? Try a cozy gingerbread-spice twist for the holidays!

Make these easy, long-lasting DIY pressed flower candle jars the perfect gift or decor item for your home.
You might also like to make DIY citrus shower steamers, these homemade orange bath bombs, or my potpourri stovetop simmer pot jars.

Why You’ll Love It
Personalized beauty: Each candle is unique, showing off your choice of pressed flowers and fragrance. These are definitely more unique than your standard pillar candles.
Eco-friendly and reusable: Natural soy wax and a reusable glass jar make this an eco-conscious project.
Simple, relaxing crafting: With minimal tools and easy steps, this project is beginner-friendly and a calming way to create something beautiful for your home.

Homemade Mason Jar Candle Materials
Parchment paper: This helps in pressing the flowers, providing a smooth, non-stick surface while keeping them intact. It ensures no mess when handling delicate petals. Wax paper is fine, too.
Thick heavy book: A heavy book is used to press and flatten the flowers. It applies gentle, even pressure to keep the petals in place while they dry.
Fresh flowers: Choose vibrant, fresh flowers such as pansies, daisies, or lavender. The flowers must be sturdy enough to press without wilting and free of excess moisture to prevent damage.
Paint brush: A small paintbrush is used to apply Mod Podge or other adhesives to the dried flowers. The brush allows for precise, gentle application without disturbing the petals.
Jar: I used an 8-ounce mason jar but you could use any sized jar or cup you would like. Note that you will need more wax if you use a larger jar.
Mod podge: Mod Podge is a versatile, water-based sealer and adhesive. It helps attach the pressed flowers to the glass and seals them to preserve their appearance.
Tweezers: They allow for precise placement when decorating your candles with pressed flowers.
Soy melting wax: Soy wax is a clean-burning, eco-friendly wax choice. It melts quickly, making it ideal for DIY candles.
Candlewick: The candlewick is the central element for your candle’s flame. It should be long enough to reach the bottom of your jar and extend slightly above the surface of the wax.
Clothespin or index card: Use a clothespin or index card to hold the candlewick in place while the wax hardens. This helps keep the wick centered, ensuring an even burn.
Essential oils or candle scent oil: Adding essential oils or candle fragrance oils provides a lovely scent to your candle.

How to Make Pressed Flower Candle Jars
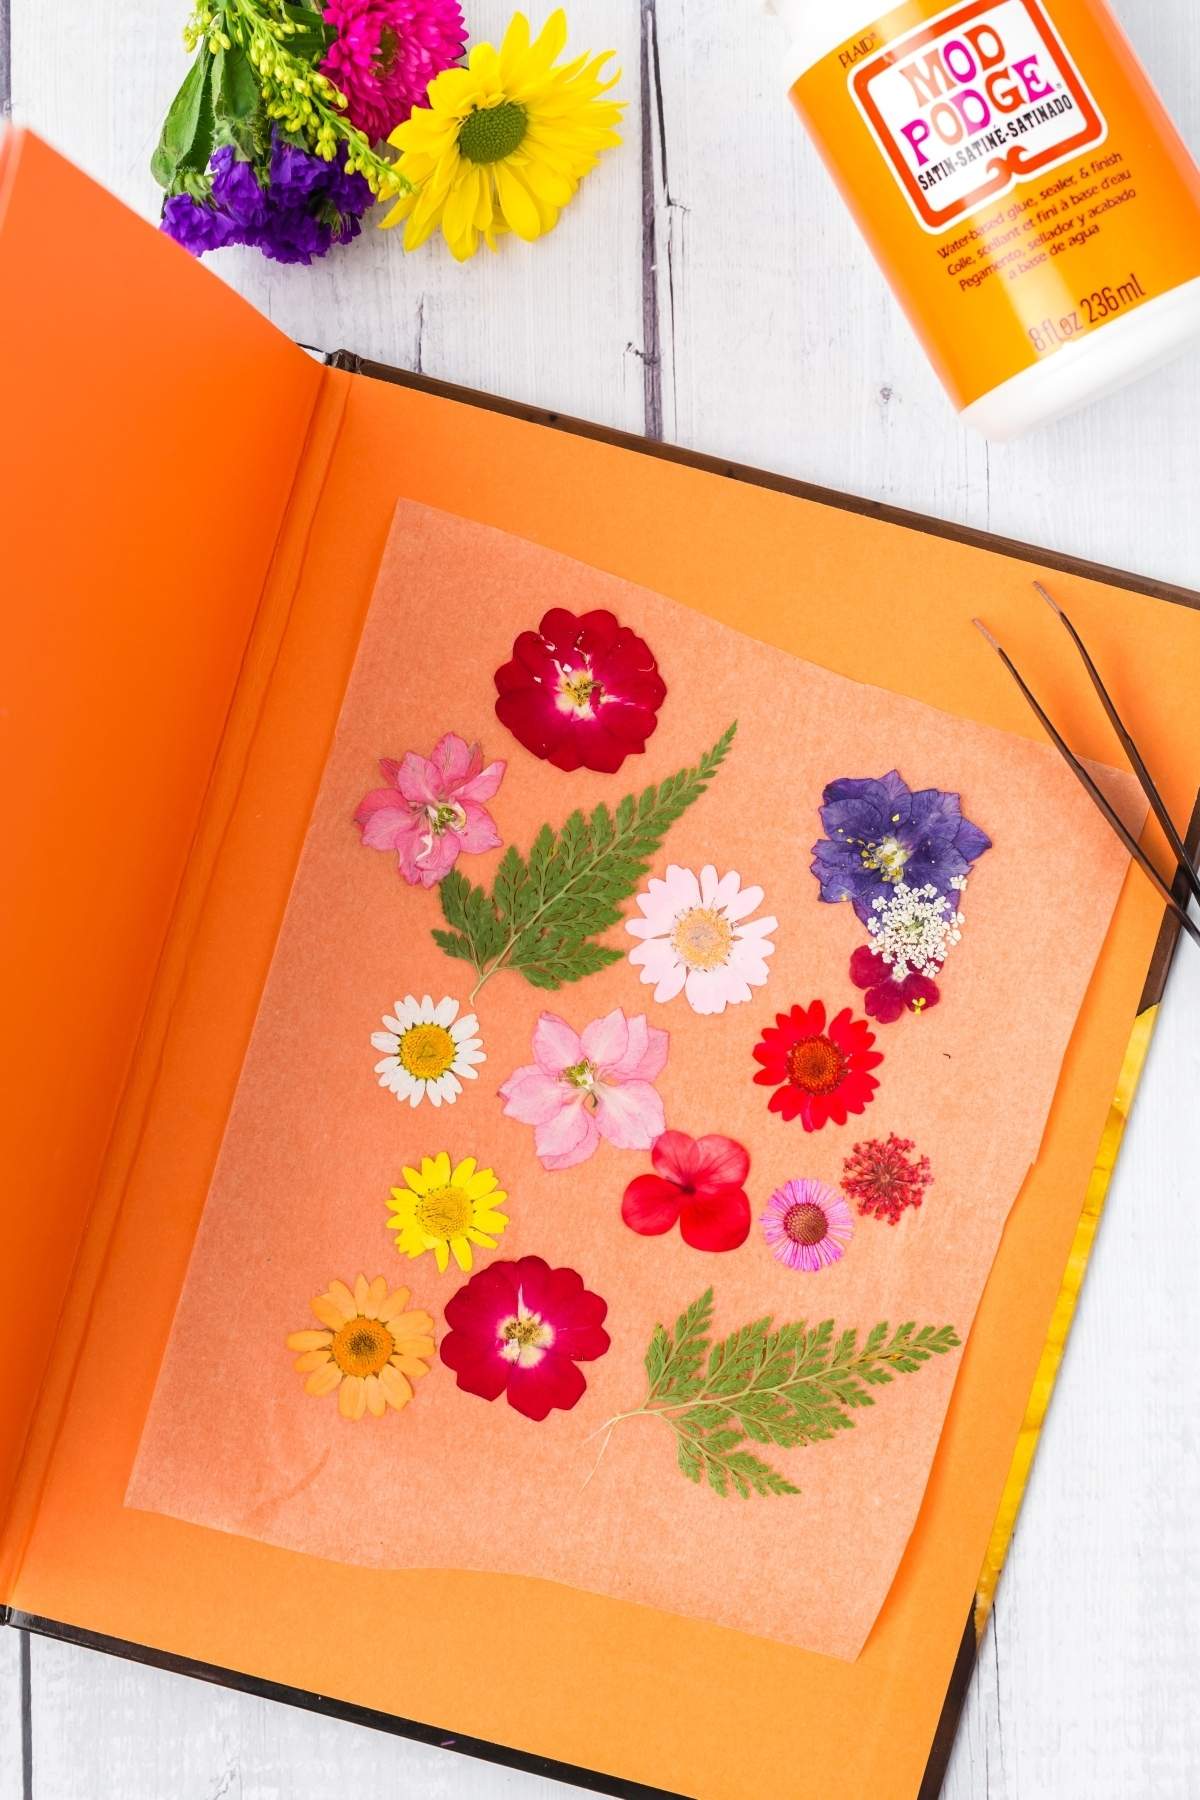
Press the flowers: Gather flowers. Lay the delicate flowers flat between two sheets of parchment paper and place the parchment inside a heavy book. Let the flowers dry for 1-2 weeks.
Decorate the jar: Apply a thin layer of Mod Podge to the areas of your jar where you want to position flowers. Use tweezers to carefully place and add pressed flowers and brush more Mod Podge over the top. Repeat this process until you are happy with the design. Allow the Mod Podge to dry for at least an hour.
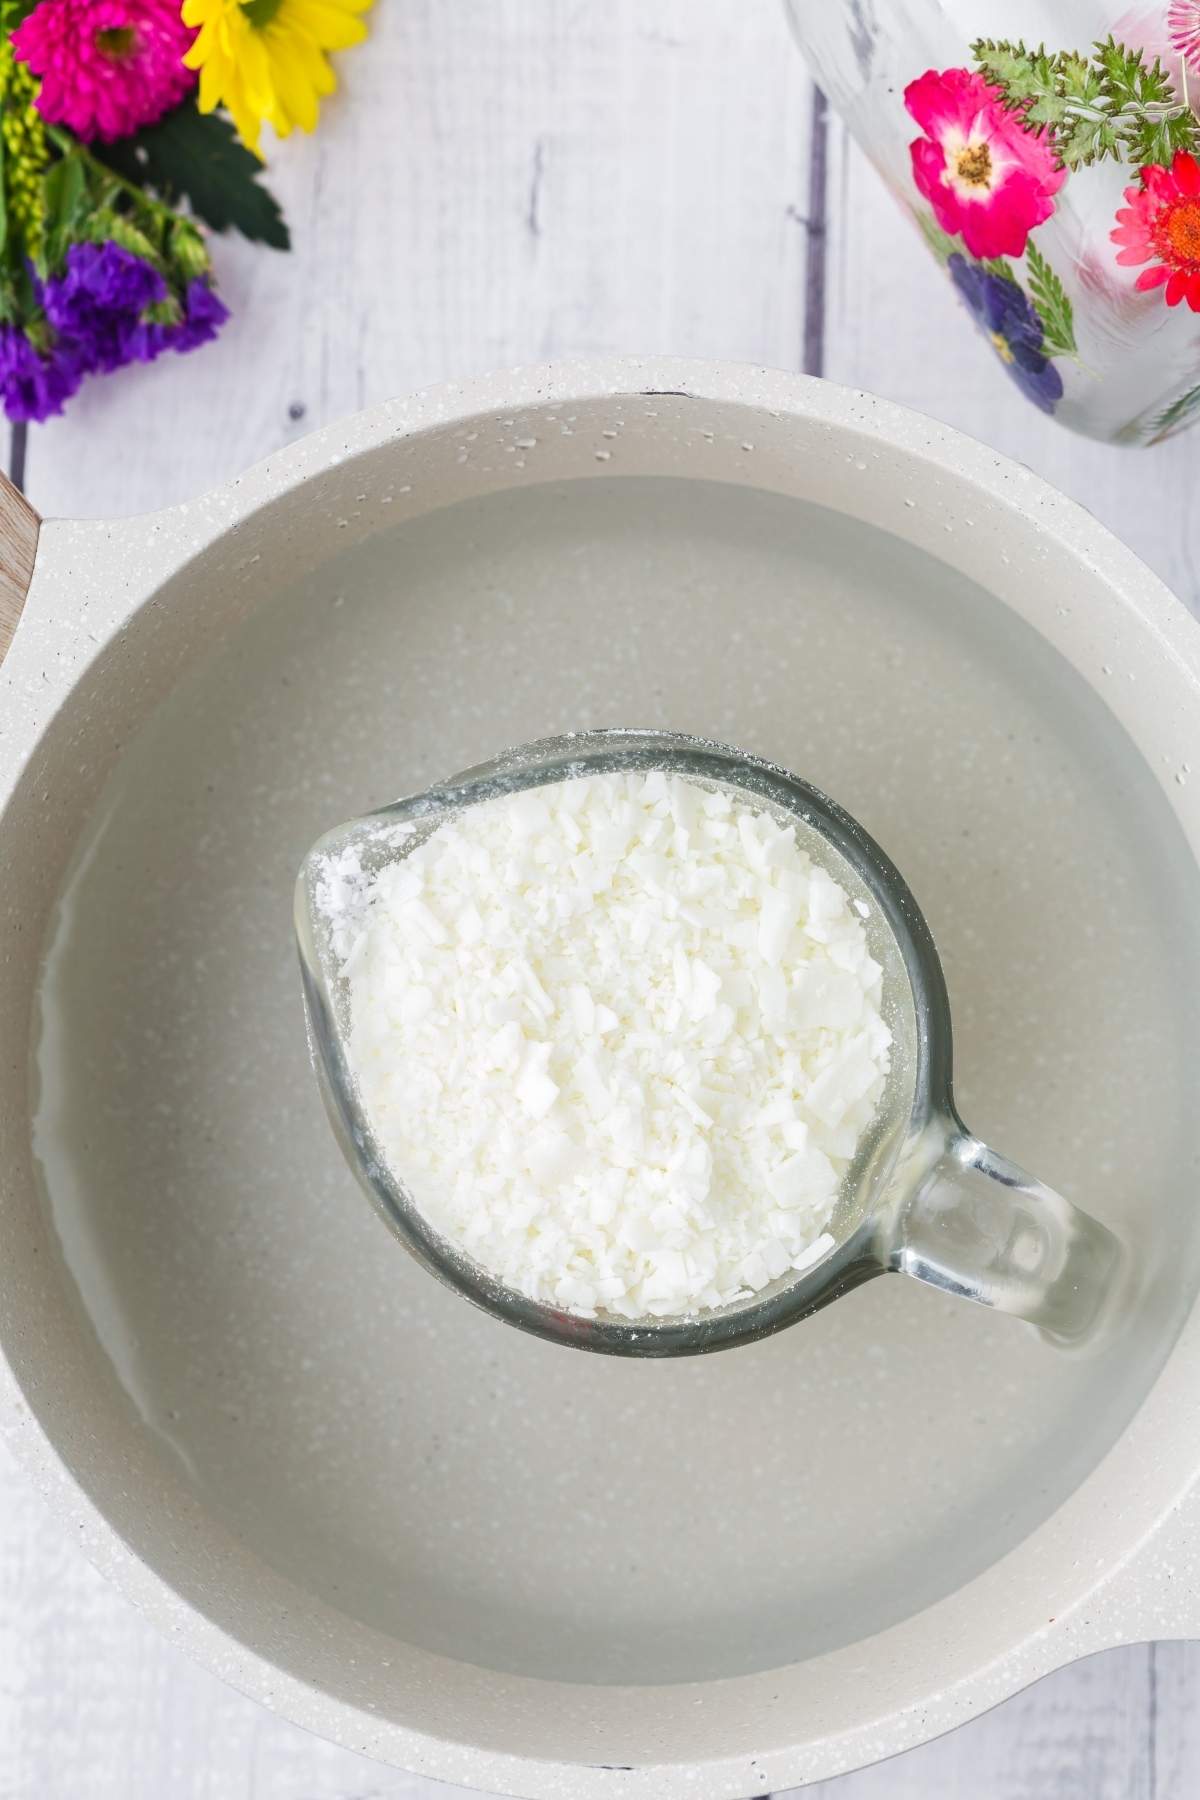
Infuse the wax: Melt the wax. Once melted, add essential oils to create a fragrance. Stir constantly until the wax is fully melted and clear.
Make the candle: Position the wick at the center of the jar and use a clothespin to hold it steady. Pour the melted wax into the jar, ensuring the wick stays centered. Let the candle cool for at least 8 hours or overnight.
Trim the wick: Once the wax is solidified, remove the clothespin and trim the wick of your pressed flower candles.

Variations
Herbal candles: Instead of flowers, press and use dried herbs like rosemary, thyme, sage, or lavender for a rustic, earthy look. Add essential oils that match the herbs, like rosemary or lavender oil.
Pressed leaves candles: Gather small leaves, push them, and adhere them to the jar for a woodland-inspired candle. Use oils like cedarwood, pine, or sandalwood for a cozy, forest-like fragrance.
Spice-infused candles: Use whole cloves, cinnamon sticks, star anise, or nutmeg pressed against the jar. Match with fragrance oils like cinnamon, vanilla, or clove.
Seashell or sand candles: Press tiny, flat seashells or sprinkle a layer of sand at the base of the jar. Use ocean breeze or coconut essential oils.
Pressed fern and moss candles: Press small pieces of fern and preserved moss. Use eucalyptus or tea tree oil.
Dried fruit candles: Use dried lemon, lime, or orange slices. Pair with citrus essential oils like orange, lemon, or grapefruit.
Crystal and Gemstone Candles: Add small, flat crystals or gemstones along the inner sides of the jar. Use grounding scents like patchouli, sandalwood, or amber.
Jar only: You can just make a flower-decorated jar and forgo the wax. Instead, place a tea candle inside and light that.

Top Tips
Melt wax slowly and evenly: Use a double boiler or heat-safe bowl over simmering water to melt your wax slowly. Ultra hot wax can affect the candle’s quality so go slowly.
Add fragrance carefully: Essential or fragrance oils should be added just before pouring to preserve their scent. Stick to recommended oil-to-wax ratios for a balanced fragrance that’s not overpowering.
Keep the wick centered: Use a clothespin or wick holder to keep the wick in place. Centering it is essential for even burning, helping your candle last longer.
Avoid overfilling the jar: Leave space at the top of your candle jar to avoid spilling and allow for safe lighting.
Let the candle cure fully: Let the candle set and cool for at least 8 hours or overnight. This helps the wax and fragrance to set correctly, so the candle burns evenly and smells great.
Trim the wick regularly: Trim the wick to about ¼ inch before each burn to keep the flame steady, prevent soot, and extend the candle’s lifespan.

How to Store Candle Jars
There’s not much to storing this homemade candle. Just keep it in a dry room temperature place and light it when desired. If your jar has a top, keep it on when unused. I like to store all my pressed flowers before using them in an airtight container.

Homemade Candle Jars FAQs
If you are short on time, you can skip pressing your own flowers. Amazon sells pressed flowers at a relatively reasonable price. I’m sure any local craft store will have the same for your candles with pressed flowers.
If you don’t live in a place where flowers are readily pickable, head on over to a florist or the floral department of your grocery store and pick out some small, colorful blooms.

Candle Jar with Pressed Flowers Tutorial

DIY Pressed Flower Candle Jars
Equipment
- Heat-Safe Bowl with Spout
- Heat-Safe Glass Jar or Cup 4 to 8-Ounce
- Parchment Paper 12-Inch Sheet
- Book Something Thick and Heavy
Supplies
- 4 Ounces Mod Podge
- tweezers
- 3 Cups soy melting wax
- candlewick
- clothespin or index card
- essential oils or candle scent oil
- water
- fresh flowers
Instructions
- Arrange the flowers in a single layer between 2 sheets of parchment paper and place the parchment paper between the pages of the back of a heavy book. Let the flowers sit in the book for 1-2 weeks to as they dry and press.
- Brush the jar with Mod Podge where you want to place a flower and, using tweezers, place the flower over that spot and then brush a layer of Mod Podge over the flower. Repeat with more flowers until you are satisfied with the design.
- Let the Mod Podge dry for at least 1 hour. If your jar or cup wants to roll around, place a rolled-up kitchen towel inside the cup to weigh it down.
- Melt wax according to package instructions and once melted mix in the essential oils (use whatever combination and quantity you want to reach your desired fragrance). Some wax brands are ok to microwave, however, most are not safe to microwave. In most cases, place your heat safe bowl inside a water filled pot and place on your stove over medium heat. Stir continuously until the wax is melted and clear.
- Place the wick in the center of the jar and hold it in place with a clothespin. Pour the melted wax into the jar. Allow the candle to set on a flat surface for at least 8 hours (or overnight) until the wax has hardened. Most wax melts yellow but will become white again once cooled. Don’t be alarmed, the candle will not be yellow.
- Remove the clothespin and trim the wick so that it only sticks out of the wax by about ¼ inch.
- Light the candle and enjoy.
- Once the candle is fully burned, clean it out and put a tea candle or more melted wax in the flower jar.
Notes
Add fragrance carefully: Essential or fragrance oils should be added just before pouring to preserve their scent. Stick to recommended oil-to-wax ratios for a balanced fragrance that’s not overpowering.
Keep the wick centered: Use a clothespin or wick holder to keep the wick in place. Centering it is essential for even burning, helping your candle last longer.
Avoid overfilling the jar: Leave space at the top of your candle jar to avoid spilling and allow for safe lighting.
Let the candle cure fully: Let the candle set and cool for at least 8 hours or overnight. This helps the wax and fragrance to set correctly, so the candle burns evenly and smells great.
Trim the wick regularly: Trim the wick to about ¼ inch before each burn to keep the flame steady, prevent soot, and extend the candle’s lifespan.


Do you love pressing flowers? If so, this DIY pressed flower candle jars tutorial is the craft for you. Depending on how many flowers you dry, you can make a ton of these candles. Grab some pretty flowers from your florist or even from your own yard. I love to make these when it’s spring and all my favorite flowers are popping up. These DIY pressed flower jars make great gifts and look incredible with their beautiful details.
Other Crafts to Try
- Add a touch of warmth and style to your favorite candles with this candle sweater cozy!
- Pamper yourself with luxuriously smooth whipped shea butter!
- Say goodbye to single-use plastic and make your own reusable beeswax wraps!
- Bring a splash of color and fun to your reading routine with these adorable DIY pom pom bookmarks.
- Indulge in a spa-like experience at home with these DIY lavender orange bath salts.


Bella Bucchiotti
Bella Bucchiotti is a Canadian-based syndicated food, travel, and lifestyle writer, photographer, and creator at xoxoBella. She founded xoxoBella in 2015, where she shares her love for food, dogs, sustainability, fitness, crafts, outdoor adventures, travel, and philanthropy to encourage others to run the extra mile, try new recipes, visit unfamiliar places, and stand for a cause. Bella creates stress-free and family-friendly recipes for weeknight dinners and festive feasts.