This post may contain affiliate links, please see the privacy policy for details.
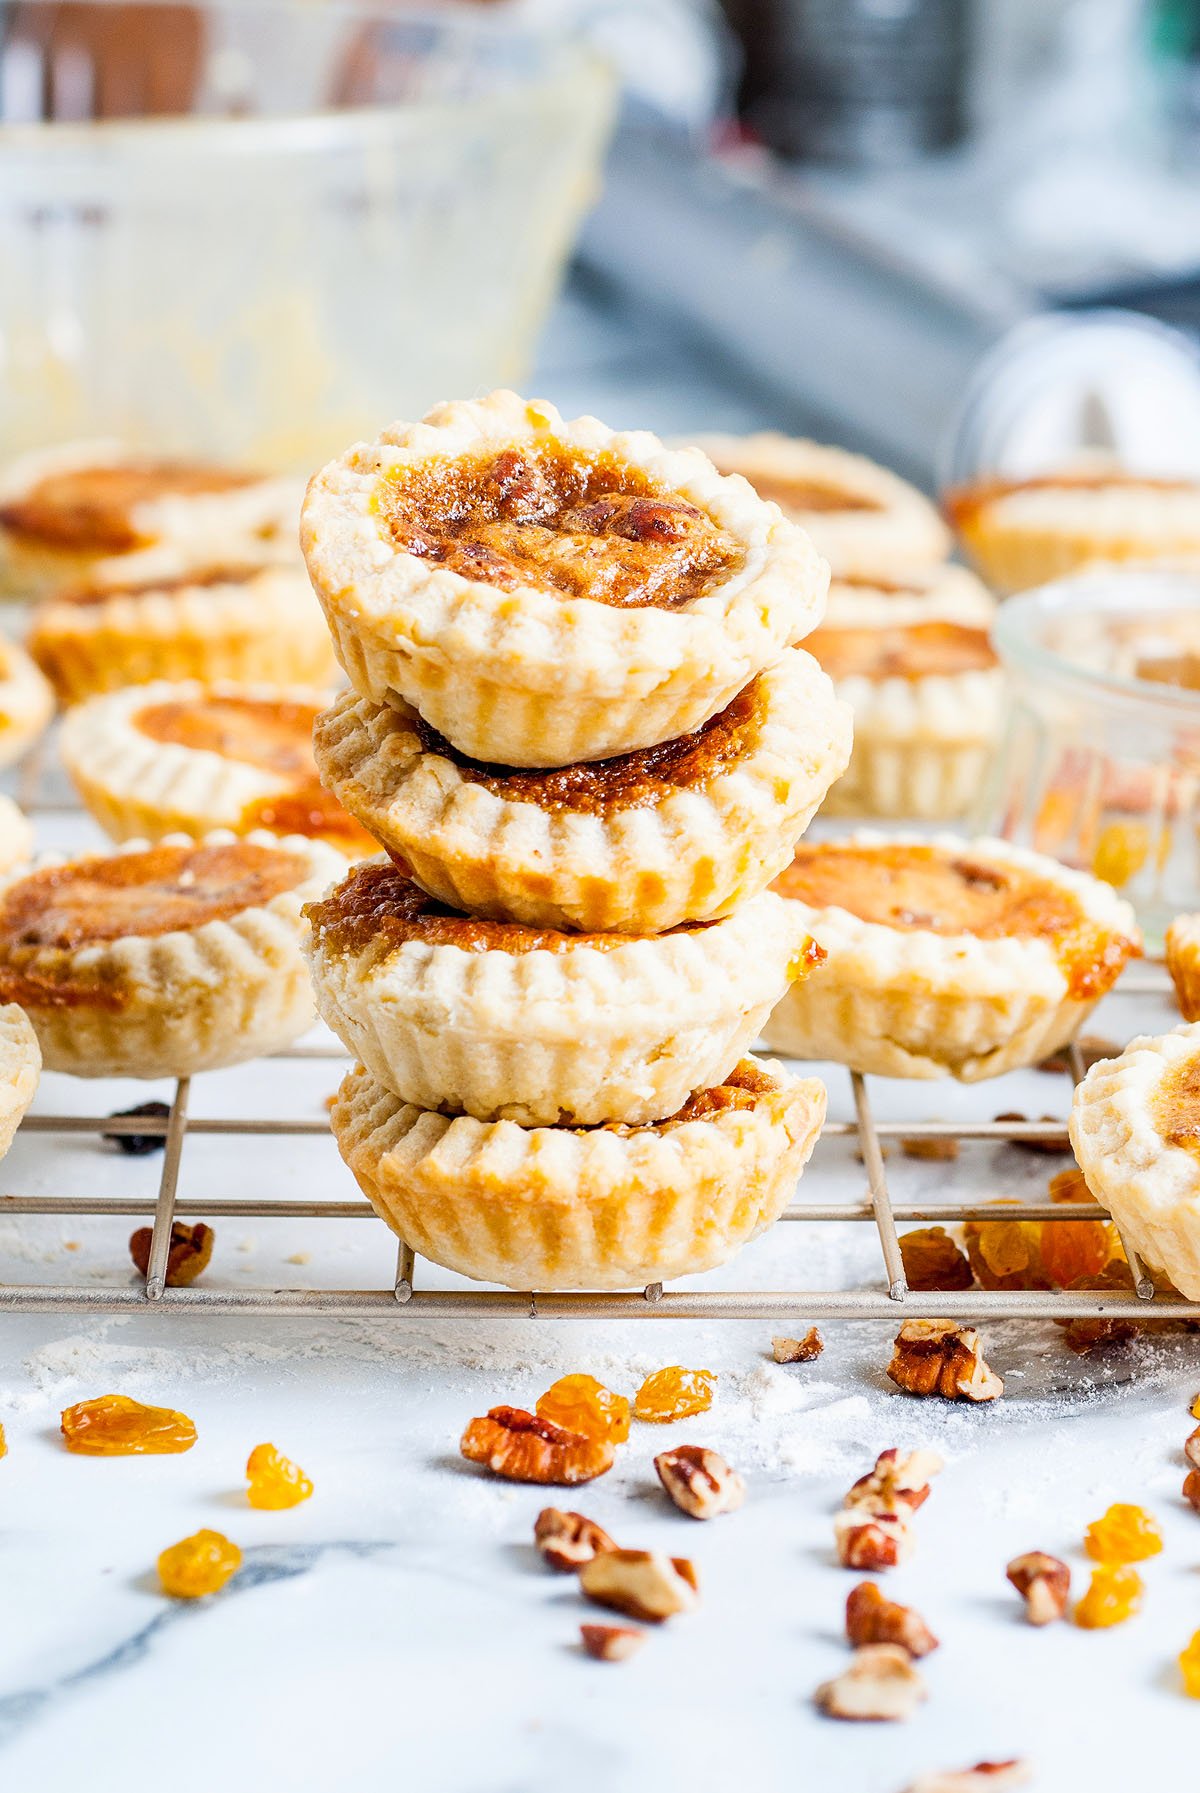
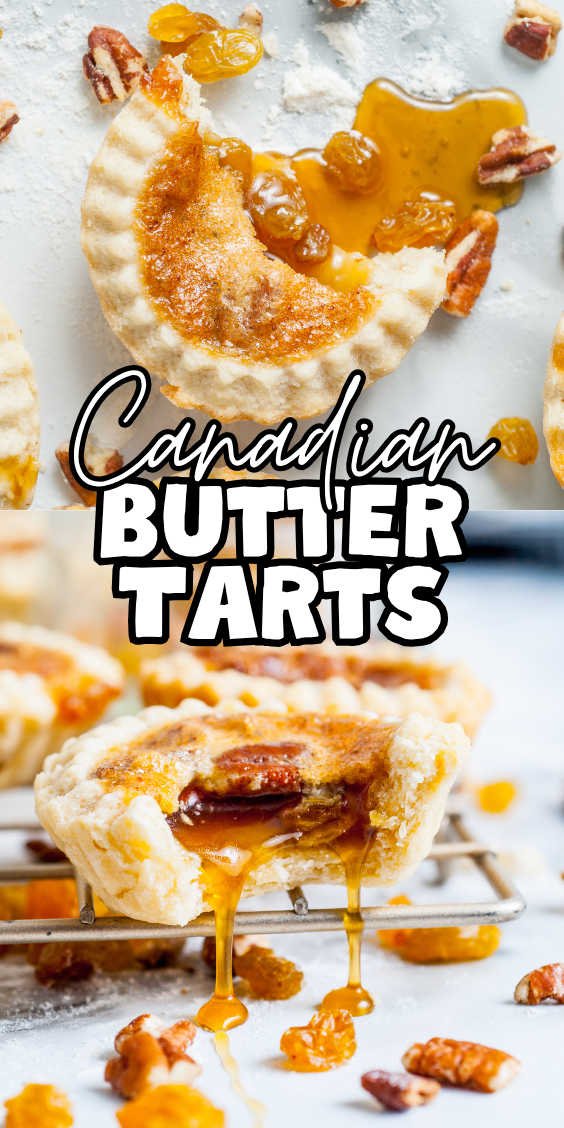
Have you ever tried Canadian butter tarts? These sweet little treats are a true Canadian classic—flaky, buttery pastry shells filled with a rich, gooey brown sugar filling that’s lightly scented with vanilla. This version includes raisins and chopped nuts for that perfect mix of texture and flavor in every bite. They’re simple to make, wonderfully indulgent, and sure to become a favorite whether you’re new to butter tarts or grew up loving them. One bite, and you’ll see why they’re such a beloved tradition.

Sweet, gooey, and perfectly flaky, canadian butter tarts bring cozy comfort in every bite of this classic treat.
Also try some other Canadian classics like East Coast lobster rolls, a Halifax Donair, a Caesar cocktail, Canada Day cookies with dip, or poutine.

Why You’ll Love It
Delicious: These homemade small dessert tarts with their buttery crust, pecans, golden raisins, brown sugar and corn syrup filling are so tasty. Even though you can find them at the bakery, the homemade version of these favorite sweet treats is even better.
Customizable: You can change some of the ingredients in this Canadian recipe if you wish, such as using another kind of nut or a different type of dried fruit.
Easy: The dough for the homemade pastry is simple to prepare and the filling for these beloved tarts is also just a matter of mixing ingredients together. Even a novice home baker should find this great Canadian classic recipe straightforward.

Old Fashioned Butter Tarts Ingredients
A complete list of ingredients and amounts can be found in the recipe card below.
Flour: For making the tart shells.
Butter: Also for the tart shells. I used salted but unsalted works too.
Shortening: Another type of fat for the shells.
Sugar: For sweetness.
Salt: Use a little extra if you’re using unsalted butter.
Light corn syrup: For sweetness and helps achieve a thick, sticky filling.
Vanilla: Always a wonderful flavor option and so good with the fruit and nuts.
Golden raisins: Plump, juicy and so tasty!
Chopped pecans: For crunch and flavor.

How to Make Butter Tarts
For more detailed instructions with weights and measurements, jump to the printable recipe card.
Start the pie crust: Put flour in a bowl with butter, shortening, sugar, and salt.
Make the dough: Blend the pie crust mixture then add vinegar and ice water (don’t overwork the dough!)
Rest the dough: Wrap it in plastic wrap and refrigerate.
Prepare the filling: Mix sugar, corn syrup, eggs, salt and vanilla, then add melted butter.
Make the flaky pastry shells: Roll out the dough and use a cookie cutter to cut circles to be the shells.
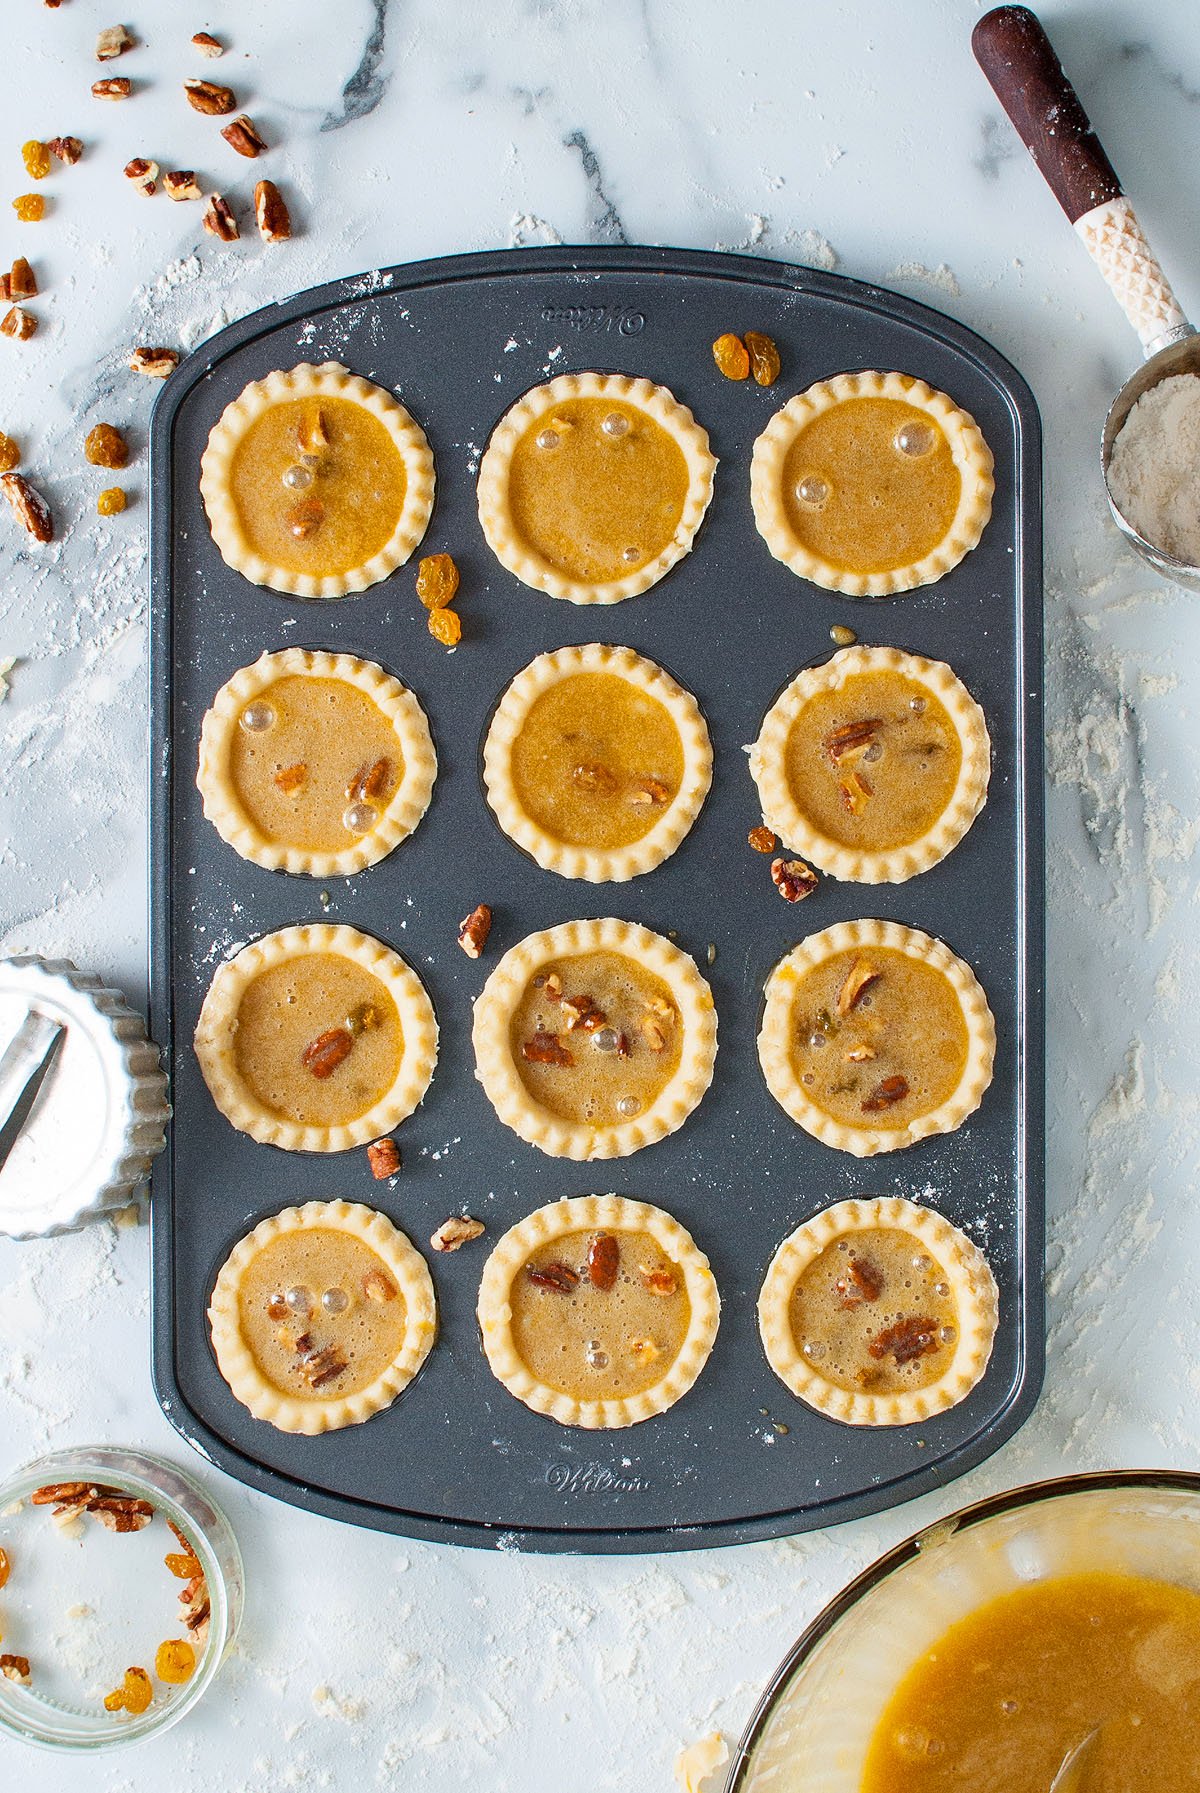
Fill the pastry shells: Once you’ve pressed the shells into a mini tart pan or muffin pan, add fruit, nuts and the prepared filling.
Cook them: Bake the tarts until golden brown.

Substitutions and Variations
Fruit and nuts: You can omit the fruit and/or nuts or swap them for other types if you want. There are different ways to make this small pastry tart and you can mix and match what you want to have in yours – dried currants and chopped walnuts, for example.
Optional add-ins: You could consider shredded coconut, or even bacon! Maybe even chocolate chips if you have some.
Corn syrup: You can use maple syrup in place of some of the corn syrup since not only does that add another flavor but maple syrup goes beautifully with so many sweet Canadian recipes. If you aren’t adding any, you could drizzle some over before serving instead!

Serving Suggestions
With other sweet treats: If you want to try another Canadian delicacy, Nanaimo bars are also really good, so if you’re baking for Canada Day why not make both? And beaver tails would be great as well.
With a garnish: You can serve this Canadian butter tarts recipe as it is or with some ice cream or whipped cream.
With a drink: Whip up maple apple whisky sours or strawberry jello shots to pair with your Canadian tarts.

How to Store Homemade Butter Tarts
Store: Keep them in an airtight container in the fridge for up to 5 days. The top will turn from crispy to soft, but they’re every bit as delicious!
Freeze: Freezing is is handy if you’re batch baking for Thanksgiving or Christmas. Once they’re completely cool, put the tarts in a freezer bag. They’ll be good for up to 3 months.
Thaw: Defrost them overnight in the refrigerator. This

Top Tips
Making the crust: I recommend using a pastry cutter to combine the ingredients, or even a pair of forks.
Cookie cutter: To get the cute crinkly dough top, use a cookie cutter with crinkly edges. Use a cookie cutter that is about ½ to 1 inch larger than the opening of the tart/muffin tin spaces. My tart pan has openings roughly 2½ inches and they are about ¾ inch deep. I used a 3 inch cookie cutter.
Check for doneness: Your butter tarts are done when the filling has caramelized and the edges are just beginning to turn golden.
Let them cool before storing: Make sure the tarts are completely cool before taking them out of the pan and storing them, else the flaky crust might break.

Butter Tarts FAQs
Either way is good. If you want to warm them back up, 10 minutes in the oven at 350°F should be sufficient.
Yes you can if you prefer to do it that way. Pillsbury pie crusts work well here.
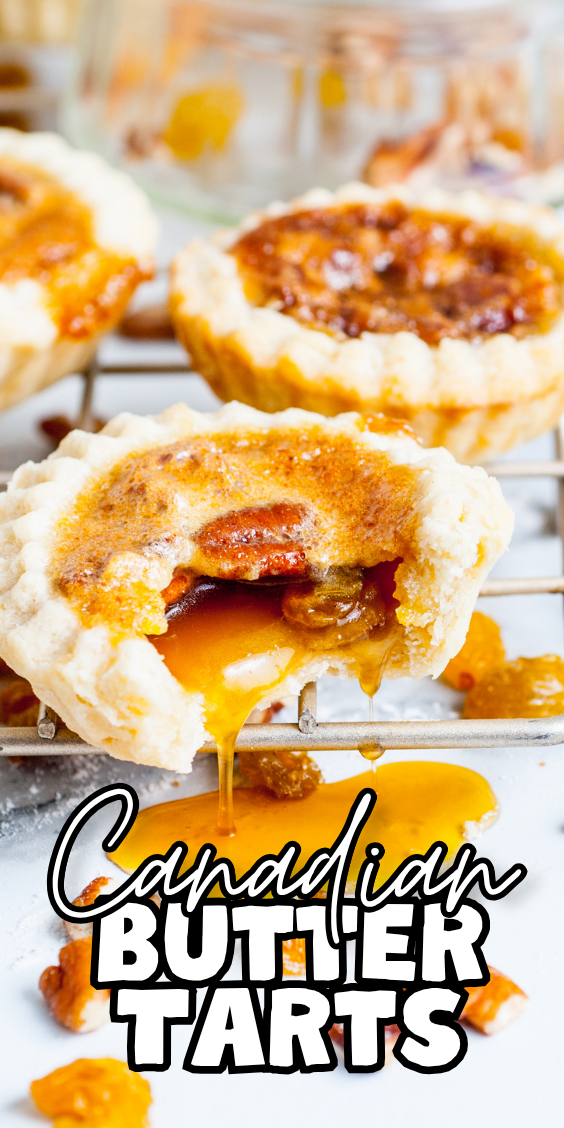
Although it’s a matter of passionate national debate whether the gooey filling should be firm, runny or somewhere between the two, it actually depends on your personal preference. If you don’t want a runny filling, add an extra egg and sub brown sugar for some of the corn syrup to thicken it up a little. For a runnier tart you could also bake for a minute or two less. For a firmer filling bake for a minute or two more.
They are sweet, buttery, caramel tasting tarts, a bit like a cross between pecan pie and sugar pie.
The first printed recipe for butter tarts was published in The Women’s Auxiliary of the Royal Victoria Hospital Cookbook in 1900, and this authentic butter tarts recipe is based on it.
Best Canadian Butter Tart Recipe

Canadian Butter Tarts
Equipment
- Round Cookie Cutter see notes
Ingredients
For the Pastry Dough:
- 2 ½ Cups all-purpose flour
- ¾ Cup butter, salted, cold
- ¼ Cup shortening, cold
- 1 Tablespoon light brown sugar, packed
- 1 Teaspoon salt
- 1 Tablespoon apple cider vinegar
- ice water, as needed
For the Filling:
- ⅔ Cup light brown sugar, packed
- ⅓ Cup corn syrup, light
- 1 egg
- 1 egg yolk
- ½ Teaspoon salt
- 1 ½ Teaspoon vanilla extract
- ⅓ Cup salted butter, melted
- ¼ Cup golden raisins
- ¼ Cup pecans, chopped
Instructions
- Preheat the oven to 400 degrees F.
Make the Pastry Shells:
- Cube the butter and shortening for the pastry dough.
- In a mixing bowl, combine the following pastry dough ingredients: flour, cubed butter, cubed shortening, light brown sugar, and salt.
- Using a pastry cutter, forks, or even your fingers, cut the butter and shortening into the dry ingredients until the mixture resembles crumbs the size of peas.
- Mix the apple cider vinegar and 4 tablespoons of ice water into the dough, continue to mix adding additional tablespoons of ice water as needed until the dough comes together.
- Wrap the dough in plastic wrap and set in the refrigerator for at least 15 minutes.
Make the Filling:
- While the dough is chilling you can make the filling. Start by combining the light brown sugar, light corn syrup, egg, egg yolk, salt, and vanilla. Mix until combined.
- Add the melted butter and mix again, set aside.
Assemble the Tarts:
- Remove the pastry dough from the fridge and unwrap. On a clean surface, roll the pastry dough to be about ¼” thick.
- Use a round cookie cutter that is approximately ½ to 1 inch larger than the opening of your mini tart pan cavities or mini muffin pan cavities. Cut as many rounds out of the dough as possible, re-roll any remaining scraps of dough and cut additional rounds until no more dough remains.
- Fill each cavity of the tart pan with a round of dough, gently pressing it into the sides and bottom of the cavity,
- Sprinkle just a few raisins and pecans into the bottom of each pastry.
- Spoon the filling on top of the raisins and pecans in each of the pastry lined tart cavities. Only fill about ¾ of the way full with the filling. You want to make sure there is a little space for the sugars to bubble up.
Bake the Tarts:
- Bake on a lower rack in the preheated oven for approximately 15 minutes or until the tops have caramelized and the edges of the pastry are just starting to become golden.
- Remove from the oven and let the tarts cool completely before removing from the pan.
Notes
Cookie cutter: To get the cute crinkly dough top, use a cookie cutter with crinkly edges. Use a cookie cutter that is about ½ to 1 inch larger than the opening of the tart/muffin tin spaces. My tart pan has openings roughly 2½ inches and they are about ¾ inch deep. I used a 3 inch cookie cutter.
Check for doneness: Your butter tarts are done when the filling has caramelized and the edges are just beginning to turn golden.
Let them cool before storing: Make sure the tarts are completely cool before taking them out of the pan and storing them, else the flaky crust might break.
Nutrition


Canada butter tarts are loved for their combination of flaky pastry and oozy, gooey filling. This butter tart recipe is authentic, classic and so yummy – it is truly the best Canadian butter tarts recipe. I am certain that the Canadian butter tart will become one of your favorite baked treats!
Other Recipes to Try
Bella Bucchiotti
Bella Bucchiotti is a Canadian-based syndicated food, travel, and lifestyle writer, photographer, and creator at xoxoBella. She founded xoxoBella in 2015, where she shares her love for food, dogs, sustainability, fitness, crafts, outdoor adventures, travel, and philanthropy to encourage others to run the extra mile, try new recipes, visit unfamiliar places, and stand for a cause. Bella creates stress-free and family-friendly recipes for weeknight dinners and festive feasts.


The filling was rich and gooey with just the right amount of sweetness, and I loved the little pop of texture from the raisins and nuts. Honestly, I could eat a whole batch by myself—definitely a new favorite!
A great bake.
I have a question?
How do you fold the pastry in the tin without any sign of fold over as in your photos?
Never have I been able to accomplish that!
Stuffing the oversized pastry in the tin always makes some pretty thick fold over creases!
hi! I press it down slightly. As well, I think the size of the pie dough pie makes a difference. Use a cookie cutter that is approx ½” to 1” larger than the opening of the tart/muffin tin spaces. My tart pan has openings roughly 2.5” and they are approx ¾” deep. The cookie cutter I used was 3”.
Followed recipe exactly. My family loved them! The crust was very tender and tasty. I can’t wait to try different fillings! A definite keeper!!
That’s great! I love them too 🙂
There was no leftovers. This has got to be my new favorite recipe from your site!! 🙂
So buttery, sweet and sticky. I loved these tarts!
These were so buttery and flaky! Loved them!
These were soooo good!! We omitted the pecans (nut allergies) and they still came out perfect. Cannot wait to make them again!!
You had me at butter!! Haha but seriously these little tarts were so good!
These buttertarts made my house smell amazing! That vanilla maple scent was mouthwatering and the tarts didn’t disappoint!
I made these for my mom and she loved them. What a special treat!
These are my favorite kind of tart!