This post may contain affiliate links, please see the privacy policy for details.
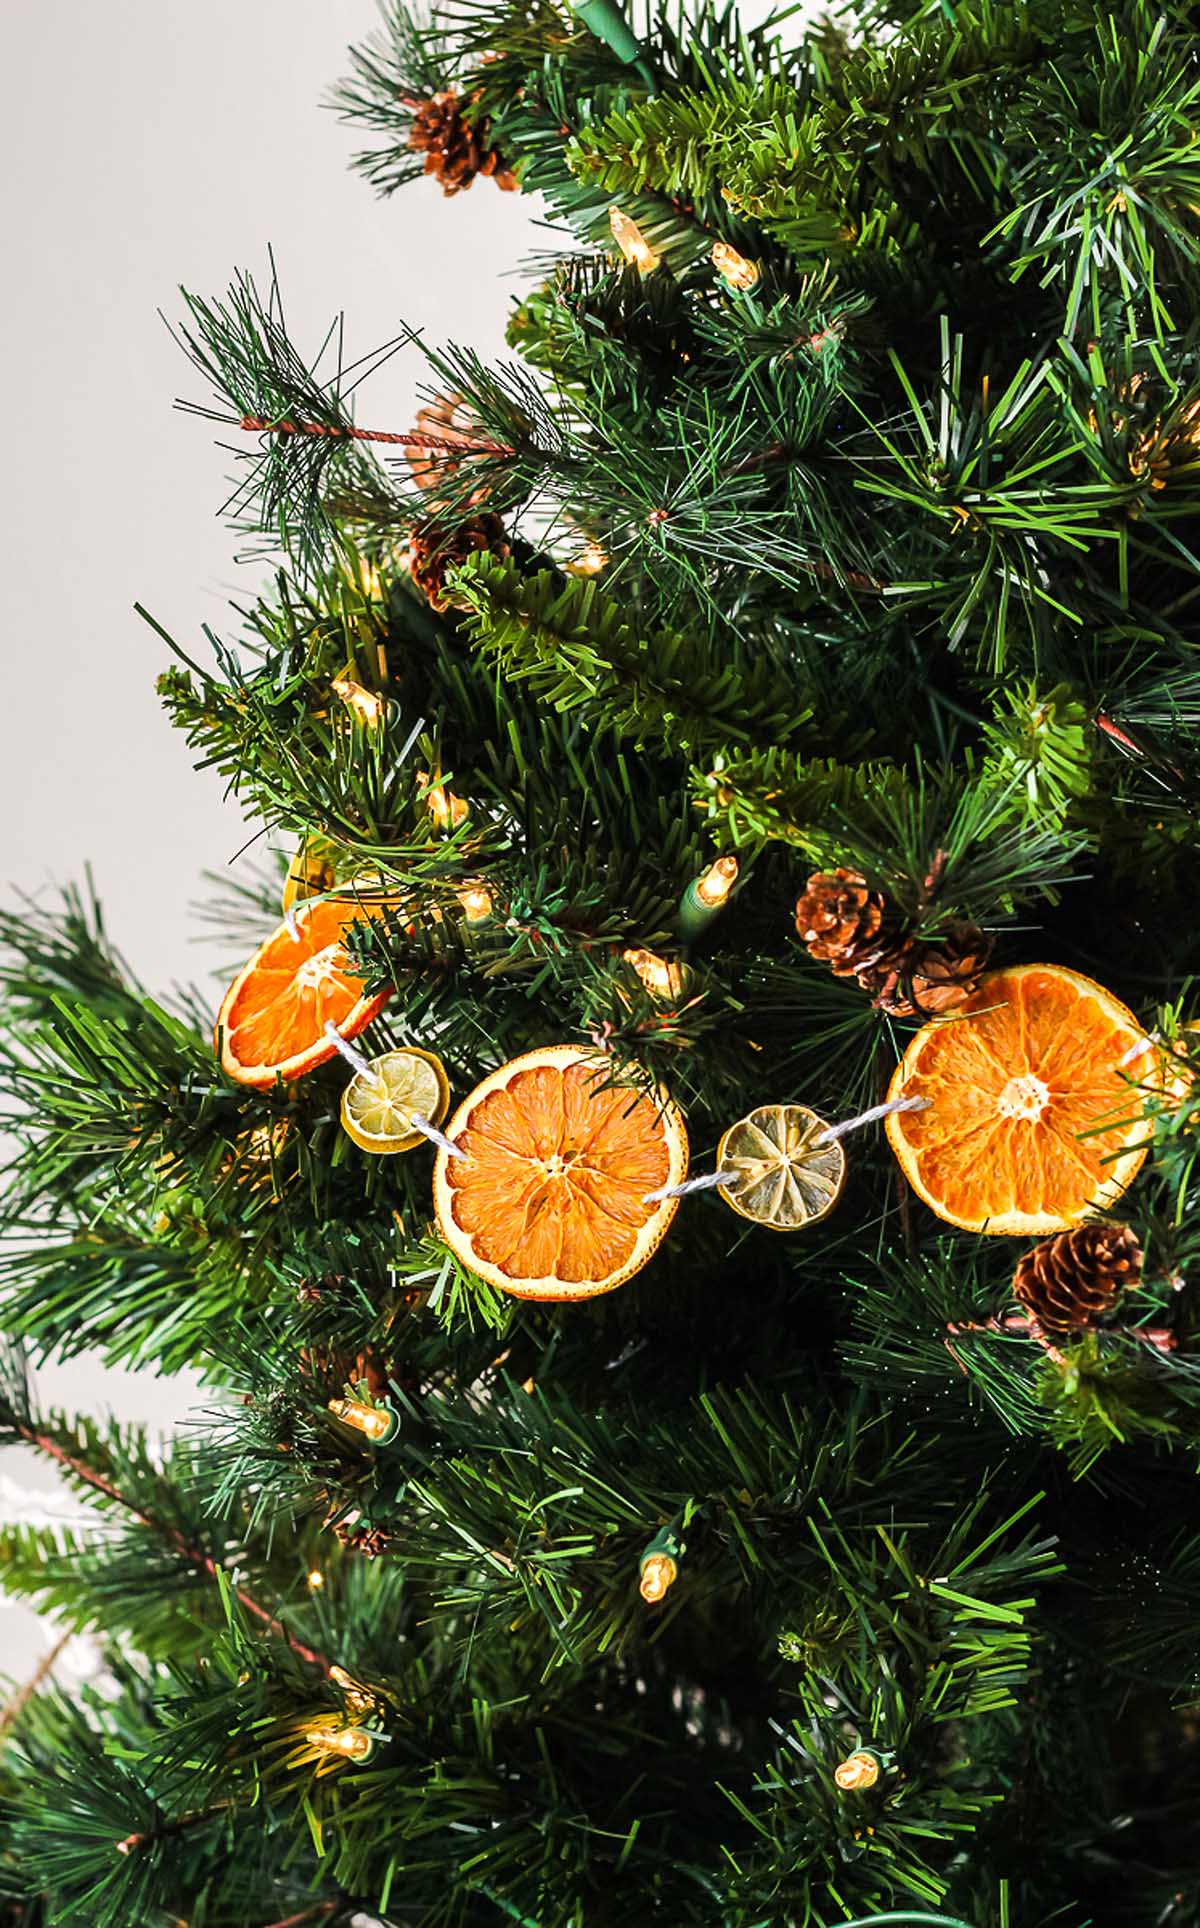
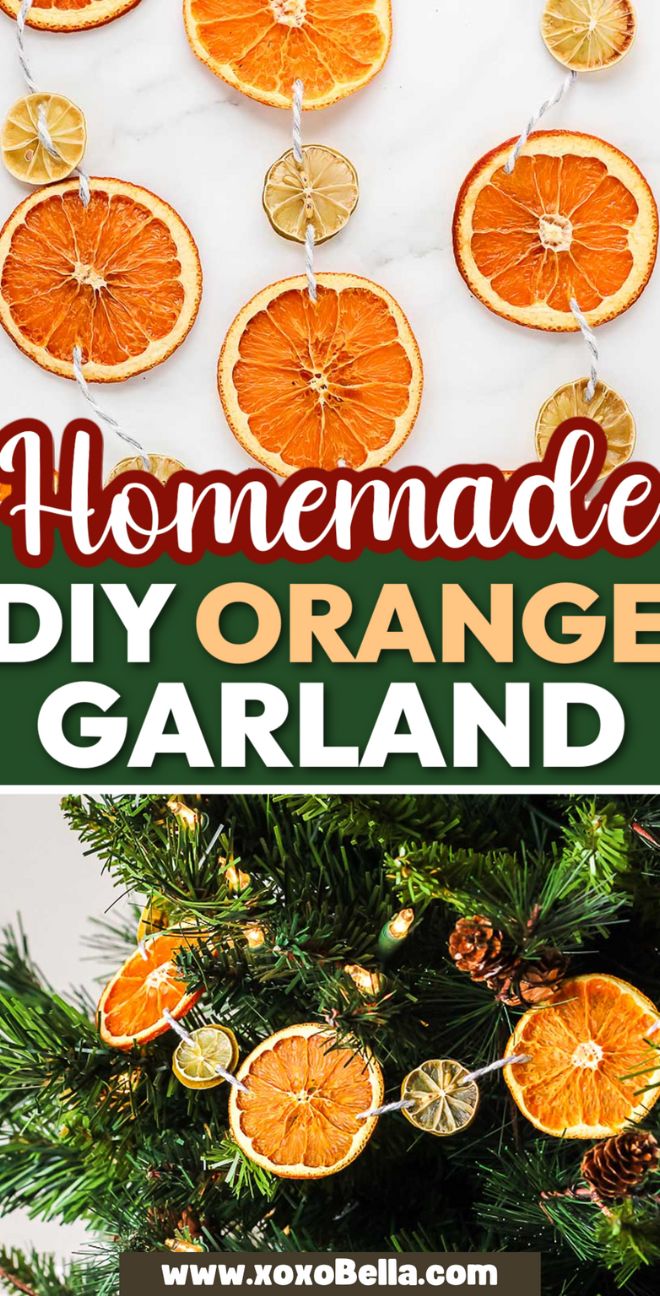
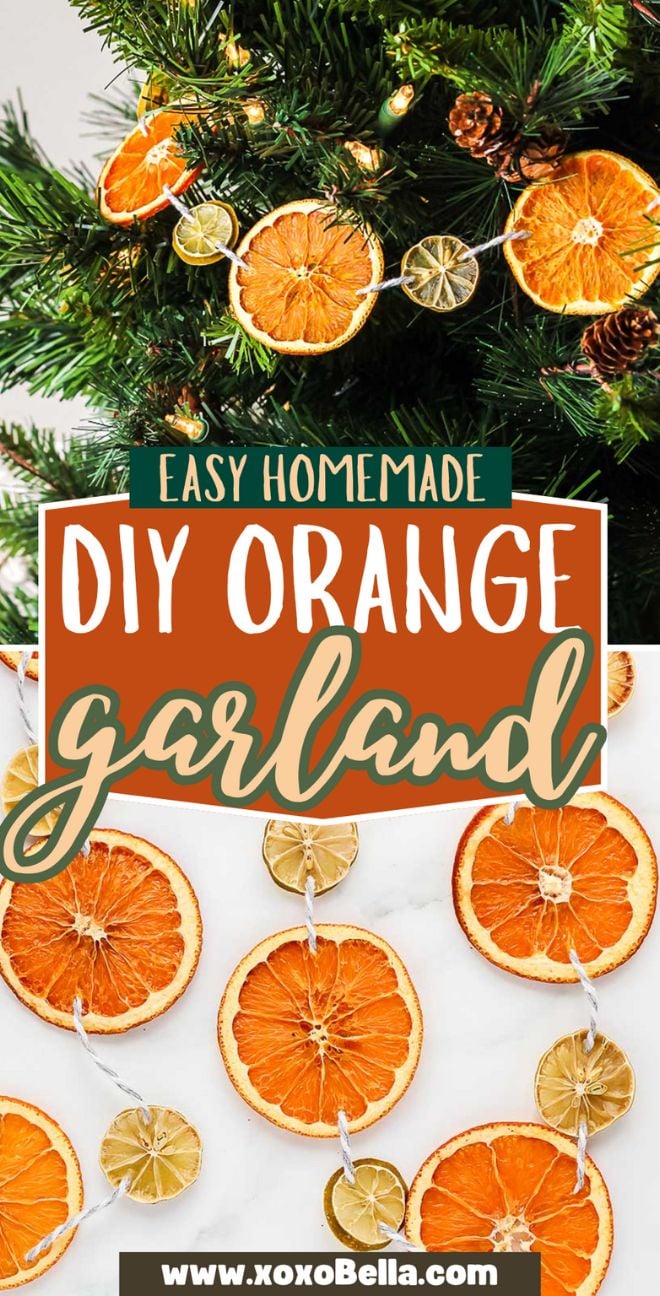
Bring a cozy, handmade touch to your holiday decor with a homemade dried orange garland. Simple materials like orange slices, cotton twine and a needle transform into rustic decoration that fills your space with natural color and subtle citrus charm. The process is easy and satisfying, and it’s a relaxing way to get creative for the season. Hang it anywhere on windows, mirrors or the mantel to warm your home with timeless charm and scent.
Learn how to make a homemade dried orange garland with orange slices and simple supplies. It brings natural color, citrus charm and rustic style to holiday decor.
You might also like to make a paper clip angel, salt dough gingerbread man garland, crochet star garland or felt Christmas tree garland.
Why You’ll Love It
Simple materials: Uses only oranges, twine and a needle which are easy to gather.
Senses activated: Natural scent and warm hues bring cheer without chemical fragrance.
Eco friendly: Fully biodegradable and ideal for composting after the season.
Customizable: Combine with other citrus, cranberries, popcorn or ribbon for creative flair.
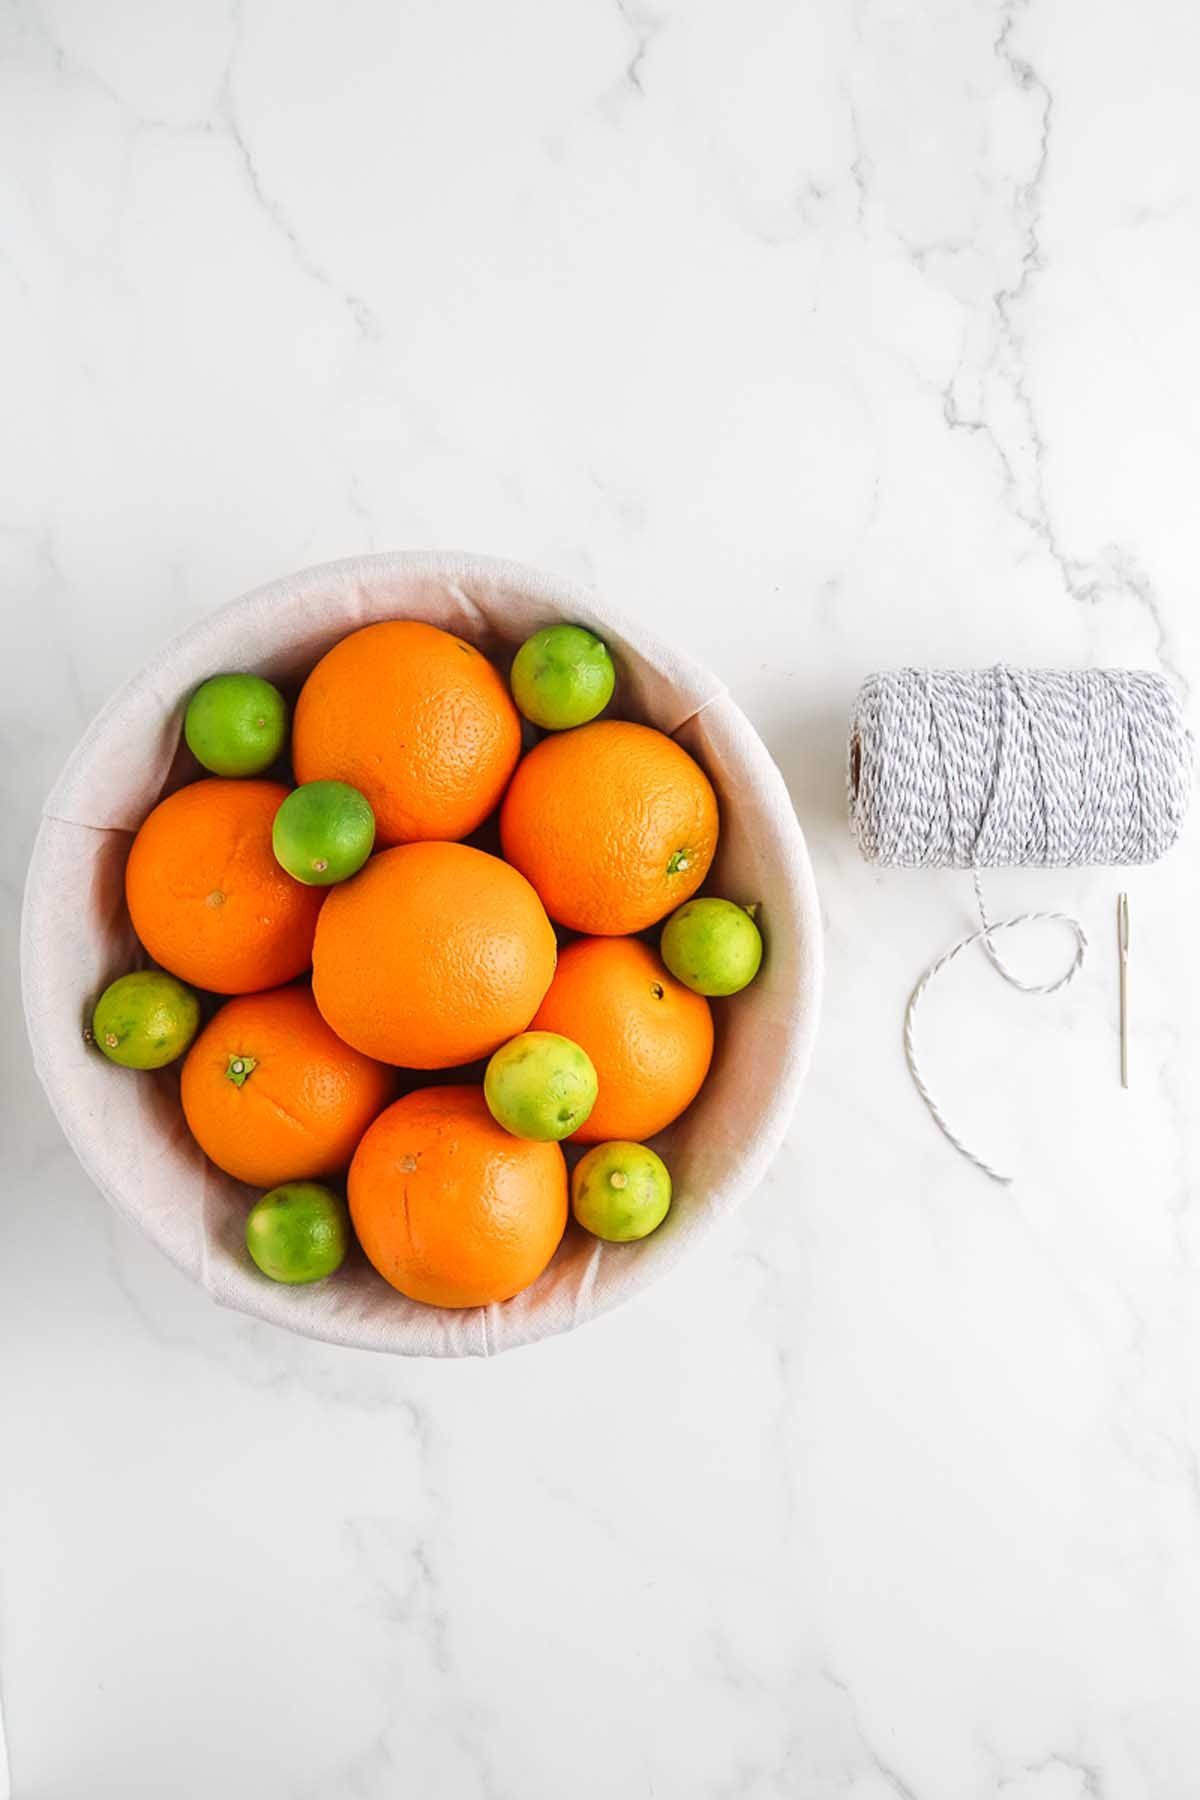
Orange Garlands Supplies and Ingredients
A complete list of ingredients and amounts can be found in the recipe card below.
Navel orange slices: Main decorative element providing vibrant color and citrus notes.
Cotton twine: Holds the slices together and allows for flexible arrangement.
Optional extras: Mix textures or add pops of color and variation. Cranberries, popcorn and ribbon are a few ideas.
How to Make a Dried Orange Garland for Christmas
For more detailed instructions with weights and measurements, jump to the printable recipe card.
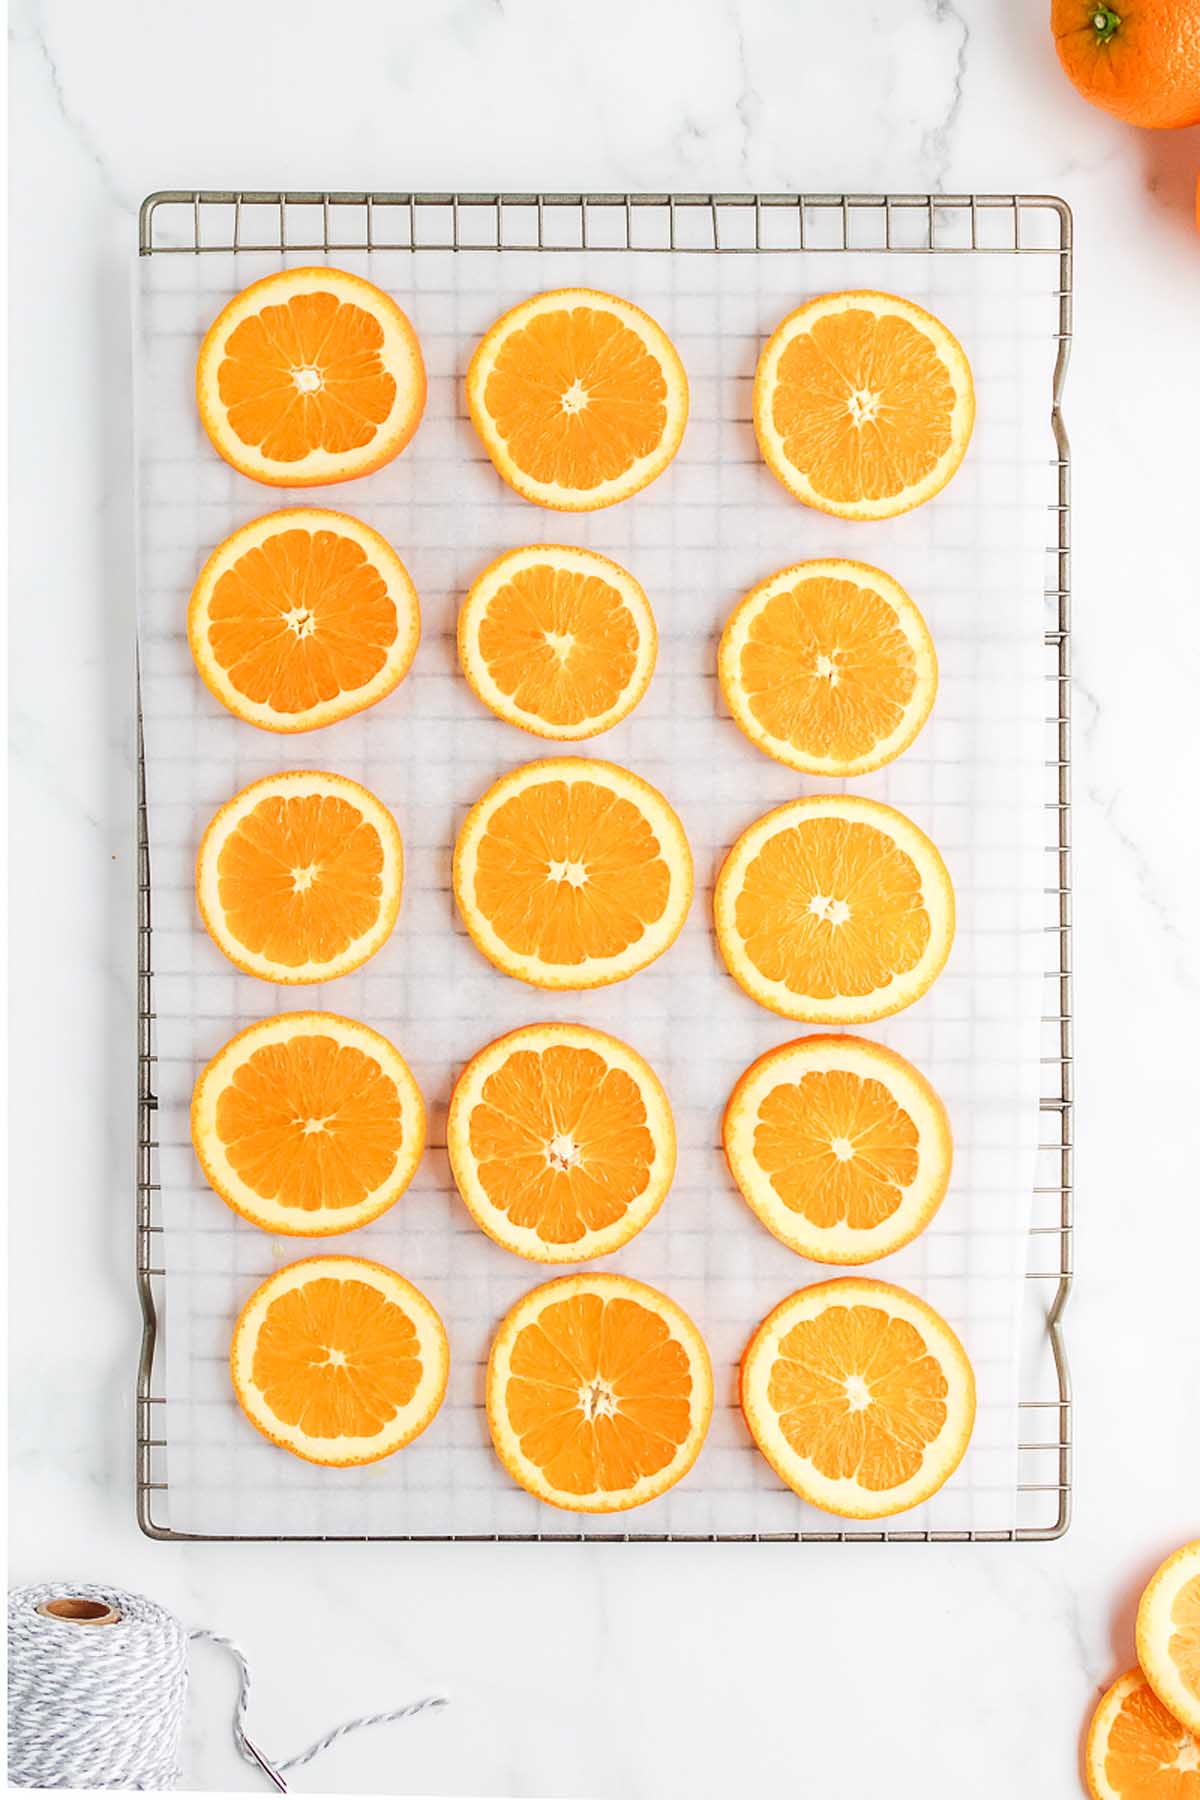
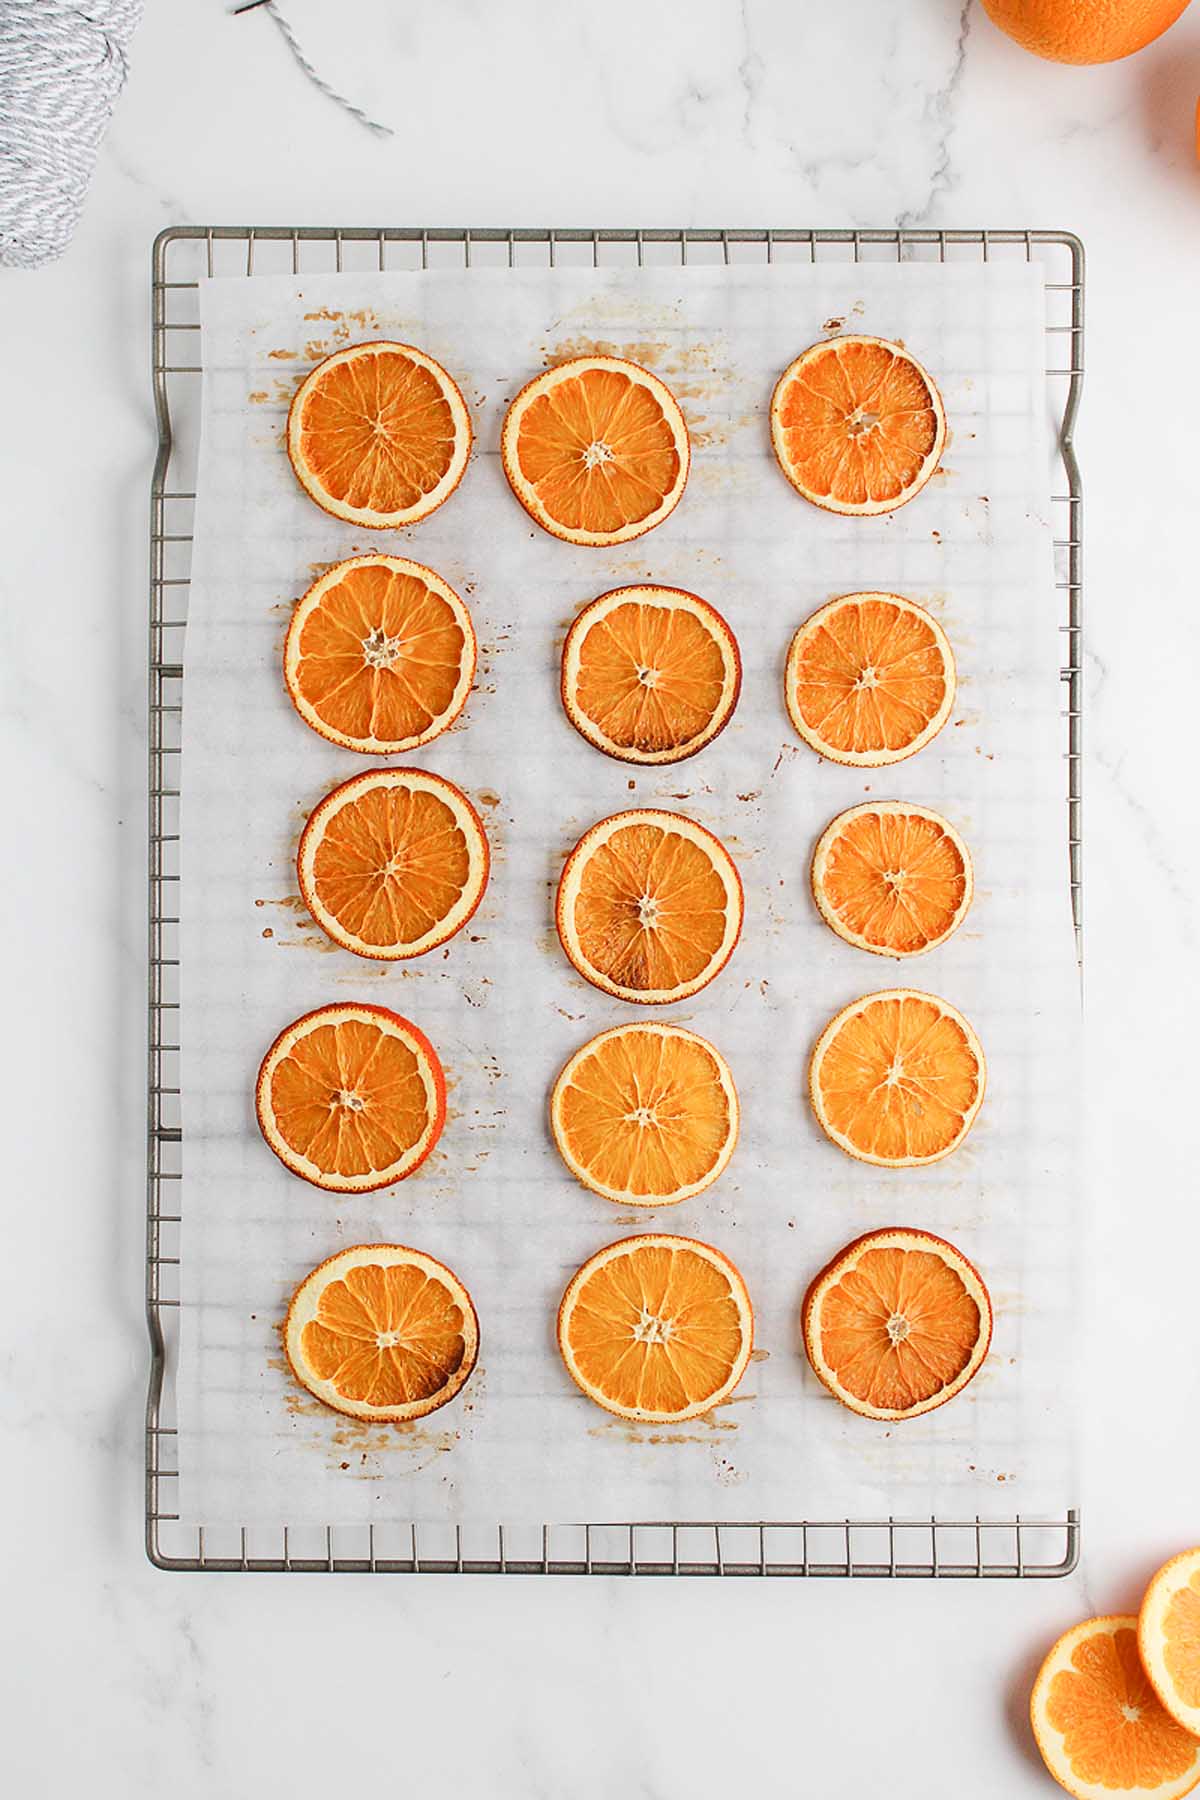
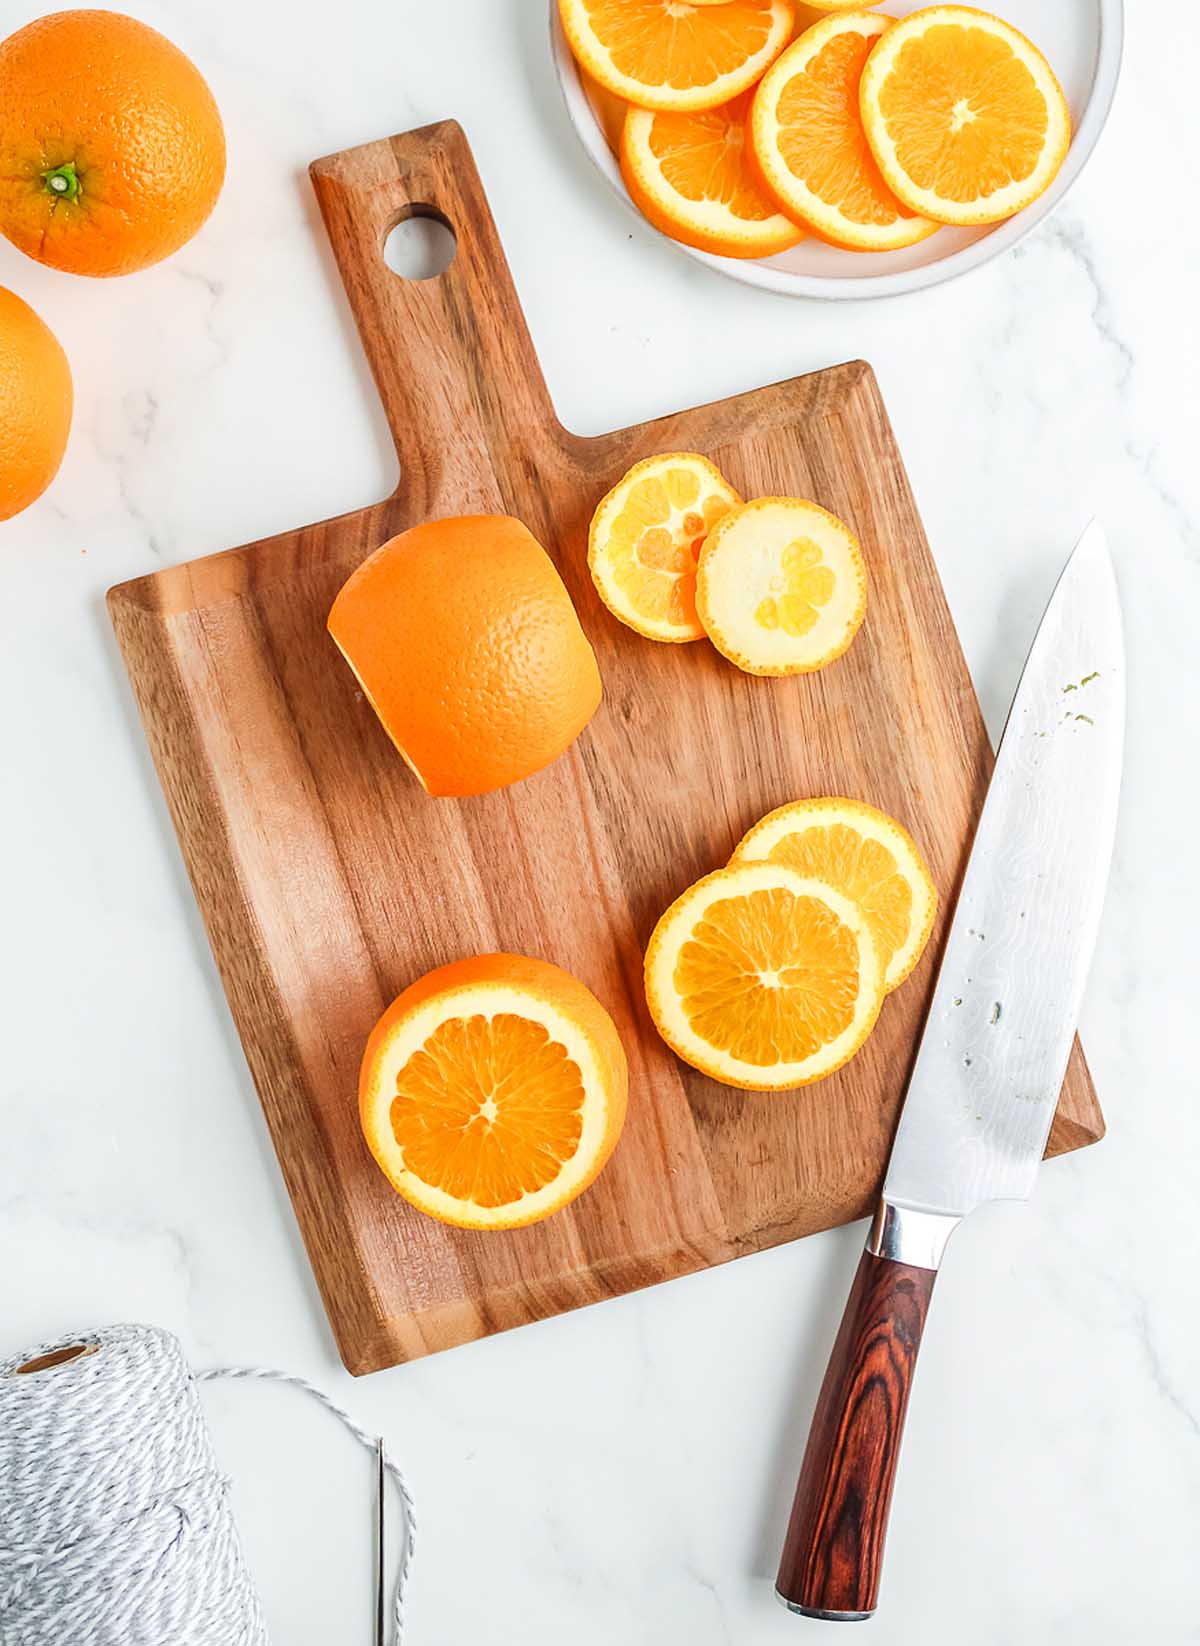
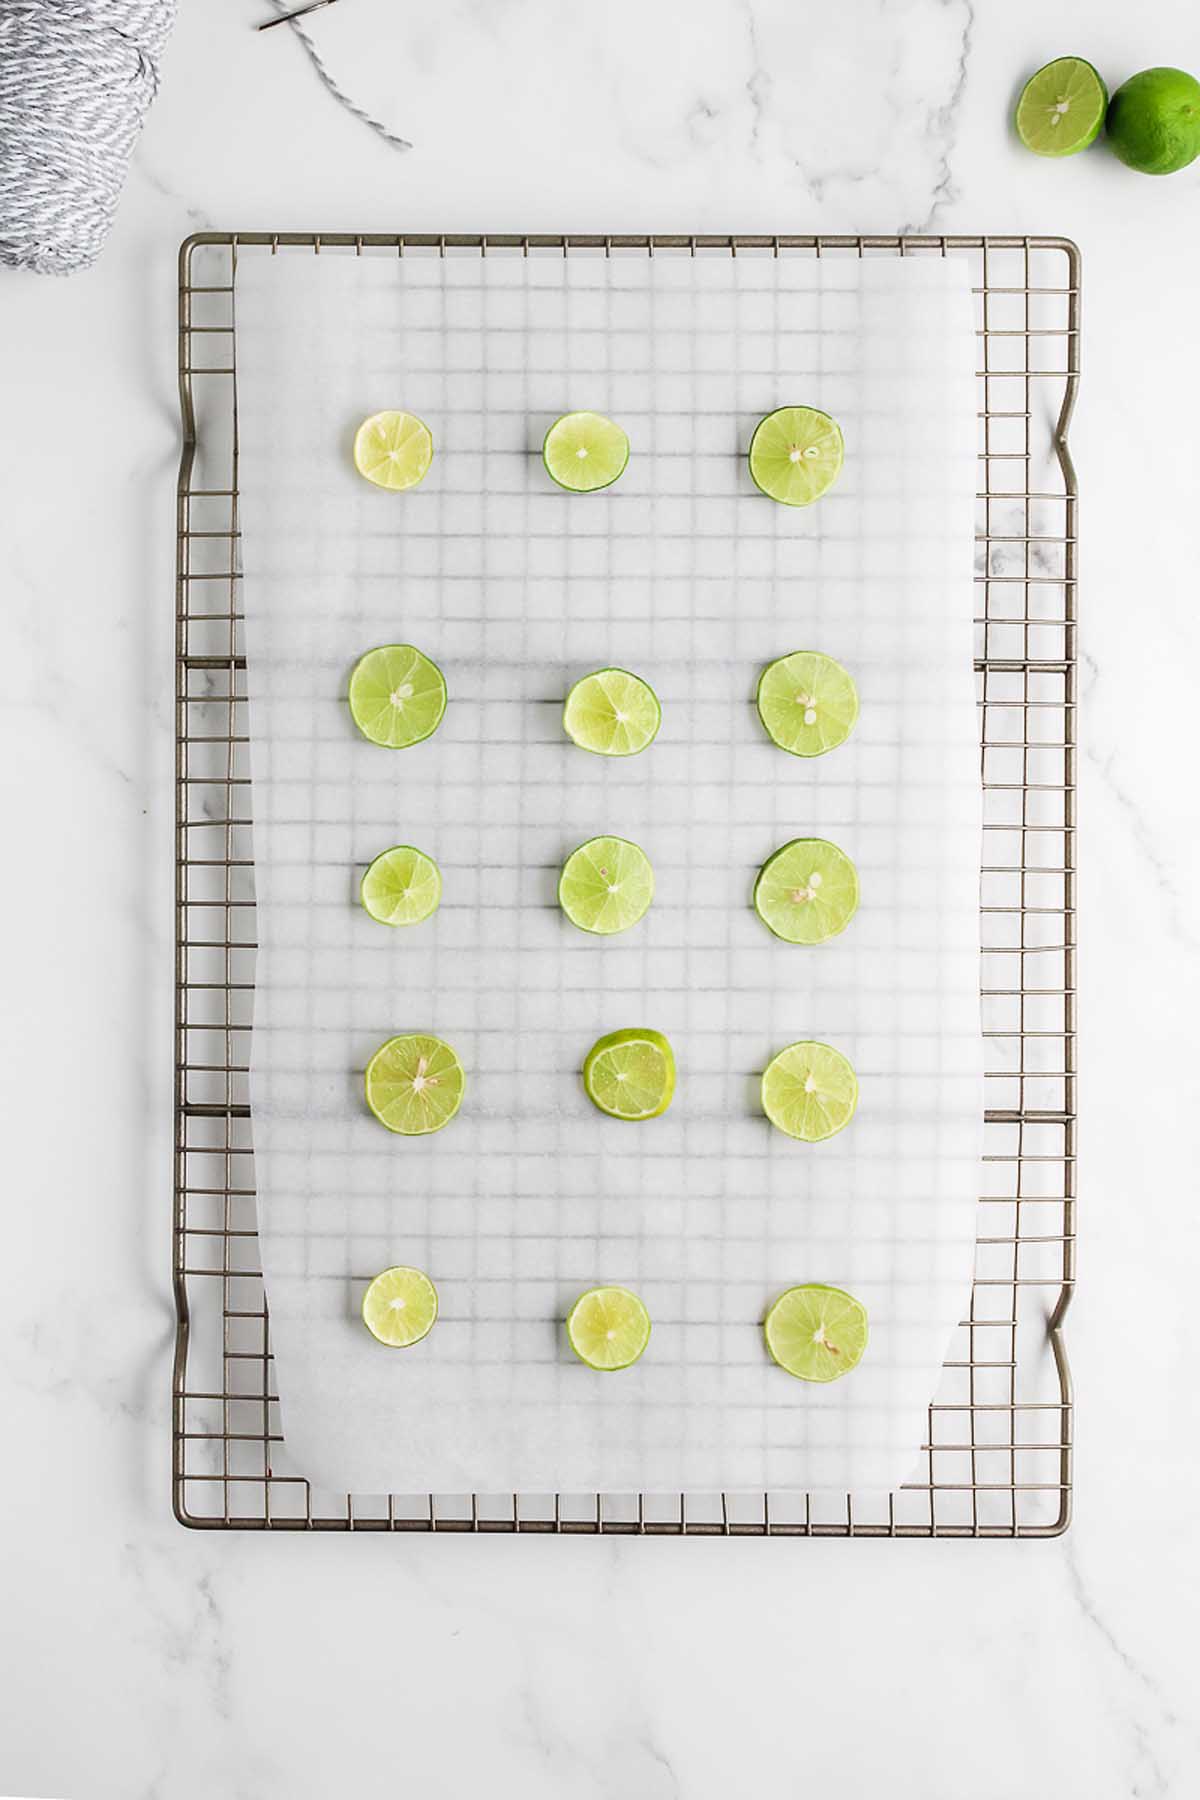
Slice the oranges: Cut oranges thinly and pat dry to reduce moisture.
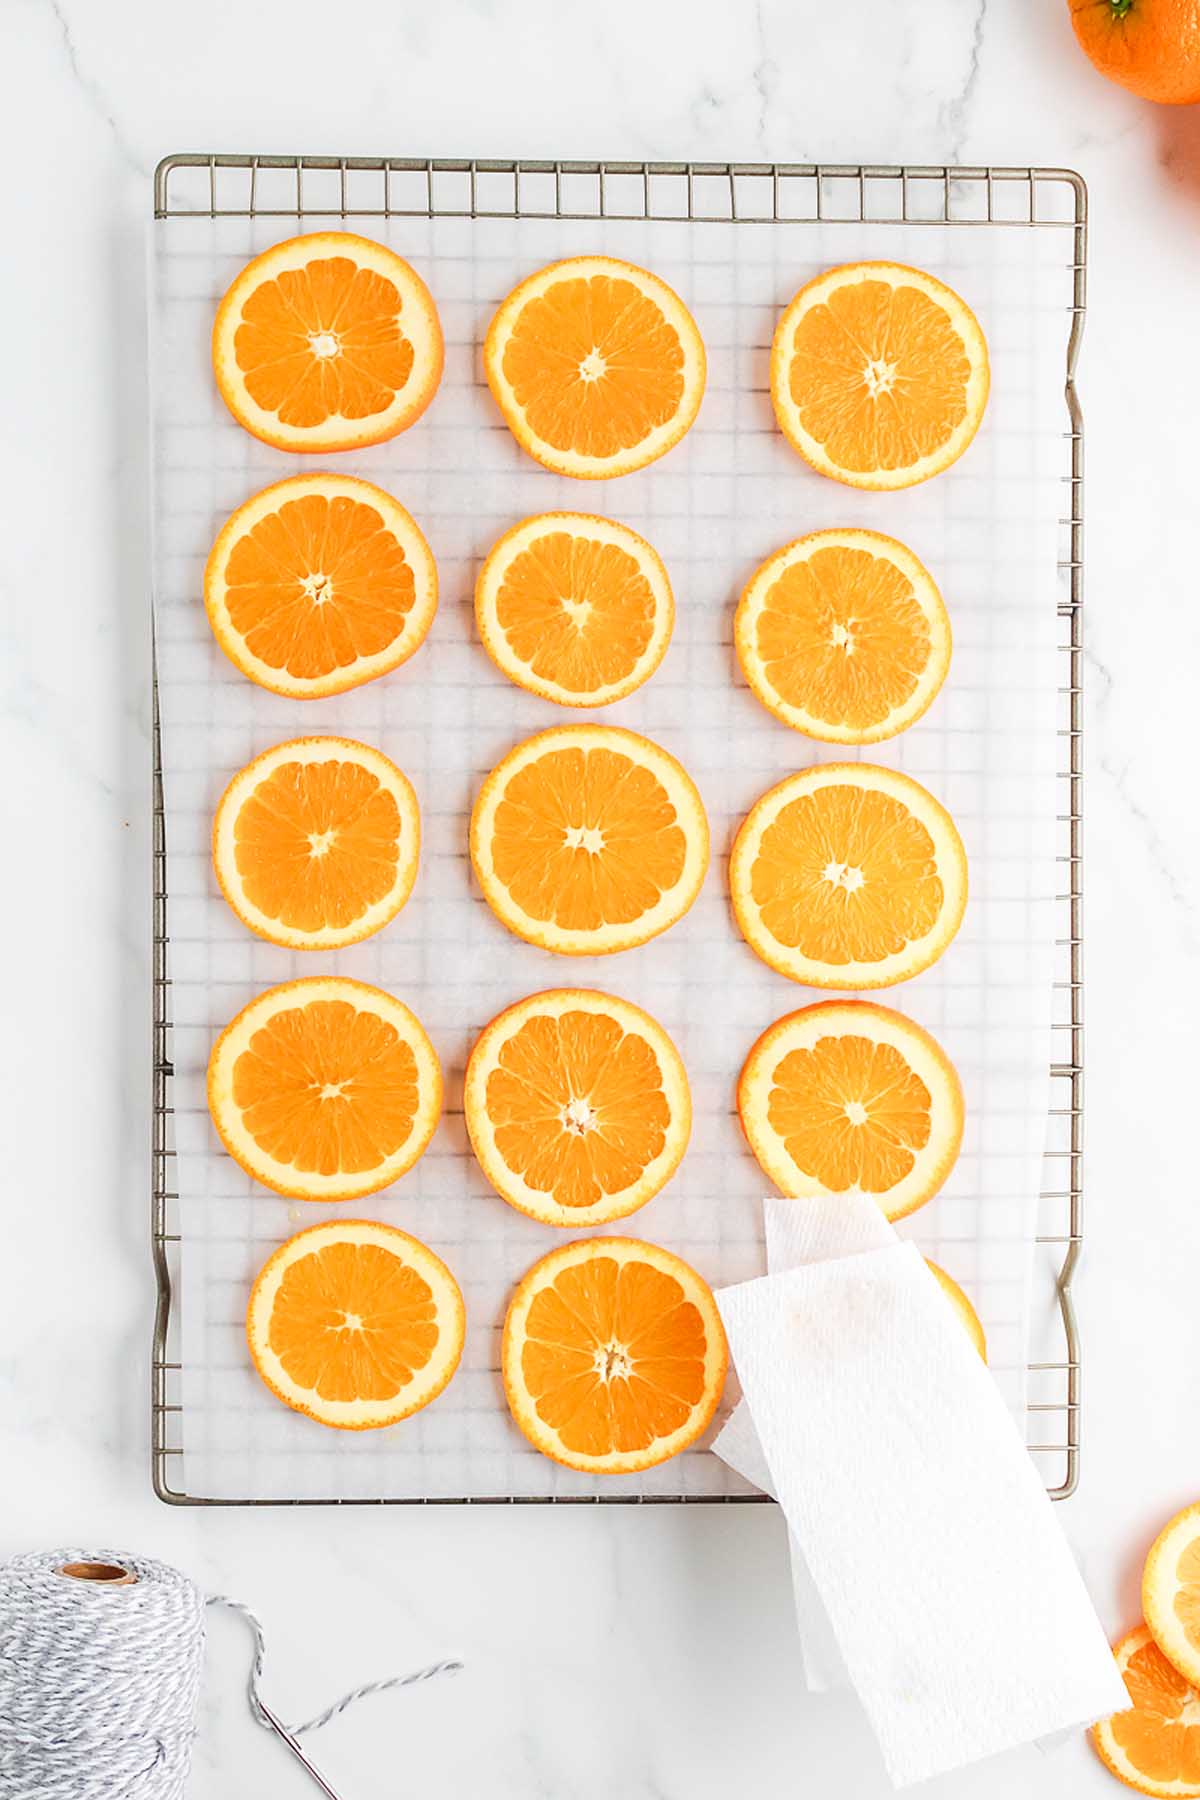
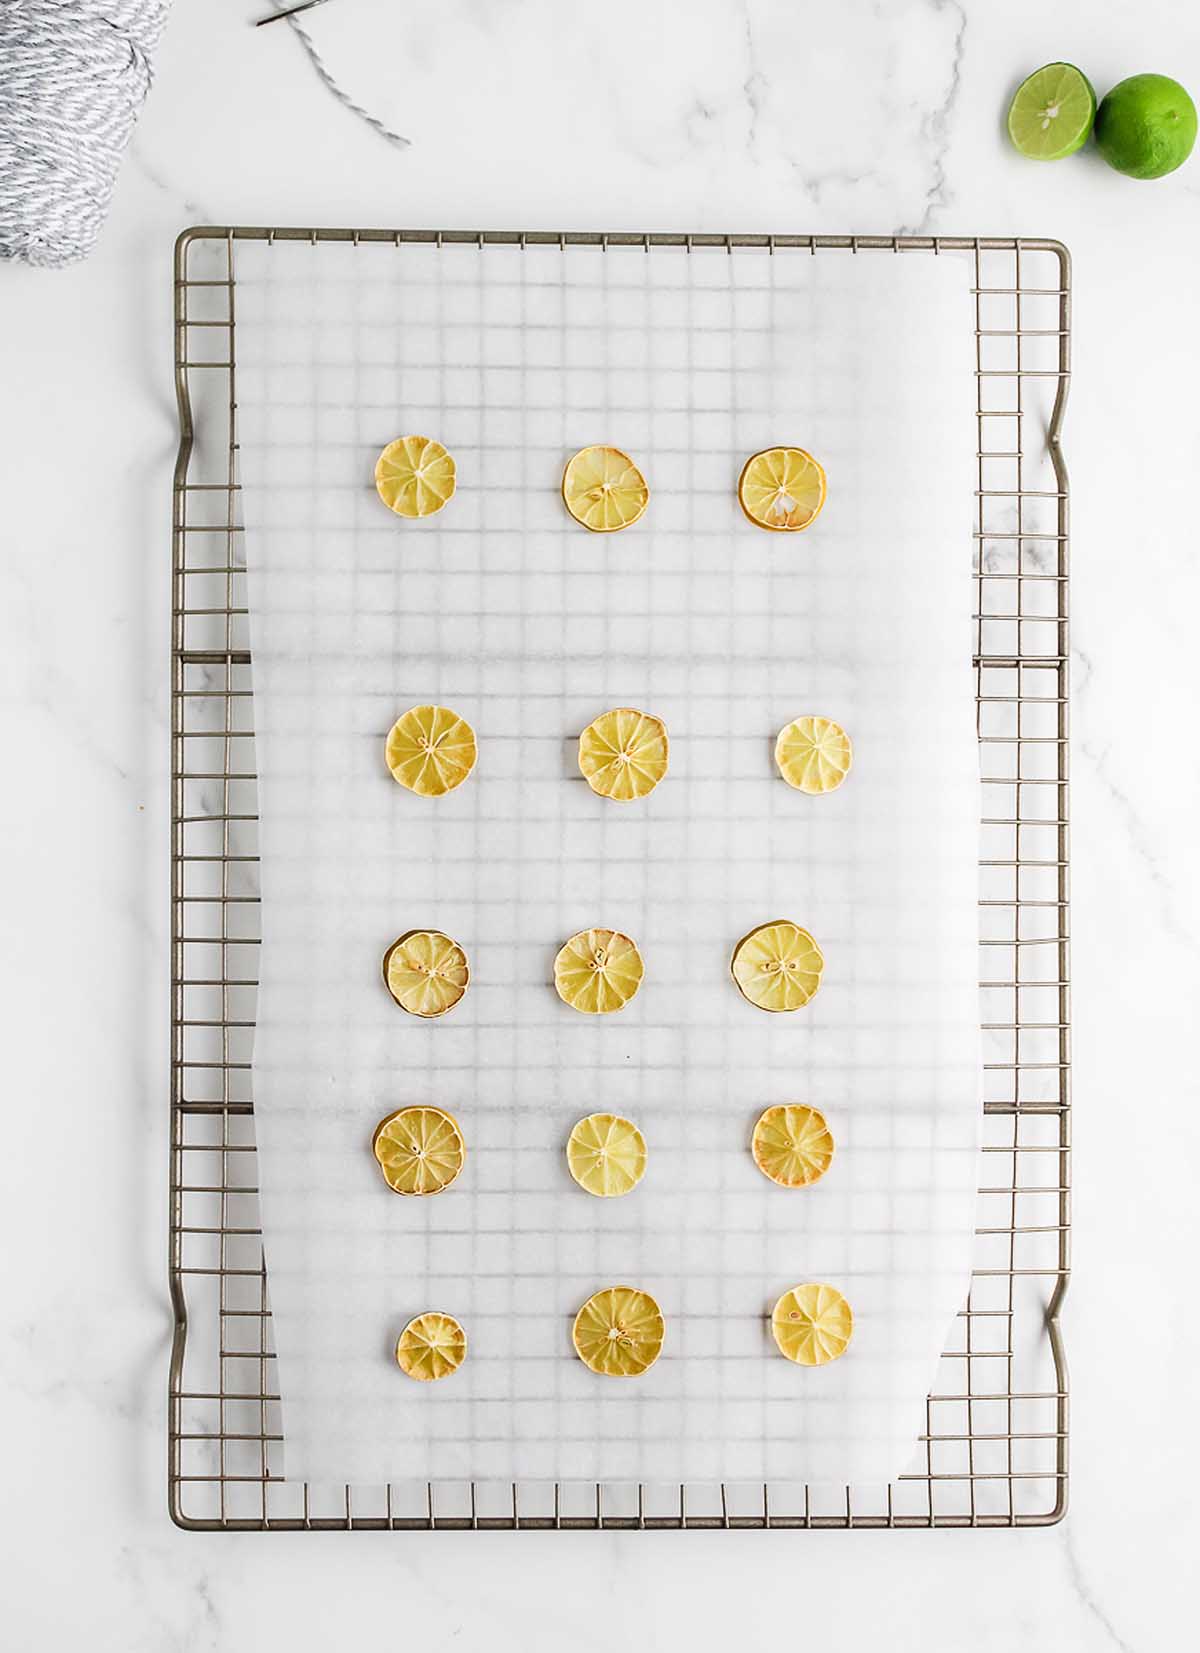
Dry the slices: Arrange them to air or gently dry until sturdy and no longer bendy.
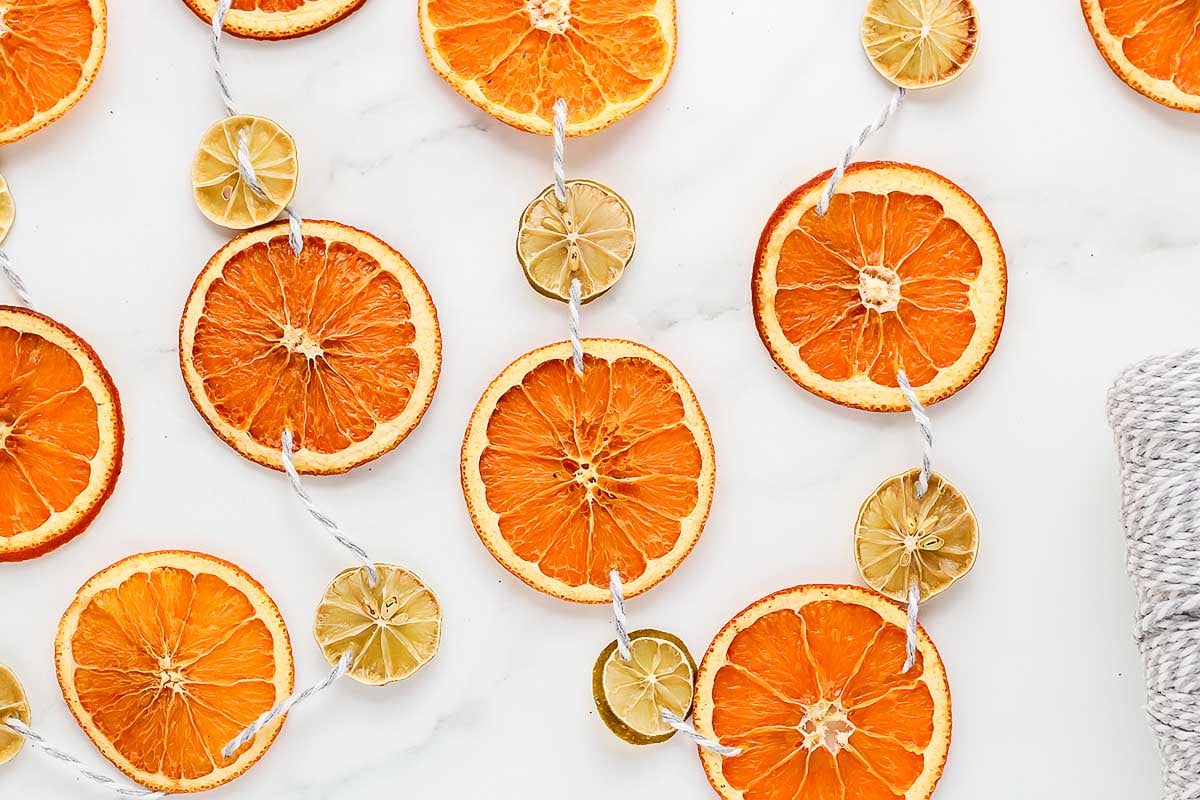
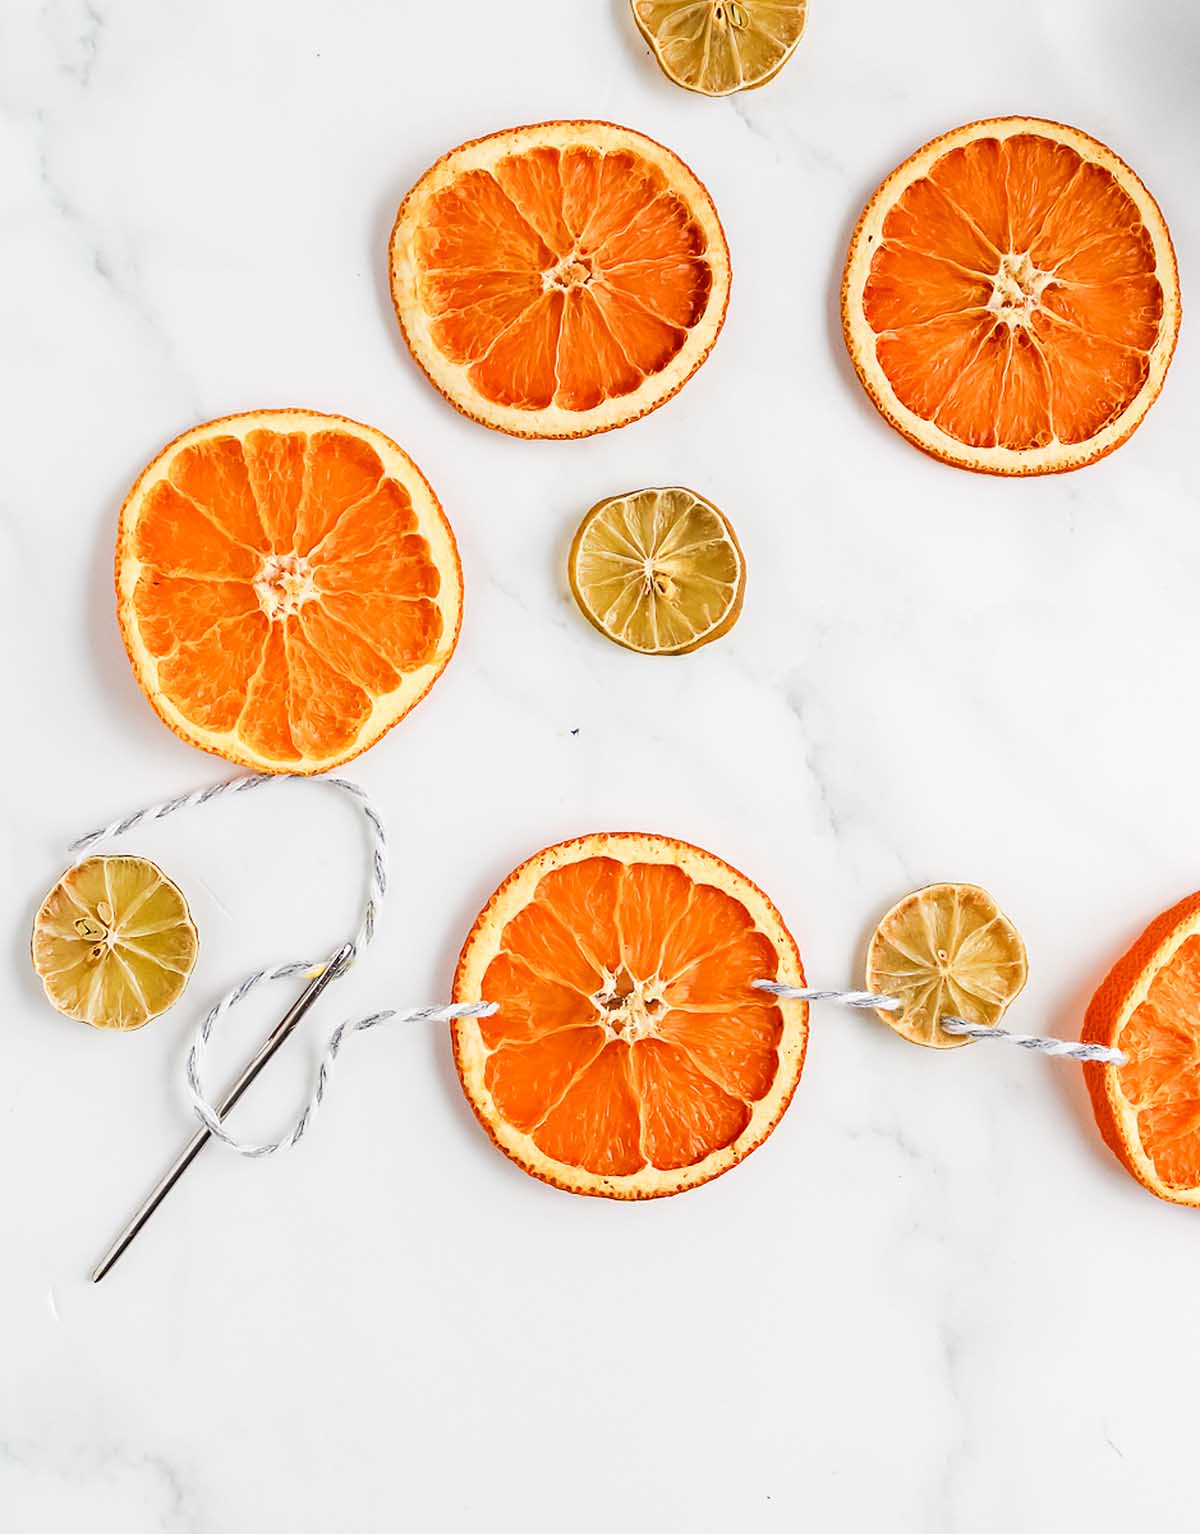
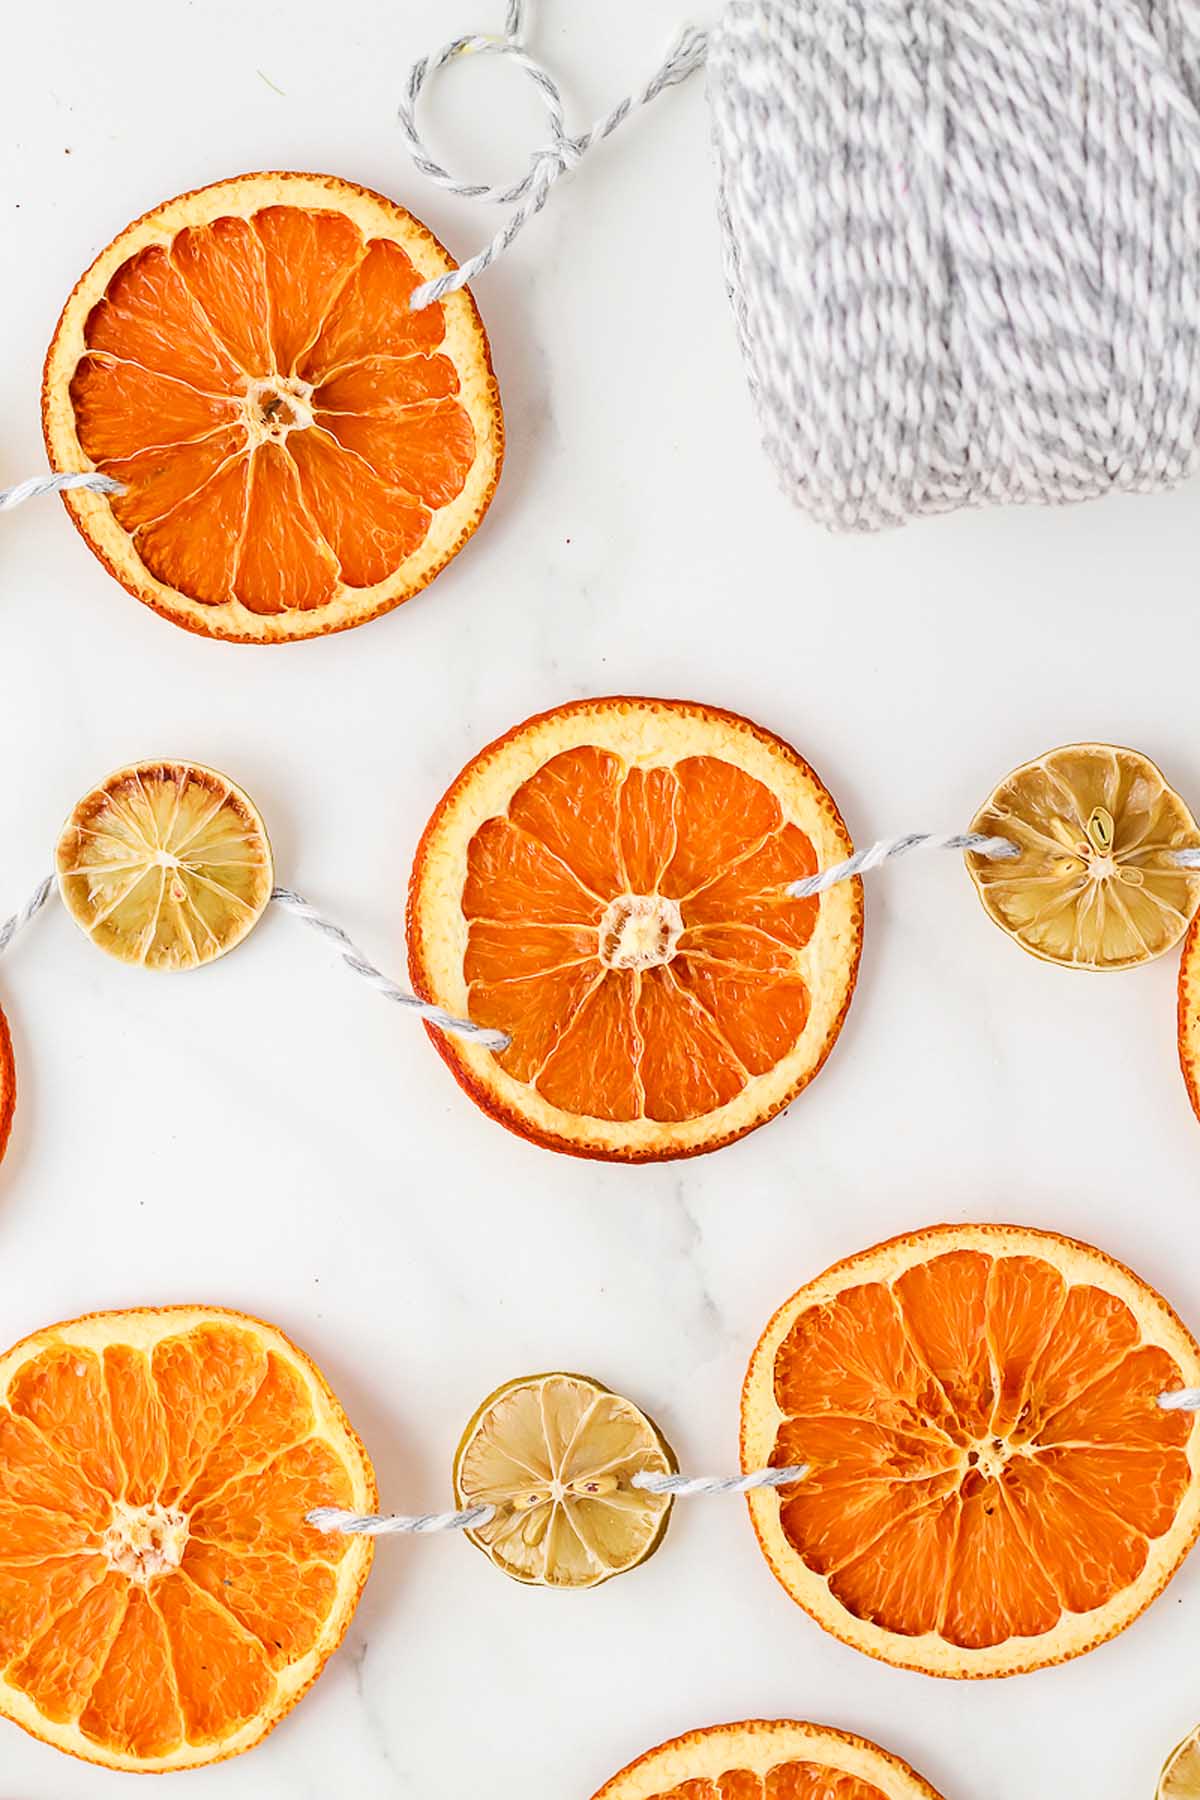
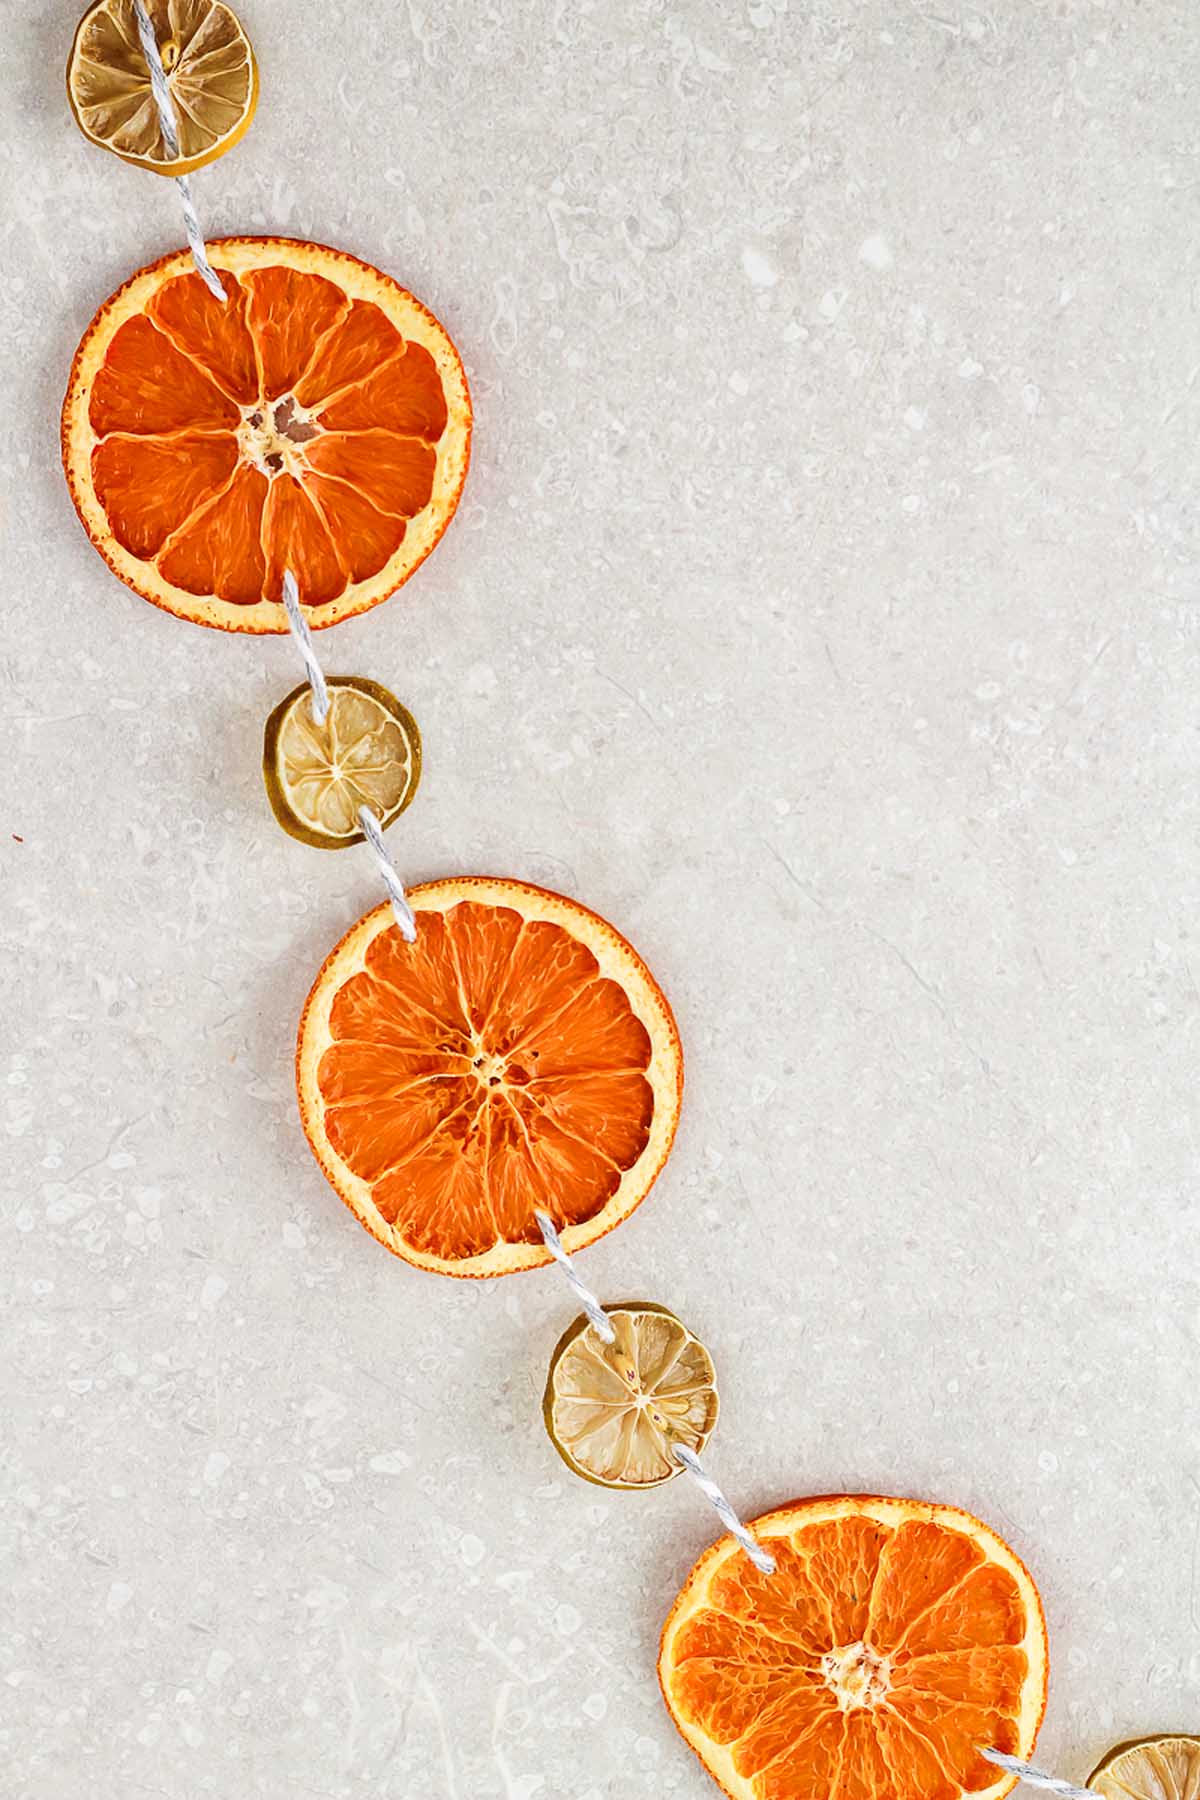
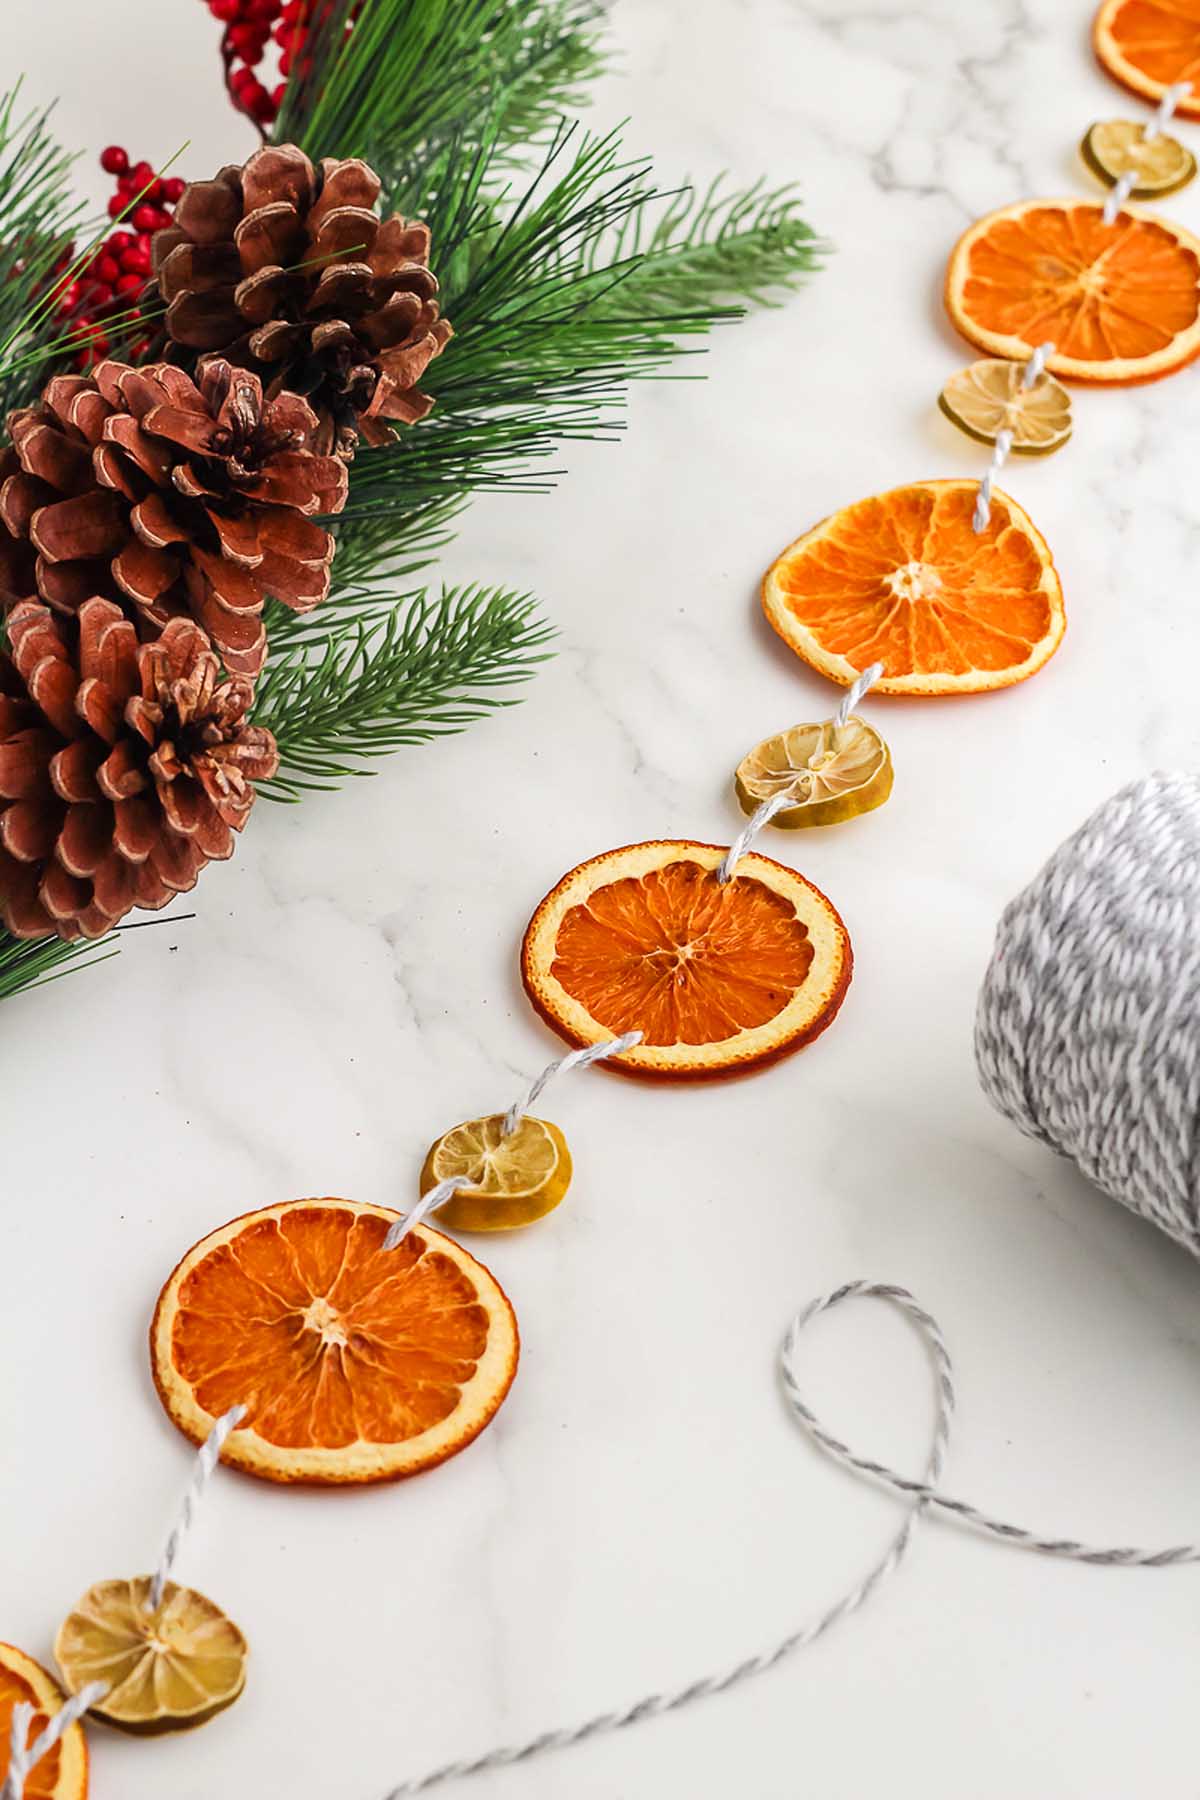
Thread the garland: Use a needle to string the dried slices on cotton twine in your chosen order.
Add extras if desired: Incorporate cranberries, popcorn or ribbon between slices for visual interest.
Substitutions and Variations
Citrus mix: Try blood oranges, lemons or grapefruit for varied color and aroma.
Festive embellishments: Add cinnamon sticks, faux berries, star anise or wooden beads for extra depth.
Timesaver: If you’re in a rush, you can buy dried orange slices instead of drying your own.
Spacing: You can have as much or as little space between each dried orange slice and dried lime slice as you wish, or even have them overlapping, as you prefer.
Ribbon alternative: Swap twine for ribbon to match seasonal themes or color palettes. Another idea is fishing line.
How to Use a Dried Orange Garland
Hang it up: Hang one dried orange garland or make several and loosely wrap them around each other for more of a statement piece. They look great anywhere, such as over the fireplace, around the stair banister, on the back of a door, or even on your front door.
Give as a gift: Pair your garland with other gifts such as a Christmas countdown calendar, bath bombs, shower steamers, heart shaped crayons, and sock snowmen.
How to Store Your Dried Orange Garland
A DIY dried citrus garland should last for a couple of years, as long as you keep it somewhere cool and very dry, preferably wrapped in paper and then in an airtight container. Since this citrusy decoration for Christmas trees is made from fresh fruit, any moisture is going to make it rot.
Top Tips
Dry thoroughly: Ensure slices are stiff and no longer bendy before threading. If you can still bend a slice, give them some more time in the oven.
Pat dry first: Lightly blot slices to remove juice and speed the drying process.
Plan layout: Lay your orange slices and extras out beforehand for balanced spacing.
Store properly: Keep your garland in a cool dry place and wrap carefully for reuse.
Dried Orange Garland FAQs
Yes, you can air dry it in a warm low-humidity place until they’re firm enough to thread.
Yes, since it’s made from natural materials it can be composted at the end of the season.
You will notice some citrus aroma while making it but it fades over time after drying.
How to Make a Dried Citrus Holiday Garland

Homemade Dried Orange Garland
Supplies
- 6 navel oranges
- 8 key limes, or extra oranges
- 6 Feet cotton twine
Instructions
- Preheat the oven to 250°F.
- Cut your oranges into thin slices about ⅛ to ¼-inch thick.
- Lay out the orange slices on a parchment lined baking sheet and dab each round with a paper towel to remove excess juice.
- Cut the limes the same way, and dab with a paper towel to remove excess juice. Place them on a separate baking sheet.
- Dry the oranges on the middle rack of the oven on for 3 to 4 hours or until they are not bendy and starting to brown slightly on the peel. Check and flip them every 30 min to make sure they dry evenly and aren't burning.
- Dry the limes for one hour at the same temperature.
- Let the citrus cool completely before stringing them together.
- Use a darning needle and poke through the flesh of the orange (not the rind) to sew the citrus together.
Notes
Pat dry first: Lightly blot slices to remove juice and speed the drying process.
Plan layout: Lay your orange slices and extras out beforehand for balanced spacing.
Store properly: Keep your garland in a cool dry place and wrap carefully for reuse.
A homemade dried orange garland is a lovely way to fill your home with natural color and a welcoming touch. With just a few supplies and some gentle crafting, you can create a decoration that looks and feels timeless. Whether displayed on your mantel, draped over a window or layered through greenery, it adds organic warmth and subtle scent to your home. It’s a seasonal craft to make and display yearly.
Other Crafts to Try
- This DIY Handmade Christmas Mistletoe Headband is fun to make.
- Is it time to make your fun Homemade Ugly Christmas Sweater yet?
- You can admire and eat a Ferrero Rocher Christmas Tree!
- DIY Personalized Baskets are really cute and hold any kinds of goodies.
- This easy-to-make Sweater Candle Cozy is an adorable gift idea.
- Which cookies will you stash in your Holiday Cookie Box?
Bella Bucchiotti
Bella Bucchiotti is a Canadian-based syndicated food, travel, and lifestyle writer, photographer, and creator at xoxoBella. She founded xoxoBella in 2015, where she shares her love for food, dogs, sustainability, fitness, crafts, outdoor adventures, travel, and philanthropy to encourage others to run the extra mile, try new recipes, visit unfamiliar places, and stand for a cause. Bella creates stress-free and family-friendly recipes for weeknight dinners and festive feasts.