This post may contain affiliate links, please see the privacy policy for details.
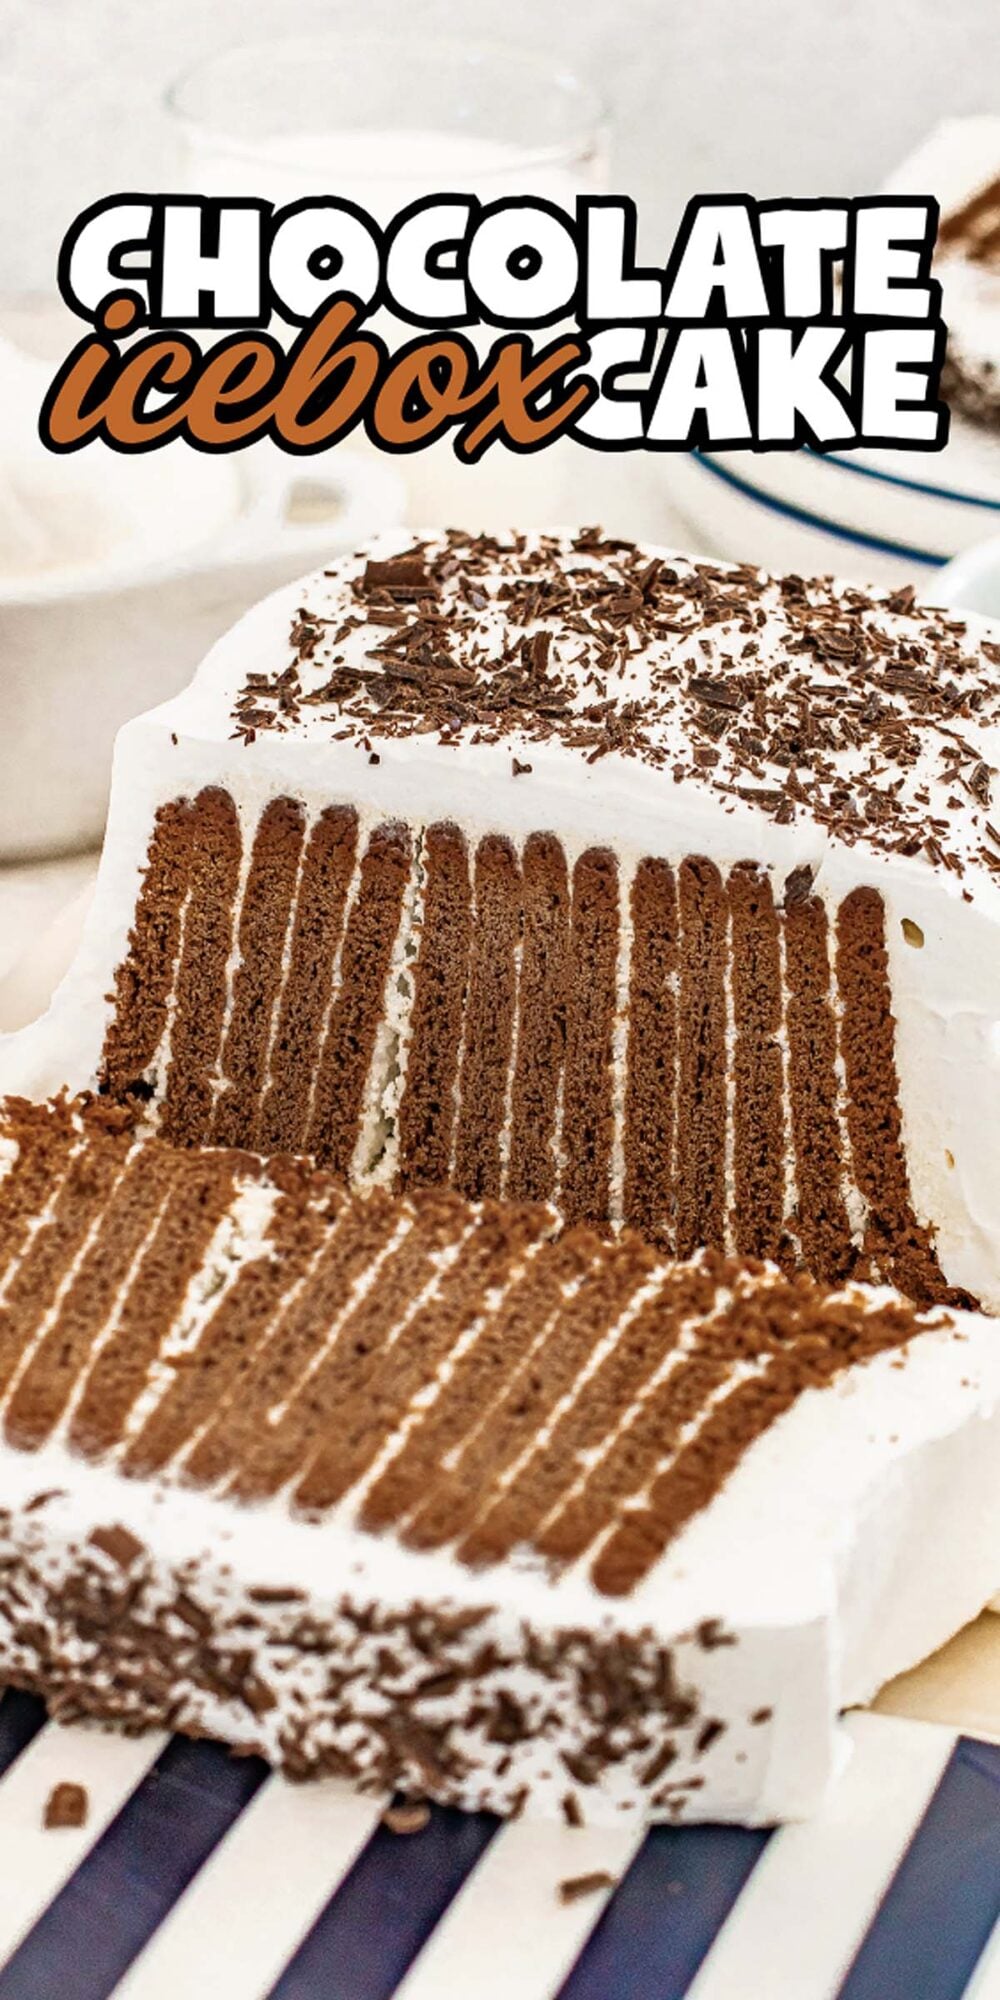
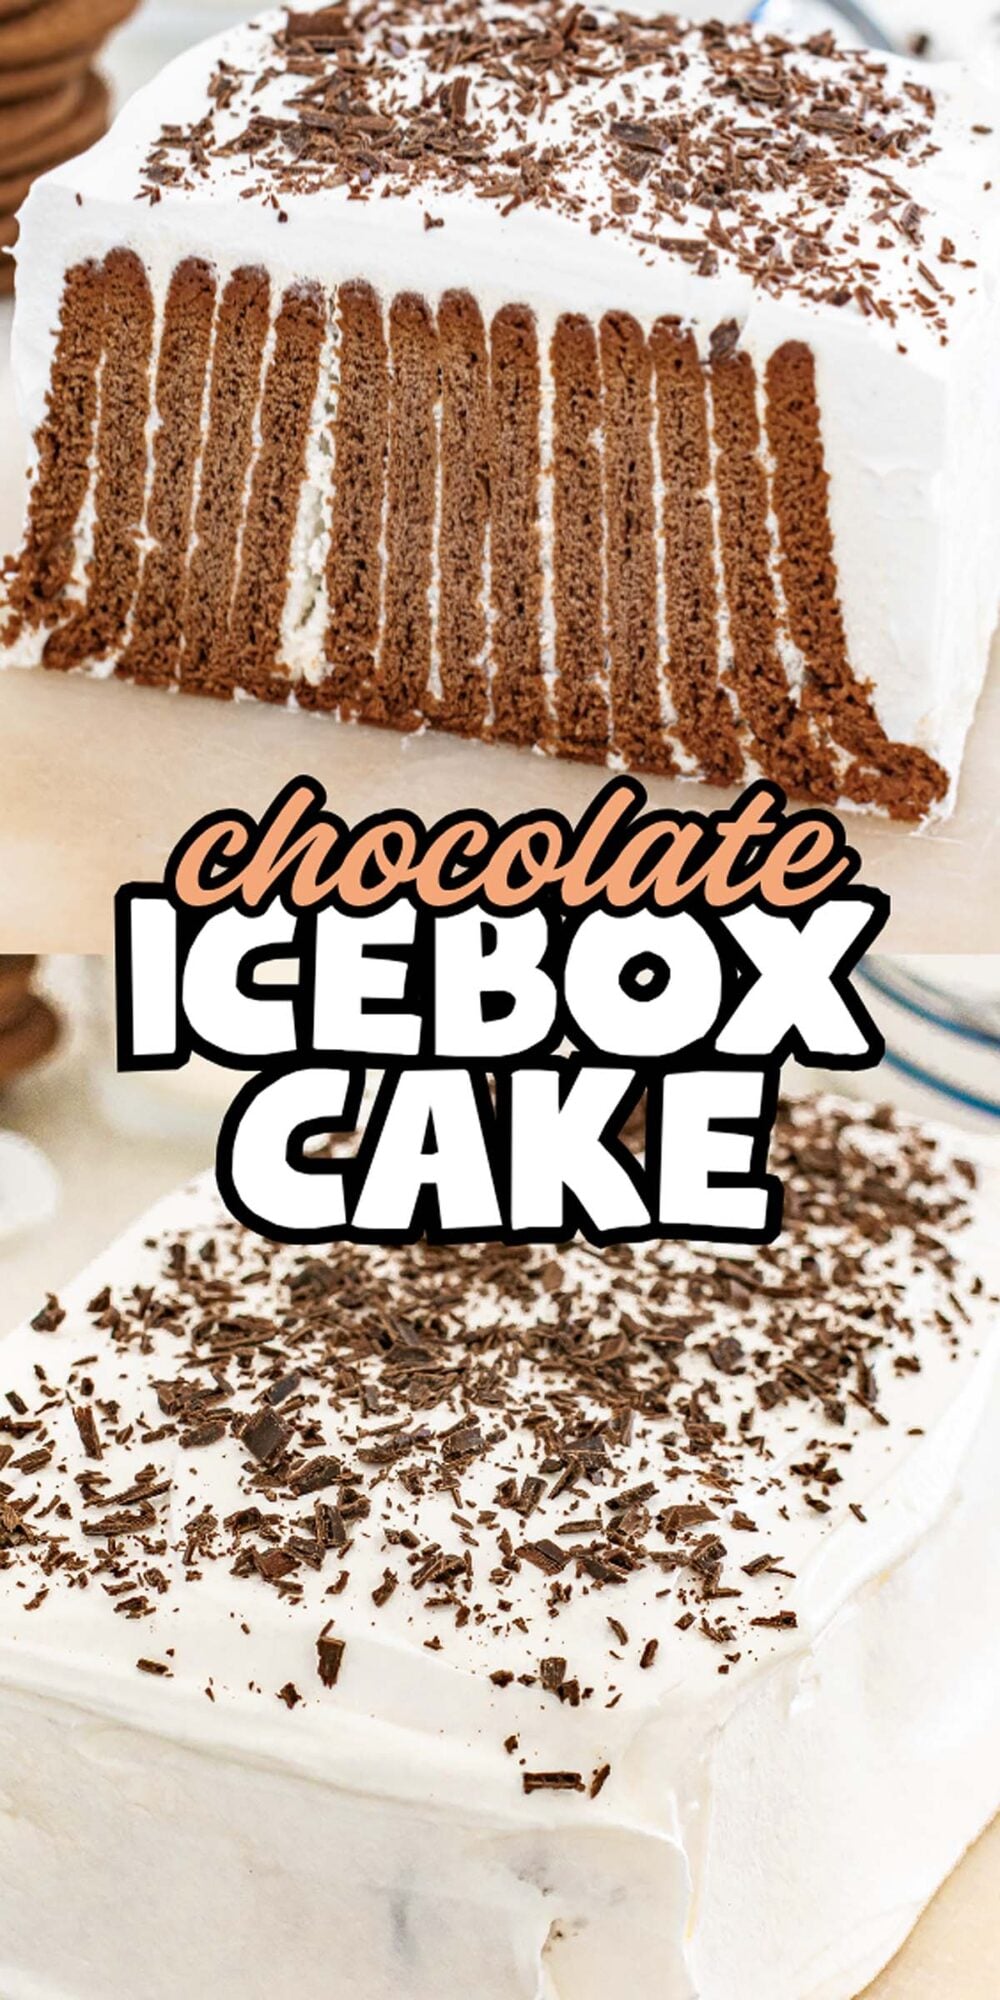
This delicious and easy-to-make chocolate icebox cake is a loaf pan dessert with chocolate wafers and homemade whipped cream in rows to make attractive layers. You only need five ingredients to make it and there’s no baking involved at all. The filling is simply whipped cream, powdered sugar and vanilla. There’s no need for pudding mix, cream cheese or anything else. If you want a super simple dessert that’s pretty much foolproof, I highly recommend this no-bake icebox cake.
Why You’ll Love It

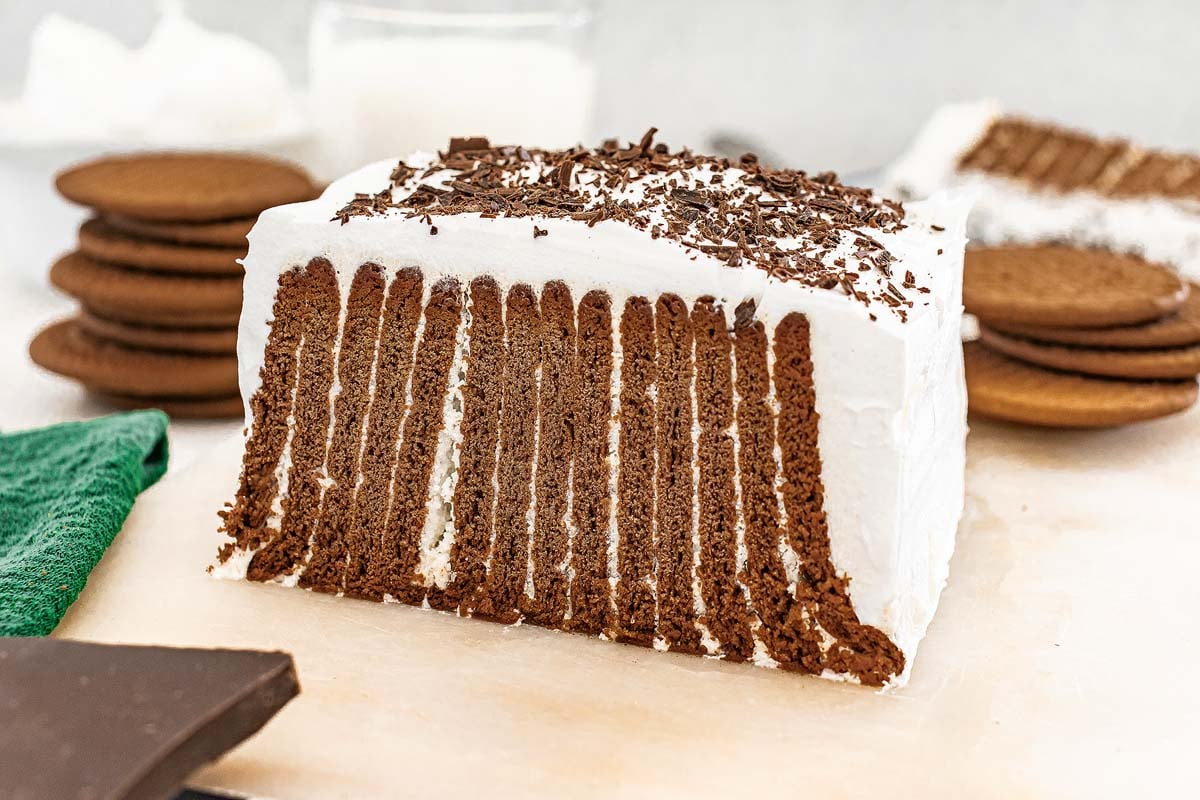
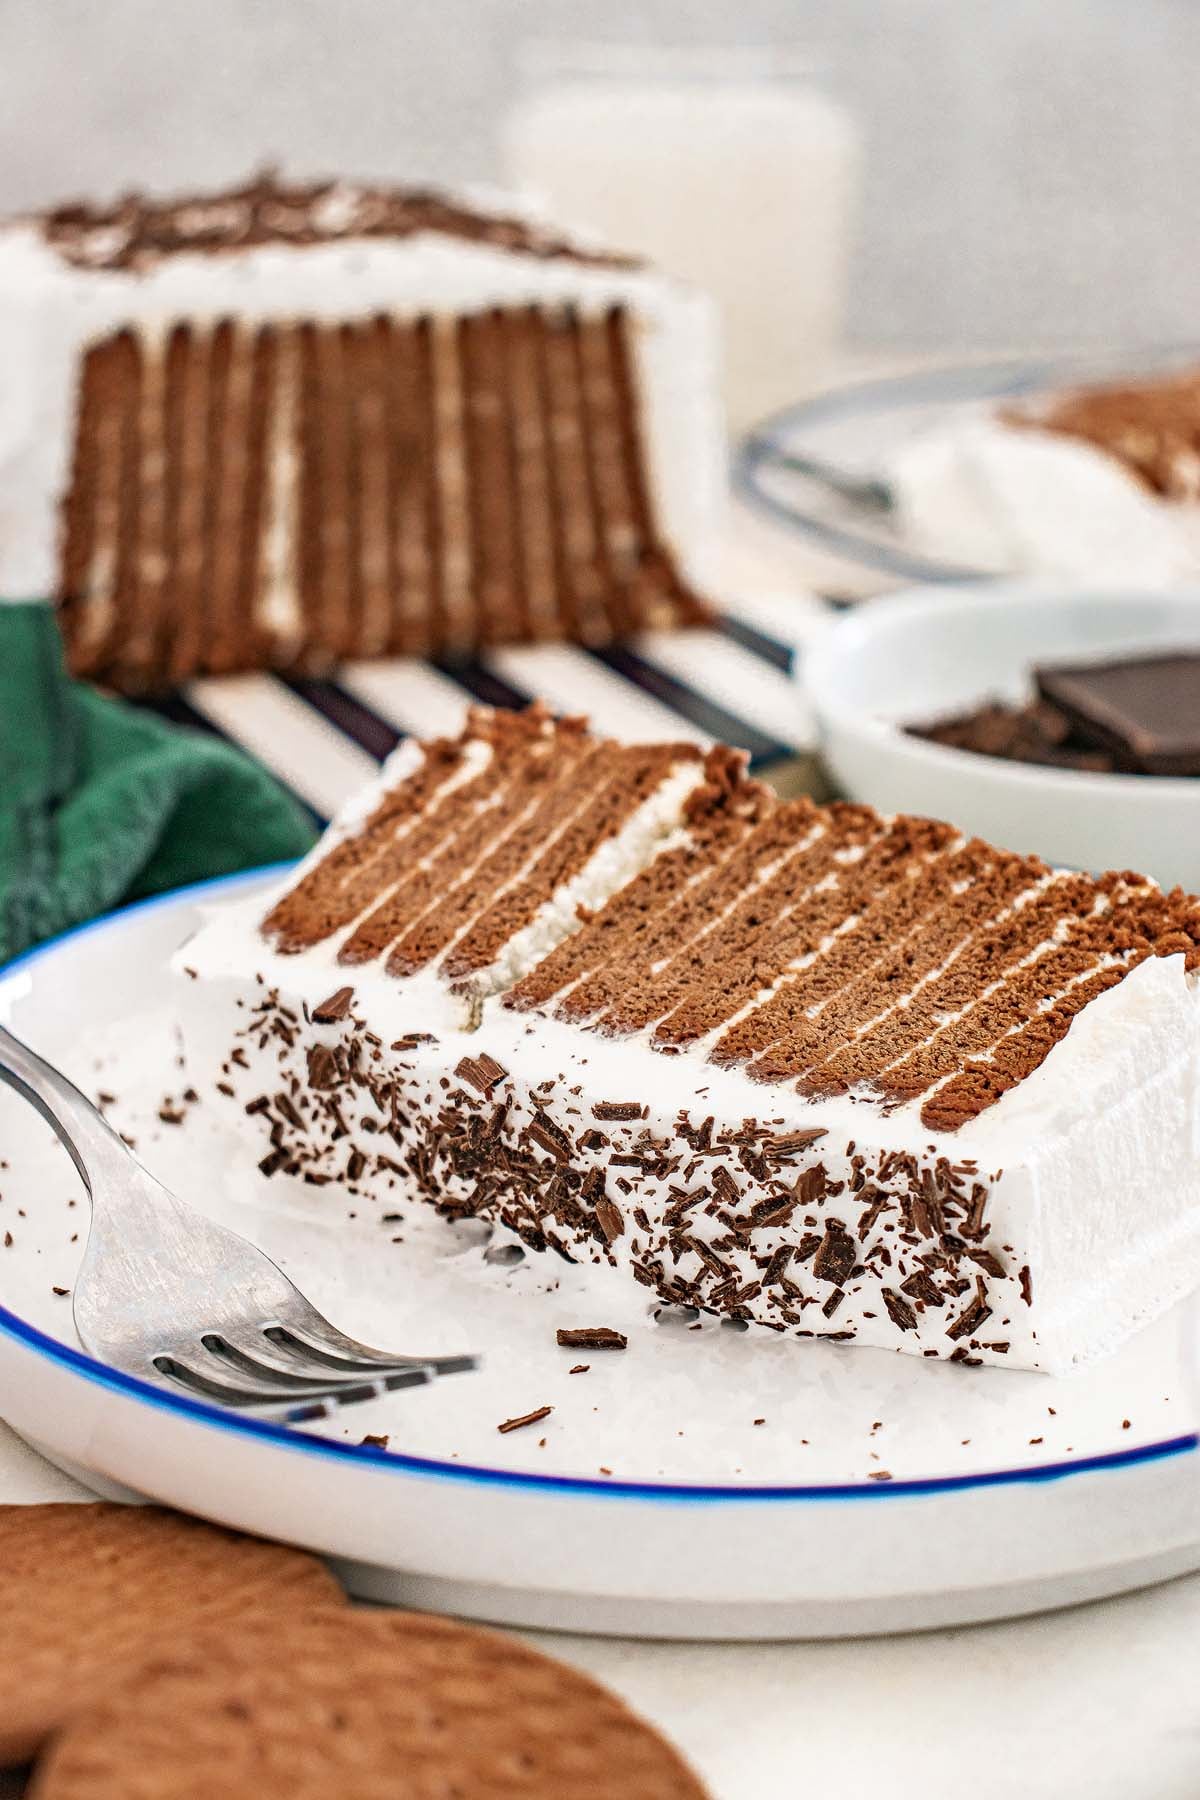
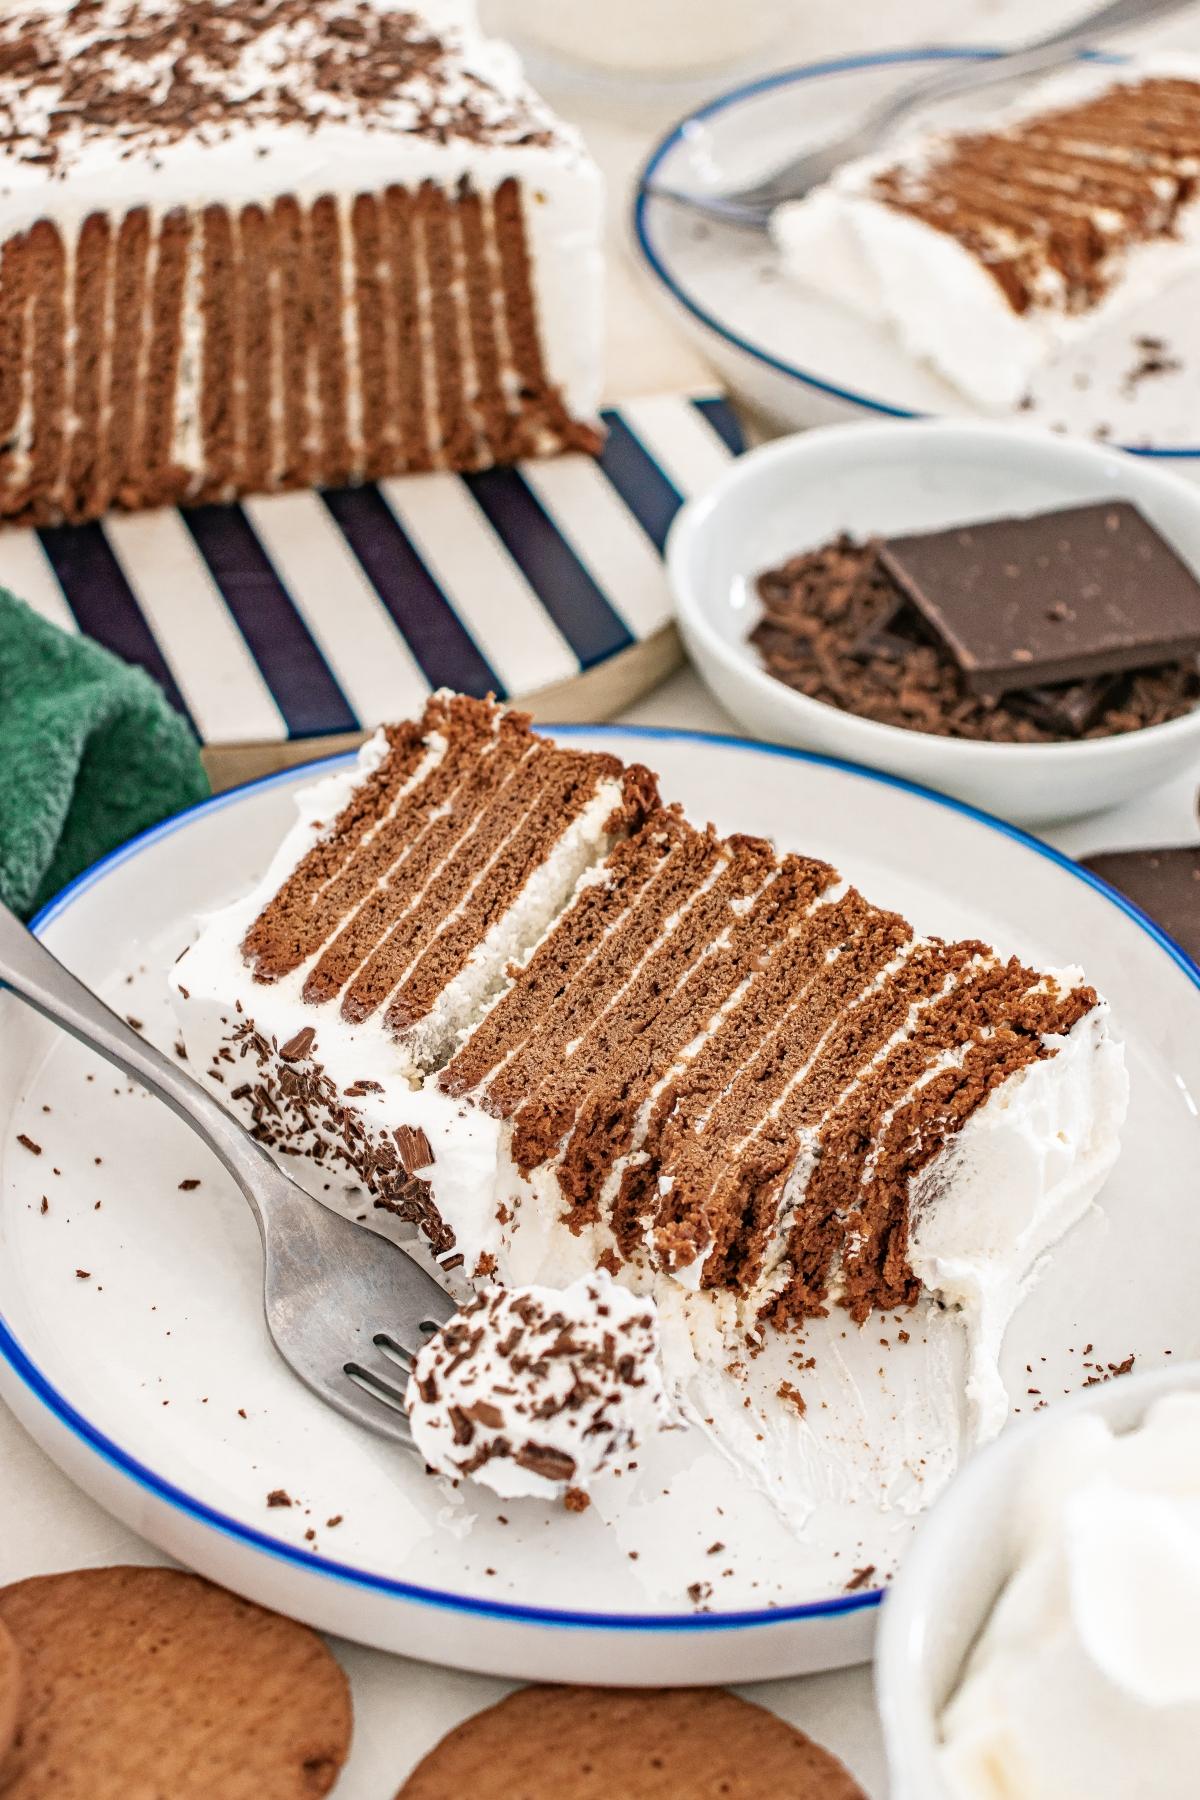
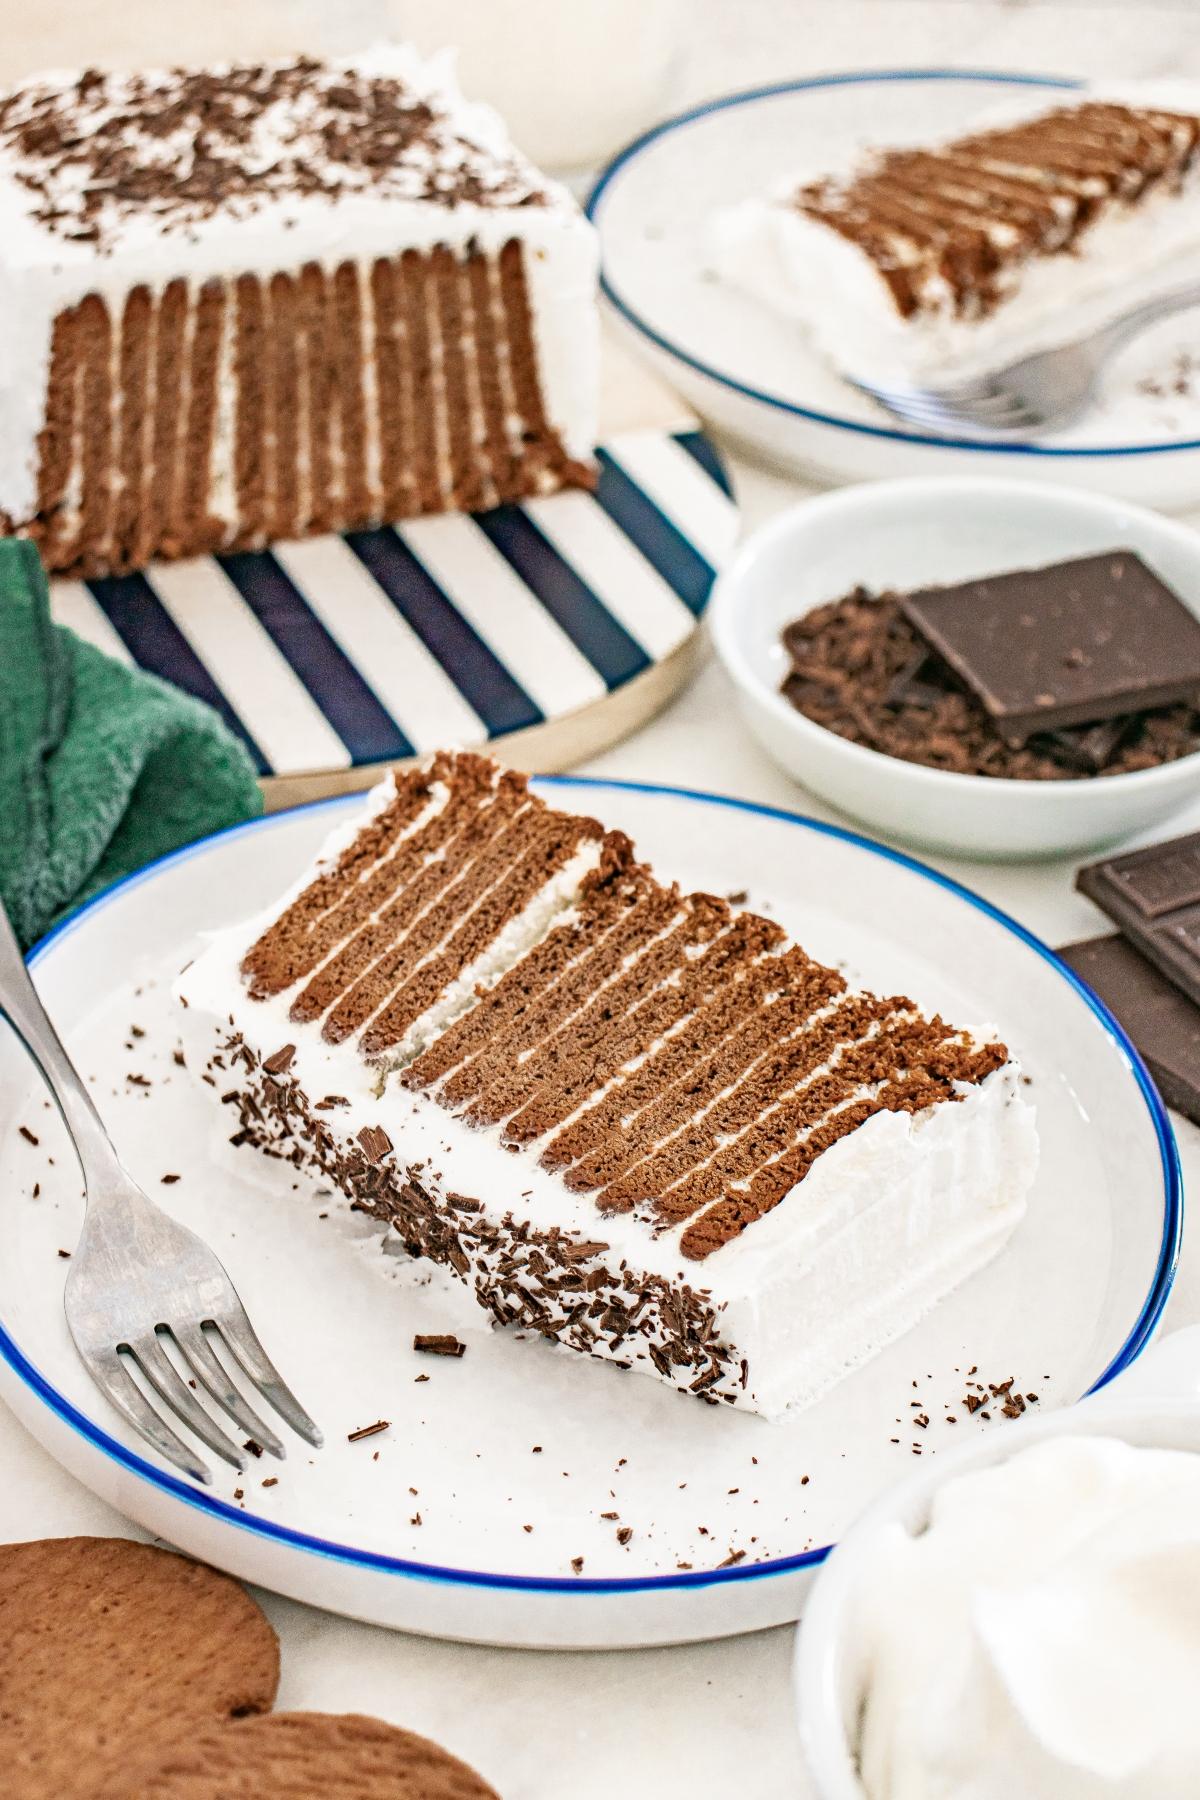
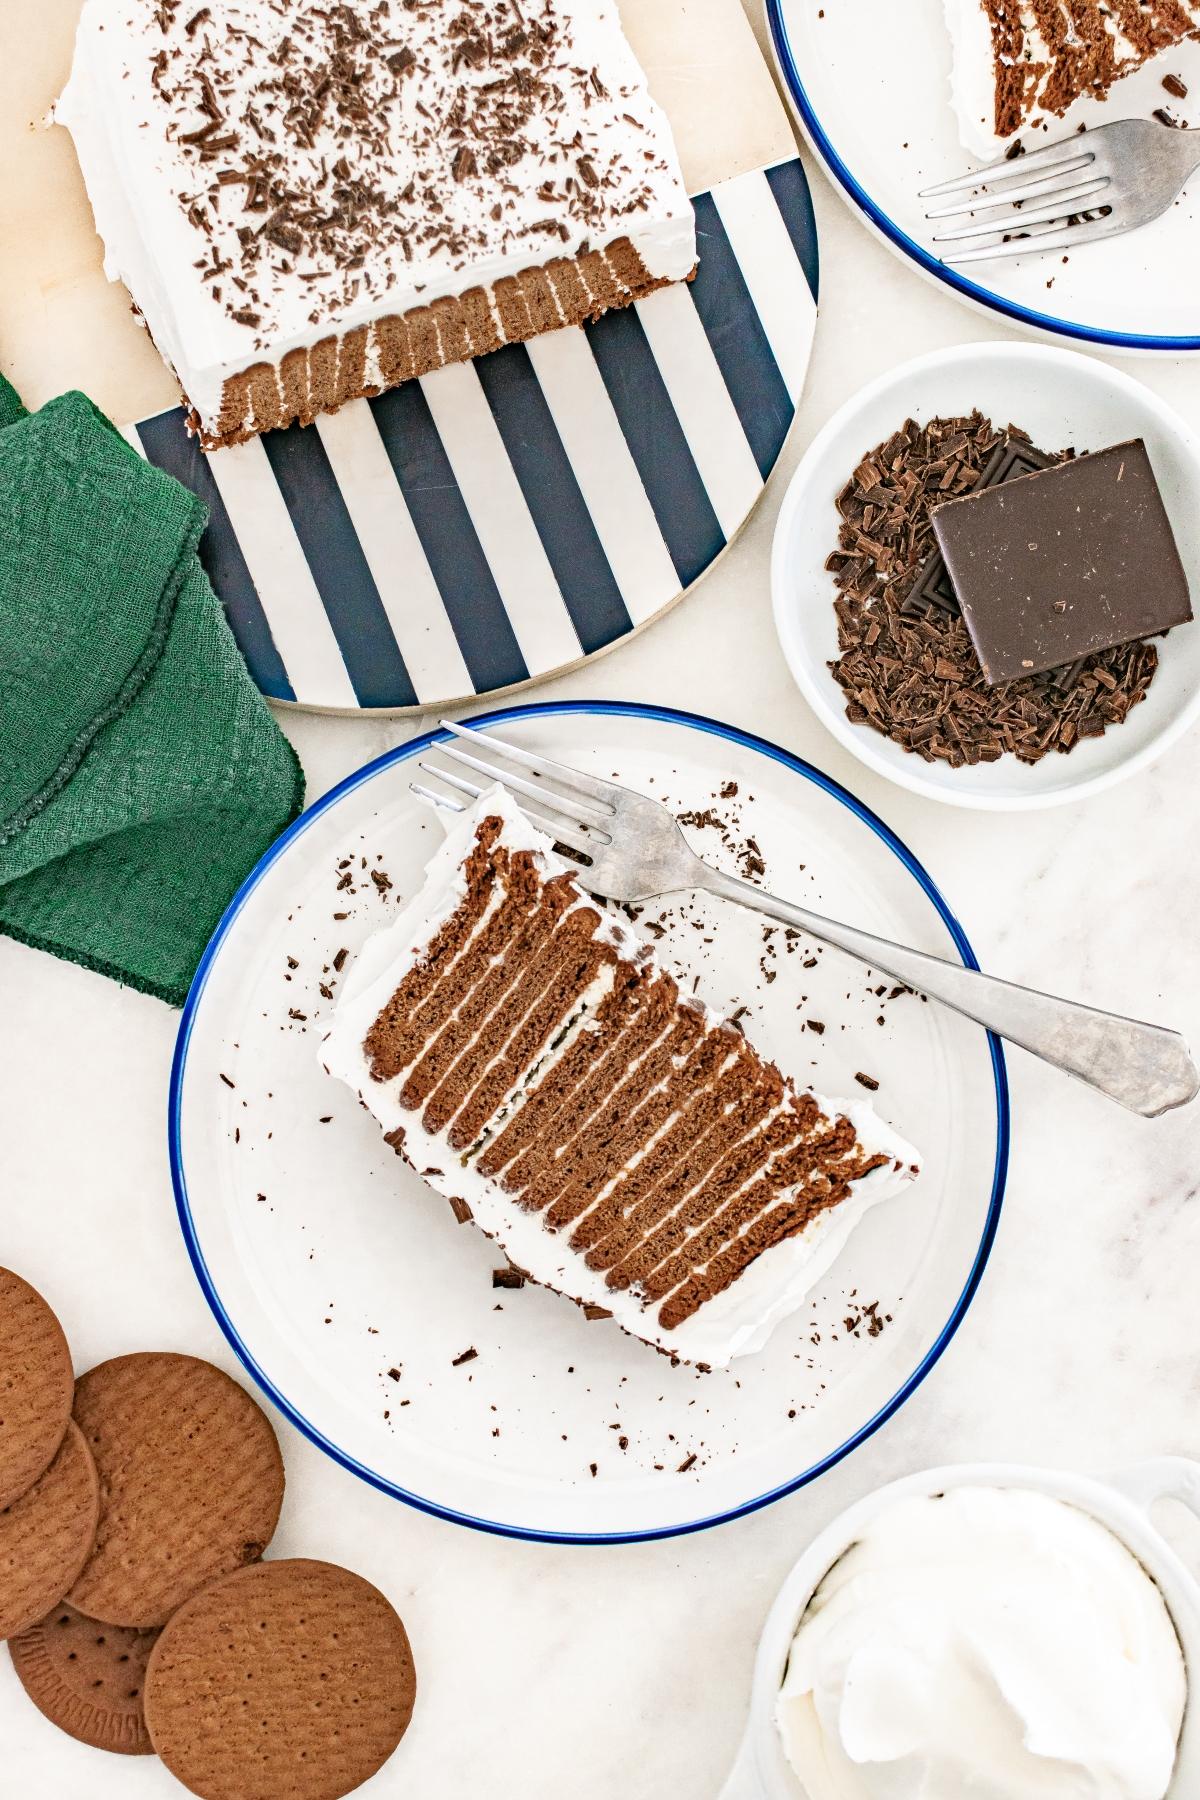
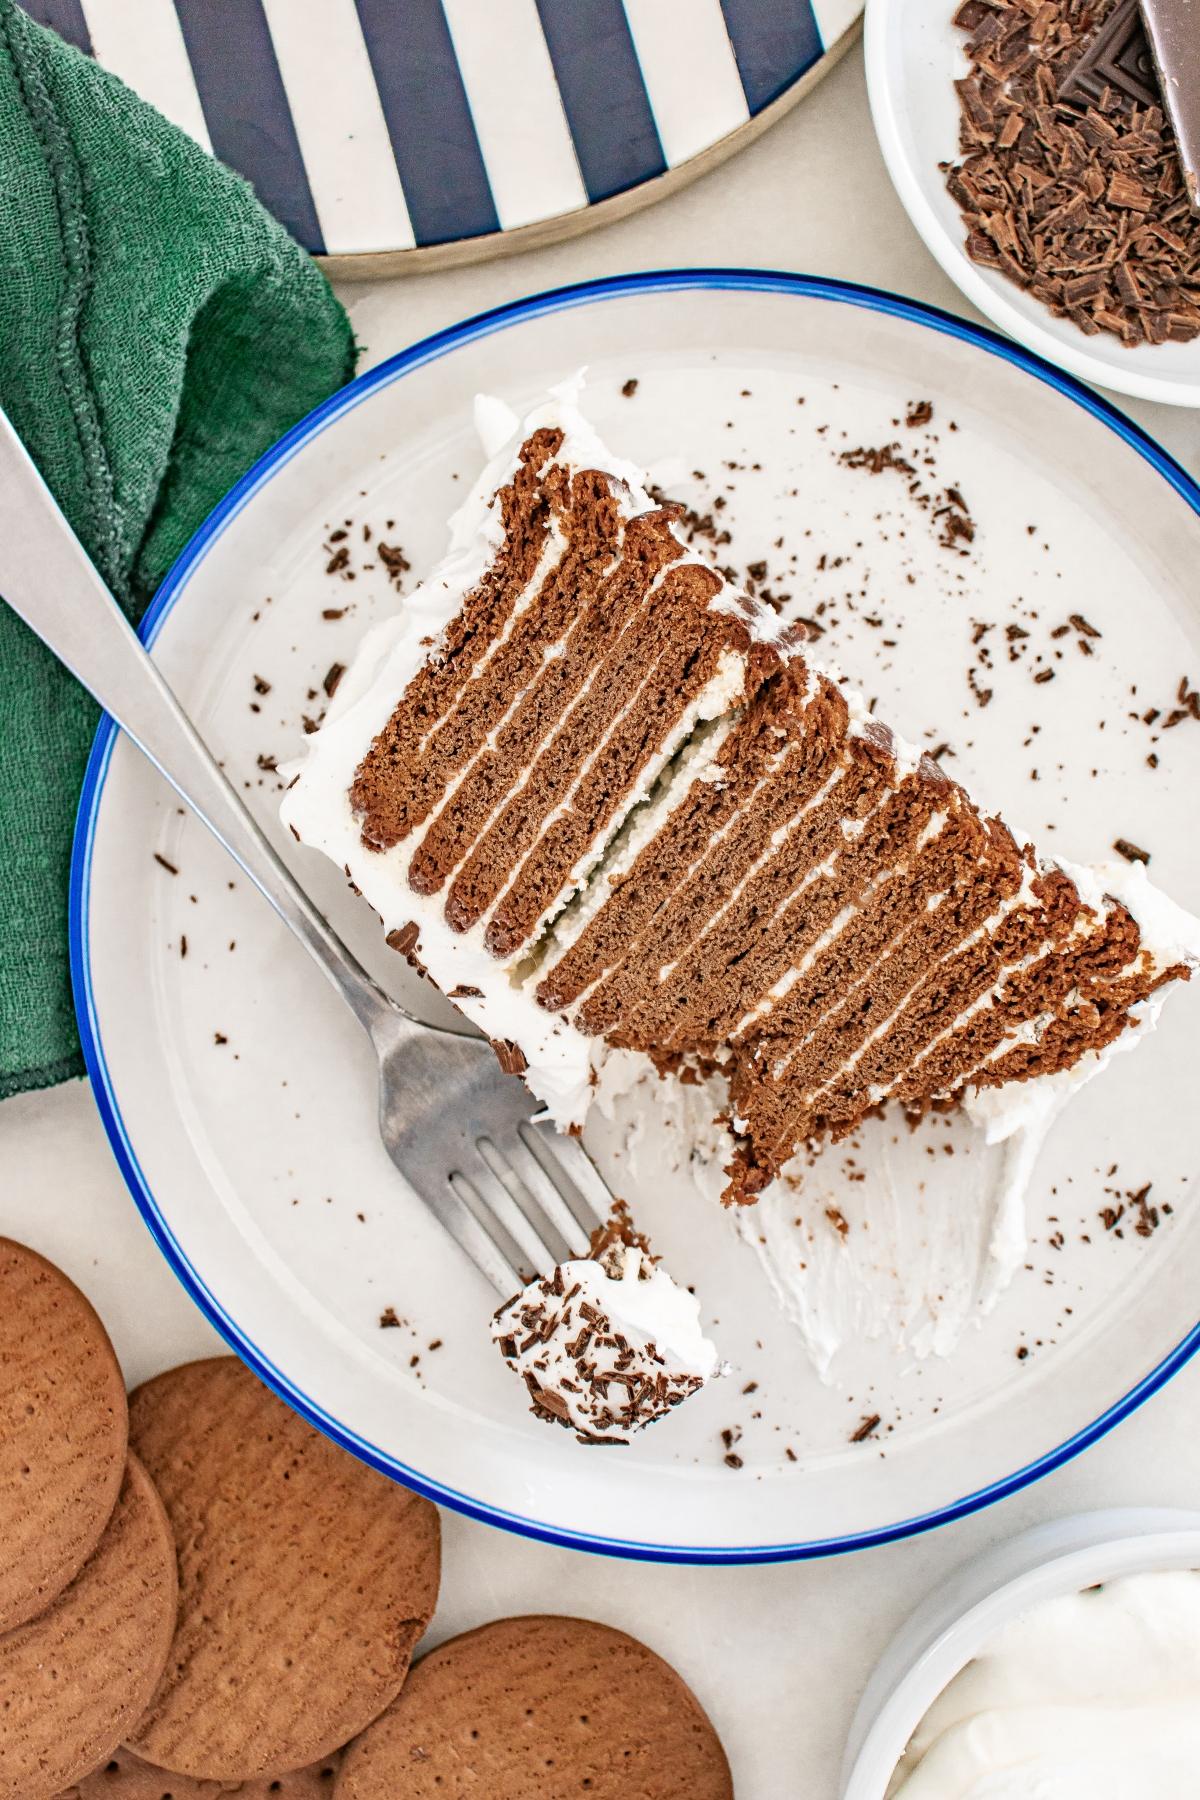
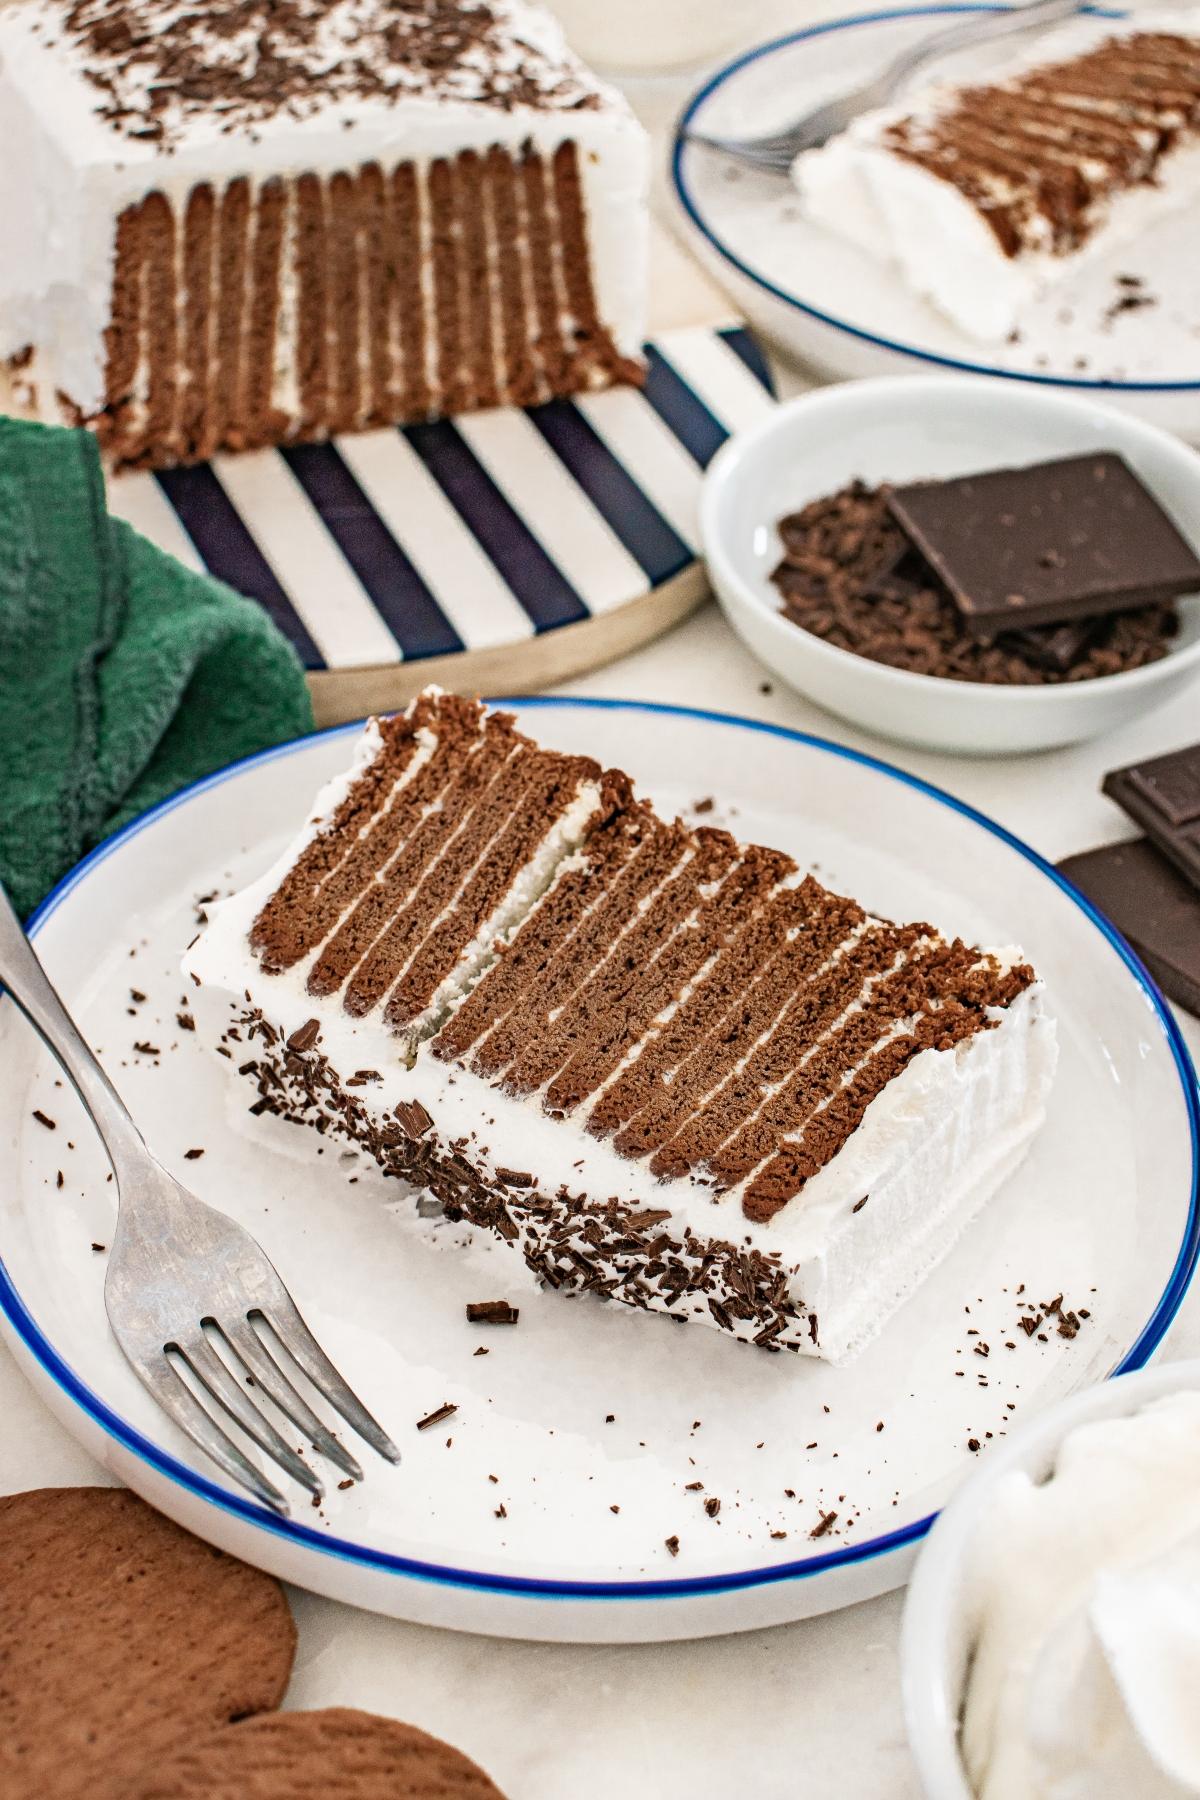
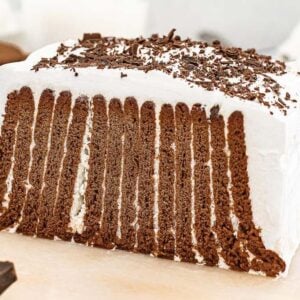
Chocolate icebox cake is a chilled loaf of chocolate wafers and vanilla whipped cream with soft layers.
Pretty striped slices: The loaf pan keeps the cookie rows lined up, so the layers show clearly.
Soft wafers: I love how the long chill turns the dessert from a stack of wafers and cream into a soft cake-like dessert.
No baking required: The shape comes from stacking the cookies in rows inside the pan.

Also try my cherry cheesecake icebox cake, eclair cake, gingersnap icebox cookies and this hummingbird sheet cake.
Classic Icebox Cake Ingredients
A complete list of ingredients and amounts can be found in the recipe card below.
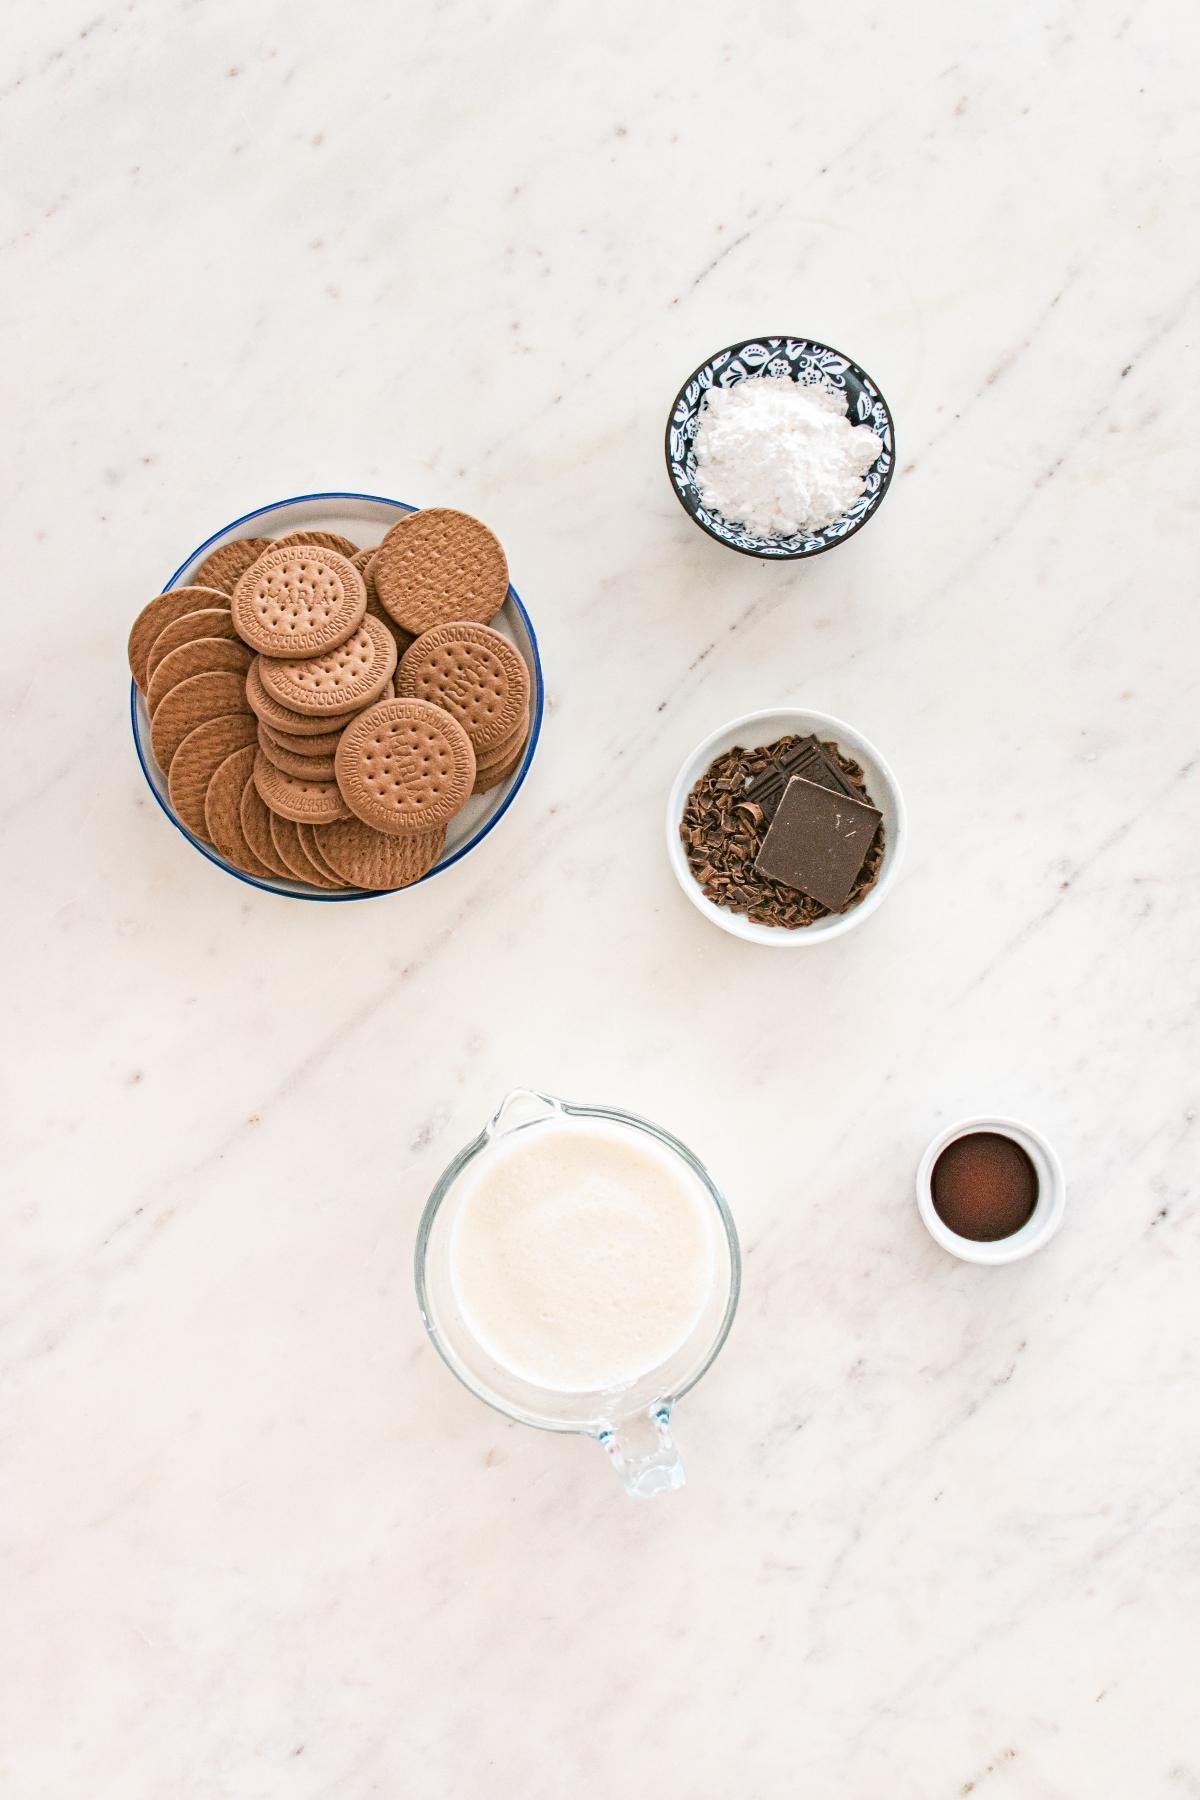
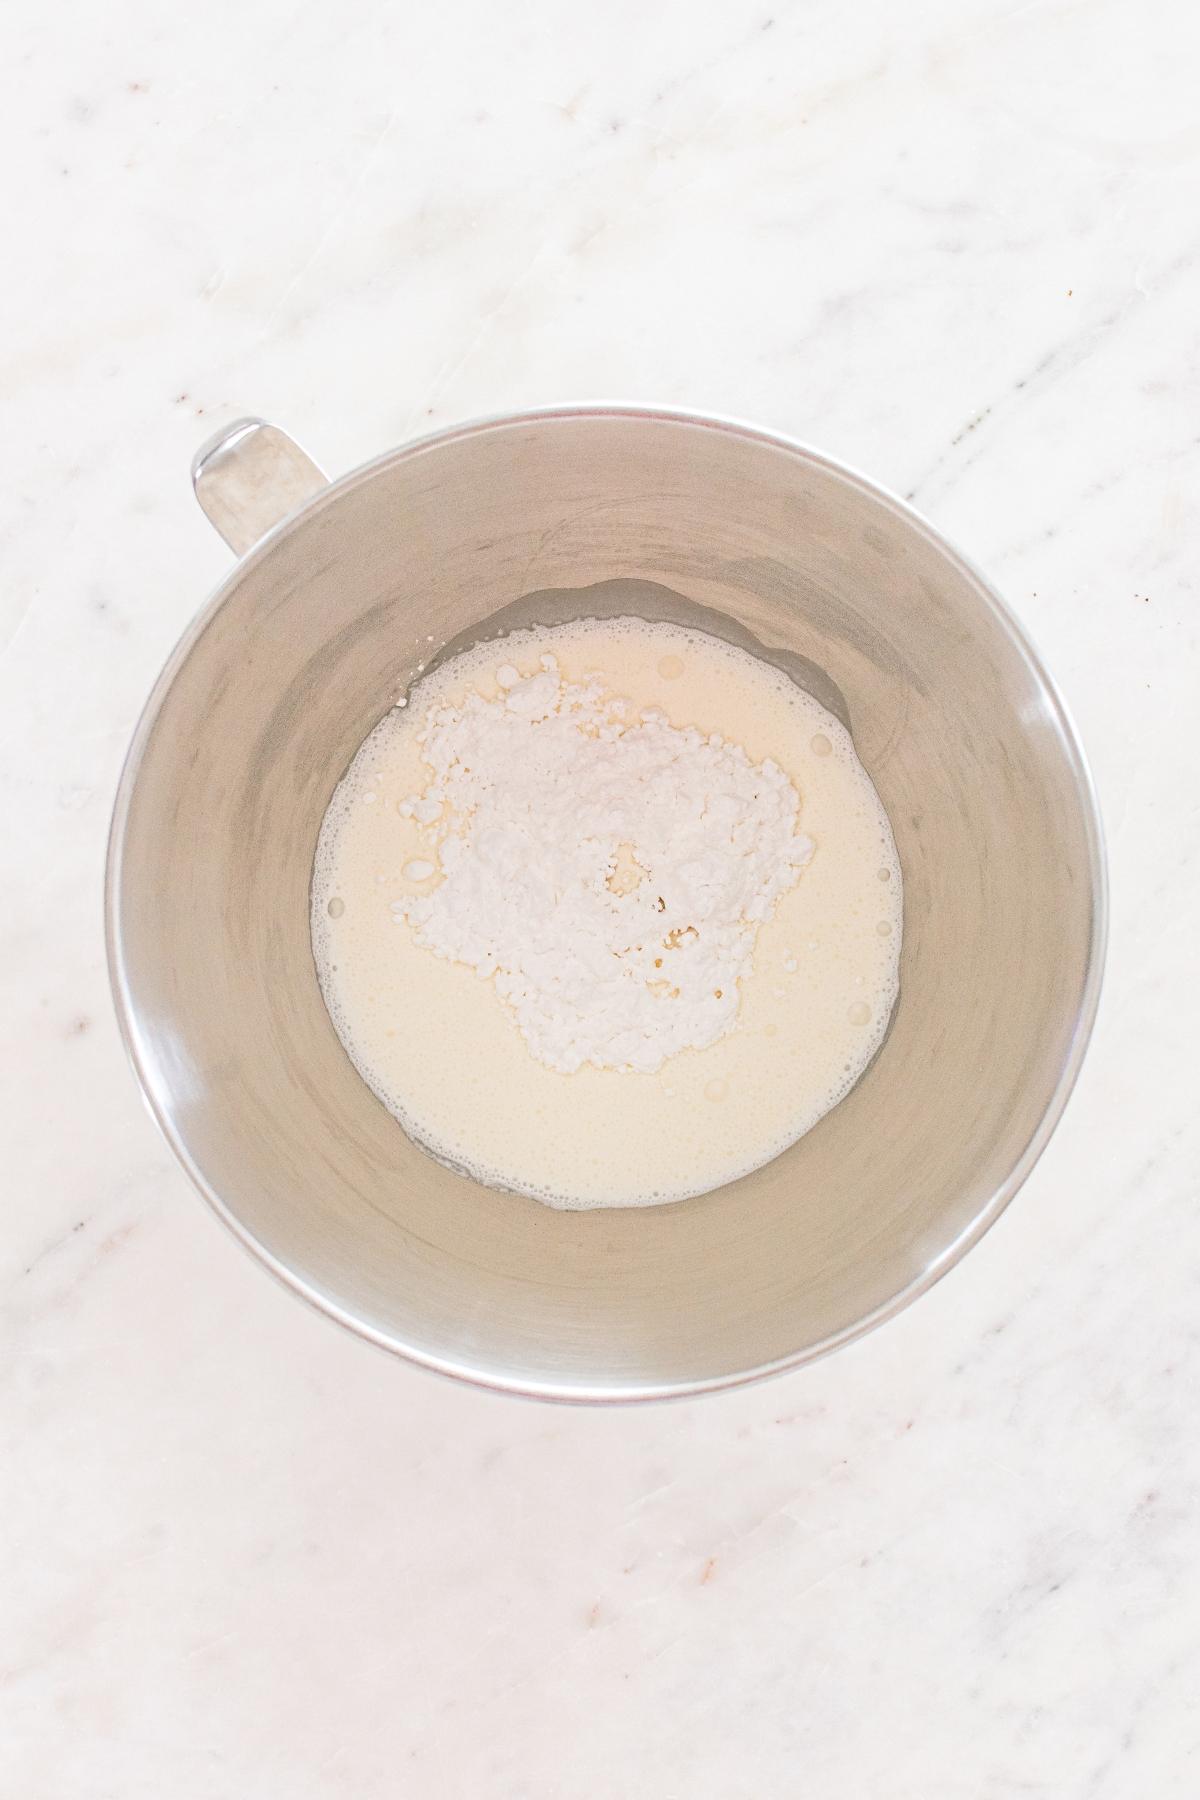
Whipped cream mixture: Heavy whipping cream, powdered sugar and vanilla make the filling and topping. Start with cold heavy cream because it holds its shape better and whips up quicker too.
Chocolate wafer cookies: These make the layers and soften during chilling. You’ll need between 40 and 45 cookies depending on their size.
Chocolate shavings: For extra chocolate on top. Optional but recommended!
How to Make Icebox Cake
For more detailed instructions with weights and measurements, jump to the printable recipe card.
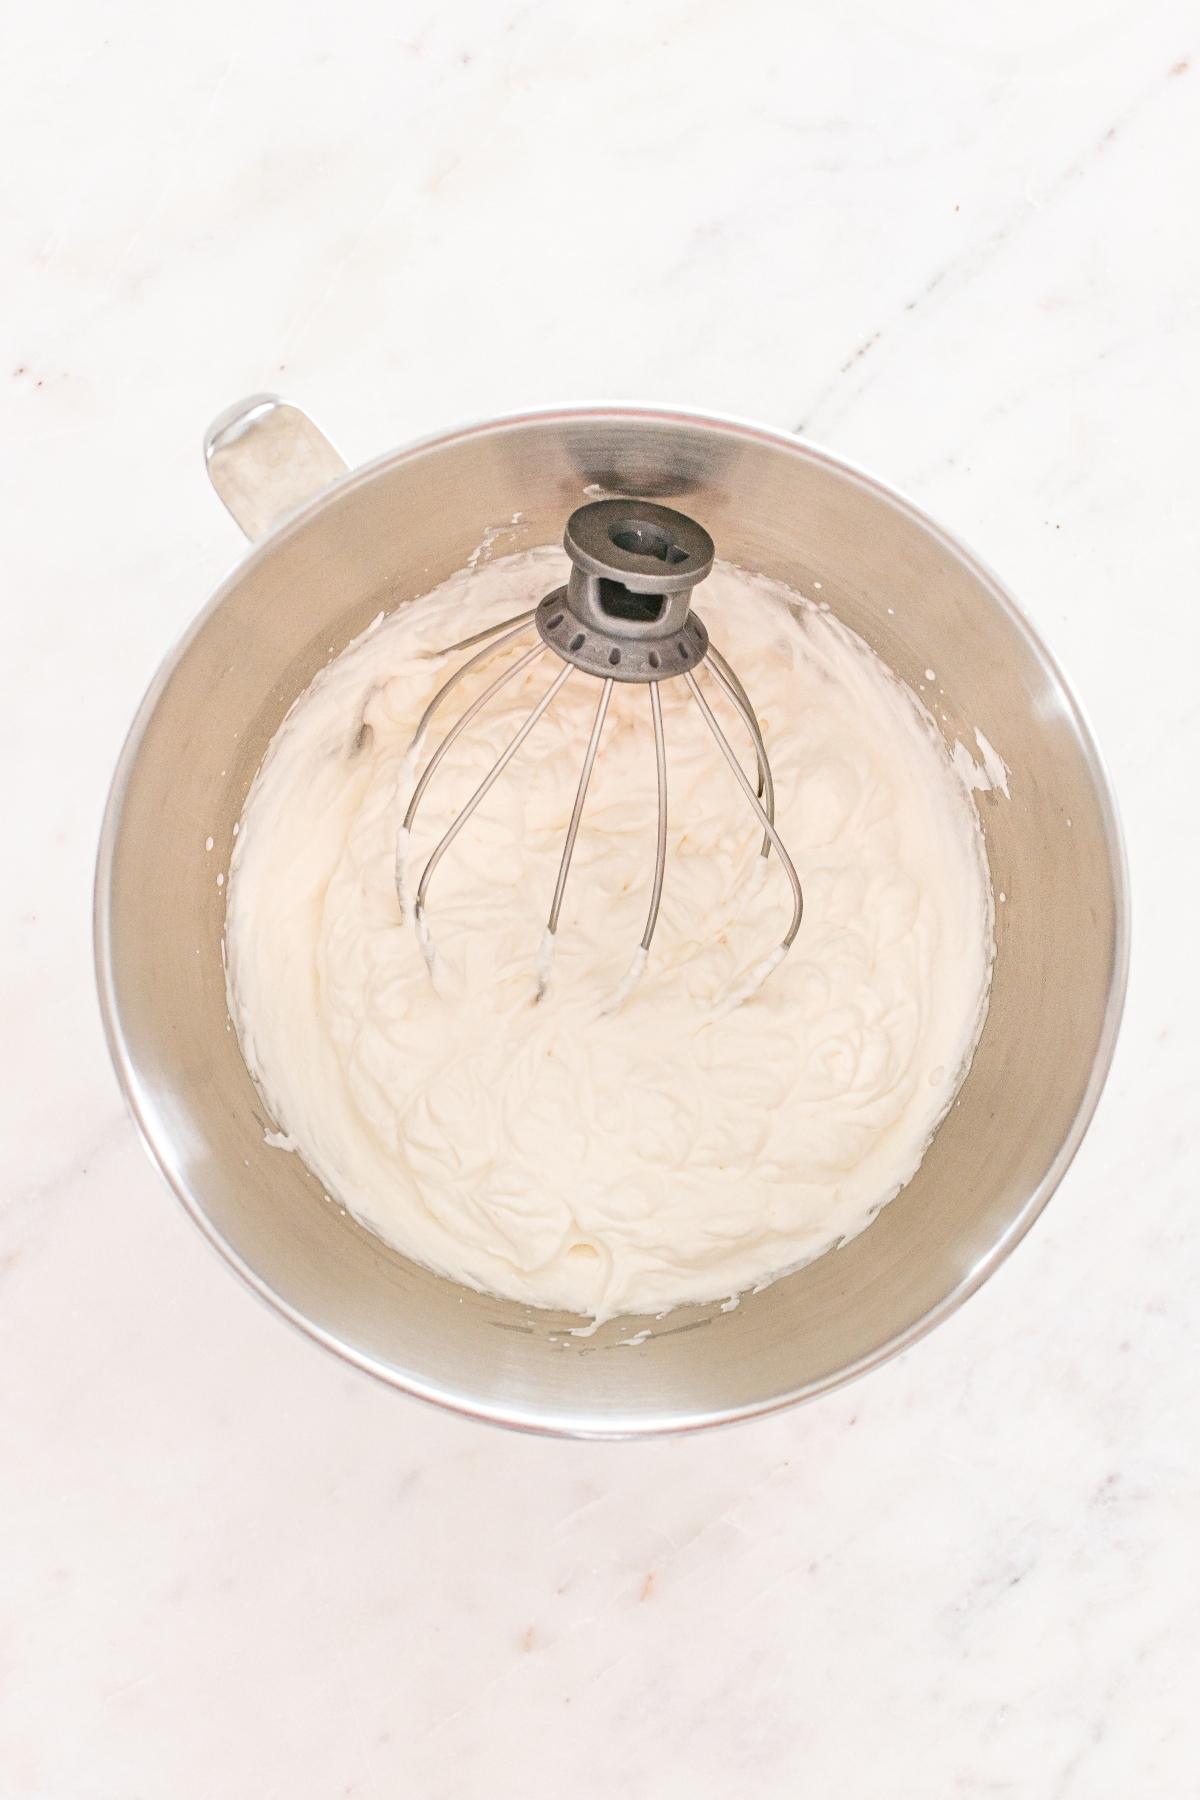
Whip the cream: Beat the heavy cream with the powdered sugar and vanilla until stiff peaks form.
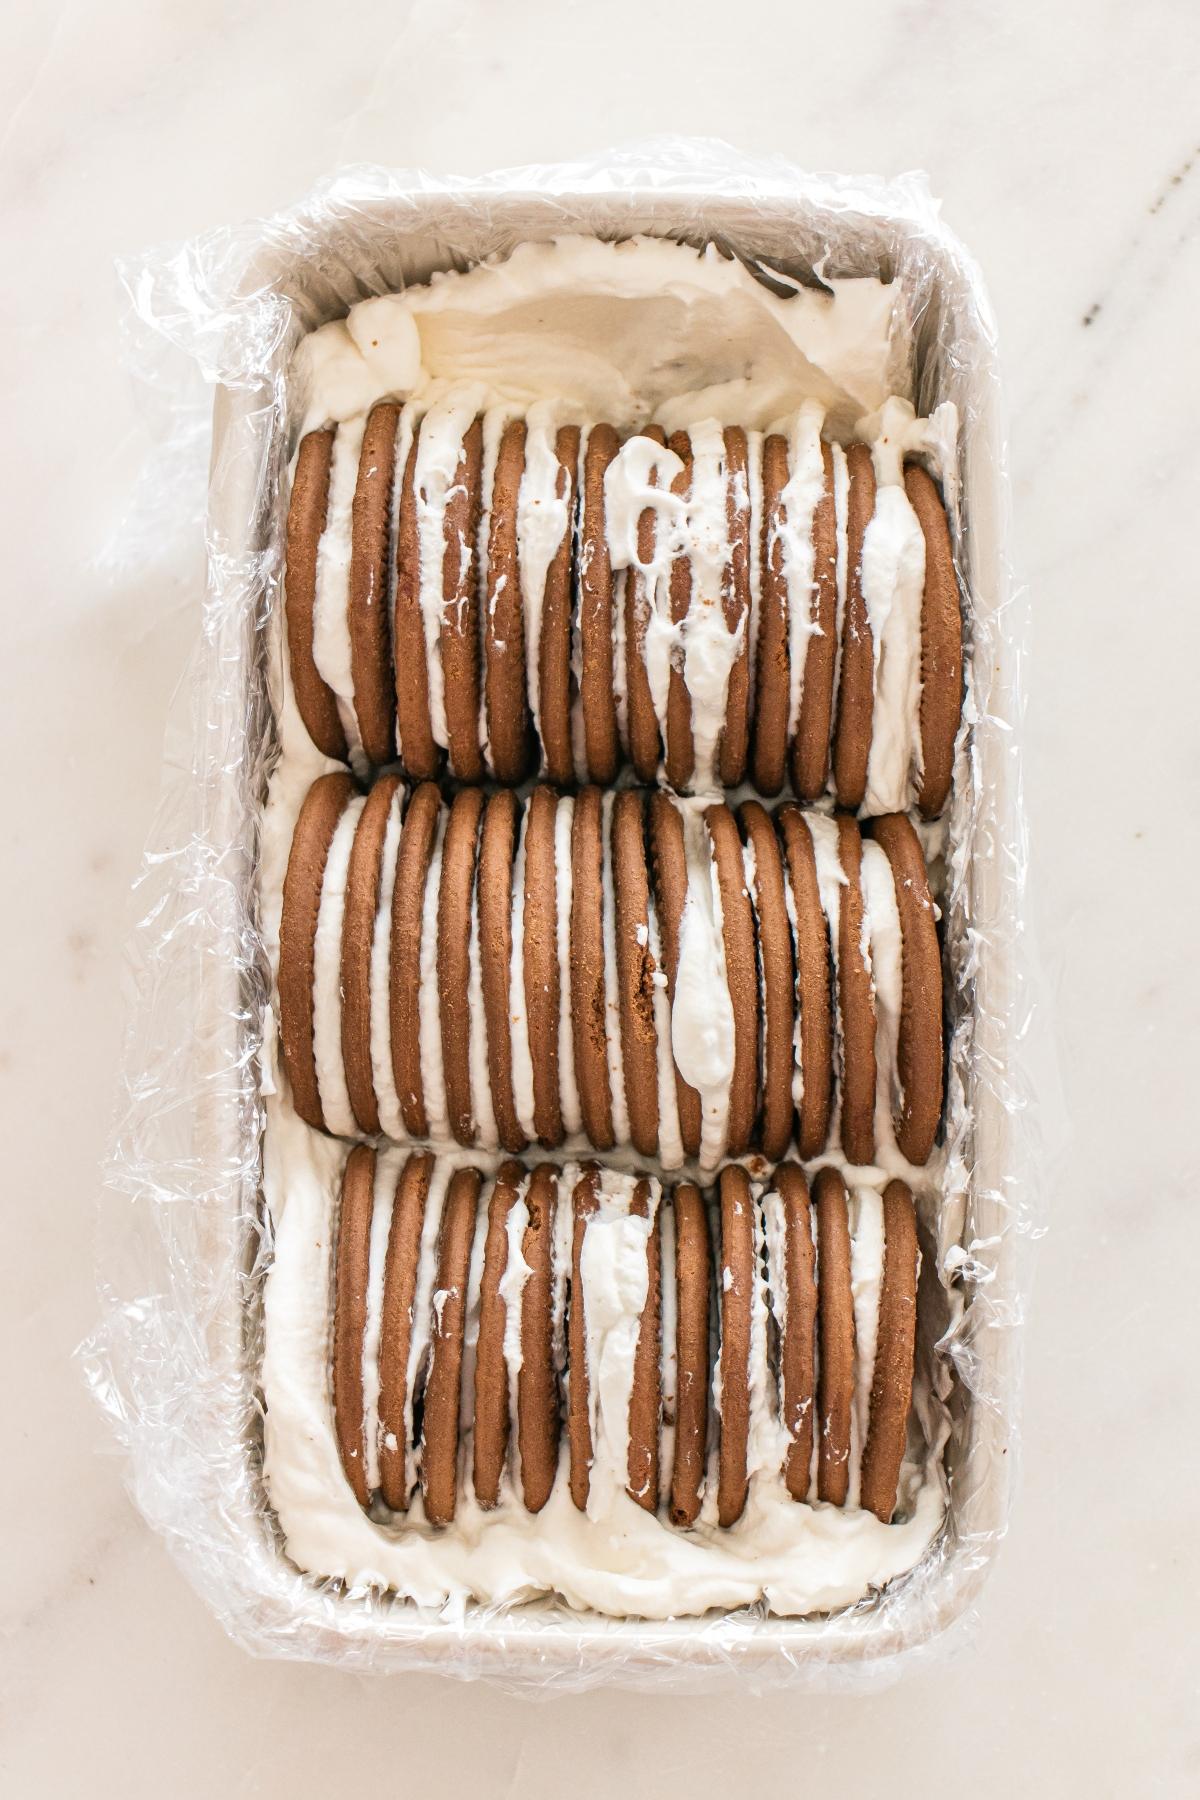
Build the rows: Spread some whipped cream on a cookie, press another cookie onto it and keep going until you have enough cookie rows to cover a loaf pan.
Cover the top: Spread whipped cream over the top.
Chill the loaf: Cover the pan and refrigerate until the cookies soften and the loaf is firm enough to lift out.
The finishing touches: Lift the loaf from the pan, spread or pipe the remaining whipped cream over it. Add chocolate shavings or your garnish of choice.

Substitutions and Variations
Mocha flavor: Add a teaspoon of espresso powder to the whipped cream.
Try a holiday version: Use peppermint extract in place of vanilla and top with crushed candy canes for a fun, festive dessert.
Different cookies: Nabisco chocolate wafers were discontinued in 2023, but I used Goya chocolate maria cookies in this recipe and they worked well. Oreo thins are another option or even vanilla wafers (these are great) if you want to change the whole flavor of the dessert.
Extra chocolatey: Sprinkle mini chocolate chips between the layers of this ice box cake.
Whipped cream: Cool Whip would work but I prefer to make my own whipped cream with vanilla extract because it tastes fresher.
Another garnish: Swap the chocolate shavings for fresh berries. Or consider a scoop of vanilla ice cream or a drizzle of hot fudge.
Gluten-free option: Use gluten-free cookies instead of chocolate wafers.
Serving Suggestions
With a drink: A cinnamon dolce latte or strawberry lemonade would be a good drink pairing.
For dessert: Enjoy a slice of chocolate icebox cake after any kind of meal from shrimp fra diavolo to slow cooker beef curry with naan bread.
With some cookies: Go full chocolate by pairing the dessert with chocolate pudding cookies or chocolate fudge cookies, or add a contrast with strawberry thumbprint cookies.
How to Store
Store: Cover tightly with plastic wrap and refrigerate for up to 3 days.
Freeze: Freeze before the final whipped cream topping for up to 1 month.
Thaw: Defrost in the refrigerator overnight before adding the final whipped cream topping and garnish.
Top Tips
Line the pan: Use a long sheet of plastic wrap with plenty of overhang so you can lift the dessert out more easily.
Stop at stiff peaks: Don’t keep mixing once the cream is fully whipped or it can become grainy.
Keep the layers thin: I experimented with thicker cream layers but it made the cookie lines less clear.
Give it enough chill time: The wafers need time in the fridge to soften. Give the dessert at least 6 hours or overnight if possible.
Save the topping cream separately: Keep the reserved whipped cream cold until you’re ready to finish the loaf.
Chocolate Icebox Cake FAQs
It either wasn’t whipped to stiff peaks or the cream was too warm when you started.
The loaf pan keeps the cookie rows packed together so the slices hold their shape. You could try using a different shaped pan, perhaps something larger if you want to make a larger cake.
Chocolate Icebox Cake Recipe
Chocolate Icebox Cake
Equipment
- Loaf Pan 8 x 5-Inch or 8 ½ x 4 ½-Inch
- Stand Mixer with Whisk Attachment
- Offset Spatula or Pastry Bag
- Peeler for Making Chocolate Shavings
Ingredients
- 3 Cups heavy whipping cream
- 3 Tablespoons powdered sugar
- 1 Teaspoon vanilla extract
- 45 chocolate wafer cookies
Optional Garnish
- chocolate shavings
Instructions
- Line a loaf pan with plastic wrap with enough overhang for easy removal.
Make the Vanilla Whipped Cream
- In a stand mixer fitted with a whisk attachment, or using a hand mixer and bowl, whip together heavy cream, powdered sugar and vanilla on medium to medium-high speed.
- Keep going until stiff peaks form, 3 to 5 minutes.
Assemble the Icebox Cake
- Take a cookie and spread about a teaspoon of whipped cream on it.
- Place another cookie on the whipped cream side and gently squeeze together.
- Repeat until you’ve used 14 cookies.
- Arrange them in the lined loaf pan and repeat until you have 3 rows of 14 cookies.
- Cover the top of the cake with whipped cream, reserving some of the whipped cream to decorate the cake before serving.
Chill the Cake
- Cover the top of the cake with plastic wrap and chill in the refrigerator for at least 6 hours or overnight. Chill the remaining whipped cream in a covered container as well.
- Lift the cake out of the pan using the plastic wrap.
Add Toppings
- Spread or pipe the remaining whipped cream over the loaf.
- Top with chocolate shavings and more crushed cookies, if liked.
Notes
Stop at stiff peaks: Don’t keep mixing once the cream is fully whipped or it can go grainy.
Keep the layers thin: I find that using thick cream layers make the cookie lines less clear.
Give it enough chill time: The wafers need time in the fridge to soften. Give the dessert at least 6 hours or overnight if possible.
Save the topping cream separately: Keep the reserved whipped cream cold until you’re ready to finish the loaf.
Nutrition

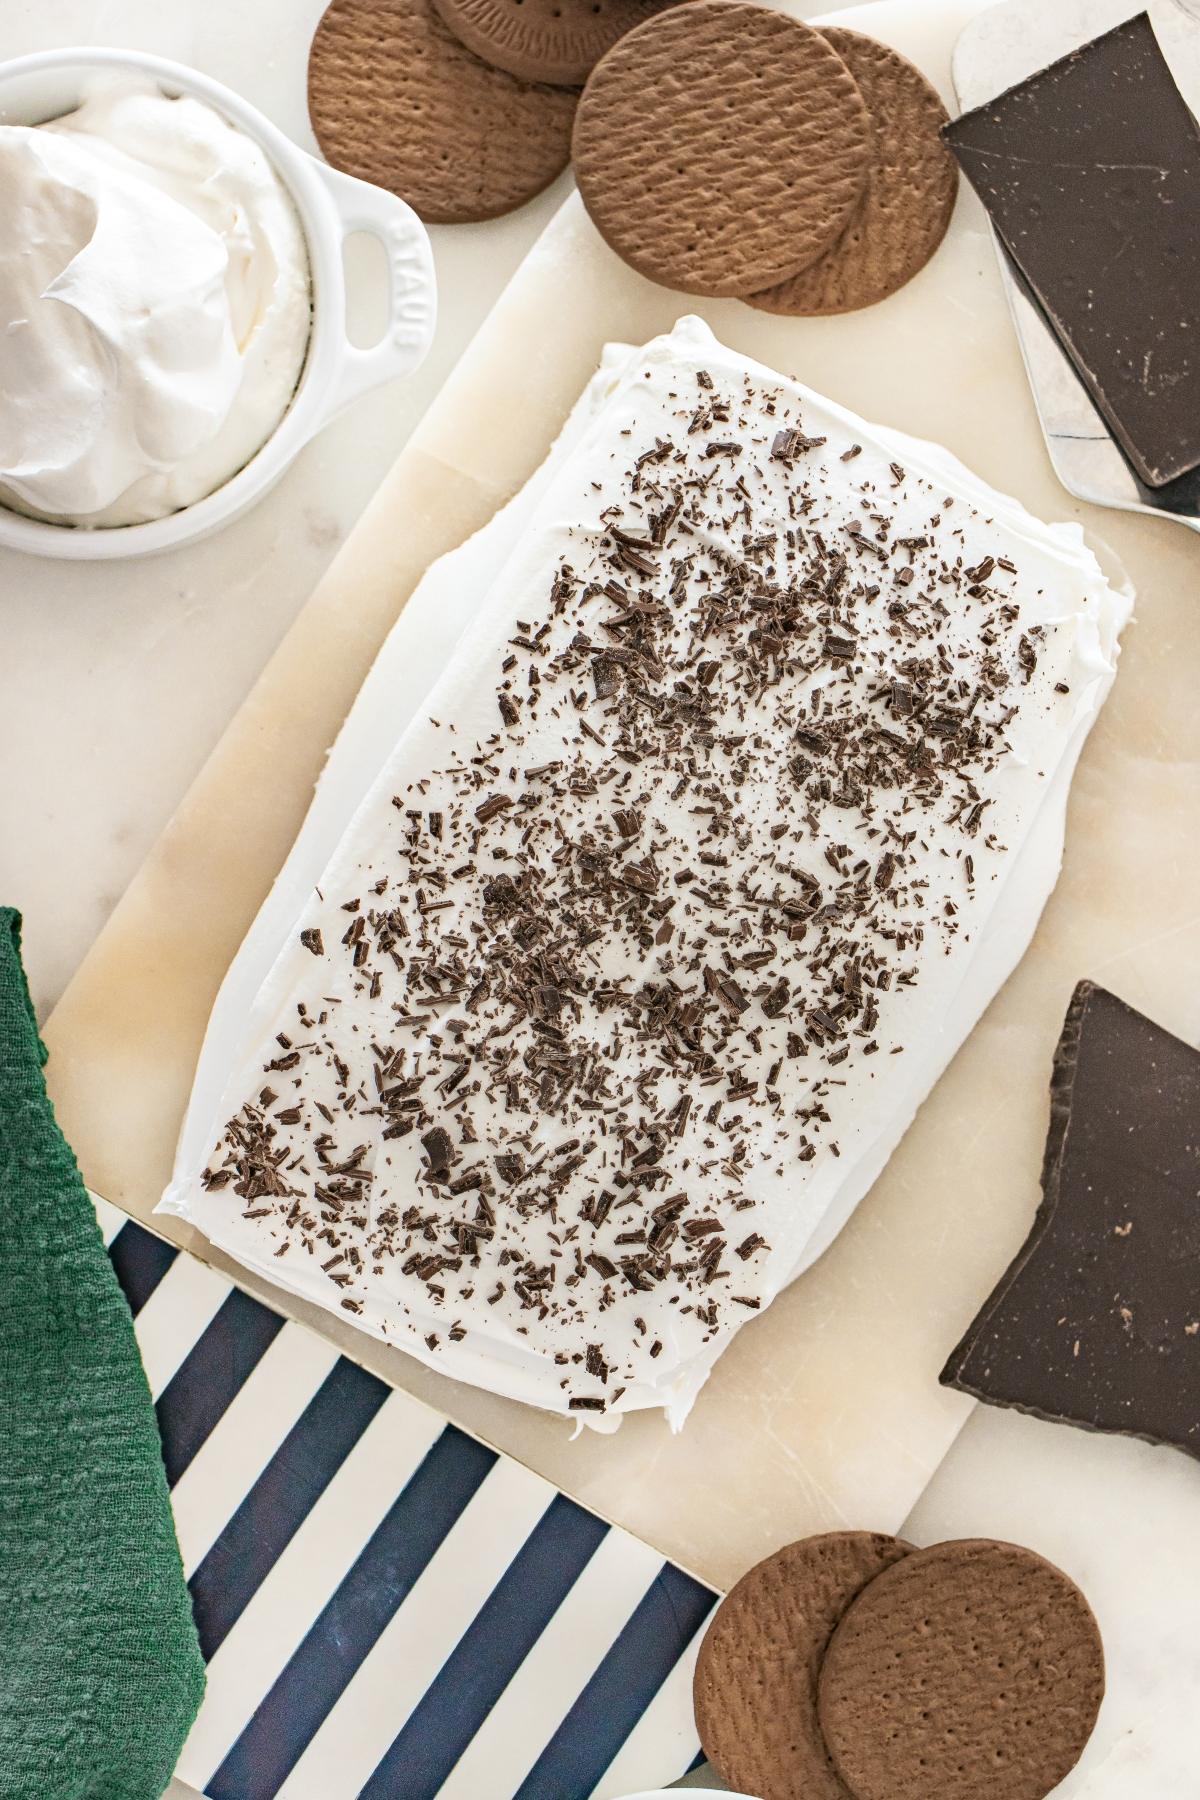
Icebox cake with chocolate wafers changes a lot while it sits in the fridge. The wafers start out crisp, then soften enough that the loaf cuts into clean slices. The cream is very simple so the chocolate cookie flavor shines through. It’s a dessert that looks better in a loaf pan than it would piled into a dish. You can see the layers clearly, and each slice still looks like what it is: chocolate wafers and whipped cream, set long enough to turn into a soft cake. Just you try to resist that second slice!
Other Recipes to Try
Bella Bucchiotti
Bella Bucchiotti is a Canadian-based syndicated food, travel, and lifestyle writer, photographer, and creator at xoxoBella. She founded xoxoBella in 2015, where she shares her love for food, dogs, sustainability, fitness, crafts, outdoor adventures, travel, and philanthropy to encourage others to run the extra mile, try new recipes, visit unfamiliar places, and stand for a cause. Bella creates stress-free and family-friendly recipes for weeknight dinners and festive feasts.