This post may contain affiliate links, please see the privacy policy for details.
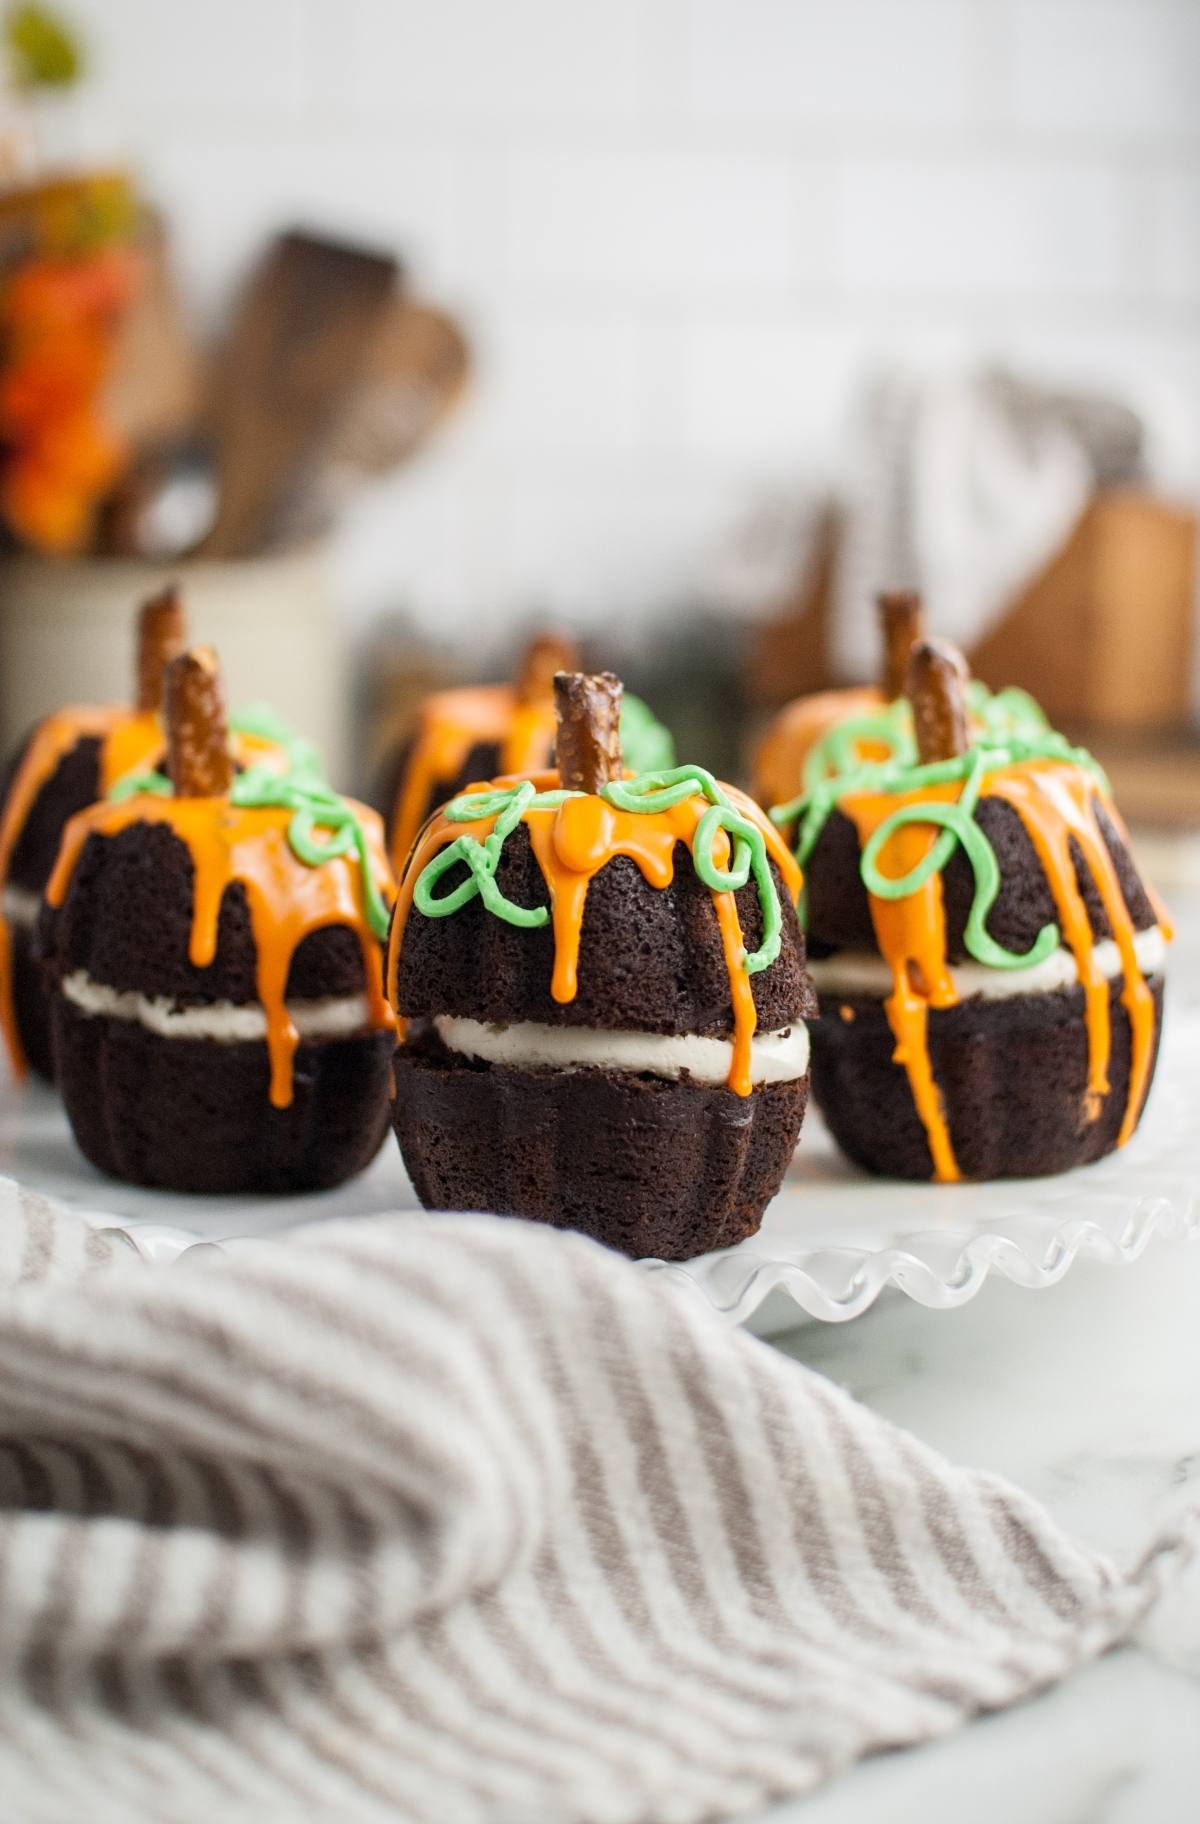
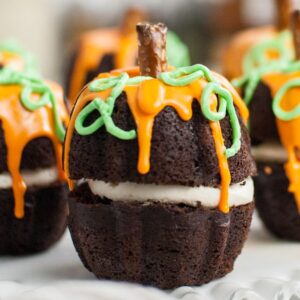
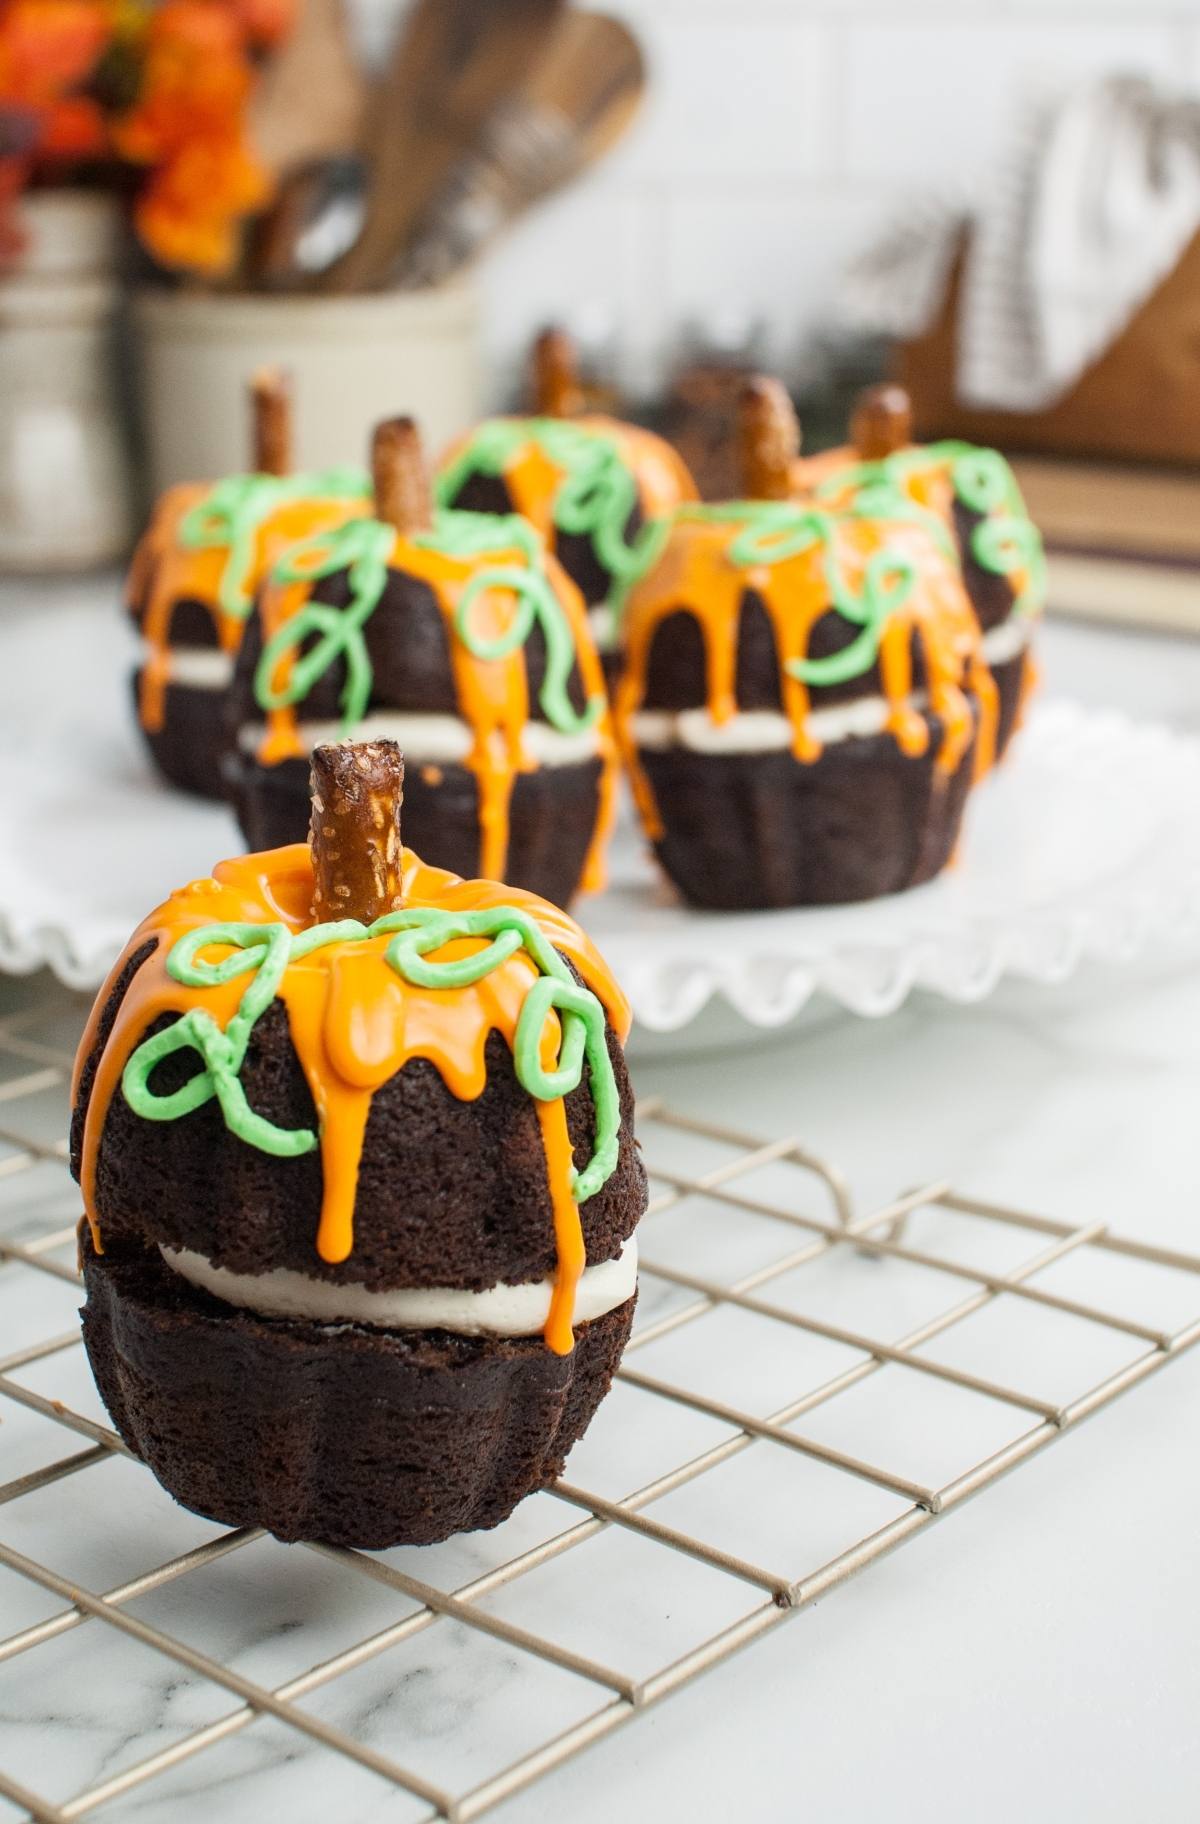
These pumpkin shaped mini bundt cakes are the perfect showstopper for your Halloween or Thanksgiving dessert table. With warm fall spices, rich cocoa, and a cream cheese filling, these little cakes deliver big flavor and lots of charm. The frosting drip effect, pretzel stem, and vine detailing make them as cute as they are tasty. They’re easy to prepare and decorate, making them a great holiday baking project. Everyone will love these adorable homemade pumpkin cakes.
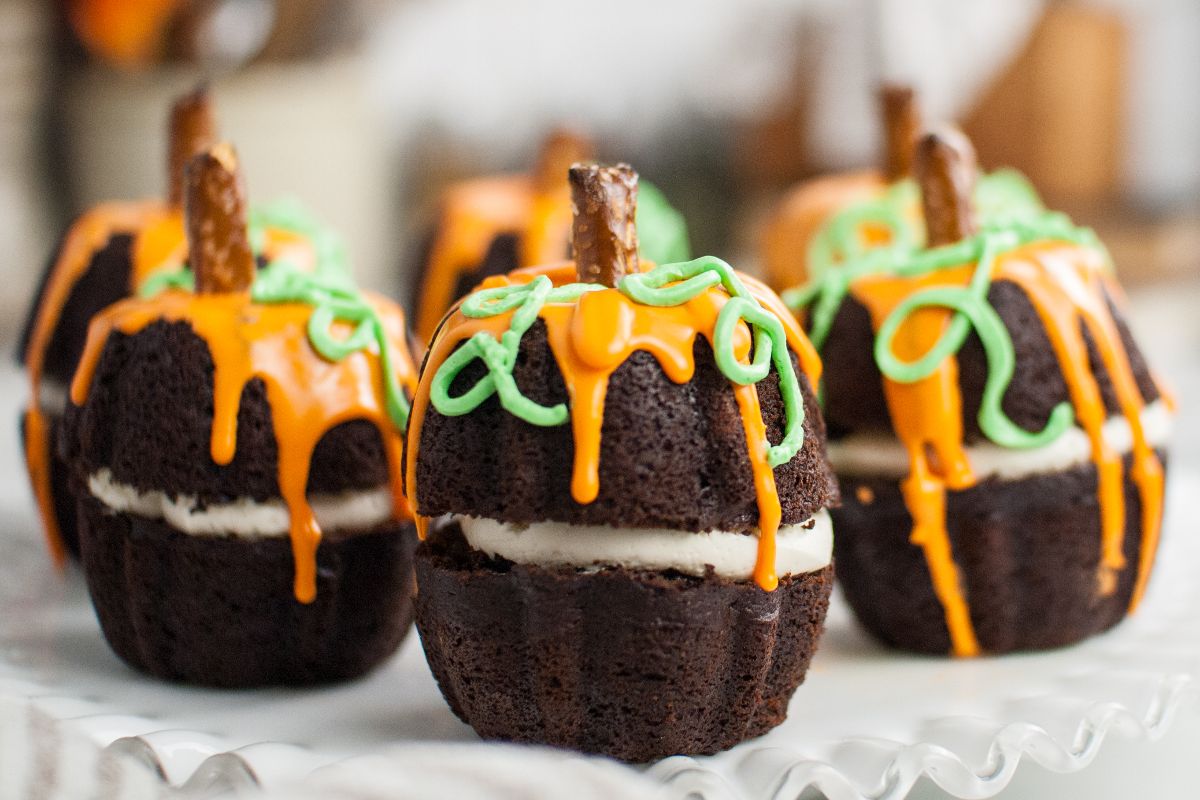
These pumpkin shaped mini bundt cakes are filled with rich cocoa, warm spices, and creamy frosting. They make the cutest festive fall or Halloween dessert.
More Halloween treats to consider include spooky ice cream floats, lunar elixir haunted cocktails or black magic rum cocktails.
Why You’ll Love It
Perfect for holidays: These little cakes add charm to Halloween and Thanksgiving gatherings.
Rich and chocolatey: Dark cocoa powder gives each bite a deep, bold flavor.
Moist and spiced: Pumpkin purée and fall spices make these soft and cozy.
Cute and customizable: Switch up the colors or decorations for different occasions.
Great for gifting: Their size and look make them ideal for sharing.
Pumpkin Mini Bundt Cake Ingredients
A complete list of ingredients and amounts can be found in the recipe card below.
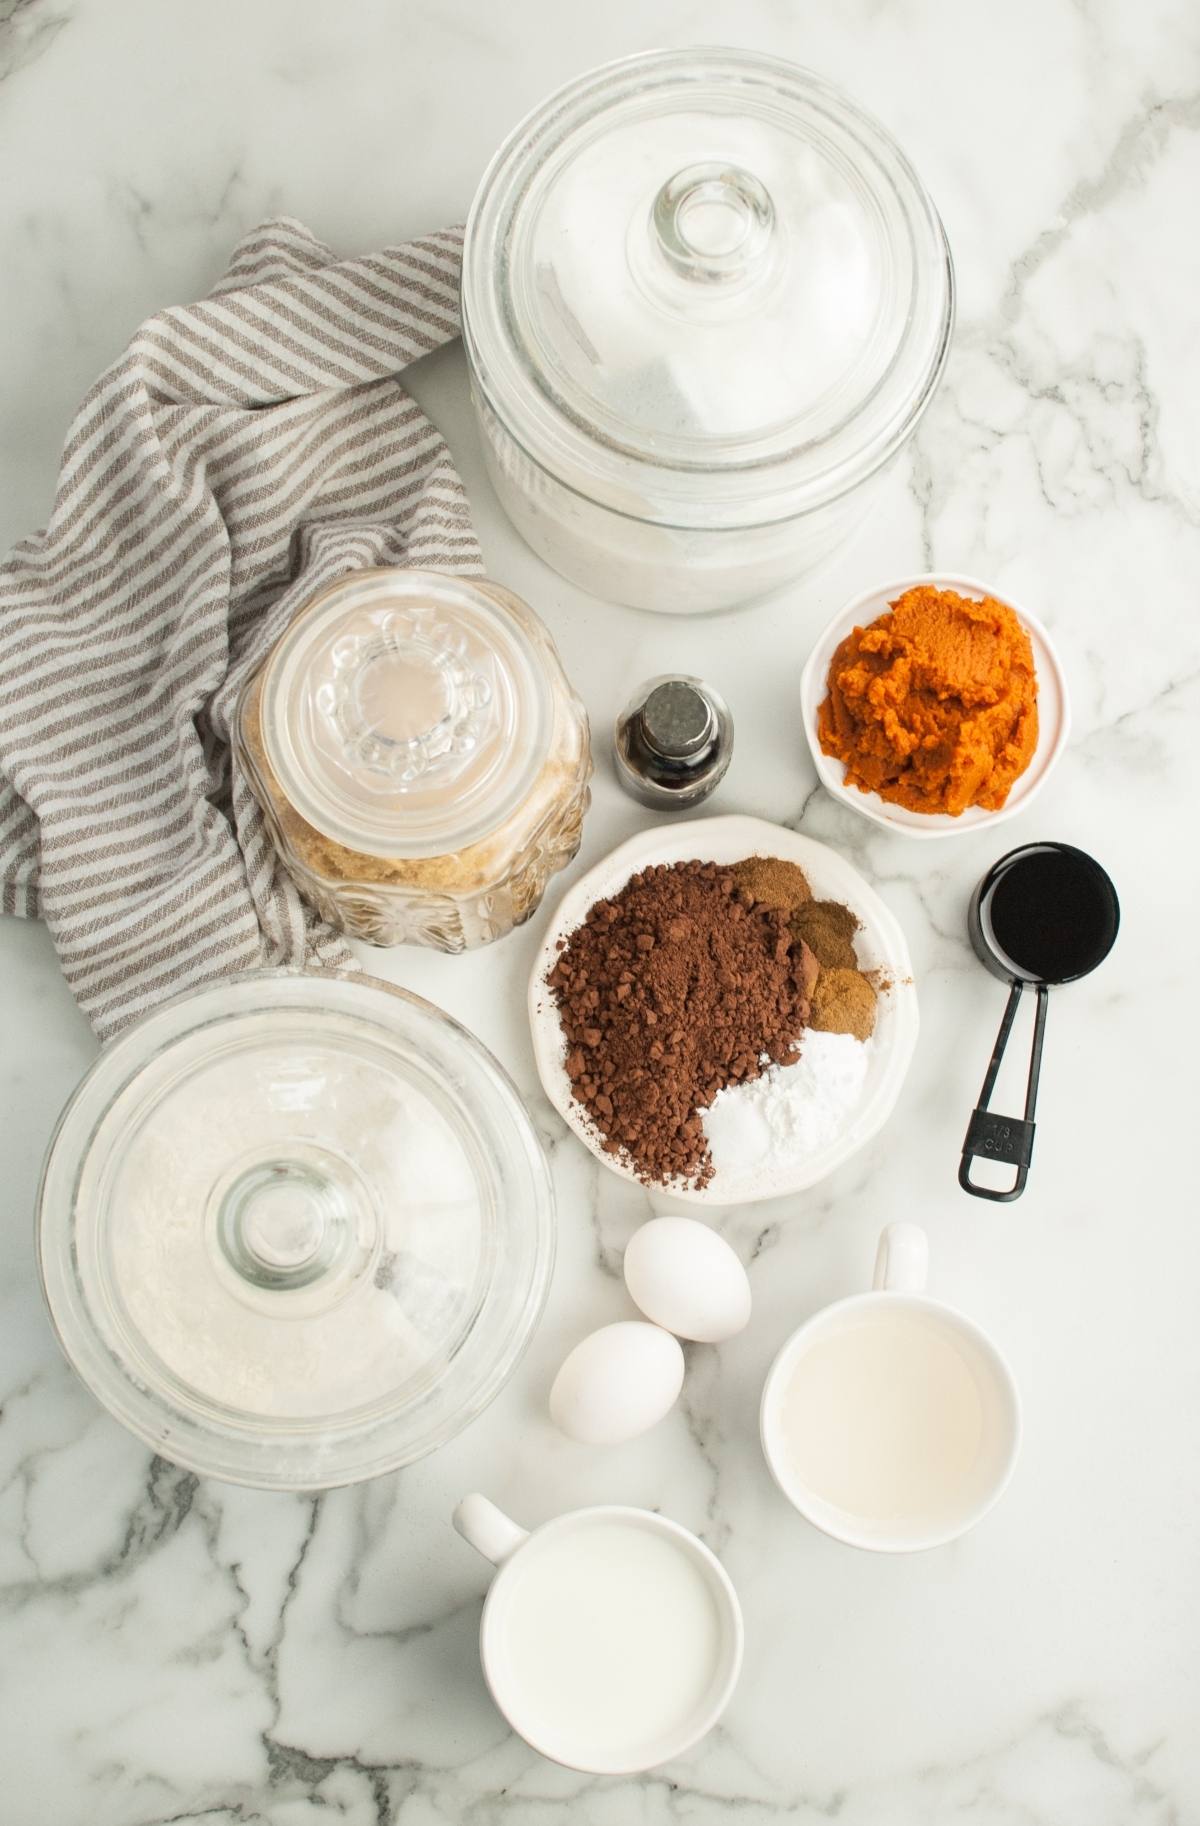
Pumpkin purée: Adds moisture and flavor, while keeping the cake tender. Get the unsweetened kind which says 100% pumpkin on the container. Don’t use pumpkin pie filling. That is something different which is sweetened and spiced.
Milk: Helps to thin the batter and blend everything smoothly.
All-purpose flour: The structure for the bundt cakes.
Granulated sugar: Sweetens the batter evenly.
Brown sugar: Adds moisture and a hint of molasses.
Cocoa powder: Provides rich chocolate flavor.
Eggs: Bind the batter together and give the cakes structure.
Olive oil: Adds richness and moisture.
Corn syrup: Keeps the texture moist and chewy.
Baking powder and baking soda: Leaven the cakes so they rise well.
Spices: Cinnamon, clove and nutmeg create a warm fall flavor profile.
Vanilla extract: Adds a soft background sweetness to the cakes and is also used in the frosting.
Pretzel rods: Act as the pumpkin “stems.”
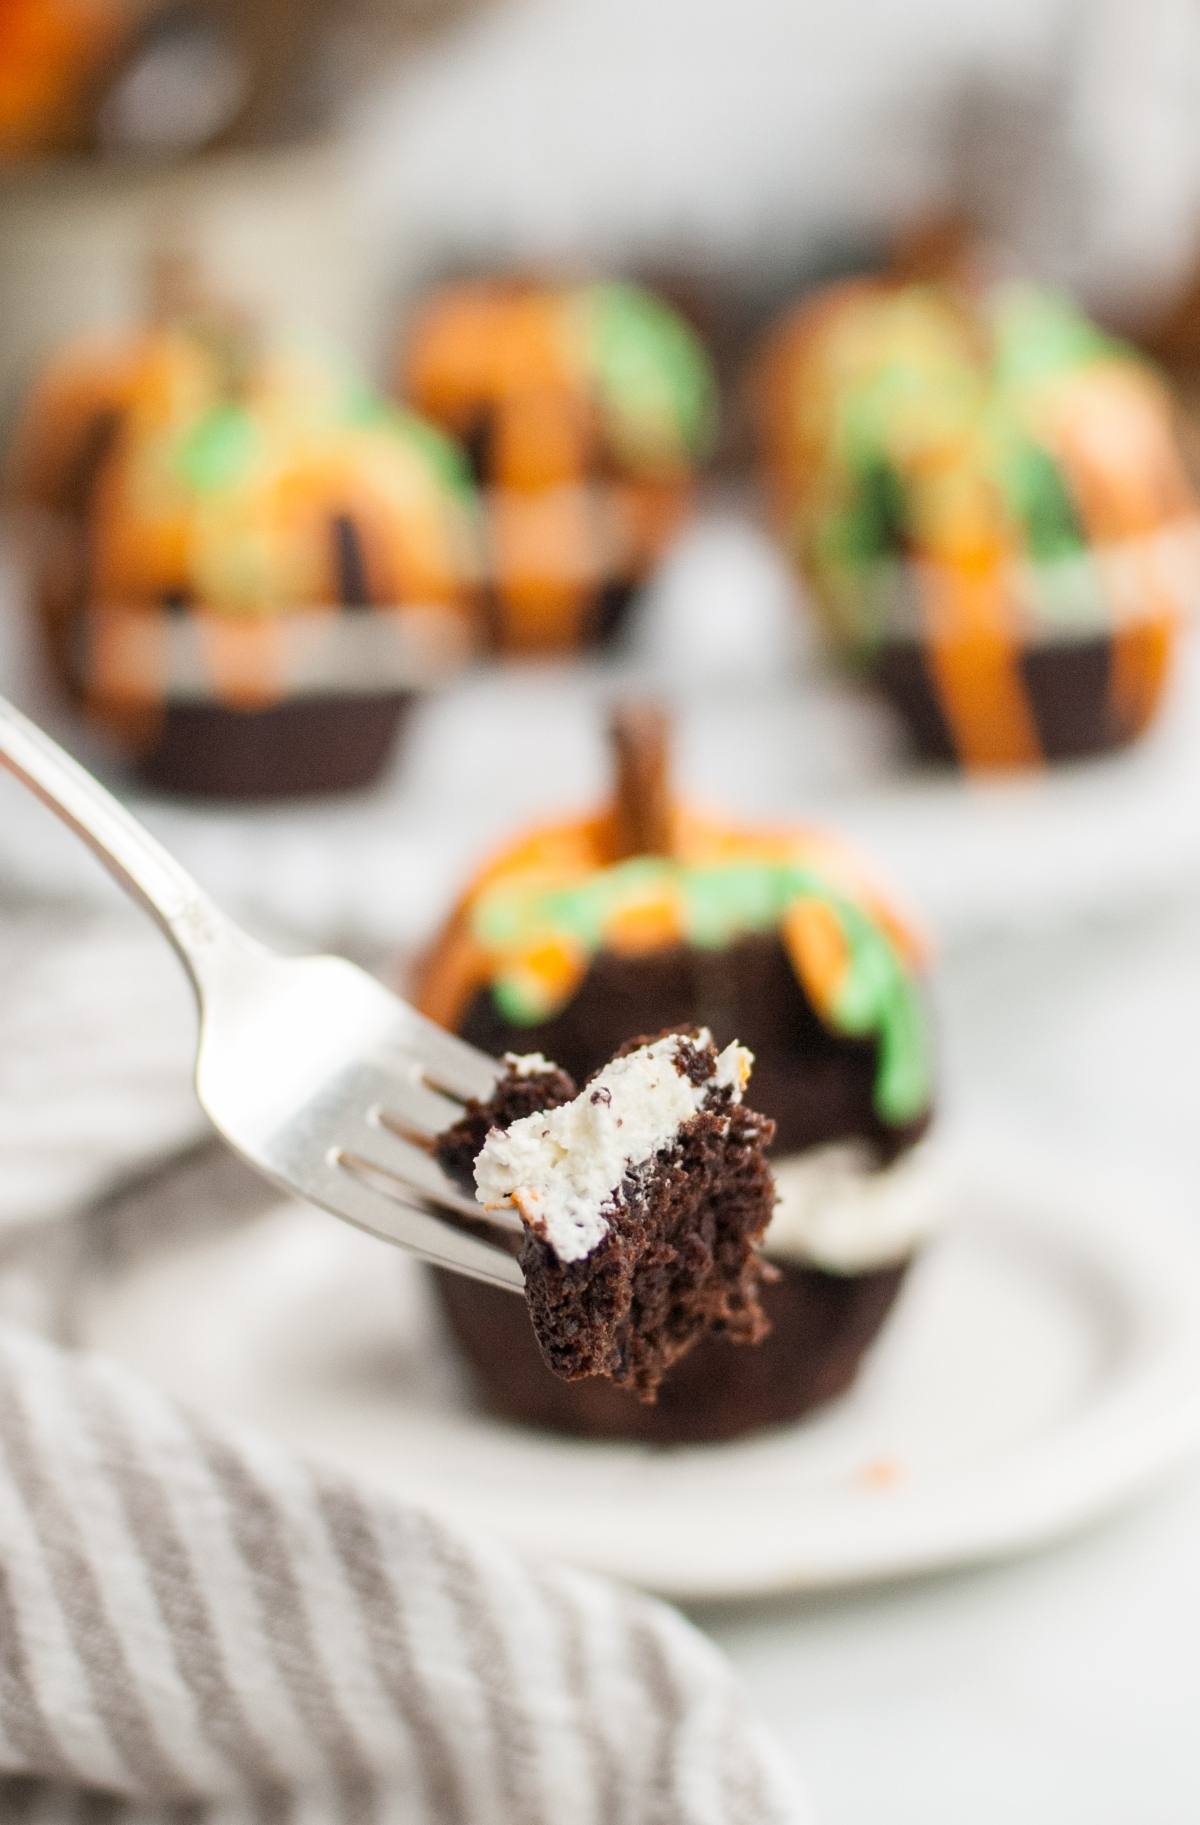
Cream cheese: Makes the filling rich and tangy.
Butter: Creams smoothly with the sugar to form the frosting base.
Heavy cream: Loosens the texture of the frosting.
Icing sugar: Sweetens and thickens the frosting.
Canned white frosting: Used for the pourable drip effect.
Orange food coloring: Colors the frosting to look like a pumpkin.
Green food coloring: Used to make vines.
How to Make Mini Pumpkin Cakes
For more detailed instructions with weights and measurements, jump to the printable recipe card.
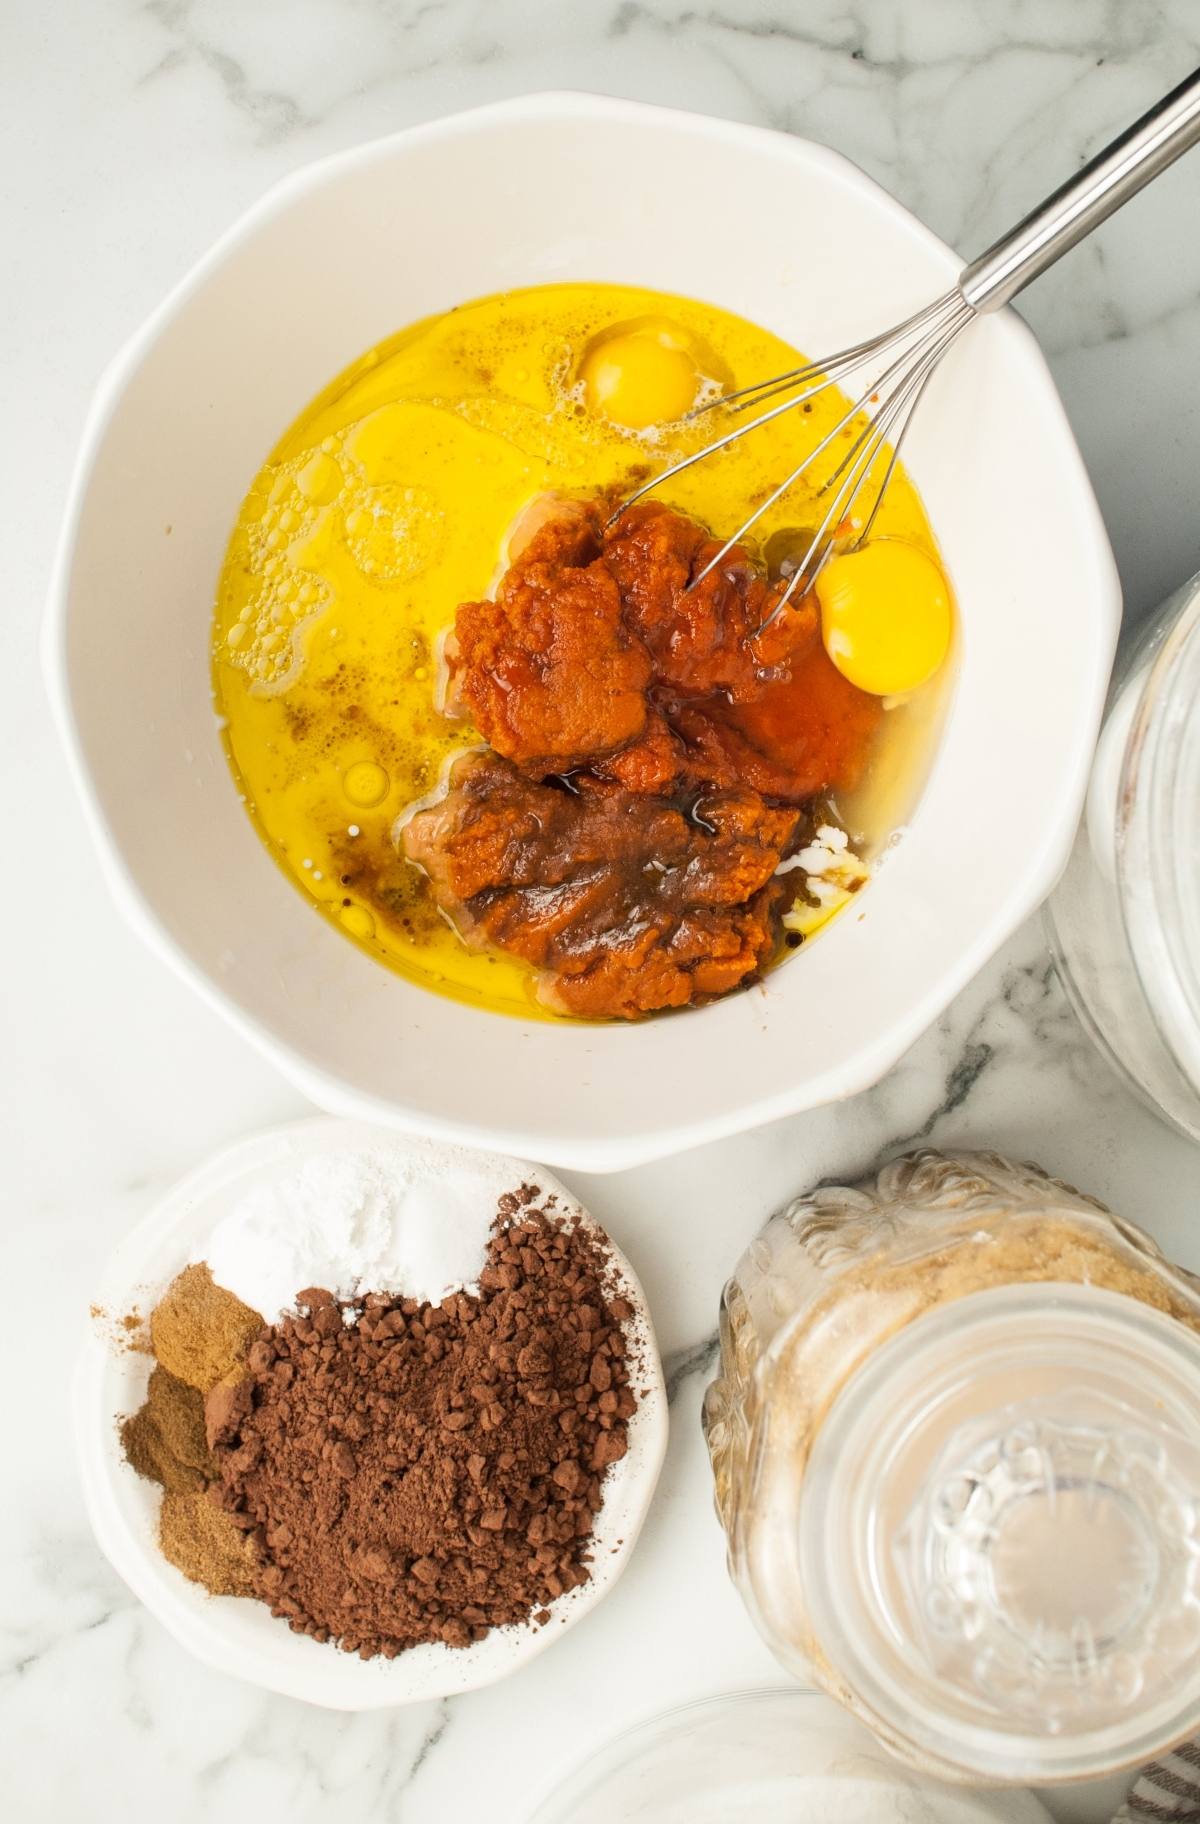
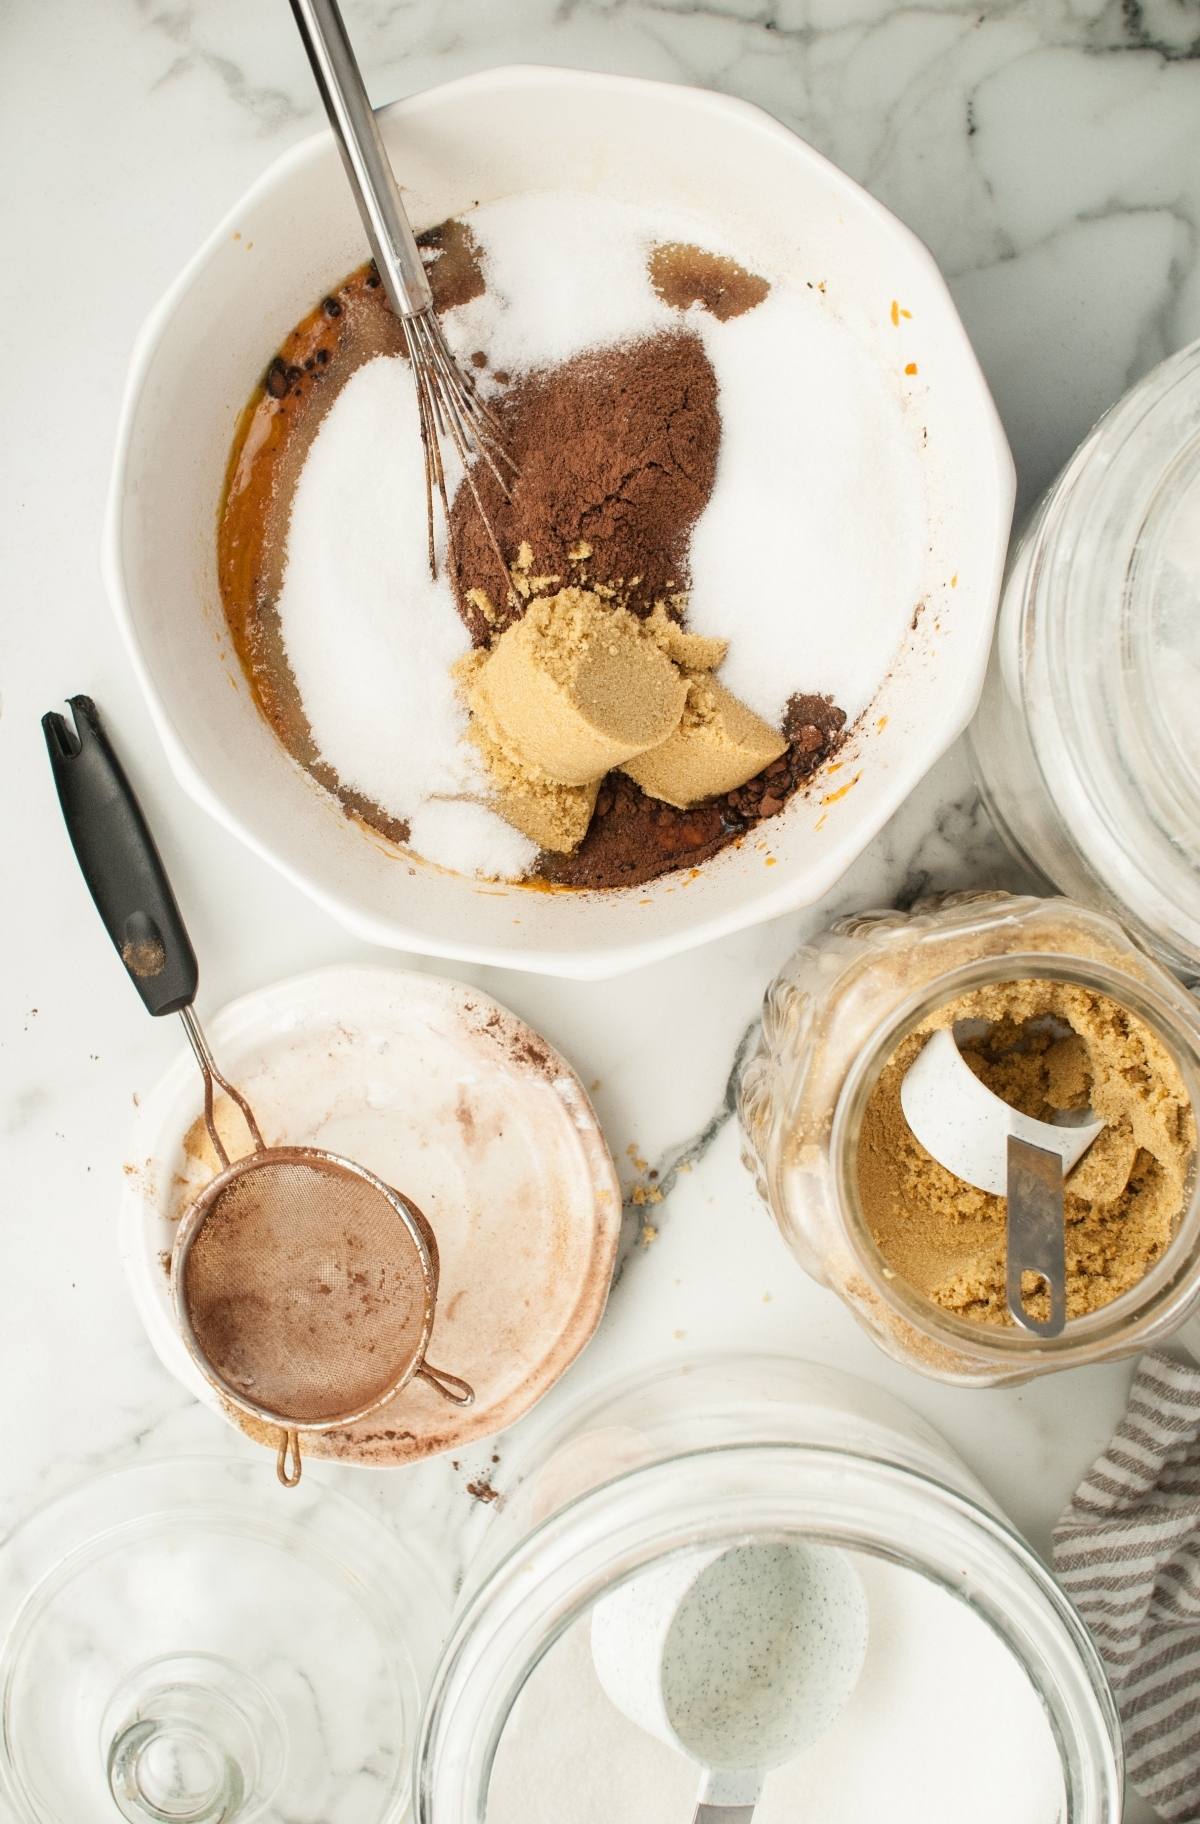
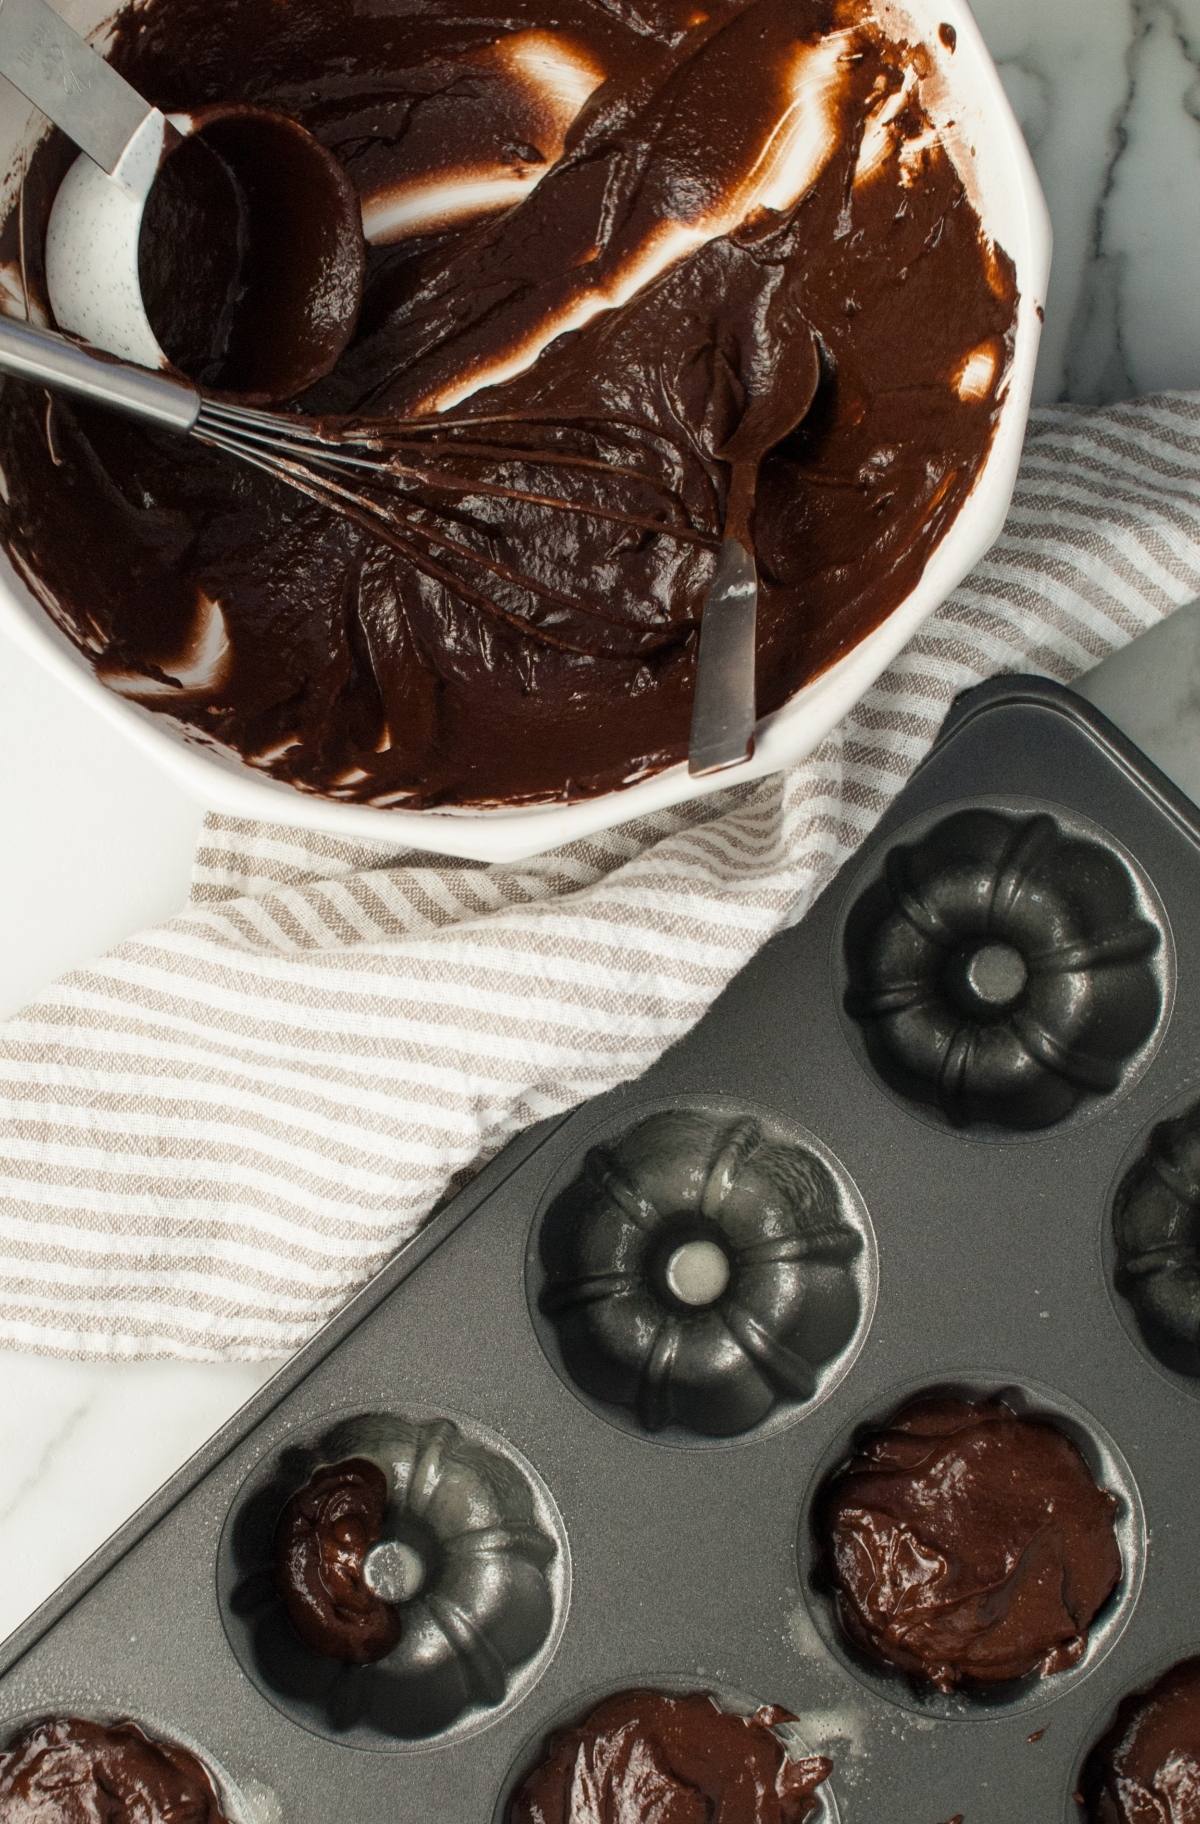
Make the batter: Mix the wet ingredients in a bowl, then sift in the dry.
Fill the molds: Spoon the batter into mini bundt pans about two-thirds full.
Bake and cool: Bake until cooked through, then cool and trim the tops flat.
Make the frosting: Beat cream cheese, butter, sugar, cream and vanilla until fluffy.
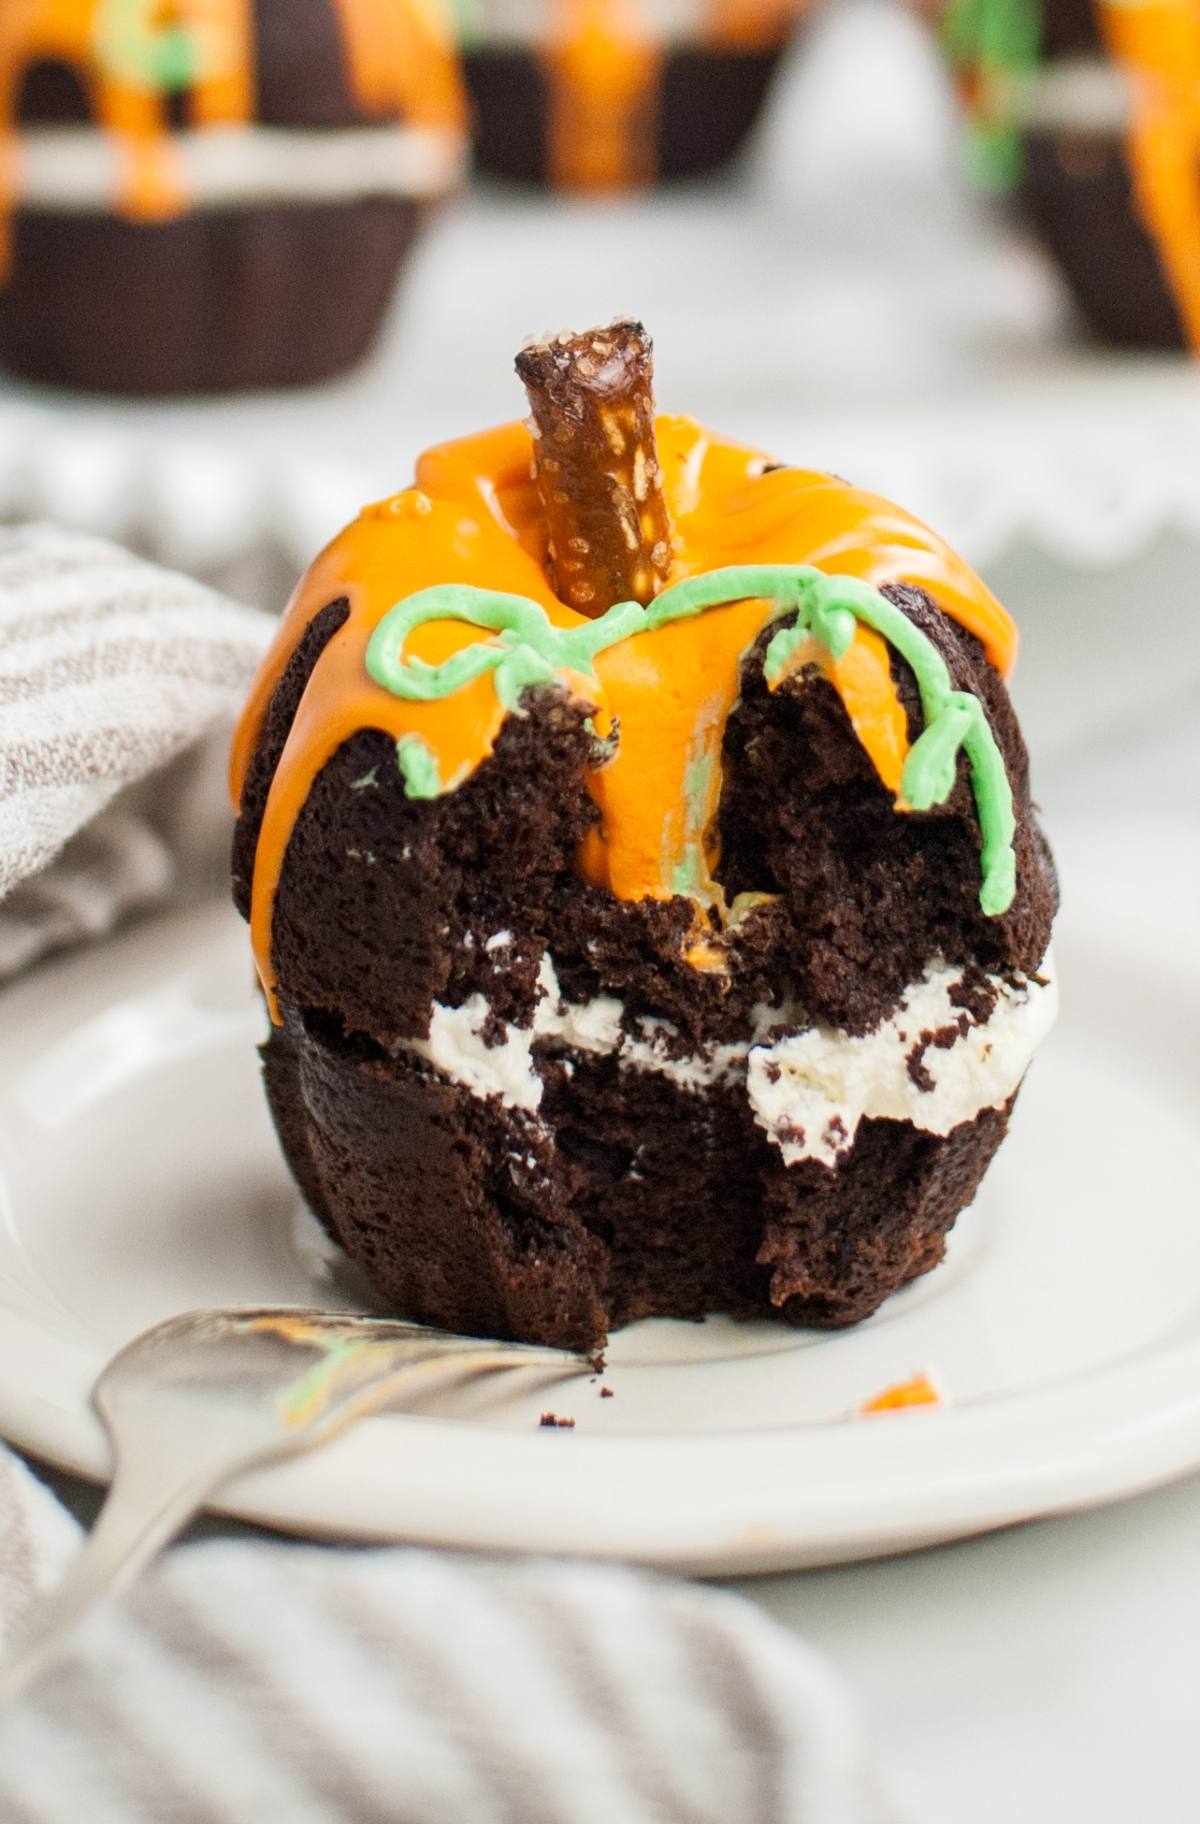
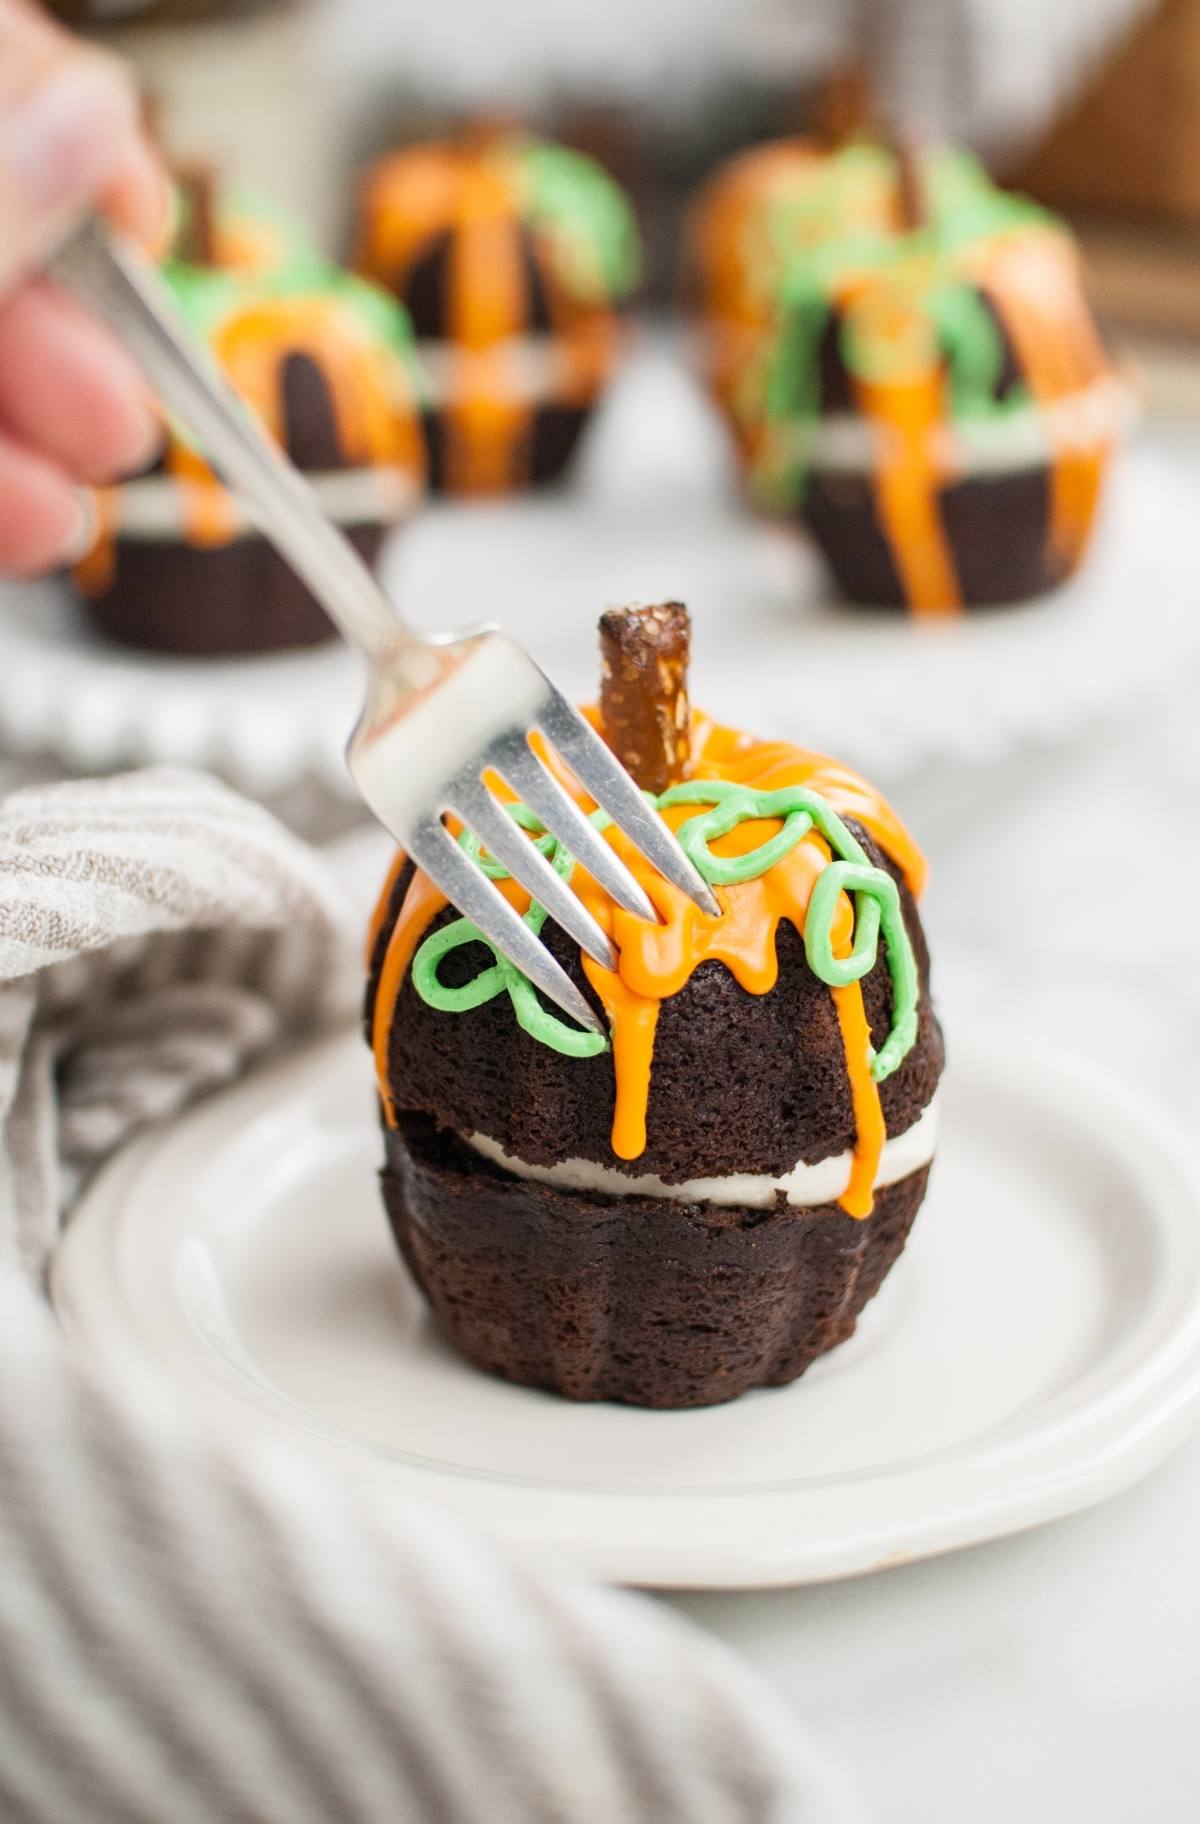
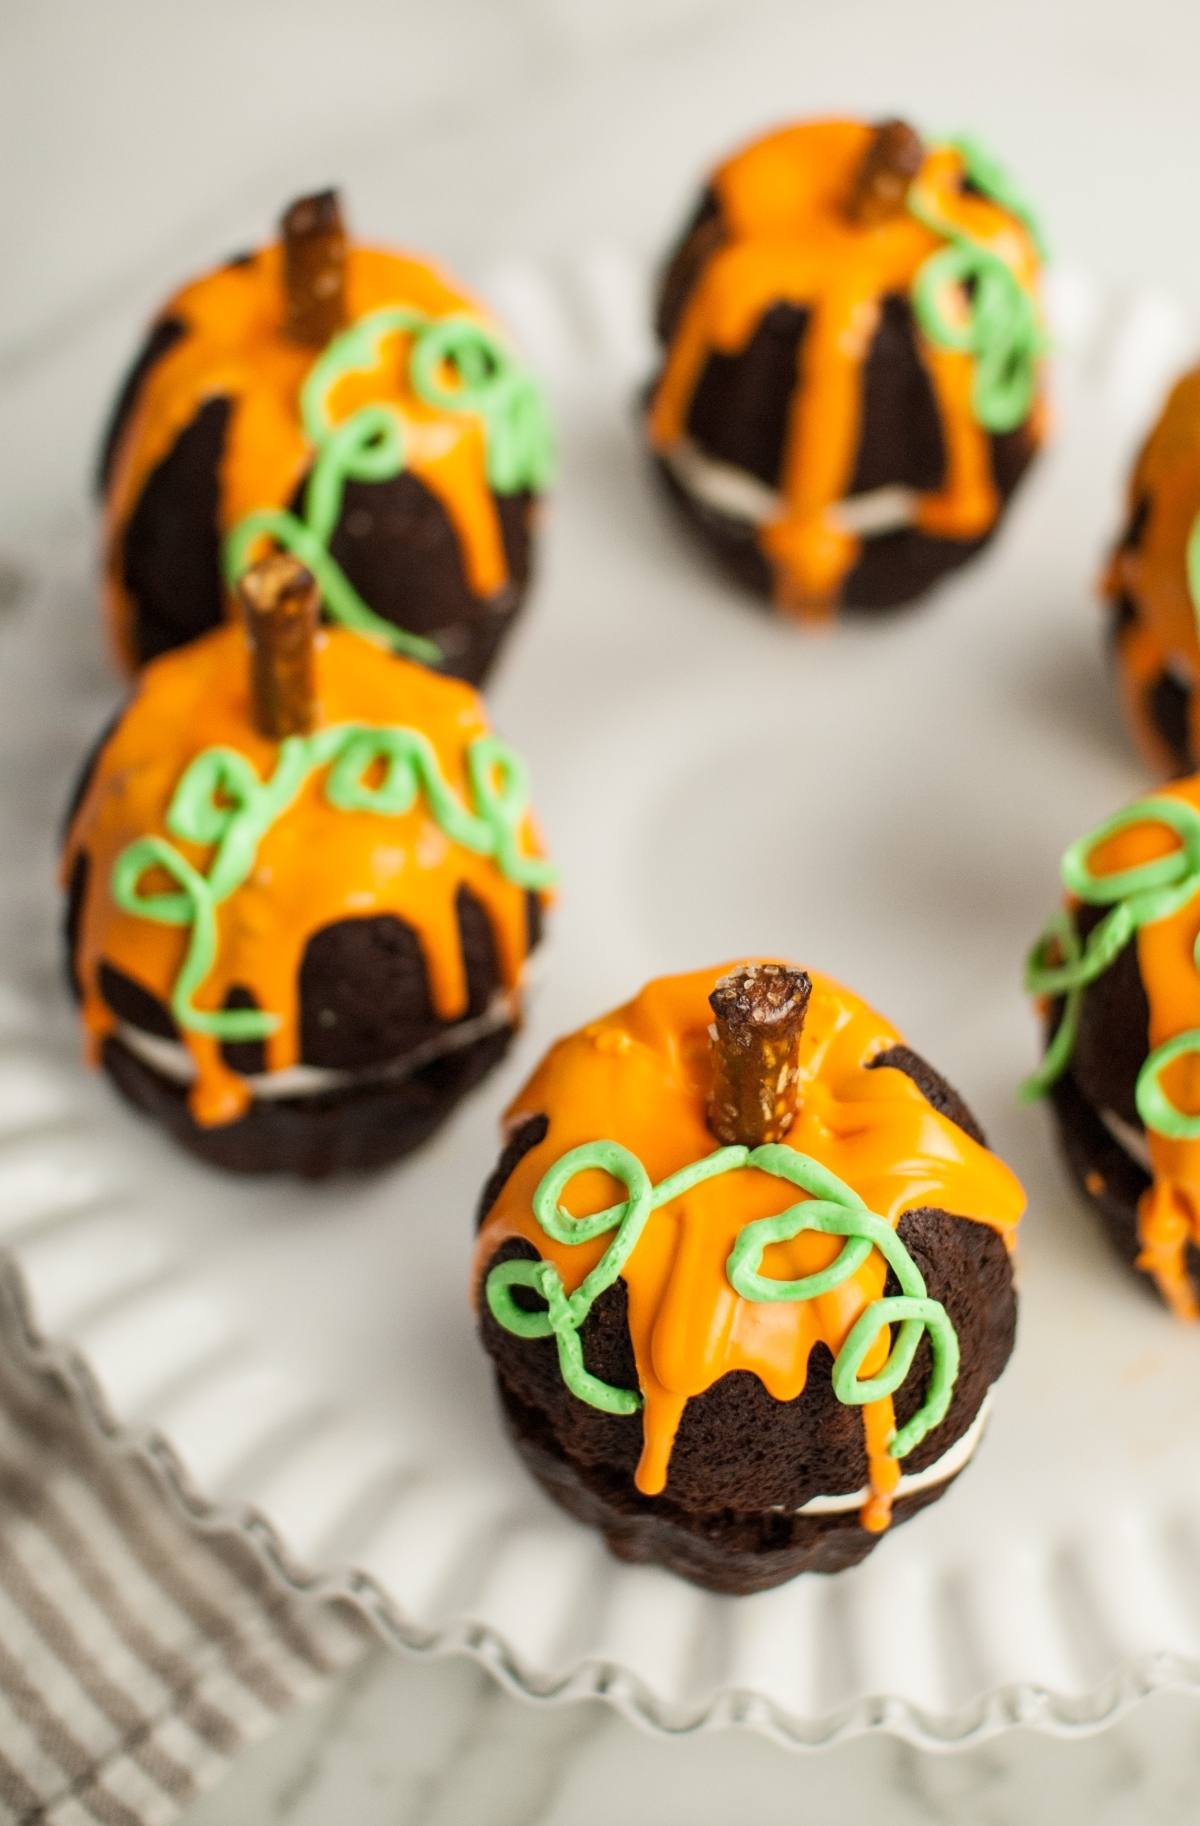
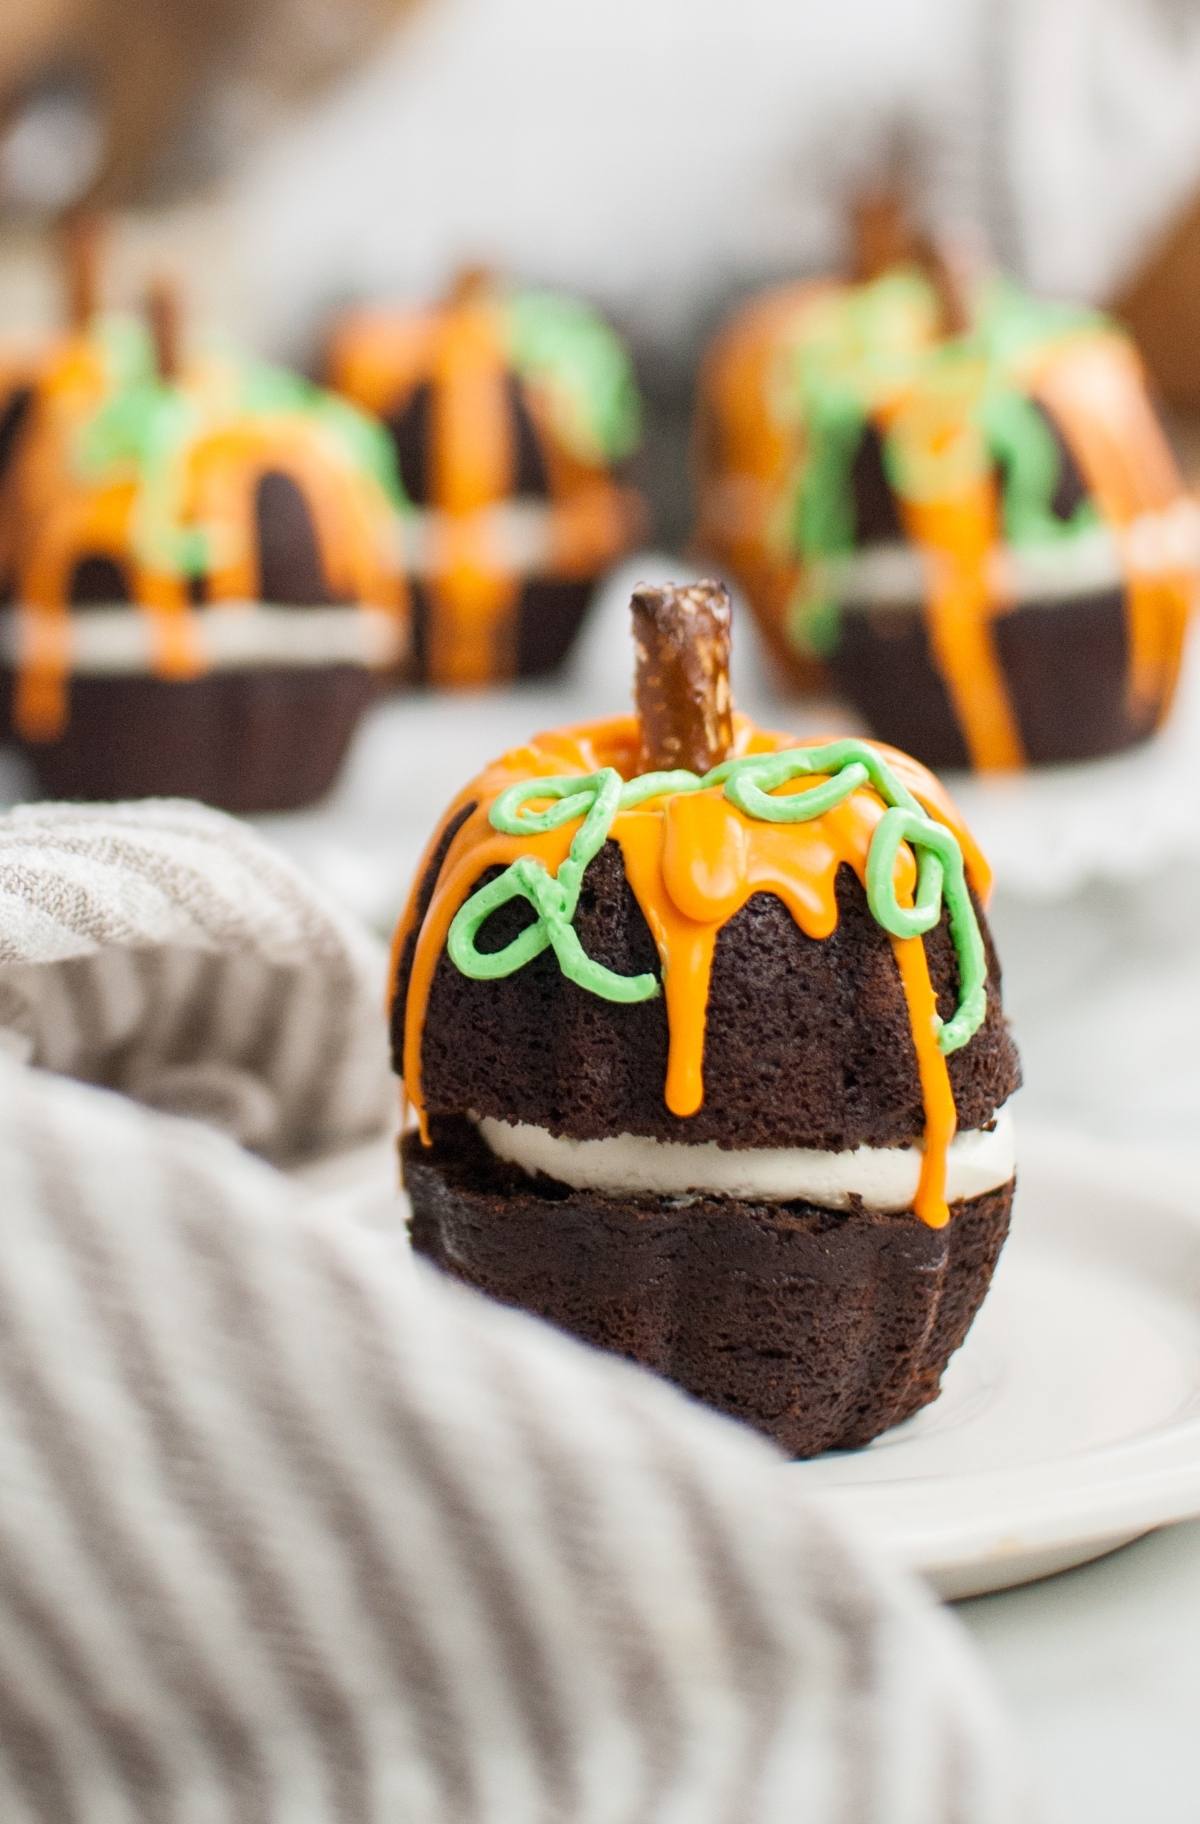
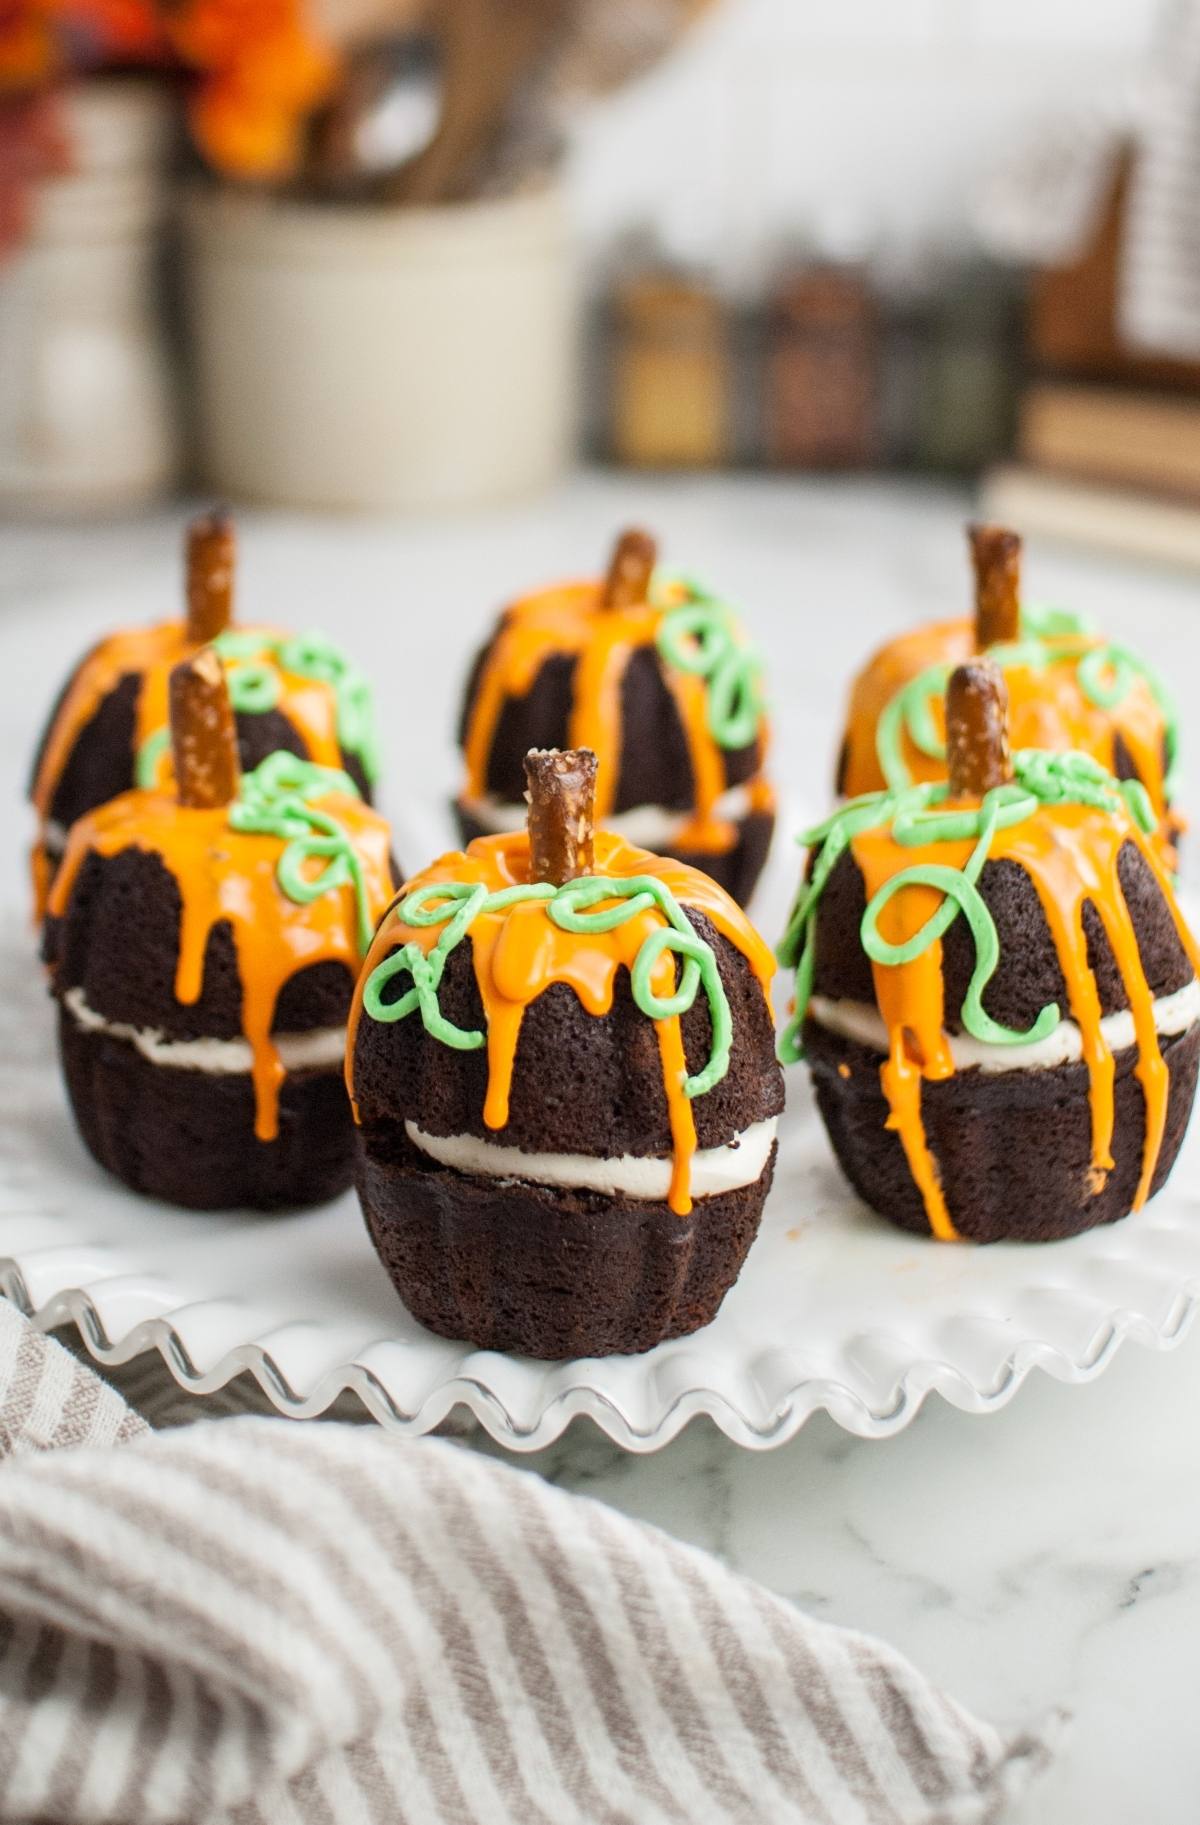
Assemble pumpkins: Pipe frosting onto one bundt, then sandwich with another.
Add the vines: Tint frosting green, pipe curly shapes onto each pumpkin.
Add the drip: Microwave white frosting, tint orange, and pour over each cake.
Finish with stems: Break pretzel rods and insert into the tops as pumpkin stems.

Substitutions and Variations
Use boxed cake mix: Save time by using a spiced or chocolate boxed mix.
Make it gluten free: Swap all-purpose flour for a gluten free blend.
Use buttercream: You can use a simple buttercream in place of cream cheese frosting.
Make minis or full size: Bake in larger bundt pans or even as cupcakes.
Not a pretzel fan? You can use tootsie rolls or small cinnamon sticks for the stems or leave them off entirely.
Serving Suggestions
With a seasonal drink: Enjoy a pumpkin spice latte or a boozy hot chocolate with your pumpkin mini bundt cakes.
After dinner: Serve them after any kind of main dish, such as an autumn chicken salad or perhaps steak and squash salad. For something heartier, how about baked gnocchi Bolognese?
How to Store Pumpkin Shaped Mini Bundt Cakes
Store: These cakes will keep for several days in an airtight container in the refrigerator, although of course they’re freshest on day one.
Freeze: I haven’t tried freezing these but I expect it would be best to freeze just the cakes and then add the frosting and decorations after thawing.
Top Tips
Use nonstick spray generously: This helps the cakes come out cleanly.
Trim flat tops: This makes stacking them easier and more stable.
Color the frosting slowly: Add coloring in small amounts until the shade looks right.
Check the drip texture: Test it before pouring to avoid too much runoff.
Pumpkin Shaped Mini Bundt Cakes FAQs
Bundt cakes date back further than most people realize. Named for their distinctive shape, not ingredients, they were inspired by the European Gugelhupf. Nordic Ware began producing the aluminum pans in the 1950s. Today, Bundt cakes are more popular than ever, with countless recipes and even bakeries dedicated solely to them.
Yes, you can bake the cakes a day ahead and decorate the next day.
Mini bundt pans give the best shape but cupcakes or muffin tins also work.
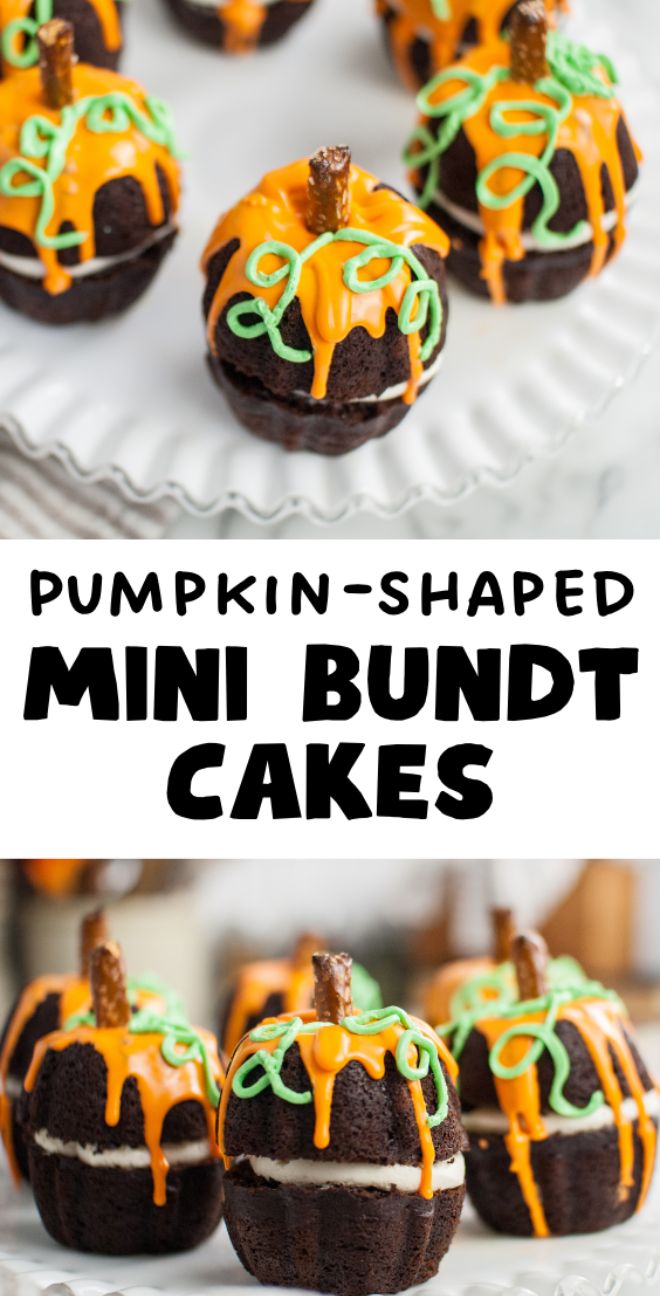
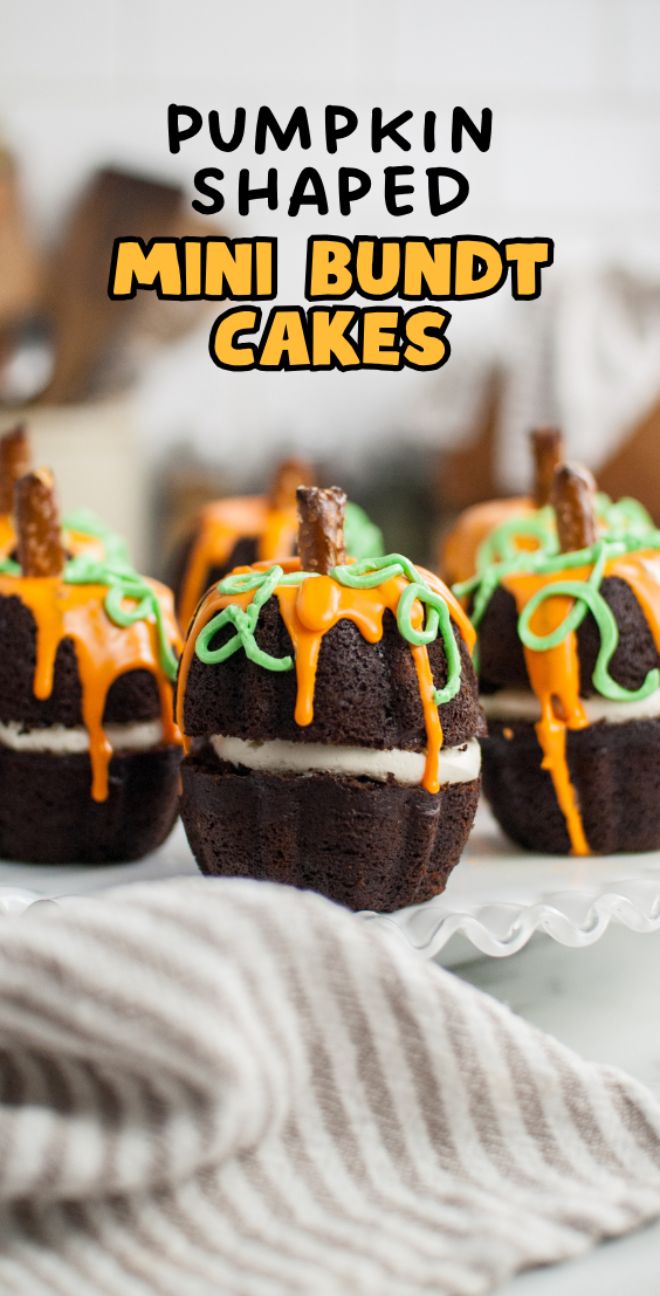
Dark Chocolate Pumpkin Shaped Mini Bundt Cakes Recipe
Pumpkin Shaped Mini Bundt Cakes
Equipment
- Mini Bundt Cake Molds
- Pastry Bag or Ziploc Bag
Ingredients
- 15 Ounces pumpkin purée, unsweetened
- 1 Cup milk
- 1 ¾ Cups all purpose flour
- 1 Cup granulated sugar
- ¾ Cup dark brown sugar, packed
- ⅔ Cup cocoa powder
- 2 eggs
- ¼ Cup olive oil
- ¼ Cup light corn syrup
- 1 ½ Teaspoon baking powder
- 1 ½ Teaspoon baking soda
- 1 Teaspoon ground cinnamon
- ½ Teaspoon ground cloves
- ½ Teaspoon ground nutmeg
- ½ Teaspoon salt
- 1 Tablespoon vanilla extract
- 5 pretzel rods, large
- nonstick cooking spray
For the Middle Frosting
- 4 Ounces cream cheese
- 1 Cup butter
- 3 Tablespoons heavy cream
- 1 ¼ Cups icing sugar
- 1 Teaspoon vanilla extract
For the Top Frosting
- 1 Can frosting, white
- orange food coloring
- green food coloring
Instructions
- Preheat the oven to 350°F
- Using a baking spray, spray each of the mini bundt molds.
Make the Cake Batter
- In a large mixing bowl, mix together the pumpkin, milk, oil, eggs, corn syrup, and vanilla.
- Sift in the cocoa powder, baking powder, baking soda, salt, cinnamon, clove, and nutmeg.
- Once thoroughly combined, mix in the flour.
Bake the Cakes
- Fill each mold about ⅔ the way full.
- Bake in a preheated oven for 20 to 30 minutes.
Cool and Trim Them
- Take the cakes out when they are fully cooked. Let cool for a few minutes then gently remove the cakes from the molds and let cool completely.
- Once cool, use a serrated knife to cut off any “dome” that may have formed while the cakes were cooking, you want the bottoms of all of the bundts to be completely flat.
Make the Cream Cheese Frosting
- Mix together the softened butter, powdered sugar, and cream cheese until light and fluffy in the bowl of a stand mixer.
- Add in the heavy cream and vanilla and continue to mix until fluffy.
- Put the frosting into a Ziploc bag and seal the top. Snip off one of the bottom corners of the bag, and pipe the frosting onto the flat side of half of the bundts. You can use a pastry bag if preferred.
- Place one of the unfrosted bundts onto the frosted side of enough, creating a sandwiched pumpkin.
Make the Top Frosting
- To make the top frosting scoop about a ¼ cup of the frosting into a small bowl and mix it with some green food coloring, place the now green frosting into a zip top bag, seal the top, and snip just a tiny little bit from the tip of one of the bottom corners of the bag – you will use this to pipe the curly vines onto the pumpkins.
Add the Orange Frosting and Pretzel Stems
- Microwave the remaining frosting for about 15 to 20 seconds, remove from the microwave and stir, you want a texture that will be easy to pour but not too runny. Mix in some orange food colouring to reach the desired orange colour. You can test if the frosting is runny enough or too runny on the back side of one of the pumpkins.
- Create a drip effect on each one of the pumpkins, making sure to cover the tops fully enough so that they slowly drip down the pumpkin a bit.
- Finish the pumpkin by snapping off the end of a pretzel rod (it should be about 2 ½ to 3 inches long) and stick it down the center of the pumpkin to make it look like a pumpkin stem.
Notes
Trim flat tops: This makes stacking them easier and more stable.
Color the frosting slowly: Add coloring in small amounts until the shade looks right.
Check the drip texture: Test it before pouring to avoid too much runoff.
Nutrition

These pumpkin bundt cakes are soft, moist and spiced just right. The decorating process is fun and the finished treats look almost too cute to eat. From the chocolate flavor to the creamy middle, every bite is worth it. These pumpkin shaped mini bundt cakes will be the hit of any autumn event or Halloween celebration. They’re easy to transport, make a fun edible craft, and are guaranteed to impress.
Other Recipes to Try
Bella Bucchiotti
Bella Bucchiotti is a Canadian-based syndicated food, travel, and lifestyle writer, photographer, and creator at xoxoBella. She founded xoxoBella in 2015, where she shares her love for food, dogs, sustainability, fitness, crafts, outdoor adventures, travel, and philanthropy to encourage others to run the extra mile, try new recipes, visit unfamiliar places, and stand for a cause. Bella creates stress-free and family-friendly recipes for weeknight dinners and festive feasts.


I love the mini bundt cake shape. They’re so easy to eat!!
So cute! I loved these and so did the kids
This is how good these are. I made them yesterday and I only have one left – one!! There are 4 of us here but we couldn’t stop. They’re seriously amazing and perfect for the fall! Guess I will be baking tomorrow as well! Can I leave 6 stars???
I love pumpkin and chocolate!