
This post may contain affiliate links, please see the privacy policy for details.
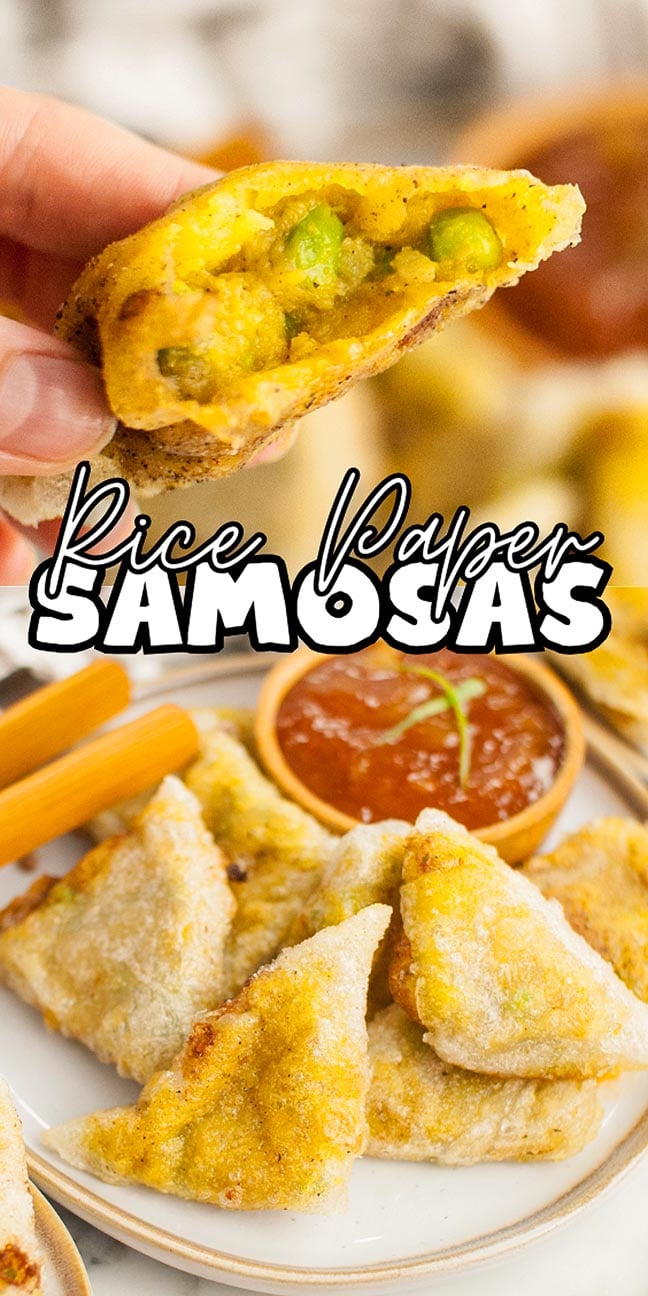
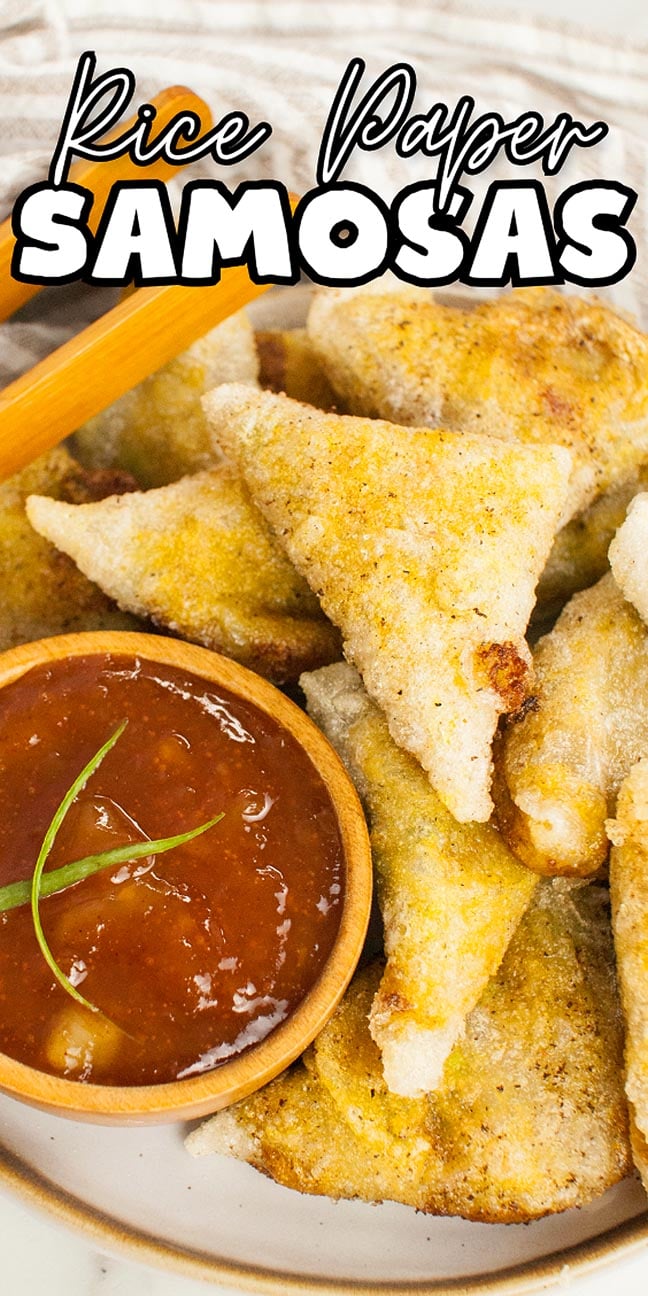
Rice paper samosas are one of my favorite shortcuts when I’m craving homemade samosas without the time and effort of making pastry from scratch. Wrapped in rice paper and pan-fried until perfectly crisp, they’re filled with a warmly spiced potato and pea mixture that’s comforting, flavorful, and satisfying. They’re wonderfully light, irresistibly crunchy, naturally gluten free, and hard to stop eating once you start. I love serving them with a tangy chutney for dipping, although they’re just as delicious fresh from the pan while they’re still hot and crispy.

Why You’ll Love It

A rice paper samosa is every bit as delicious as a traditional pastry-wrapped version. The crispy rice paper shell gives way to a warmly spiced potato, pea, and onion filling that’s packed with classic Indian-inspired flavors.
Wonderfully crispy: Rice paper fries up beautifully, creating a light, golden, crunchy shell that pairs perfectly with the soft, flavorful filling.
Naturally gluten-free: Rice paper makes an excellent alternative to traditional pastry, so you can enjoy this rice paper samosa air fry recipe without the gluten.
Easier than traditional samosas: Skip making the dough from scratch and enjoy all the comforting flavors of homemade samosa rice paper bites with much less effort.

More gluten free ideas include these lemon bars, sweet and sour sauce, GF pulled pork, broccoli pasta salad, and these egg roll wrappers.

Crispy Rice Paper Samosa Ingredients
A complete list of ingredients and amounts can be found in the recipe card below.
Rice paper: Rice paper is my favorite shortcut for making gluten-free samosas. It fries up beautifully, creating a light, crispy wrapper without the hassle of making pastry from scratch.
Potatoes, onion and peas: I like using Yukon Gold potatoes because they mash up nice and creamy while still keeping a little texture. The peas add pops of sweetness, and the onion gives the filling plenty of savory flavor.
Garam masala: This warm, fragrant spice blend gives the filling its classic samosa flavor. Every brand is a little different, so use one you enjoy since it really shines in this recipe.
Butter: A little butter makes the mashed potatoes extra rich and creamy. If you’re making these vegan, simply swap in your favorite plant-based butter.
Curry powder: I like pairing curry powder with garam masala because they complement each other so well, adding even more warmth and depth to the filling.
Vegetable oil: Use a neutral oil with a high smoke point for the best results. I like vegetable oil because it lets the spices and filling flavors take center stage.

How to Make Potato Samosas in Rice Paper
For more detailed instructions with weights and measurements, jump to the printable recipe card.
Prepare the filling: Boil the potatoes and sauté the onion before adding the spices. Add the peas. Drain the potatoes and then mash them. Combine the potatoes with the pea mixture and then add more spices.
Soften gluten free rice paper wrappers: Dip them in cool or warm water to soften.
Fill the samosas: Cut each softened rice paper wrapper in half and add some filling before rolling it up. Repeat with the rest of the samosa paper and the potato and pea samosa filling until it’s all used.
Fry and serve: Fry them until crisp and sprinkle some pepper, garam masala and curry powder over each homemade Indian samosa before serving.
Air fryer option: Lightly coating the rice paper with oil helps it crisp up beautifully. If the samosas aren’t as golden as you’d like after 10 minutes, cook them for another minute or two, checking frequently so they don’t overcook.

Substitutions and Variations
Potatoes: Sweet potatoes would add a tasty twist to the flavor.
Peas: You can use green beans or okra instead.
Vegan version: Swap the butter for your preferred vegan alternative, perhaps coconut oil.
Onion: Use a yellow, red or white onion, or even a sweet one such as Vidalia.
Make them spicy: Add some chili powder, red pepper flakes, minced fresh chili pepper or hot sauce.
Air fryer option: Instead of frying in oil, cook the assembled samosas in a preheated 375 degrees F air fryer for 10 to 12 minutes, turning halfway through, until crispy and golden.

Serving Suggestions
With savory snacks: Pair your rice paper samosas with naan bread or crab cake egg rolls.
As a side dish: Enjoy them with butter chicken, chicken madras or a vegetable curry and add some rice on the side.

How to Store
Store: These gluten-free vegan samosas are best enjoyed while they’re hot and crispy. But they will keep for up to 3 days. It’s best to store them in an airtight container in the refrigerator.
Freeze: You can also freeze them but, if you want to do this, undercook them a little so you can finish them off in the fryer after thawing again.
Thaw: Defrost overnight in the refrigerator.
Reheat: Warm them back up in the microwave, oven or air fryer.

Top Tips
Don’t overcrowd the pan: Leave a little space between each samosa while frying so they crisp up evenly and don’t stick together. Rice paper is delicate until it cooks and can tear if it clings to another samosa.
Pair with a good chutney: I love serving these with mango or mint chutney. Tamarind chutney is another delicious option if you enjoy a sweet and tangy dipping sauce.
Don’t worry about perfect folds: The traditional triangle fold is fun to do, but don’t stress if yours aren’t picture-perfect. As long as the filling is completely sealed inside, they’ll fry up beautifully.
Prep ahead: I often make the filling a day in advance to save time. You can also assemble the samosas a few hours ahead, store them in an airtight container in the refrigerator, and fry them just before serving for the crispiest results.

Gluten Free Samosa FAQs
Rice paper tears most often when it’s soaked for too long or overfilled. I only dip each sheet in warm water for a few seconds because it continues to soften as it sits. If it feels a little firm at first, don’t worry. It will become much easier to fold after about 20 to 30 seconds.
Most grocery stores carry rice paper in the international foods aisle, often near Asian ingredients. If you can’t find it there, try an Asian supermarket or order it online. It’s commonly sold for making fresh summer rolls and fried rice paper recipes.
Yes! Lightly brush or spray the assembled samosas with oil and air fry them at 375 degrees F for about 10 to 12 minutes, turning them over halfway through cooking. They come out wonderfully crispy while using much less oil than traditional frying.
Yes. Lightly brush the assembled samosas with oil and bake them at 400 degrees F until they’re crisp and golden, flipping them halfway through cooking. They won’t be quite as crispy as pan-fried or air-fried samosas, but they’re still delicious.
Yes. I often make the potato filling a day in advance and keep it refrigerated until I’m ready to assemble the samosas. You can also fold them a few hours ahead and refrigerate them in a single layer before frying. For the crispiest results, fry or air fry them just before serving.

Rice Paper Samosa Recipe

Rice Paper Samosas
Equipment
Ingredients
- 5 potatoes, medium, golden or Yukon
- 1 Cup peas, frozen
- 1 onion, medium
- 3 Tablespoons butter, or vegan alternative
- 1 Teaspoon salt
- 1 Teaspoon garam masala
- 1 Teaspoon curry powder
- 1/2 Teaspoon black pepper
- 2 Tablespoons vegetable oil, or more if needed, to sauté the onion
- 20 rice papers
Instructions
- Peel and cut the potatoes into 1 to 2-inch chunks. Put potatoes in a pot of boiling water and cook until tender.
- While the potatoes are boiling, mince the onion and sauté in a pan with a little oil until soft and have some color.
- When the onions are almost done, add ½ teaspoon garam masala, ½ teaspoon salt, ½ teaspoon curry powder and ½ teaspoon black pepper. Continue to cook for a few minutes, then add in the frozen peas and cook until peas are hot. Remove from heat, set aside.
- Remove your potatoes from the boiling water when they have become tender, put them into a mixing bowl with the butter and mash them using a potato masher or fork. They don't need to be smooth – it's better if they are still a bit chunky.
- Add the pea mixture to the potatoes and mix to combine. Add in the remaining spices, I like to do this a 1/4 teaspoon at a time to prevent over seasoning. Since all the ingredients are cooked you can taste as you go!
- When you are done making the filling, it's time to set up a workstation. First you will need a clean work surface with a cutting board, then a shallow plate or baking sheet that can fit the size of your rice paper.
- Pour some water into the baking sheet, enough to coat the bottom. I also recommend having a second baking sheet lined with parchment paper.
- Take a sheet of your rice paper and dip it into the water, flip it over and let it sit for just a second or two then pull it out and put it onto your cutting board. Give it a few seconds then when the sheet has softened, cut the sheet of rice paper in half with a sharp knife.
- Put about 1 1/2 to 2 tablespoons of the filling onto the very bottom middle of the sheet. Then like you would fold a flag, fold one of the bottom corners up over the top of the filling and attach it to the opposite side to create a triangle with the filling inside, then flip the triangle up once, and then flip it over once. Fold any leftover edges over and make sure there are no gaps or breaks anywhere.
- You want to make sure the filling is fully sealed, set your folded samosa on your parchment lined baking sheet and continue this process until you have used all of your filling.
- In a small bowl mix together a teaspoon of salt with a dash of pepper, curry powder and garam masala. You will be using this to lightly sprinkle on your samosas after they have been fried.
- Pour about a quarter to a half of an inch of oil in the bottom of a skillet, carefully heat the oil to 350 degrees F on your stove. Working in small batches, fry two to three samosas at a time frying for a few minutes on each side then set the samosas on to a rack to drip excess oil off. Immediately sprinkle with a bit of the seasoned salt mixture you made.
Notes
Pair with a good chutney: I love serving these with mango or mint chutney. Tamarind chutney is another delicious option if you enjoy a sweet and tangy dipping sauce.
Don’t worry about perfect folds: The traditional triangle fold is fun to do, but don’t stress if yours aren’t picture-perfect. As long as the filling is completely sealed inside, they’ll fry up beautifully.
Prep ahead: I often make the filling a day in advance to save time. You can also assemble the samosas a few hours ahead, store them in an airtight container in the refrigerator, and fry them just before serving for the crispiest results.
Nutrition


Gluten free vegan samosas offer so much flavor in every bite. This homemade Indian samosa recipe wraps the samosas in rice paper to keep them free from gluten. Enjoy them as an appetizer, side dish or snack.
Other Recipes to Try
Bella Bucchiotti
Bella Bucchiotti is a Canadian-based syndicated food, travel, and lifestyle writer, photographer, and creator at xoxoBella. She founded xoxoBella in 2015, where she shares her love for food, dogs, sustainability, fitness, crafts, outdoor adventures, travel, and philanthropy to encourage others to run the extra mile, try new recipes, visit unfamiliar places, and stand for a cause. Bella creates stress-free and family-friendly recipes for weeknight dinners and festive feasts.


Extremely complicated to copy!
I hope their worth it 🙂
I hope you liked them!
These gluten-free samosas are a game-changer! So tasty and easy to make!
This was so perfect! I made this yesterday and we enjoyed eating these with my family!
Incredibly tasty! This recipe has earned a permanent spot in my kitchen.
Wow these look so delicious and not even as difficult to make and prep as it looks! Love how it’s gluten free too!
Don’t’ have to be vegan to enjoy these! They look wonderful!
I would love to try these! I love potatoes and peas!
These vegan samosas are filled with a yummy filling and a crisp outside, perfect for snacking!
I haven’t heard of these before. I am sure I would like them! They look scrumptious.
I have never seen rice papers used. That would be so quick and easy!