This post may contain affiliate links, please see the privacy policy for details.
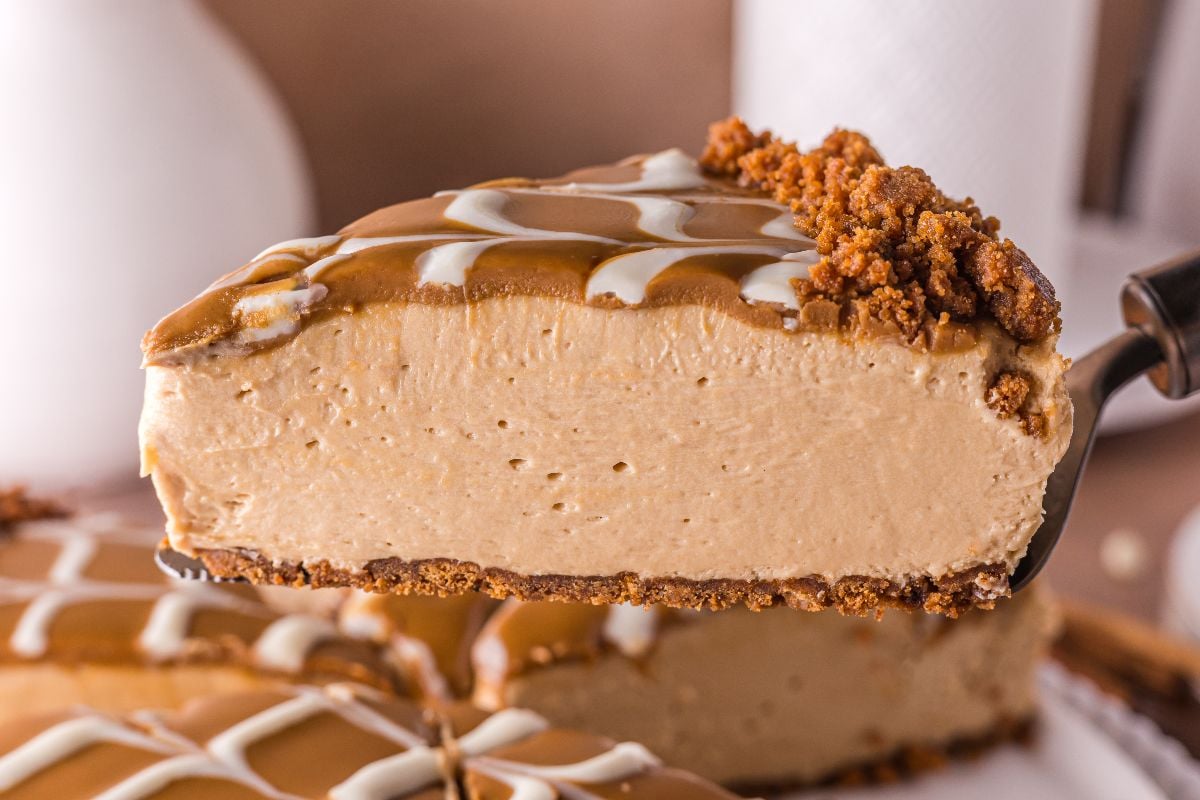
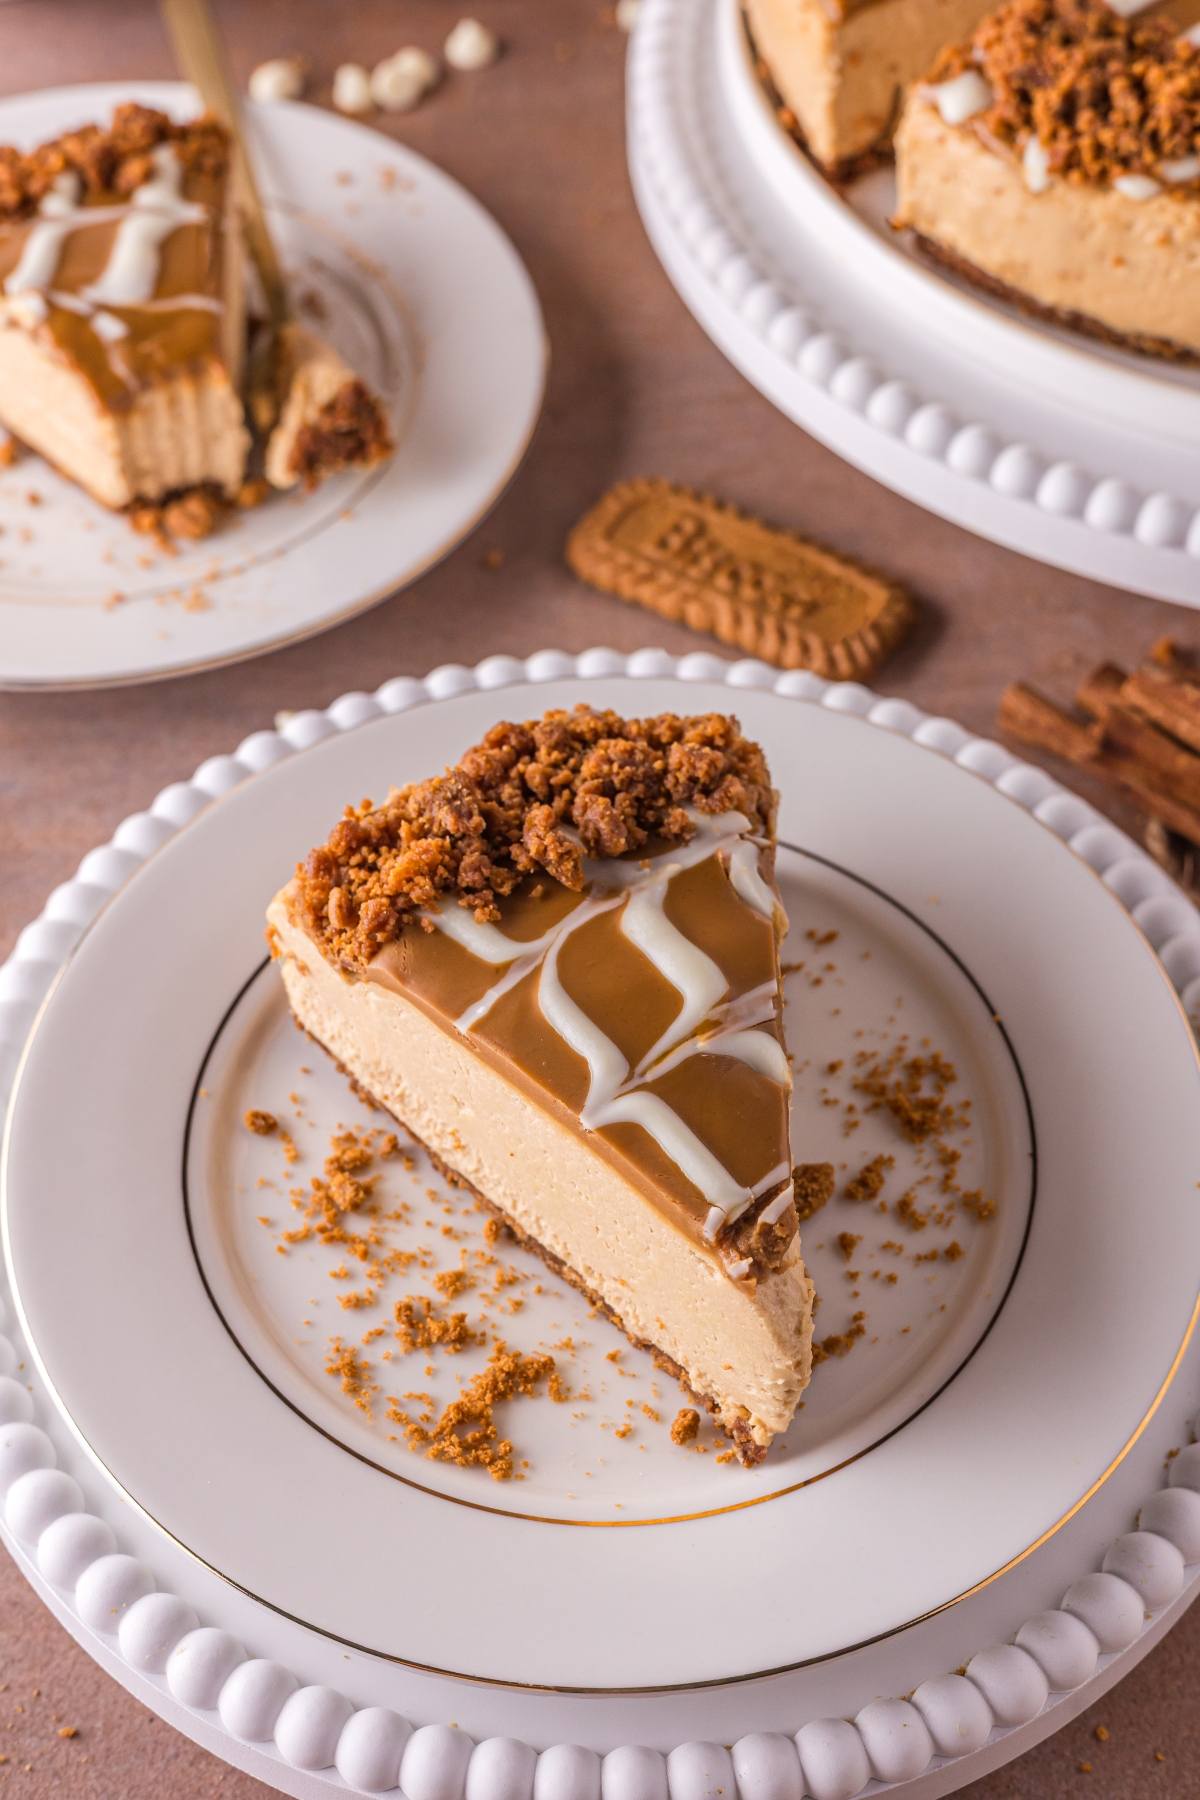
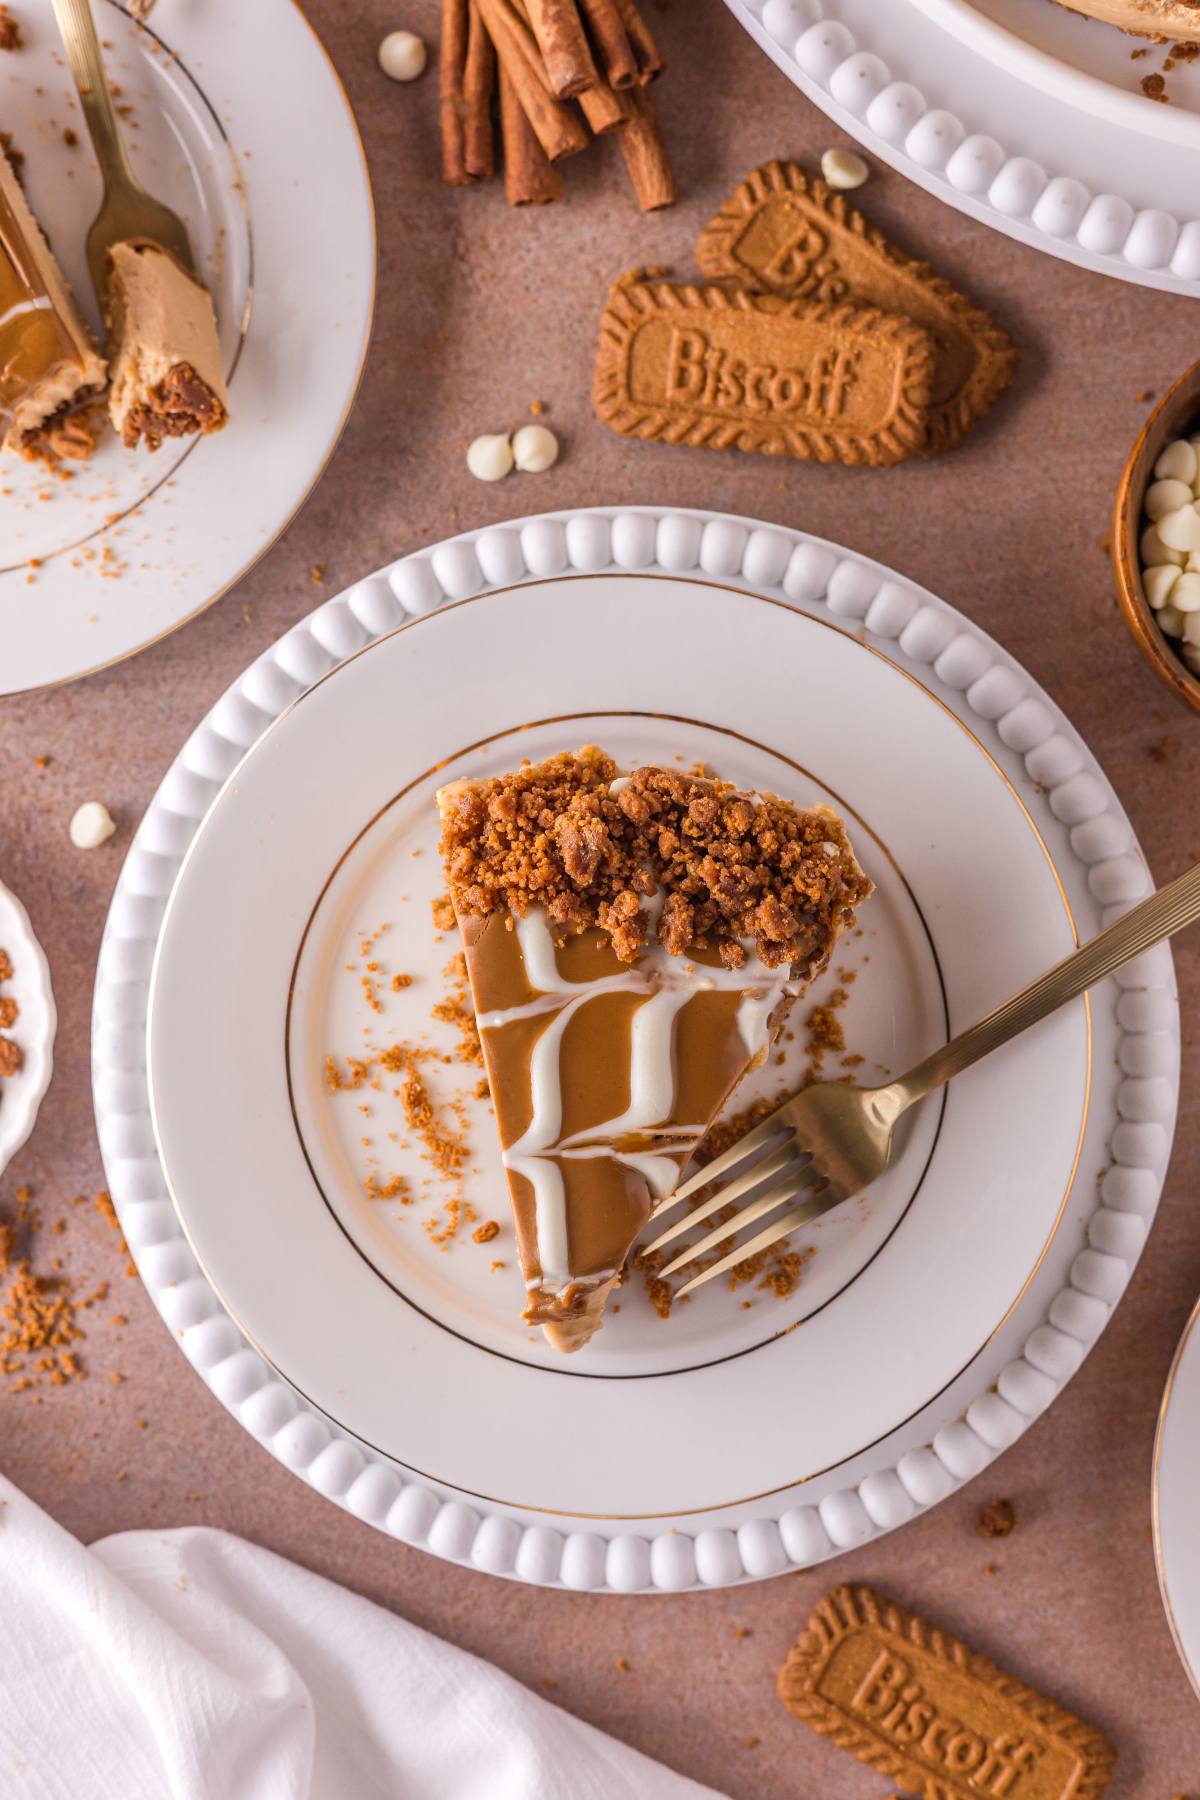
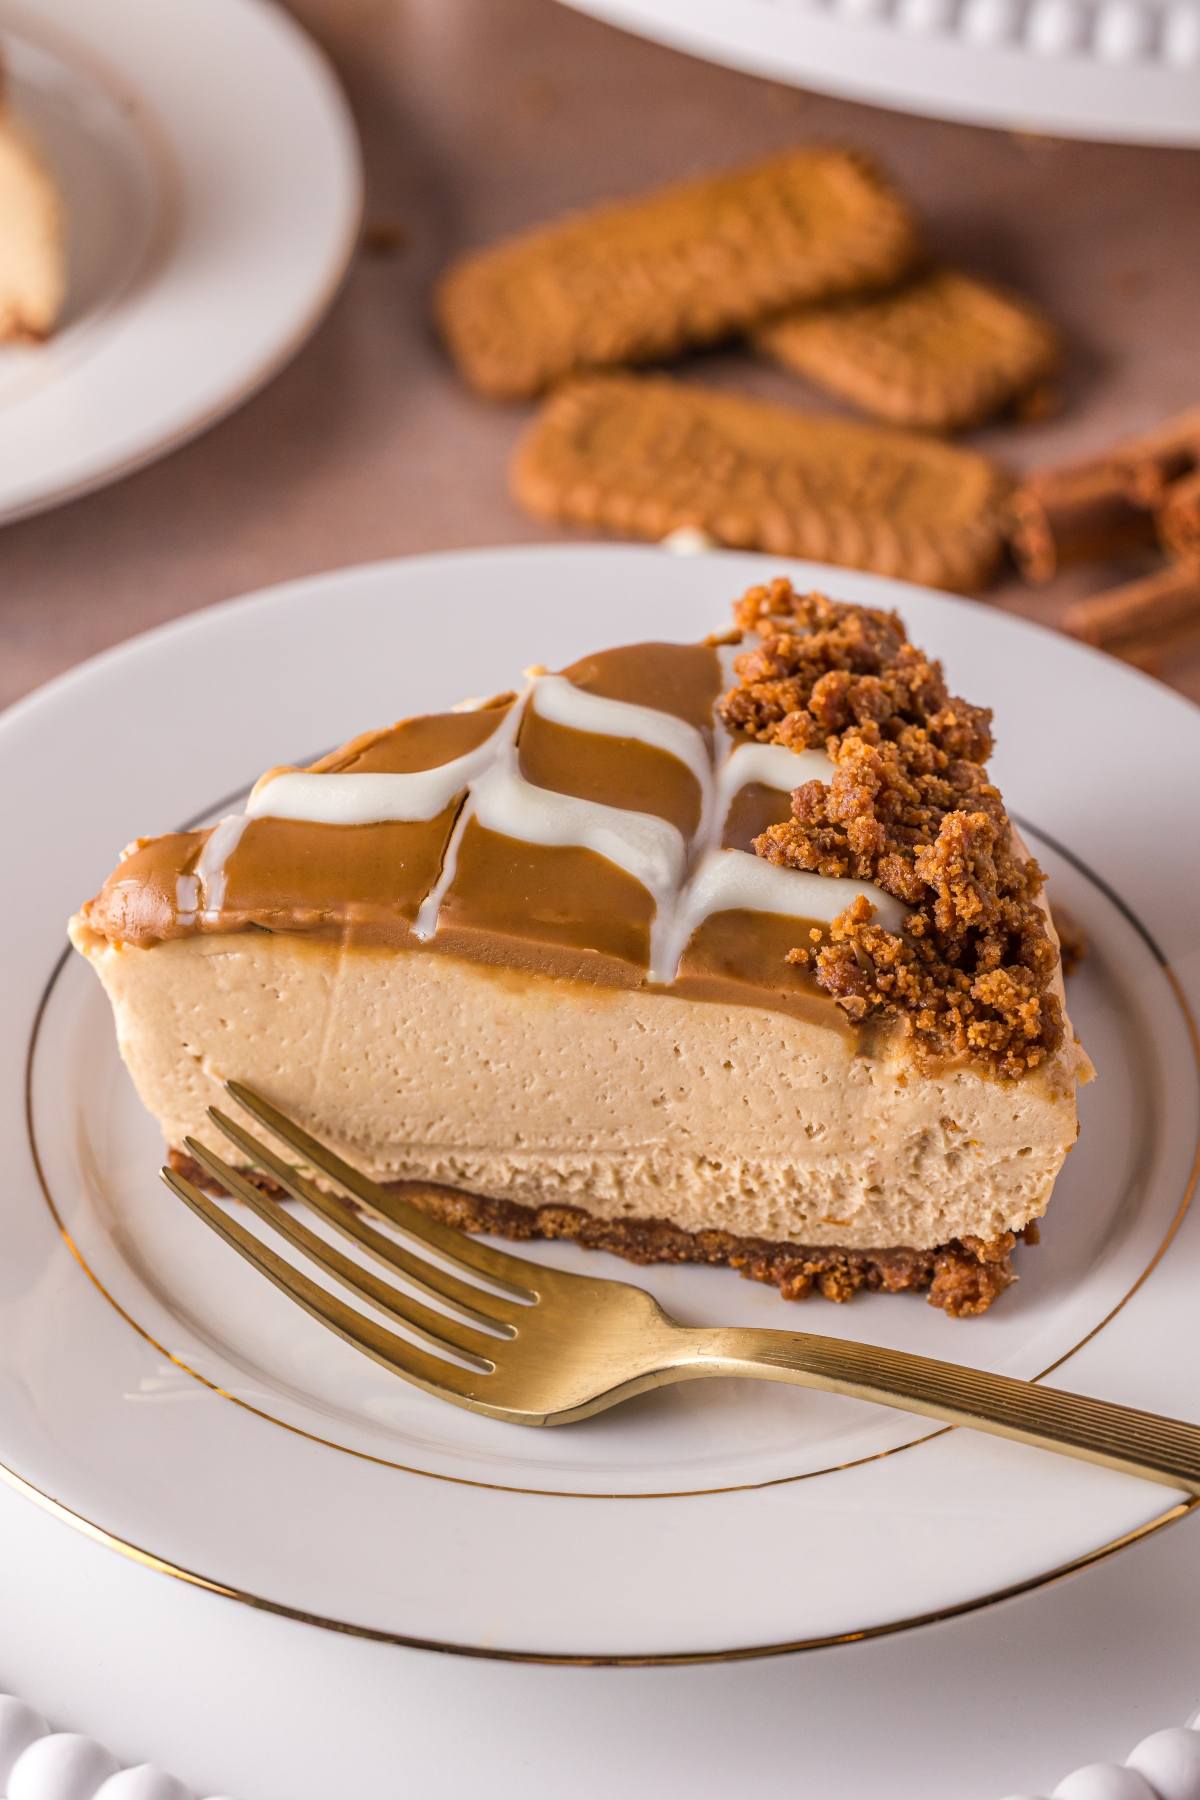
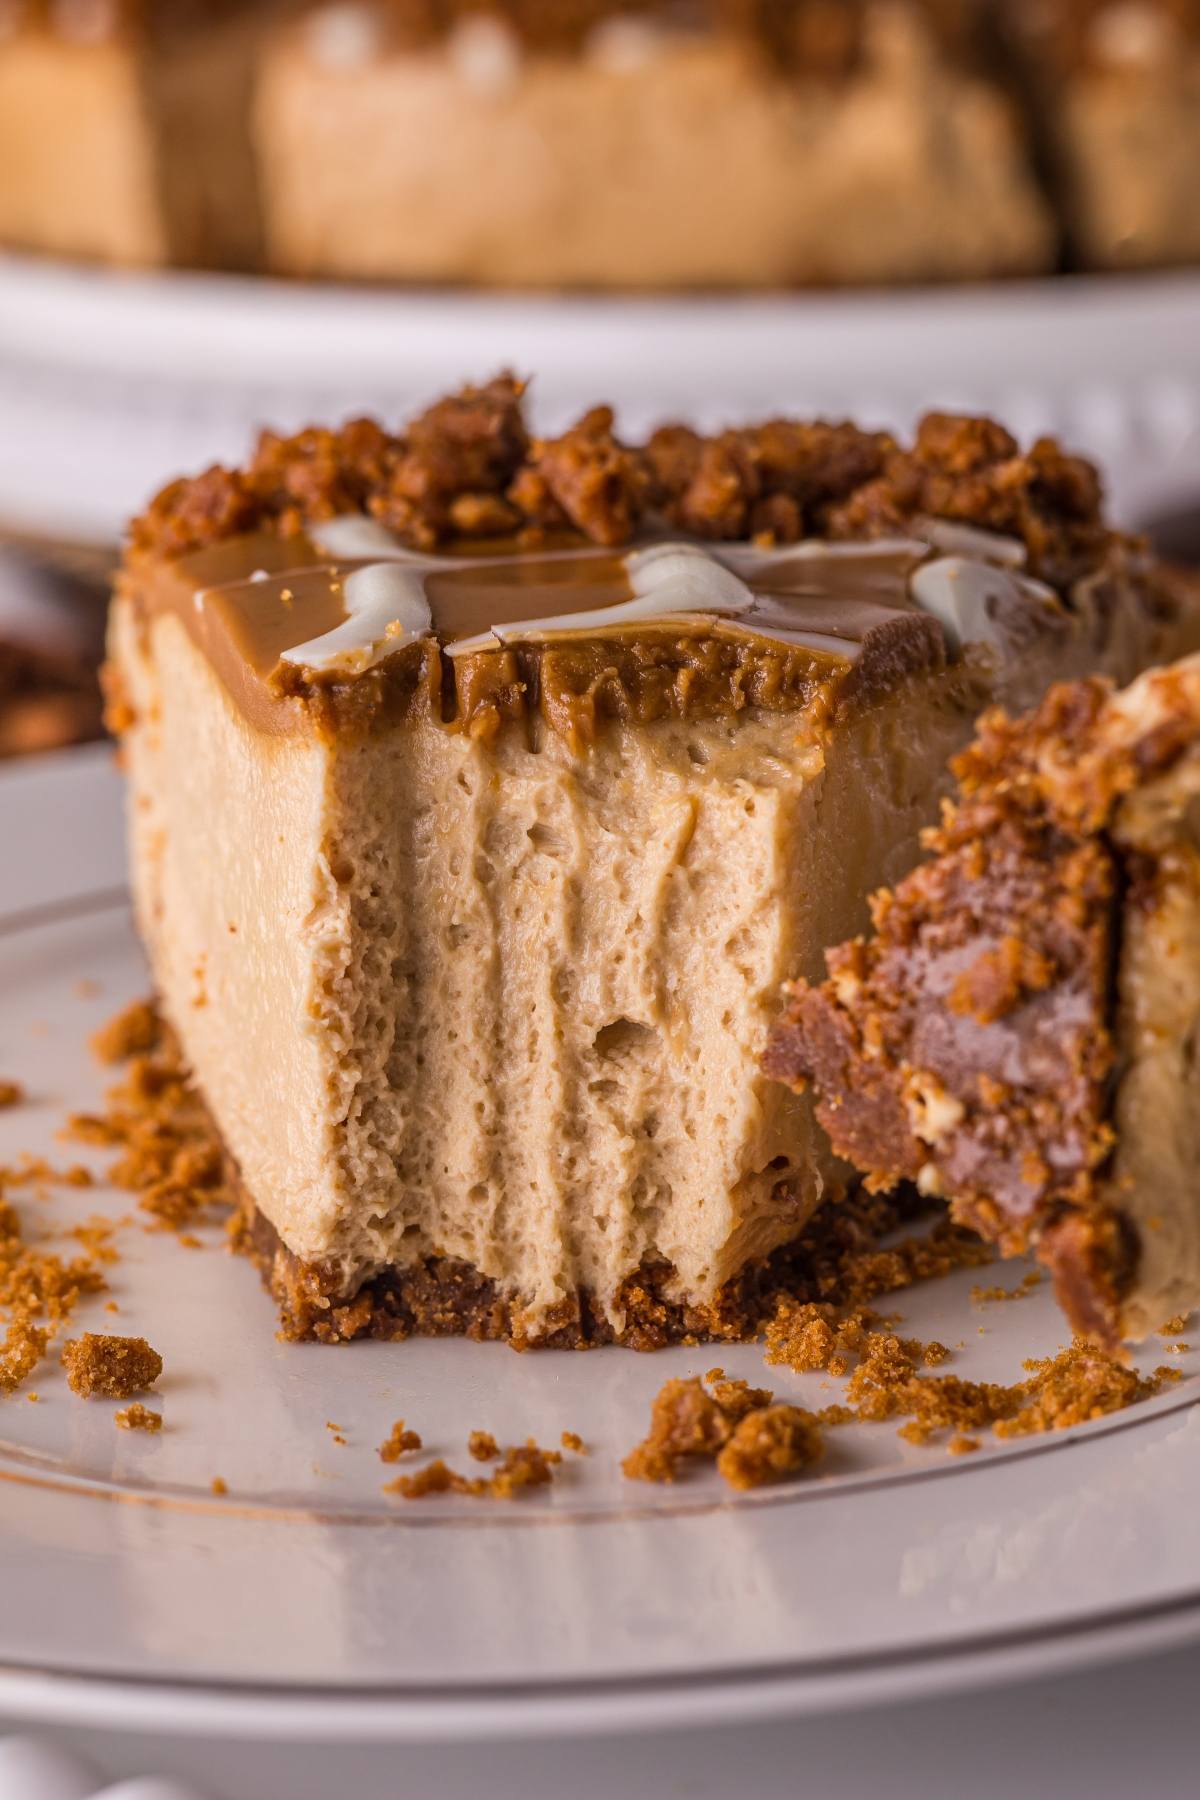
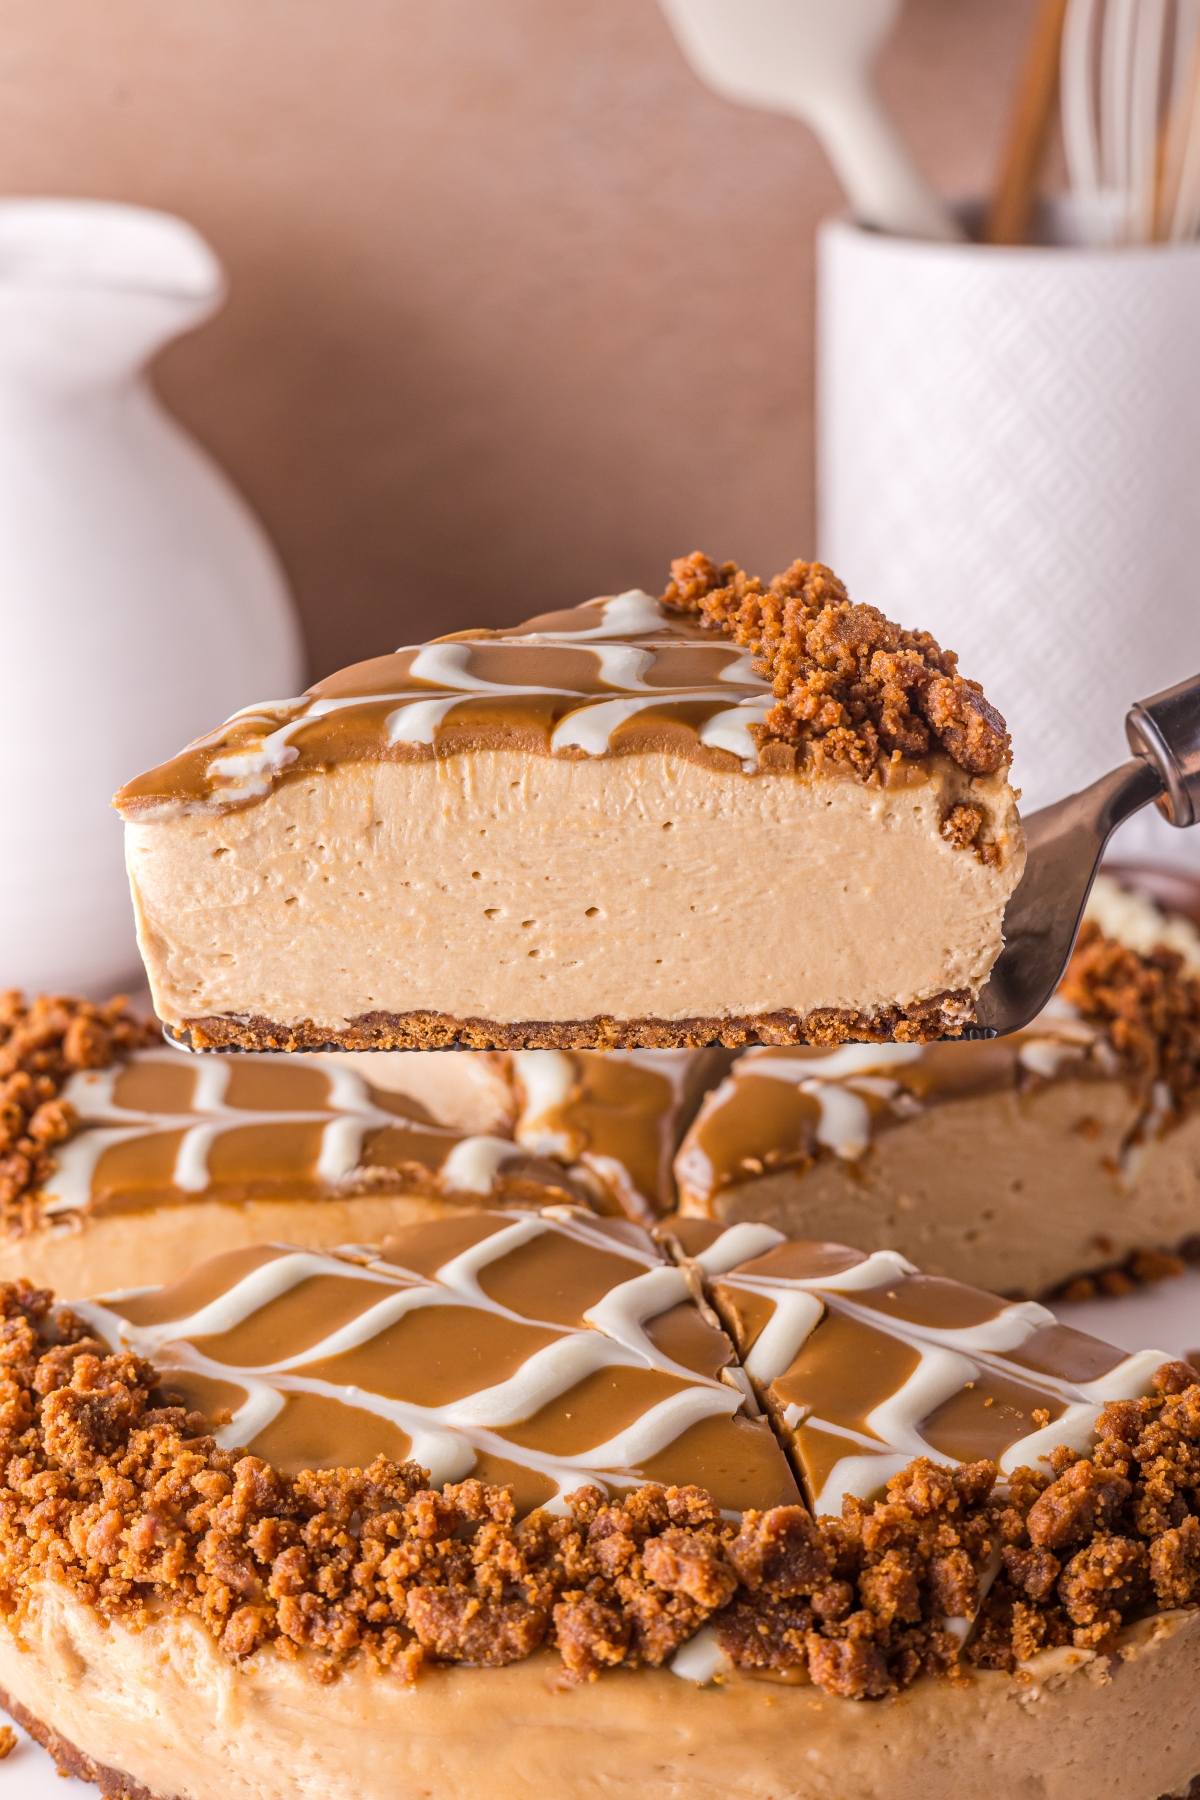
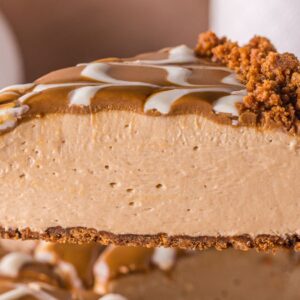
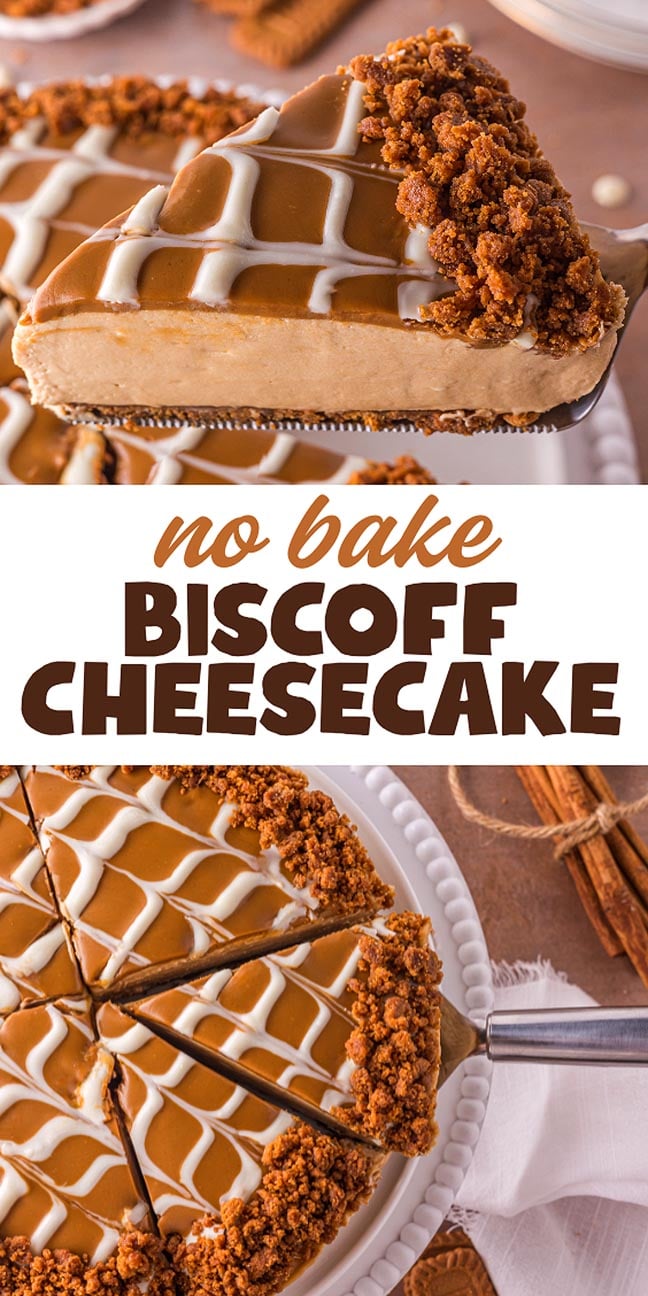
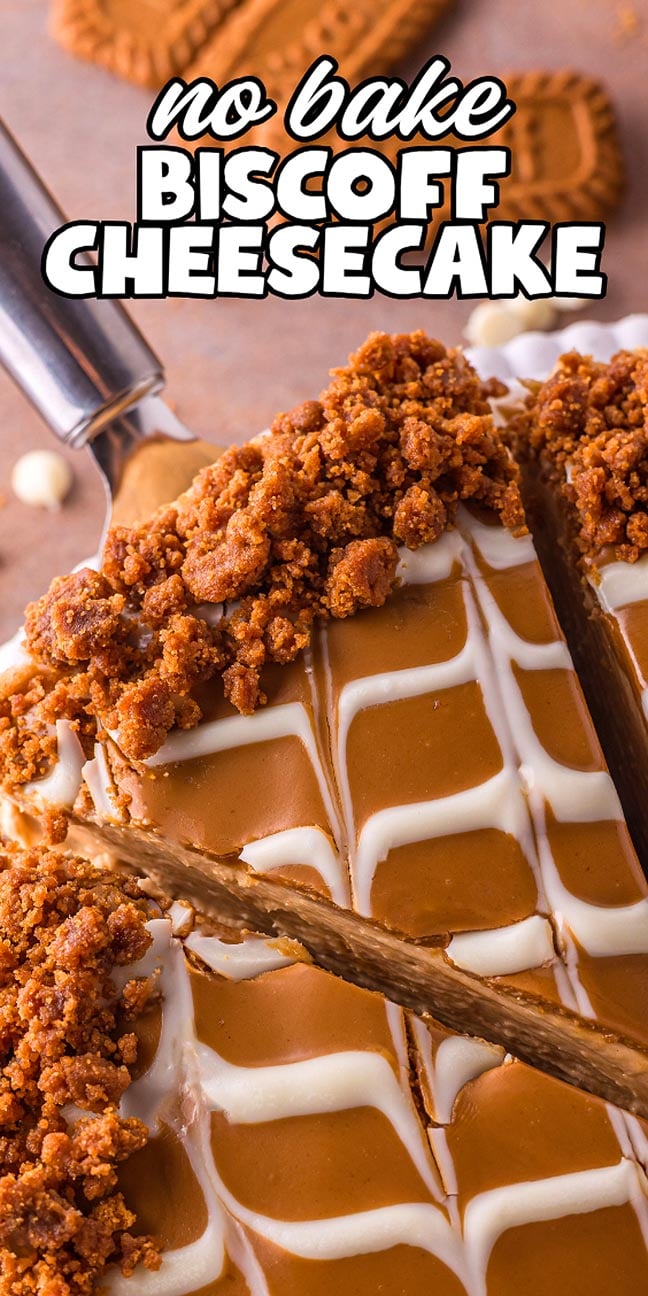
This no bake Biscoff cheesecake is a rich, chilled dessert built around bold cookie butter flavor and a smooth, sliceable texture. It starts with a spiced Biscoff cookie crust that presses firmly into the pan, then is topped with a creamy filling made from whipped cream, cream cheese and Biscoff spread. After several hours in the fridge, the cheesecake sets into clean layers. A white chocolate drizzle and extra cookie crumbs go on last, adding contrast and an impressive looking finish.
Why You’ll Love It

This cheesecake combines a buttery Biscoff crust with a thick, creamy filling. Cookie butter carries through every layer, while the white chocolate topping is so pretty.
No baking required: Everything sets in the fridge.
Strong cookie butter flavor: Biscoff shows up in every layer.
Make-ahead friendly: It holds well after chilling overnight.
Also try Biscoff tiramisu, cannoli cheesecake, apple pie cheesecake, strawberry cheesecake cookies, Biscoff panna cotta and lemon cheesecake.
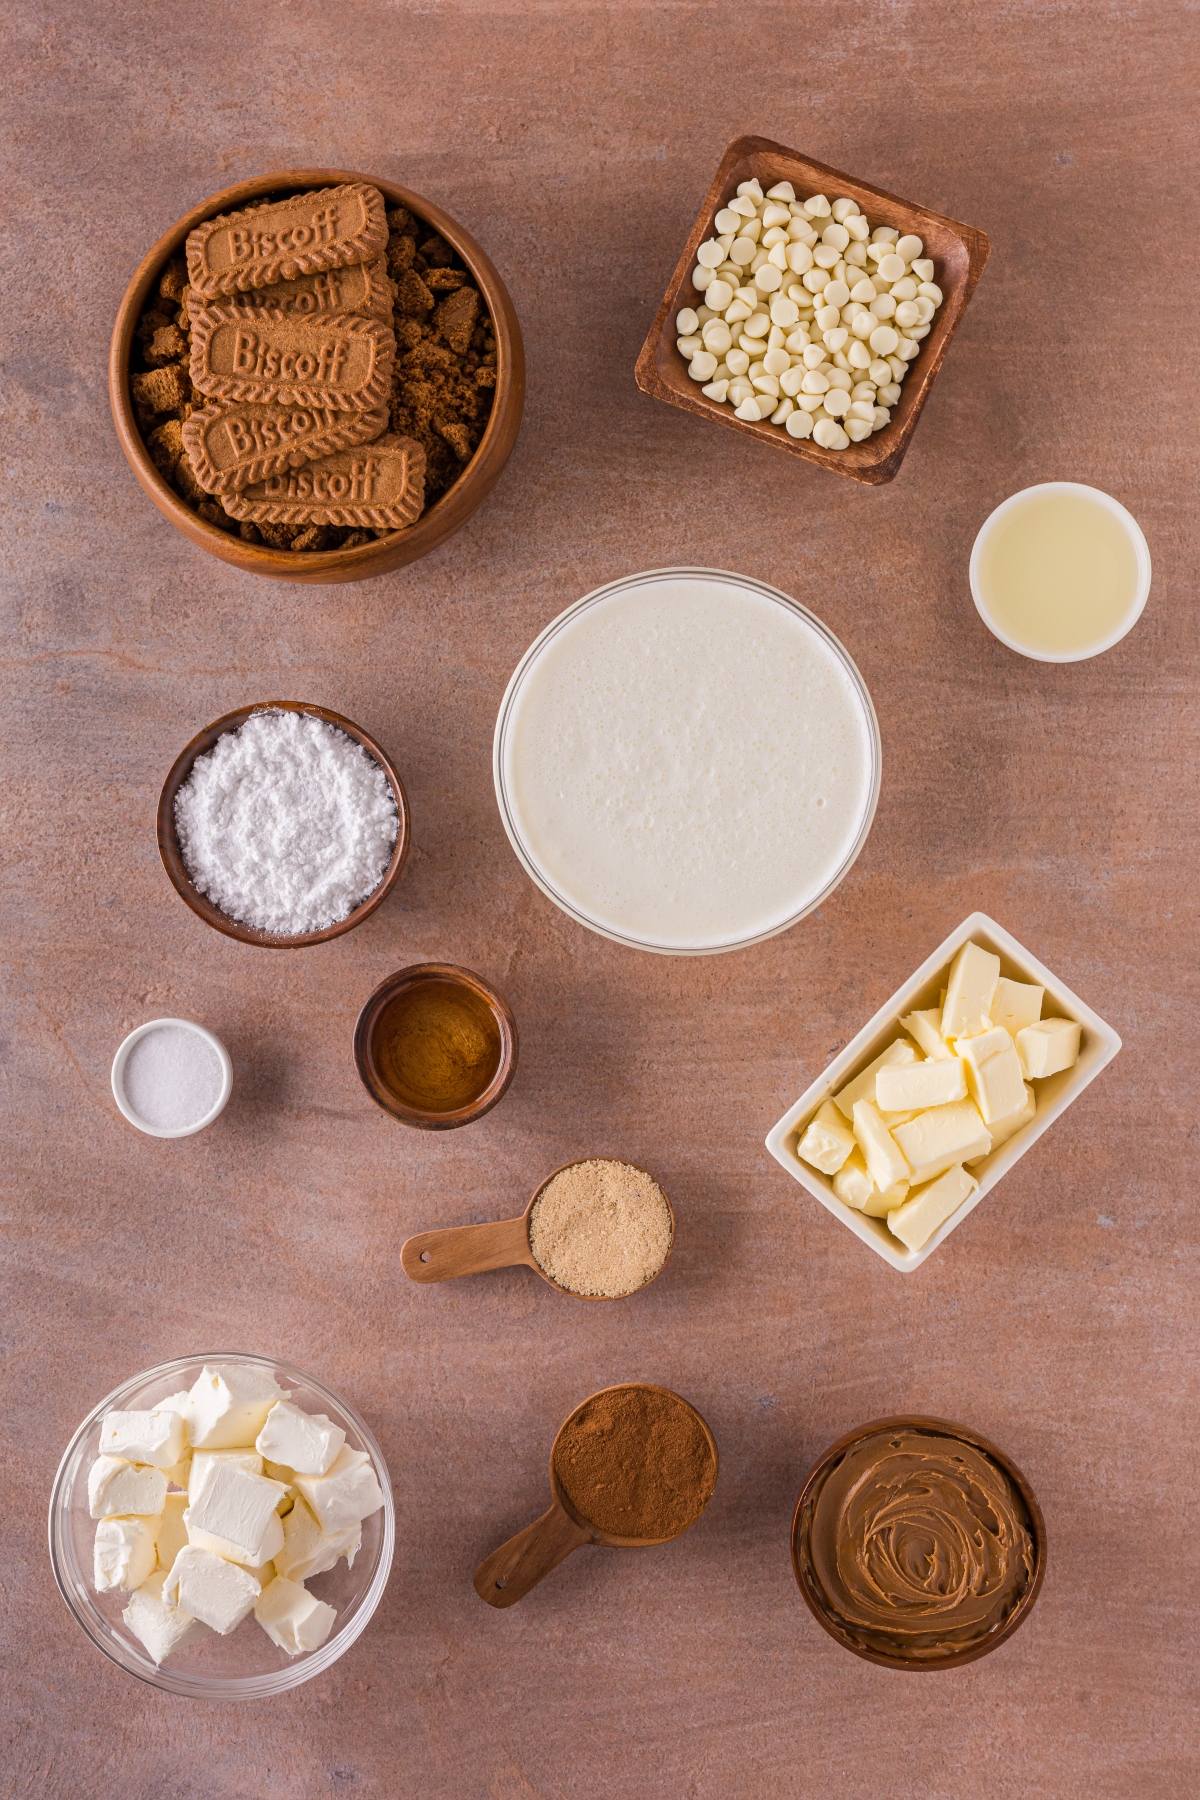
Lotus Biscoff Cheesecake Ingredients
A complete list of ingredients and amounts can be found in the recipe card below.
Biscoff cookies: Crushed to form the crust and also used as a decorative topping.
Unsalted butter: Binds the cookie crumbs into a firm base.
Brown sugar: Adds depth and warmth to the crust.
Cinnamon: Enhances the spiced flavor of the cookies.
Heavy whipping cream: Whipped to give the filling structure and lift.
Cream cheese: Forms the creamy base of the cheesecake. I recommend full fat cream cheese for the best flavor. Use brick-style cream cheese, not the whipped kind.
Biscoff cookie butter: Provides the main flavor throughout the dessert. I recommend smooth, not crunchy, Biscoff cookie butter spread.
Powdered sugar: Sweetens the filling smoothly.
Lemon juice: Balances the richness of the filling in your creamy Biscoff cheesecake.
White chocolate chips: Melted for the decorative topping. I used Ghirardelli white chocolate chips but you can use any brand you like.
Canola oil: Keeps the melted chocolate fluid for drizzling.
How to Make Biscoff Cheesecake
For more detailed instructions with weights and measurements, jump to the printable recipe card.
Prep the pan: Chill the mixing bowl and beaters, then line the bottom of a springform pan with parchment.
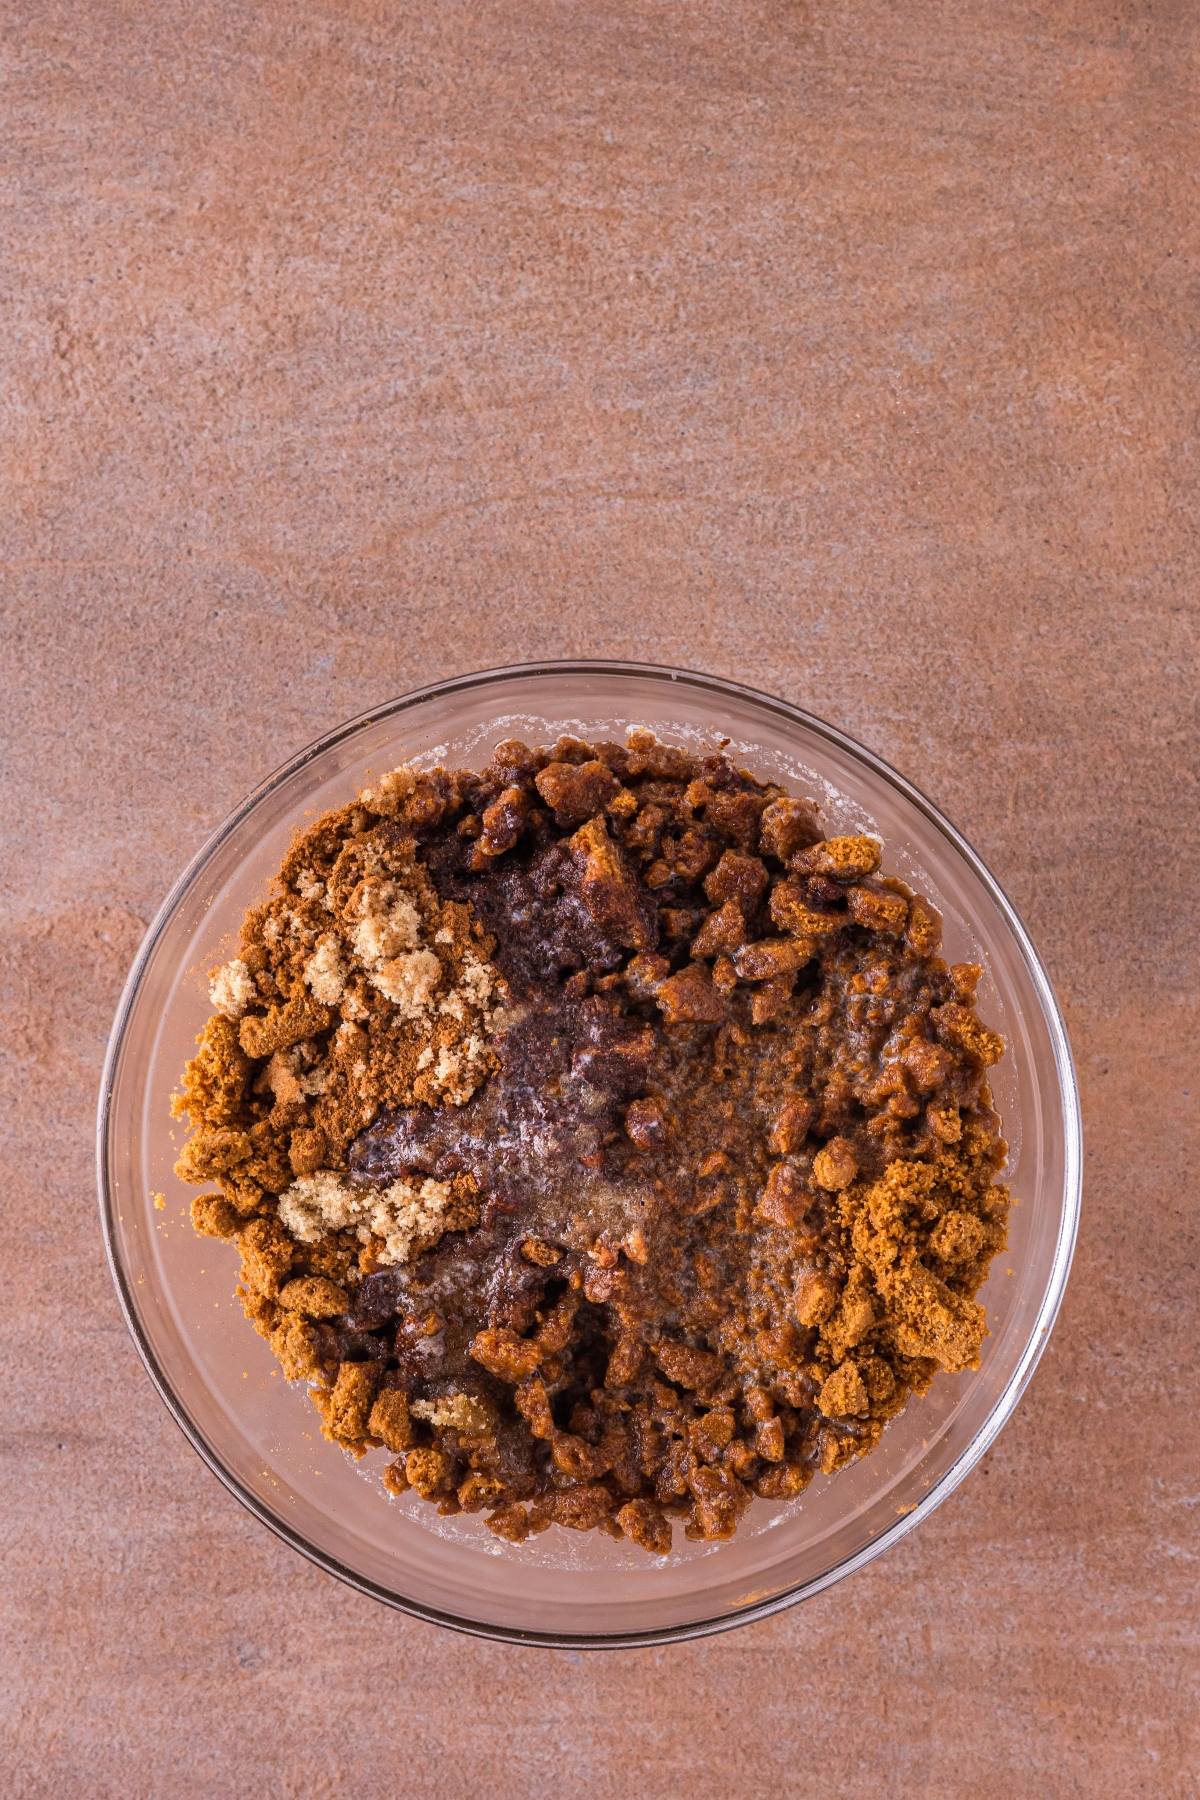
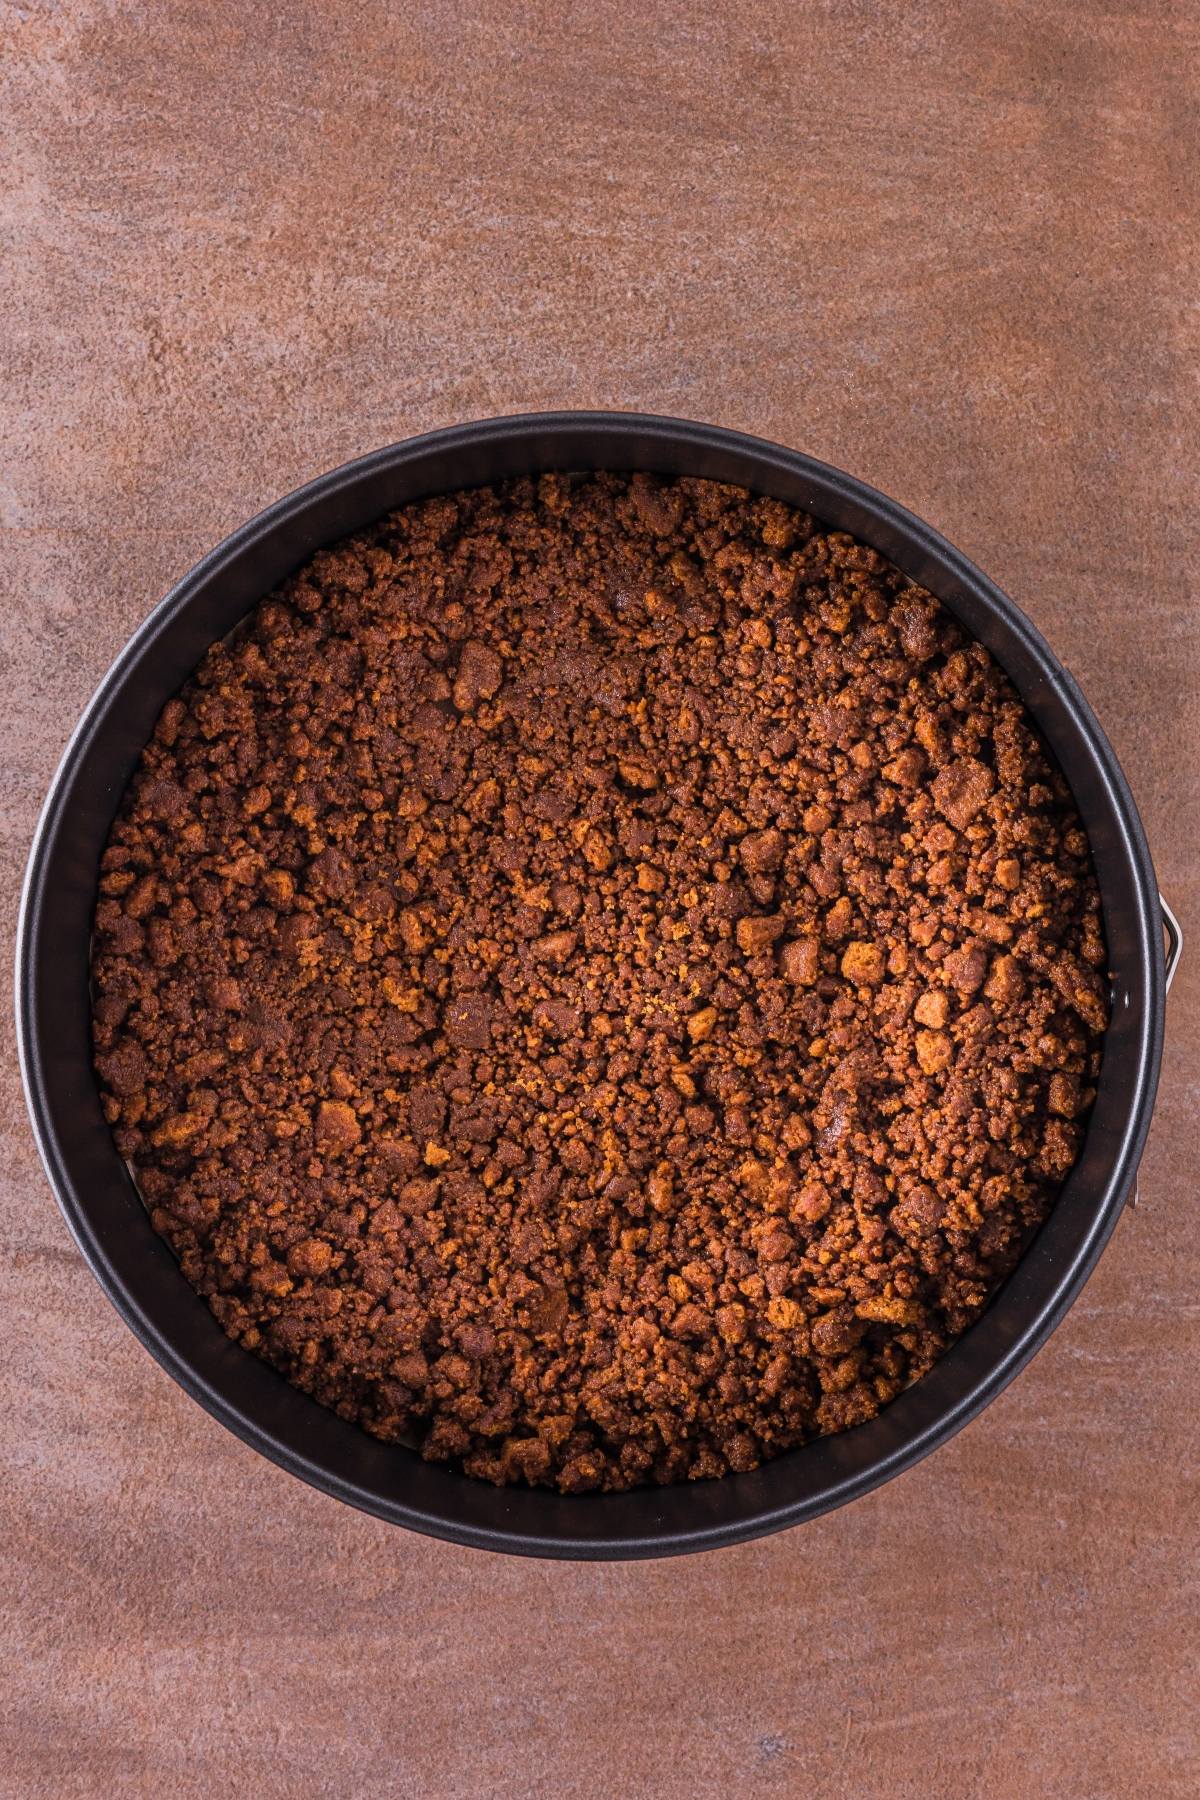
Crush the cookies: Break the Biscoff cookies into small, pebbly crumbs and mix with melted butter, brown sugar and cinnamon.
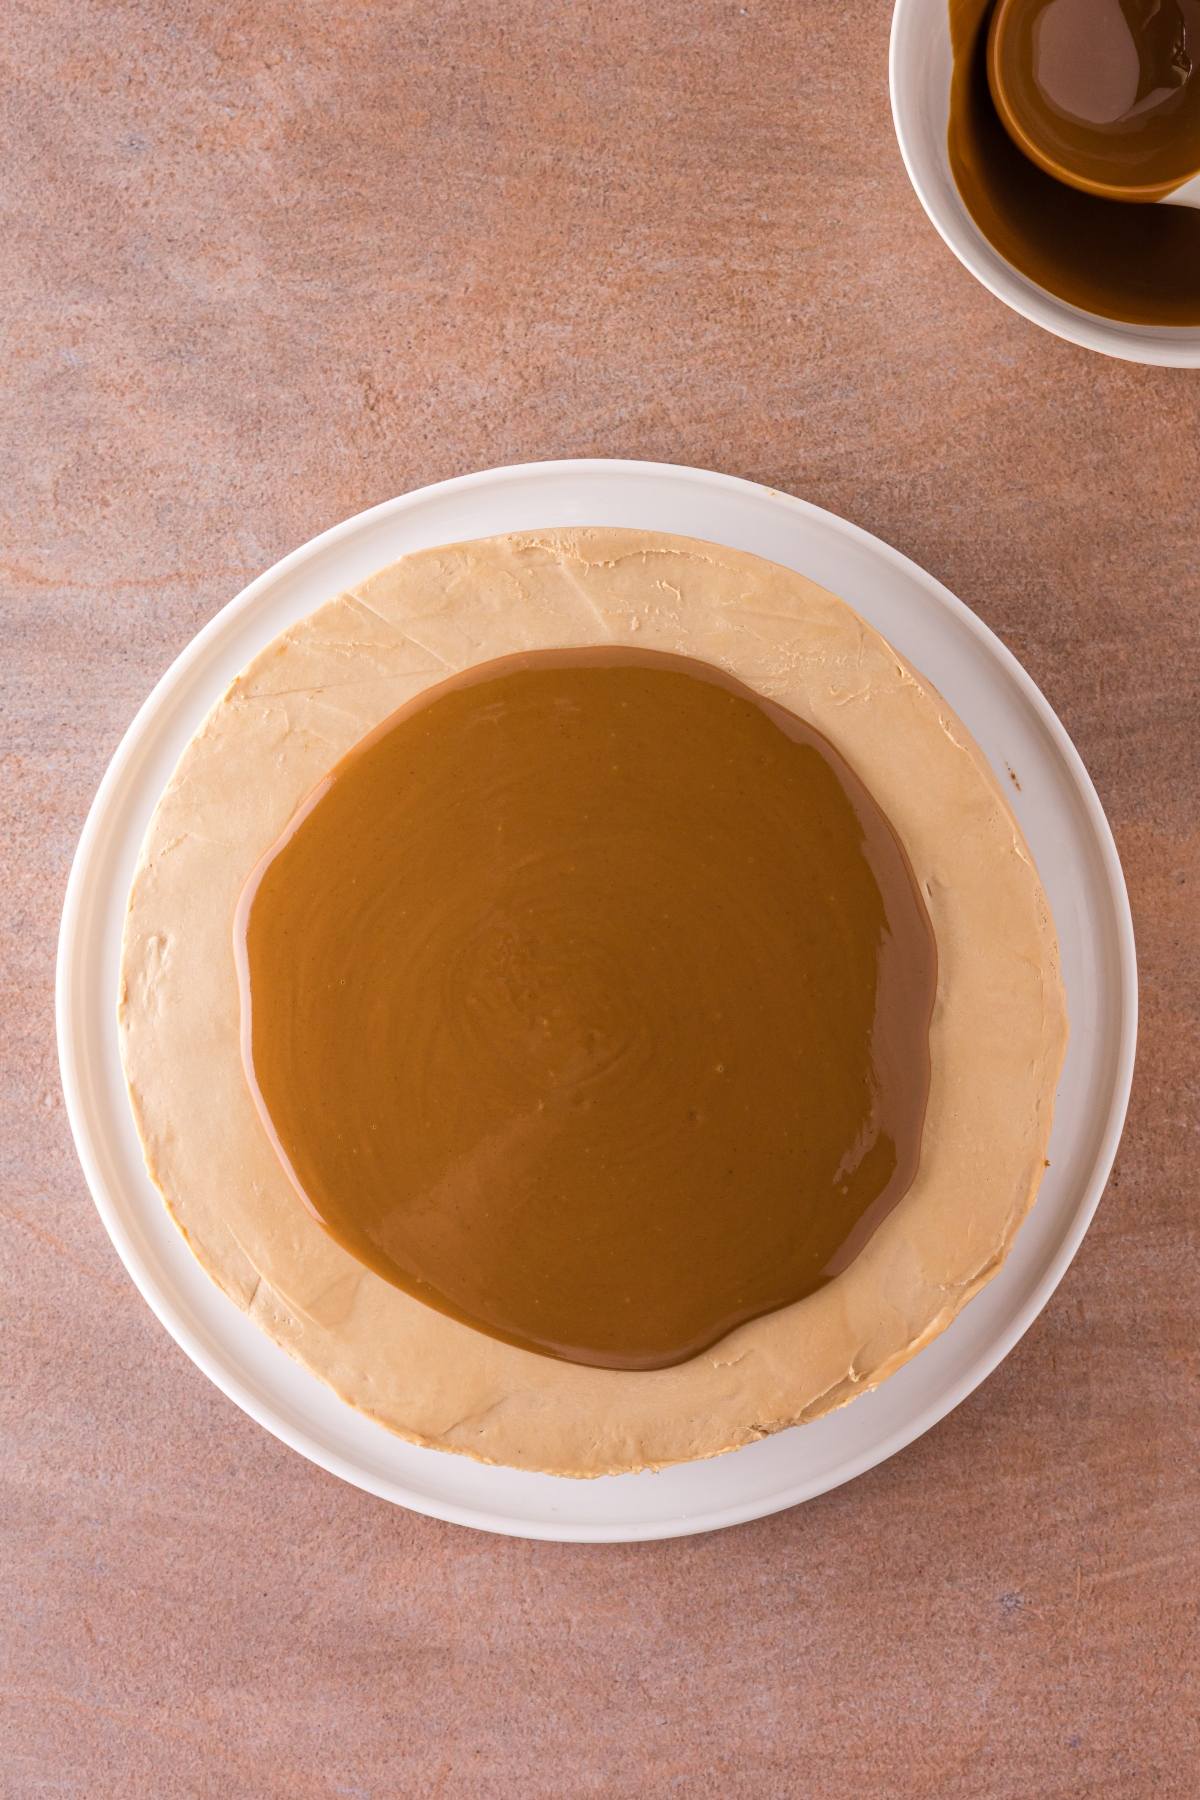
Form the crust: Reserve some crumbs for topping, then press the rest firmly into the bottom of the pan.
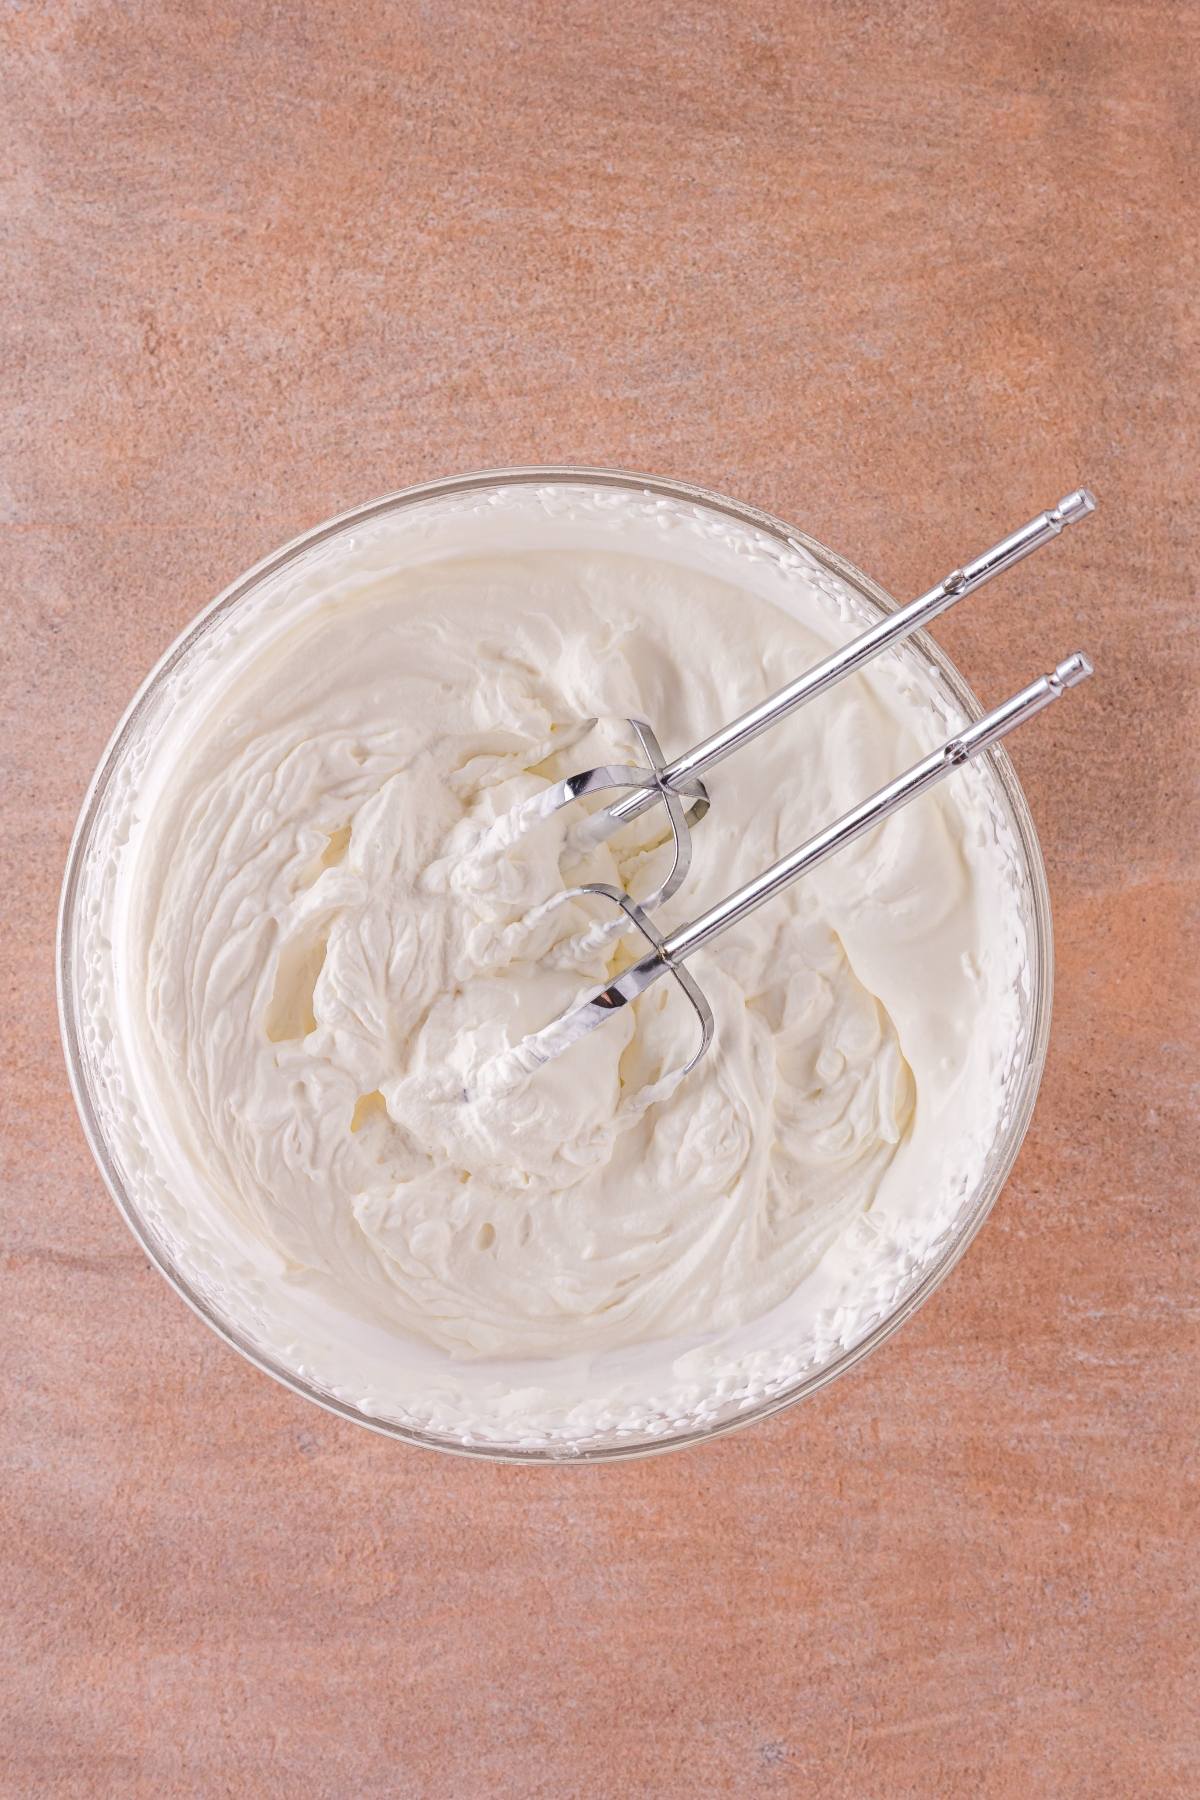
Whip the cream: Beat the cold heavy cream just until firm peaks form, then refrigerate.
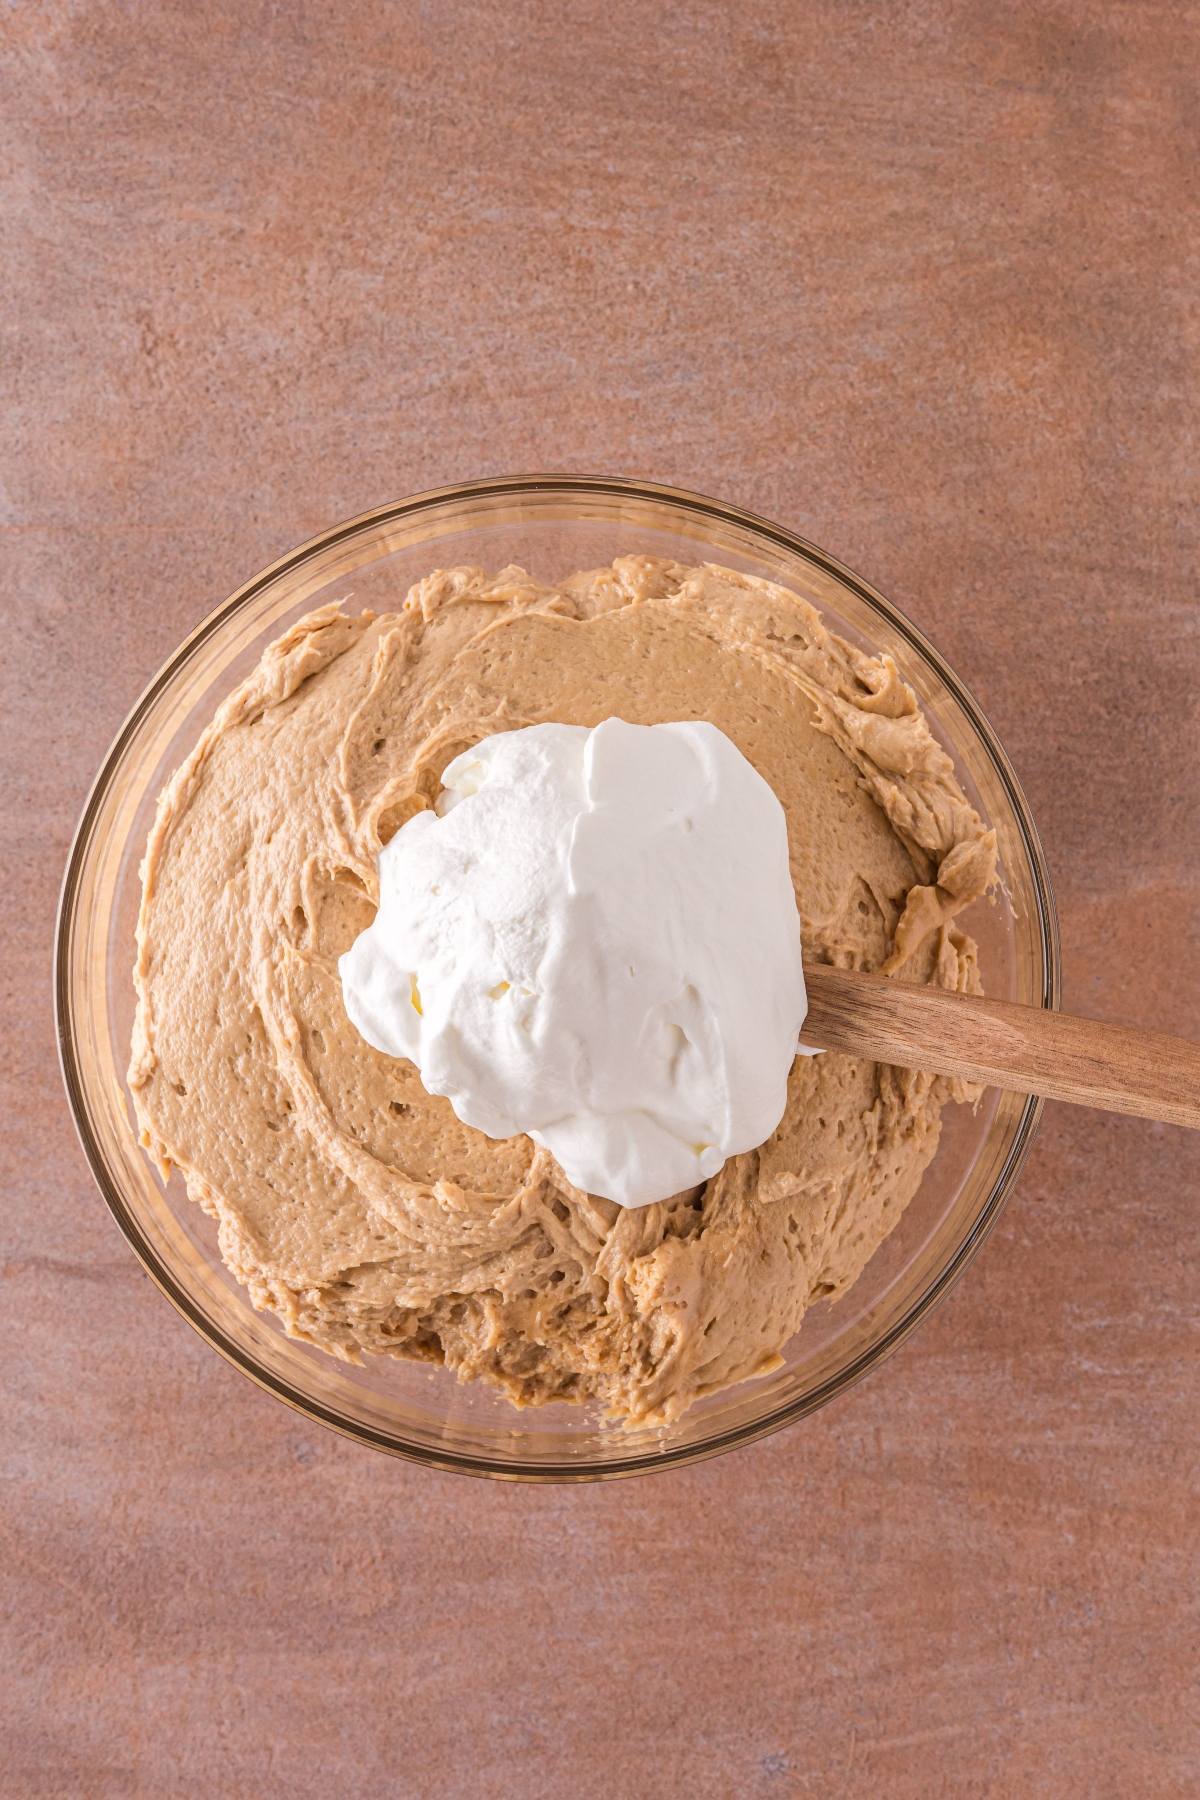
Mix the filling: Beat cream cheese, Lotus Biscoff spread, powdered sugar and lemon juice until completely smooth.
Combine: Gently fold the whipped cream into the cream cheese mixture, scraping the bowl thoroughly.
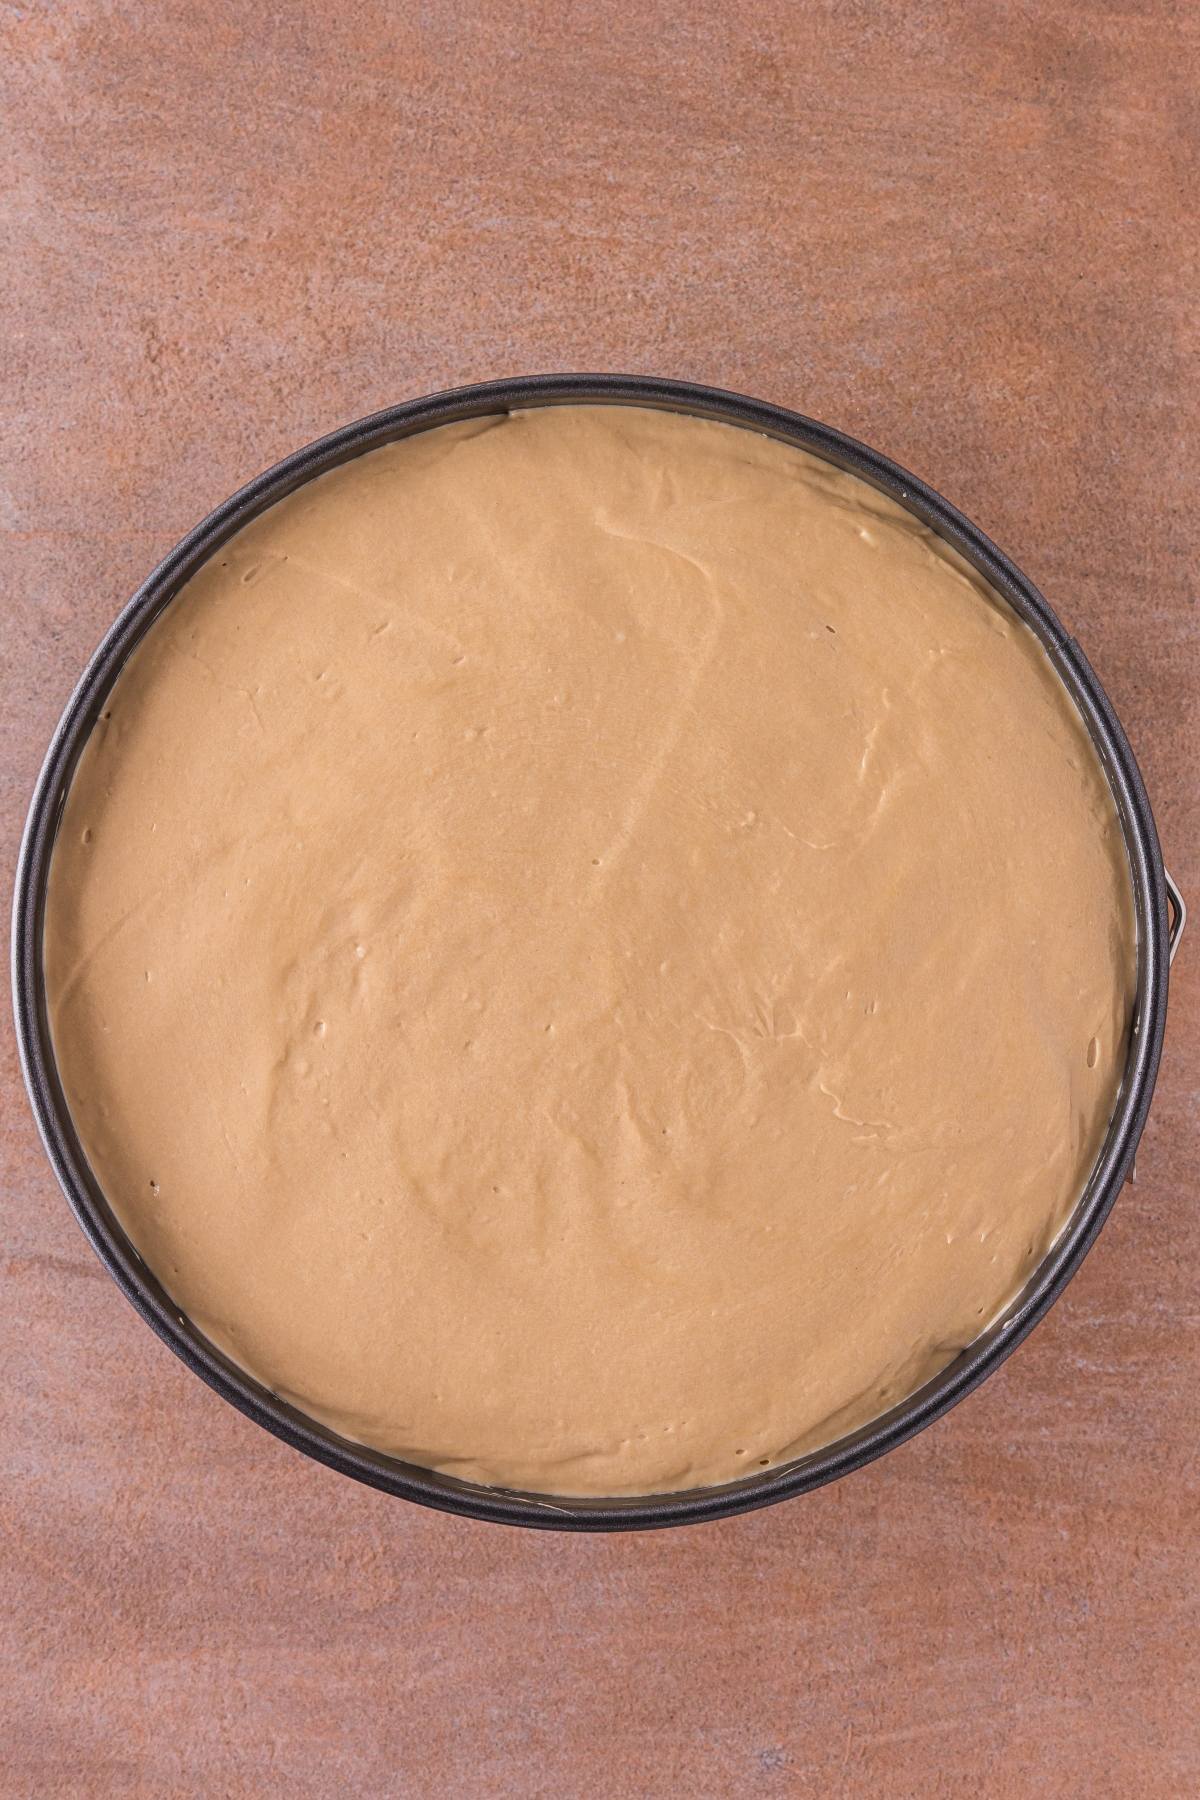
Fill the pan: Spread the mixture evenly over the crust and smooth the top.
Chill: Cover loosely and refrigerate until fully set.
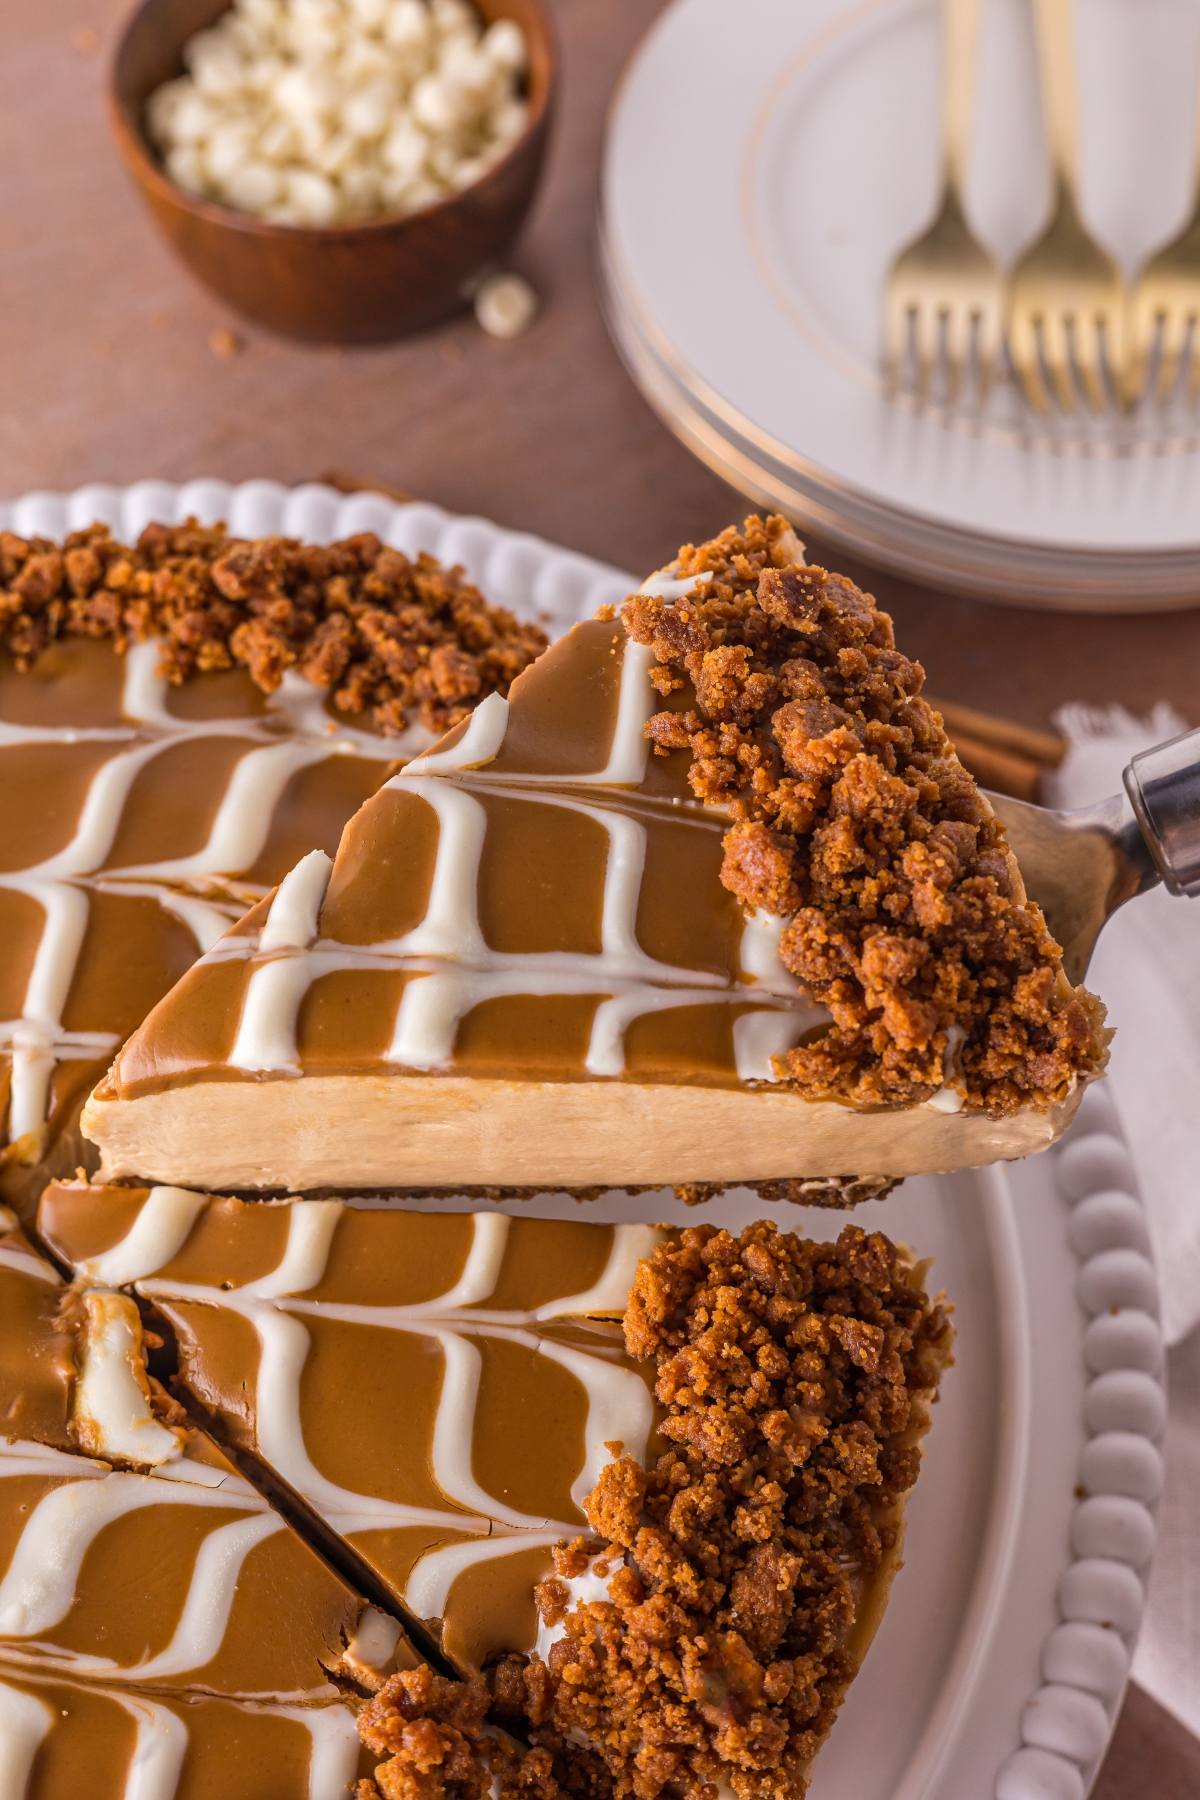
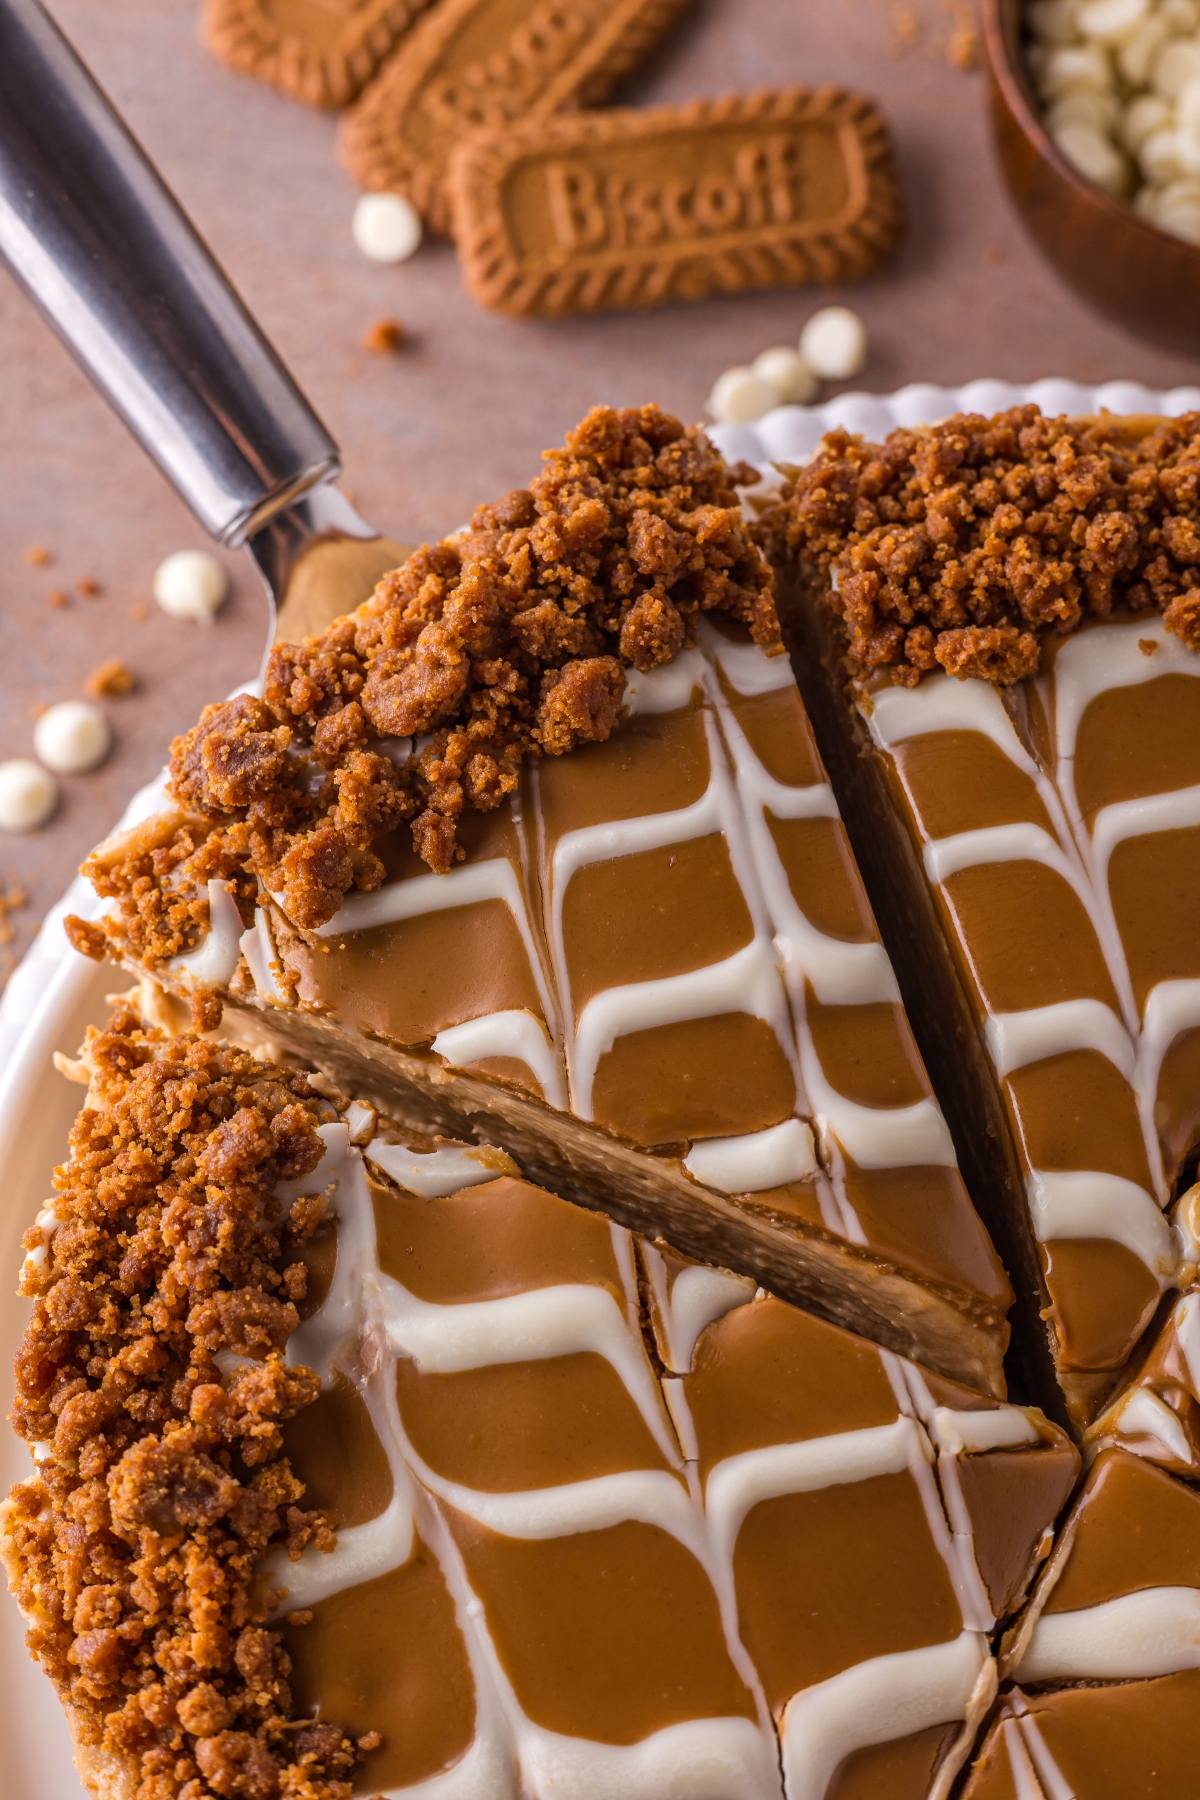
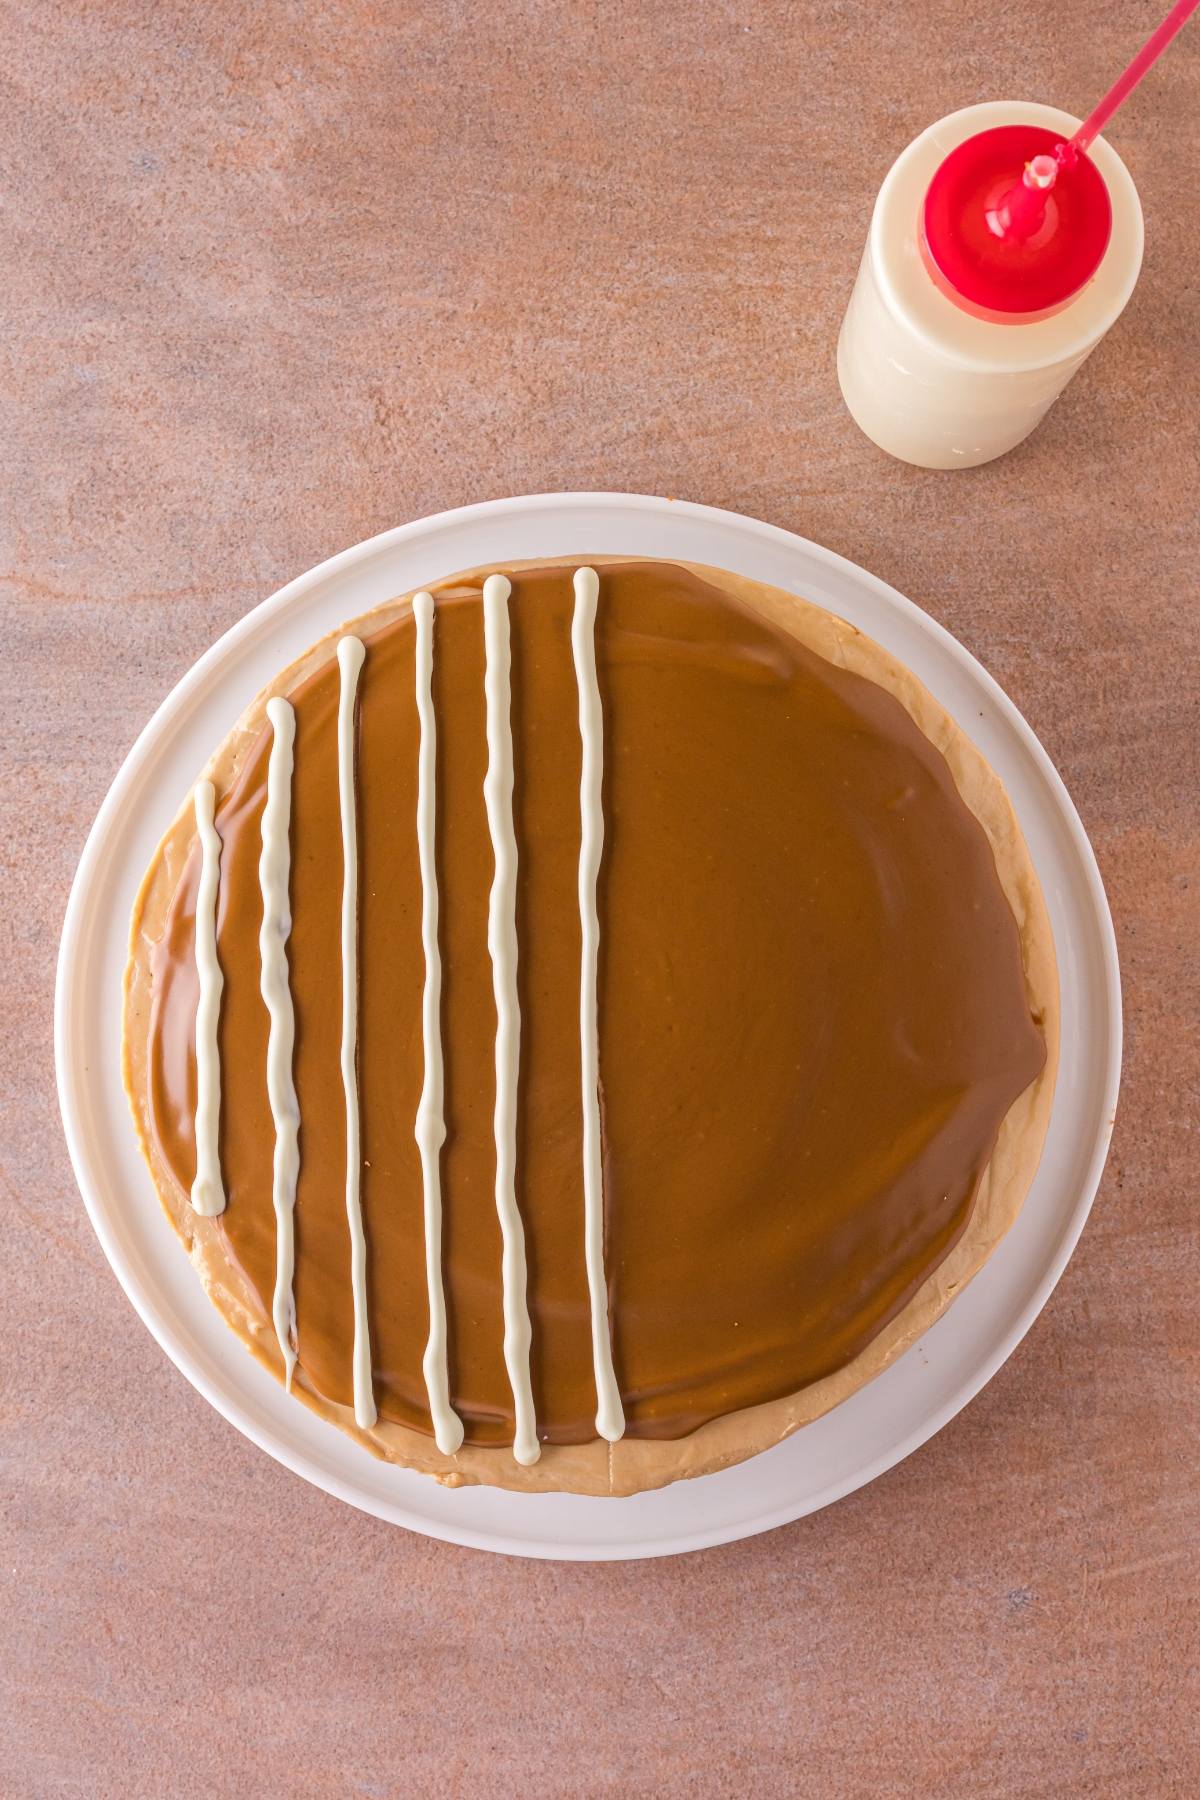
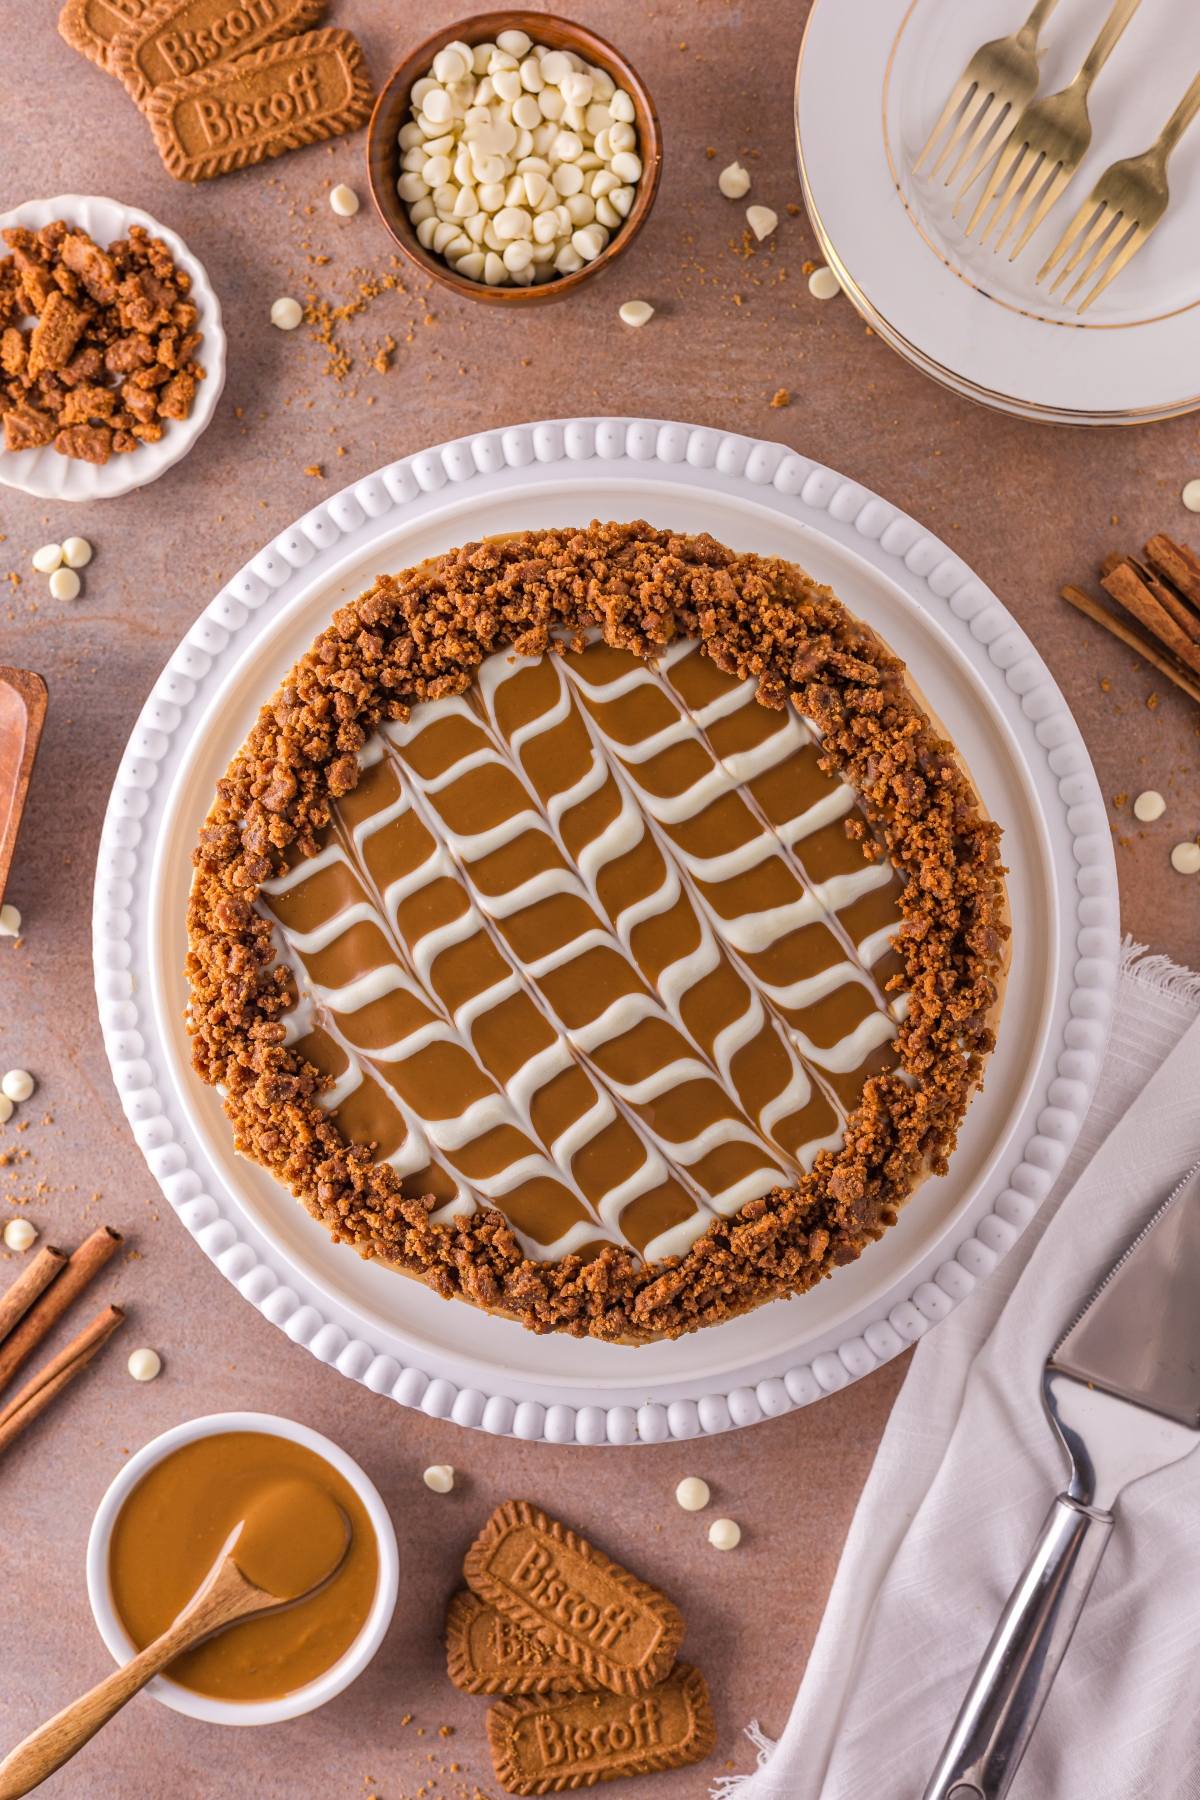
Decorate: Drizzle melted white chocolate over the top and finish with the reserved cookie crumbs, then slice cheesecake and serve.
Substitutions and Variations
Cookie swap: Graham crackers or gingersnap cookies can replace Biscoff cookie crumbs, using the same weight.
Chocolate change: Milk or dark chocolate can be used instead of white chocolate.
Spread texture: Smooth Biscoff spread works best for an even filling but you can try crunchy if you don’t mind the lumpy texture.
Thicker crust: Double the crust ingredients if you prefer a heavier base.
Serving Suggestions
For dessert: Enjoy it for dessert after a meal of meatballs and gravy or chicken puttanesca.
With a drink: Pair it with a hard peach iced tea or iced gingerbread latte.
On a buffet table: Serve the chilled cheesecake with other snacks, such as loaded tater tot nachos and smoked beef jerky.
How to Store
Store: Store Biscoff cheesecake in an airtight container in the fridge and use within 4 or 5 days.
Freeze: Freeze this no bake cheesecake whole or sliced for up to 1 month.
Thaw: Thaw your cookie butter cheesecake overnight in the refrigerator before serving.
Top Tips
Smooth filling: Let the cream cheese soften fully before mixing to keep the filling smooth.
Condensation control: Very gently blot any surface moisture with a paper towel just before serving.
Extra firmness: A 30-minute rest in the freezer helps if the cheesecake is going to sit out or if you prefer it firmer.
Lotus Biscoff Cheesecake FAQs
Cream cheese that’s too cold can cause lumps, so allow it to soften before mixing. Also, I recommend smooth, not crunchy, cookie butter.
Yes, it’s ideal made a day or two in advance so it has time to fully set.
Not at all. I had a great result using my 9-inch springform pan.

No Bake Biscoff Cheesecake Recipe
No Bake Biscoff Cheesecake
Equipment
- Springform Pan 9-Inch
- Rolling Pin or Meat Mallet
- Pastry Bag or Squeeze Bottle
Ingredients
For the Crust
- 20 Biscoff cookies, regular sized
- 8 Tablespoons unsalted butter, 113g, melted
- 1 Tablespoon brown sugar
- 1 Tablespoon ground cinnamon
For the Filling
- 1 ¾ Cups heavy whipping cream, 400g, very cold
- 2 ½ Cups cream cheese, 600g, at cool room temperature
- 1 ¾ Cups Biscoff cookie butter, 454g
- 1 ¾ Cups powdered sugar, 182g, sifted
- 2 Tablespoons lemon juice
- 1 Teaspoon salt
For the Topping
- 1 Cup Biscoff cookie butter, 250g
- 1 Cup white chocolate chips, 170g
- 1 Teaspoon canola oil
Instructions
- To start, chill the bowl and beaters in the freezer while prepping a round 9-inch springform pan.
- Cut out a round piece of parchment paper to line the bottom of the pan.
Prepare the Crust
- Place cookies in a Ziploc bag and, using a rolling pin or meat mallet, smash cookies until crumbled into a small pebbly consistency.
- Transfer to a medium-sized bowl.
- Add melted butter to the cookie crumble bowl.
- Reserve ½ cup of the mixture for the garnish and use the remaining cookie crumb mixture to press firmly into the bottom of the pan.
Prepare the Filling
- Take the chilled bowl and beaters from the freezer and pour the heavy whipping cream into the chilled bowl.
- Using a hand mixer, beat the whipped cream for about 2 ½ minutes on medium, just until firm peaks form. Do not overmix.
- Place that bowl into the refrigerator while you mix the other ingredients.
- Taking a clean bowl, beat the softened cream cheese, cookie butter, powdered sugar, lemon juice, and salt together until very smooth.
- Remove the whipping cream bowl from the fridge and gently fold the whipped cream into the cream cheese mixture until smooth with a spatula. Be sure to scrape the very bottom of the bowl so that you don’t have any white streaks of cream that weren’t folded.
- Pour the cheesecake batter into the springform pan, smoothing it out on the top.
Chill Overnight
- Cover with tented foil.
- Leave it to set in the fridge overnight or for 6 to 8 hours at least. It’s a no-bake recipe, so the longer it can rest, the better!
Decorate the Cheesecake
- Pour the melted white chocolate and canola oil into a funnel into a squeeze bottle with a thin tip.
- Make 9 lines across.
- Rotate the cheesecake 90 degrees and drag a toothpick lightly through the white chocolate lines down to the other end.
- Alternate up/down for each one. For the final images, I have 9 “toothpick drags” but you can do as few or as many as you’d like. (Or you can just make “dots” of white chocolate and swirl on the top!)
- Spoon the reserved ½ cup of cookie crumb mixture around the edge of the cheesecake.
Notes
Condensation control: Very gently blot any surface moisture with a paper towel just before serving.
Extra firmness: A 30-minute rest in the freezer helps if the cheesecake is going to sit out or if you prefer it firmer.
Nutrition
This Lotus Biscoff cheesecake recipe delivers rich cookie butter flavor over a spiced crust, finished with a smooth topping and white chocolate drizzle. After chilling, the texture is creamy and set, so serving it is straightforward. The mix of sweetness, spice and light tang keeps the flavor balanced from first bite to last. It’s a great make-ahead dessert that keeps well in the fridge and tastes just as good a day or two later. Every slice of Biscoff cheesecake is a real treat.
Other Recipes to Try
Bella Bucchiotti
Bella Bucchiotti is a Canadian-based syndicated food, travel, and lifestyle writer, photographer, and creator at xoxoBella. She founded xoxoBella in 2015, where she shares her love for food, dogs, sustainability, fitness, crafts, outdoor adventures, travel, and philanthropy to encourage others to run the extra mile, try new recipes, visit unfamiliar places, and stand for a cause. Bella creates stress-free and family-friendly recipes for weeknight dinners and festive feasts.