This post may contain affiliate links, please see the privacy policy for details.
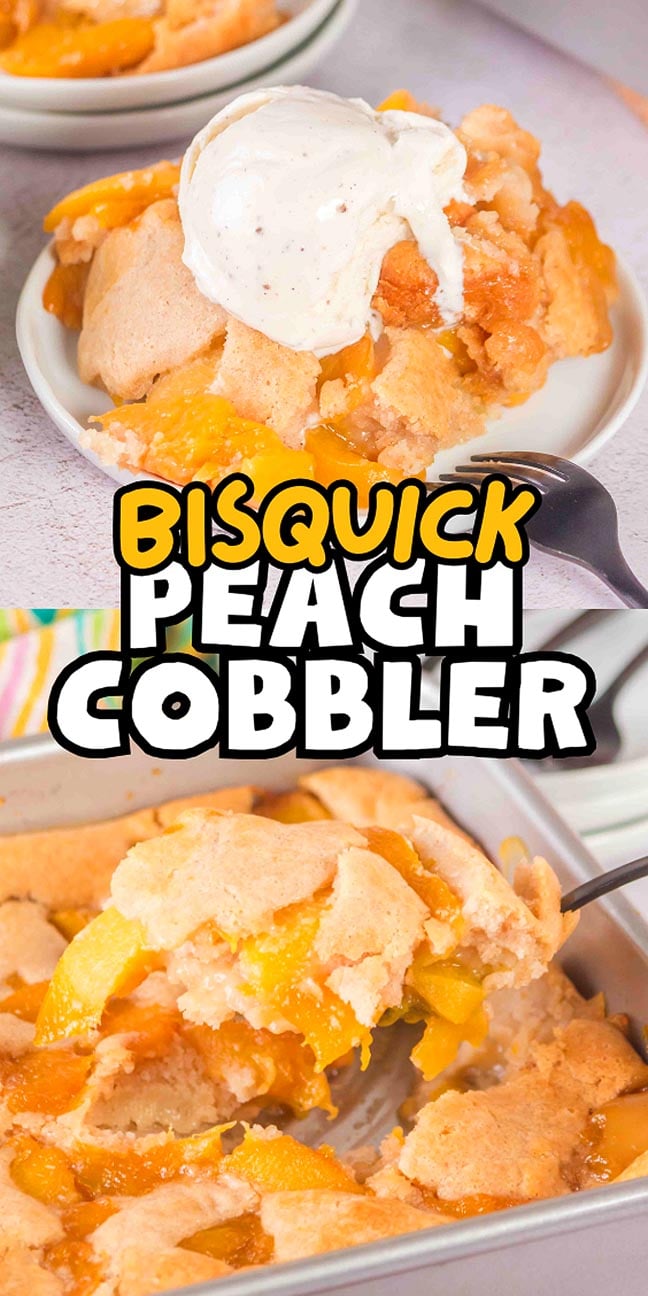
Nothing says nostalgia quite like a warm, bubbly Bisquick peach cobbler fresh from the oven! This shortcut dessert has been around for generations, and for good reason—it’s ridiculously easy to make and downright delicious. Whether you use fresh, frozen, or canned peaches, this cobbler comes together in just 10 minutes, making it perfect for last-minute cravings or impromptu family gatherings. Top it off with a scoop of vanilla ice cream, and you’ve got a dessert that tastes like childhood summers and cozy Sunday dinners all in one bite. This is one recipe you’ll find yourself making again and again!

Why You’ll Love It

You’re going to love how quick and simple this Bisquick peach cobbler recipe is to prepare. Served warm it’s such a cozy and comforting dessert.
Easy to make: Bisquick is a great ingredient, as it’s so versatile. Rather than weighing and measuring flour, baking powder and so on, you can simply use Bisquick to make this peach cobbler recipe.
Tastes so good: This cobbler is made with juicy canned peaches and also has vanilla and lemon flavors. It’s really tasty!
A crowd-pleaser: Everyone is going to love this easy peach cobbler recipe. And the whole family is going to crave it again and again.

Looking for more Bisquick recipes? You might also like lemon blueberry cobbler, this apple cobbler or how about this delicious coffee cake?

Bisquick Peach Cobbler Ingredients
A complete list of ingredients and amounts can be found in the recipe card below.
Bisquick: Use the original Bisquick baking mix for this peach cobbler recipe.
Vanilla extract: Use 100% pure vanilla for the best flavor.
Lemon zest: I love how the lemon taste goes with the peaches.
Ground cinnamon: Just a pinch!
Sliced peaches: The main flavor in this tasty cobbler.
Light brown sugar: For sweetness.

How to Make Peach Cobbler with Bisquick
For more detailed instructions with weights and measurements, jump to the printable recipe card.
Prepare the batter: Combine the Bisquick, milk, melted butter, cinnamon, vanilla, and lemon zest in a large bowl to make a batter. Pour the Bisquick mixture into a baking dish.
Add the peaches: Toss the peaches with brown sugar and arrange the sugared peaches on top of the batter.
Bake and serve: Bake in a preheated oven until a golden brown color on top and then serve warm.

Substitutions and Variations
Gluten-free option: If you want a gluten-free version of this delicious recipe, use gluten-free Bisquick.
Sliced peaches: Chopped peaches would also work. Canned peaches are easier but you can use fresh peaches if you prefer. Frozen peaches are another option but thaw and drain them well first.
Not a peach fan? Feel free to use other fruits instead.
Ground cinnamon: Substitute ground nutmeg or ginger for the cinnamon.
Lemon zest: Although optional, I recommend adding it to brighten the overall flavor of the cobbler.

Serving Suggestions
Appetizers: Begin your meal with a bowl of cowboy soup.
Main dishes: Next up, enjoy Mediterranean steak bowls or chicken fried rice and pork potstickers.
Desserts: Enjoy this peach cobbler with a scoop of vanilla or cinnamon bourbon peach ice cream, or perhaps with whipped cream on top.

How to Store
Store: Keep leftover peach cobbler made with Bisquick in an airtight container in the refrigerator and eat within 2 or 3 days.
Freeze: You can freeze your cobbler in an airtight container for up to 3 months.
Thaw: Defrost it in the refrigerator overnight (or reheat from frozen).
Reheat: You can warm it back up in the oven or microwave from chilled. If you want to reheat it from frozen, cover the baking dish with foil and cook at 300°F or 325°F until warm in the center.

Top Tips
Drain the peaches well: I let mine sit in the sieve for a while so all the liquid drains off. You can also pat the peaches dry with paper towels – no one wants soggy cobbler!
Use metal tongs: The easiest way to transfer the peach slices onto the batter in the baking dish is with metal tongs.
Cool before storing: Make sure the cobbler is completely cool before storing it, otherwise the resulting condensation will make it watery.

Bisquick Peach Cobbler FAQs
Yes. It’s best to assemble the peach cobbler, freeze it in the baking dish and then cook it when you’re ready. Freeze the unbaked cobbler for up to 3 months. When ready to bake, put the frozen cobbler in the oven and cook for about 20 minutes longer than the recipe says.
I love ice cream with mine, although whipped cream with a drizzle of chocolate or caramel sauce would also be fantastic.

Best Bisquick Peach Cobbler Recipe

Bisquick Peach Cobbler
Equipment
- Baking Dish 8-Inch Square
Ingredients
- 1 ¼ Cups Bisquick mix, original
- 1 Cup milk
- ½ Cup butter, melted
- ½ Teaspoon cinnamon
- 1 Teaspoon vanilla extract
- 2 Teaspoons lemon zest, optional
- 2 Cans peaches, sliced, 15-Ounce cans, well-drained. Fresh or thawed frozen peaches work, too!
- ¾ Cup light brown sugar, packed
Instructions
- Preheat the oven to 375°F.
- In a large mixing bowl, mix the Bisquick, milk, melted butter, cinnamon, vanilla extract, and lemon zest until everything is combined and you have a batter.
- Pour the batter into an 8-inch square baking dish and spread it evenly.
- In another mixing bowl, add the peaches and brown sugar. Toss to coat the peach slices with the sugar.
- Carefully add the peaches on top of the batter. Don’t mix them in.
- Bake for about 50 minutes or until the top is golden and the edges are set. If the top is browning too fast, cover it with aluminum foil.
- Serve warm.
Notes
Use metal tongs: The easiest way to transfer the peach slices onto the batter in the baking dish is with metal tongs.
Cool before storing: Make sure the cobbler is completely cool before storing it, otherwise the resulting condensation will make it watery.
Nutrition


This easy Bisquick peach cobbler is flavored with subtle accents of lemon and vanilla. It makes a cozy, delicious dessert and is perfect with a scoop of ice cream on top. Making peach cobbler with Bisquick is a breeze, even for newbie home cooks. Serve this classic dessert after dinner and you just know everyone will love it – perhaps this is going to be a new favorite family.
Other Recipes to Try

Bella Bucchiotti
Bella Bucchiotti is a Canadian-based syndicated food, travel, and lifestyle writer, photographer, and creator at xoxoBella. She founded xoxoBella in 2015, where she shares her love for food, dogs, sustainability, fitness, crafts, outdoor adventures, travel, and philanthropy to encourage others to run the extra mile, try new recipes, visit unfamiliar places, and stand for a cause. Bella creates stress-free and family-friendly recipes for weeknight dinners and festive feasts.


Shortcuts are always a lifesaver for me, but there is nothing short about the flavor. Still so perfectly delicious!
Warm, bubbly, and bursting with peachy goodness. Definitely serving this with ice cream again!