This post may contain affiliate links, please see the privacy policy for details.
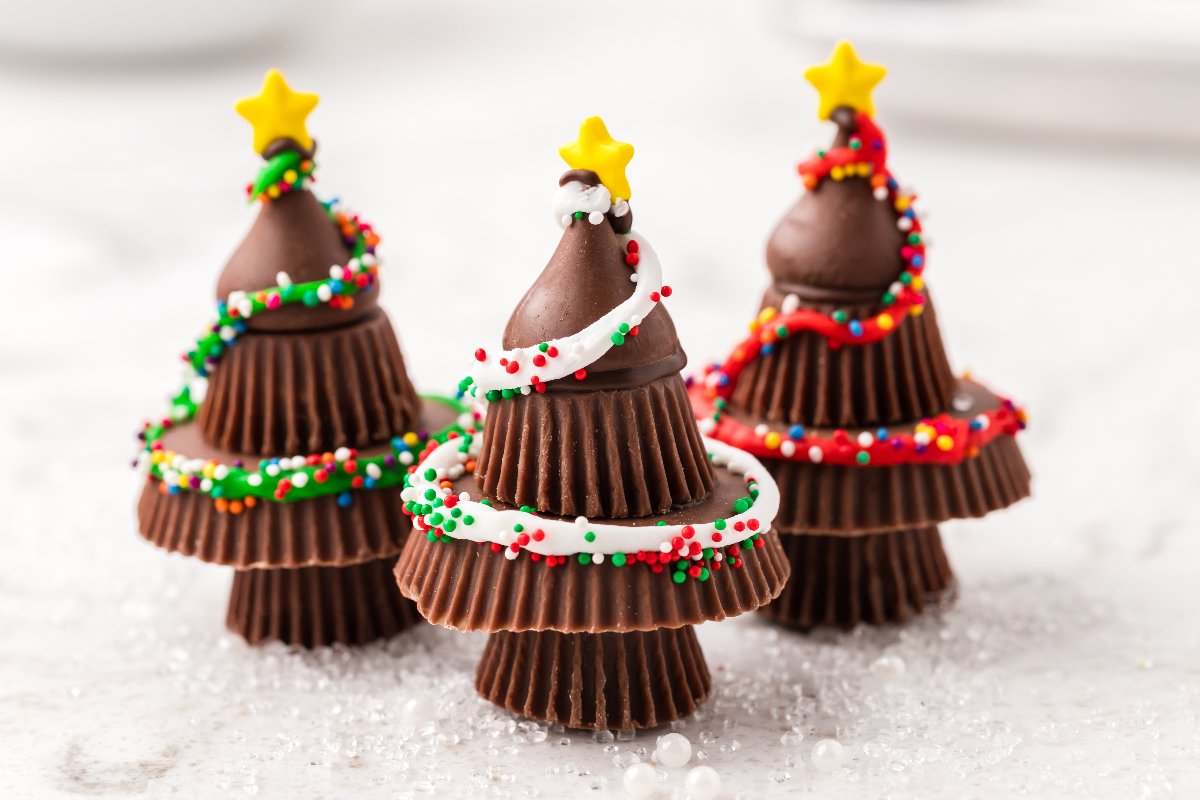
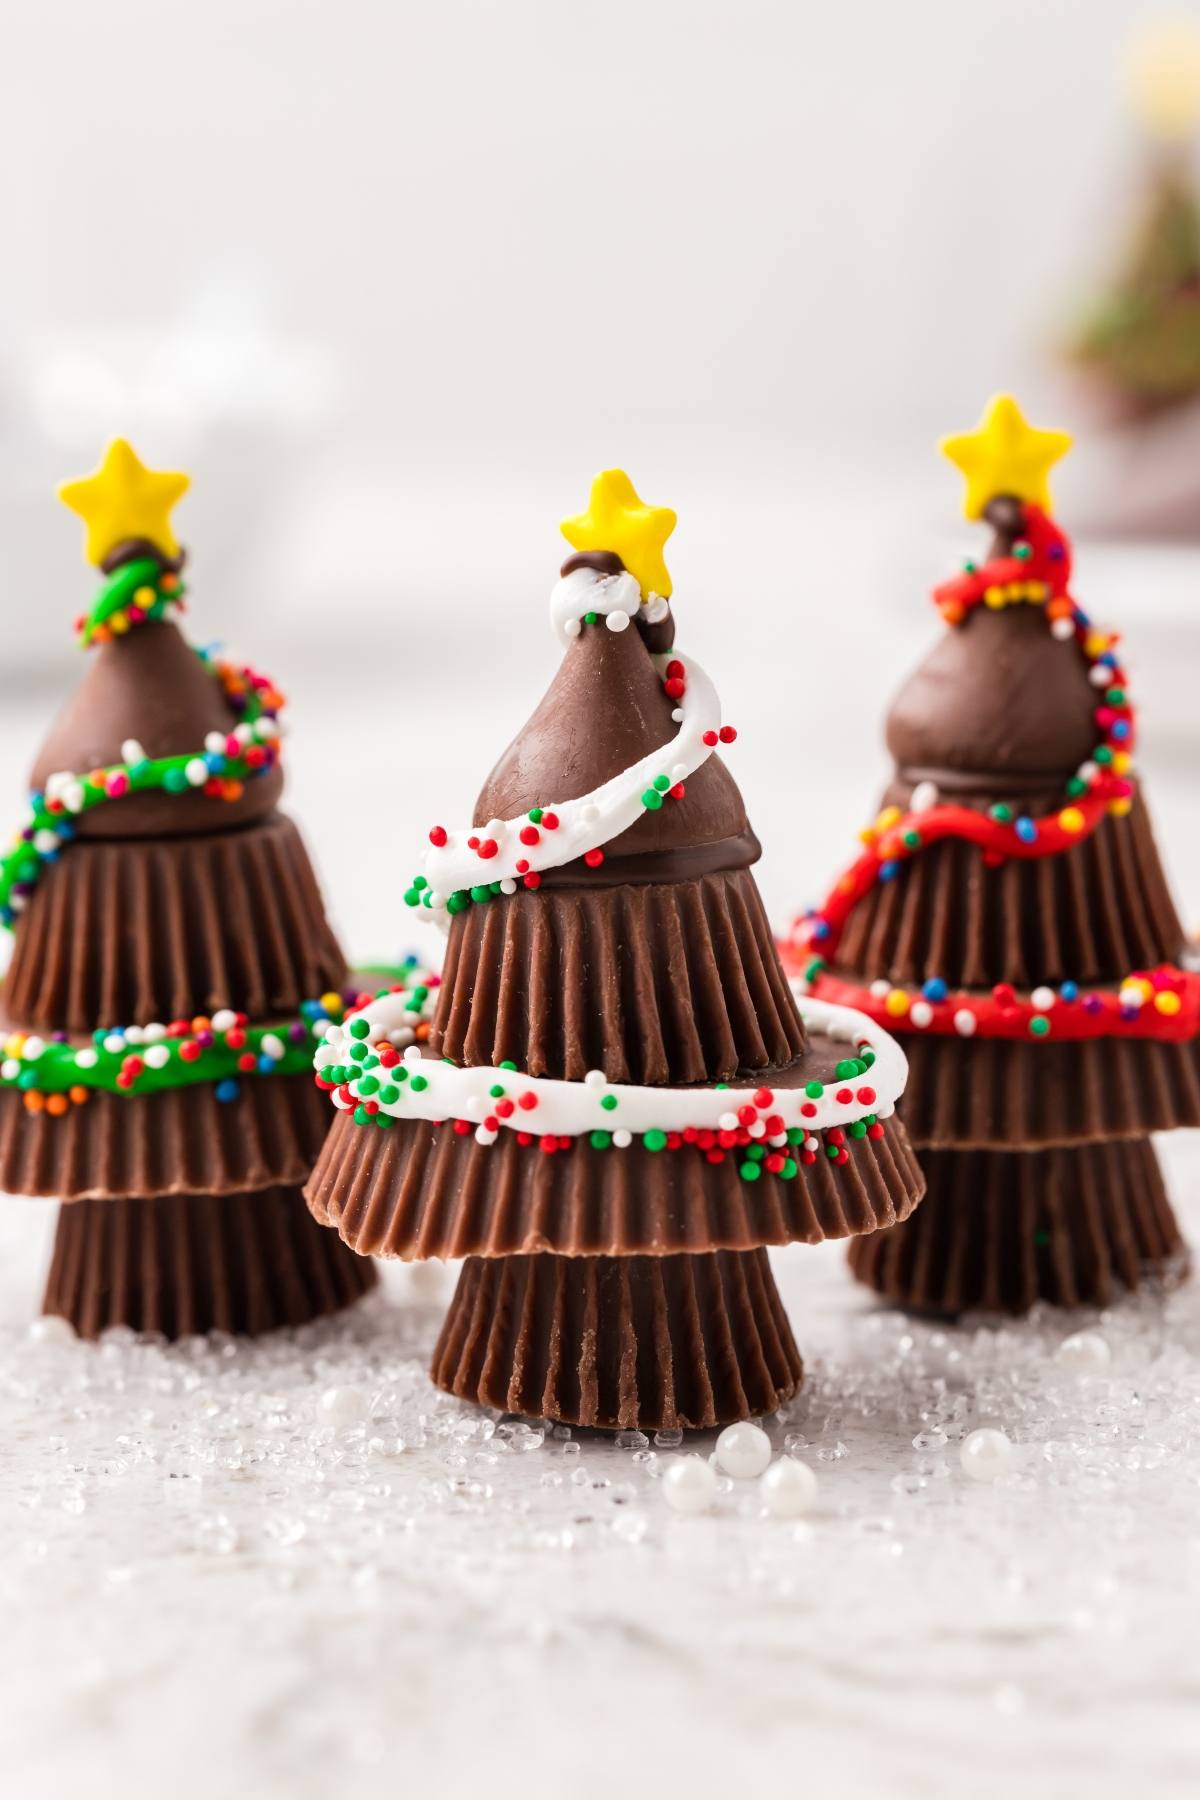
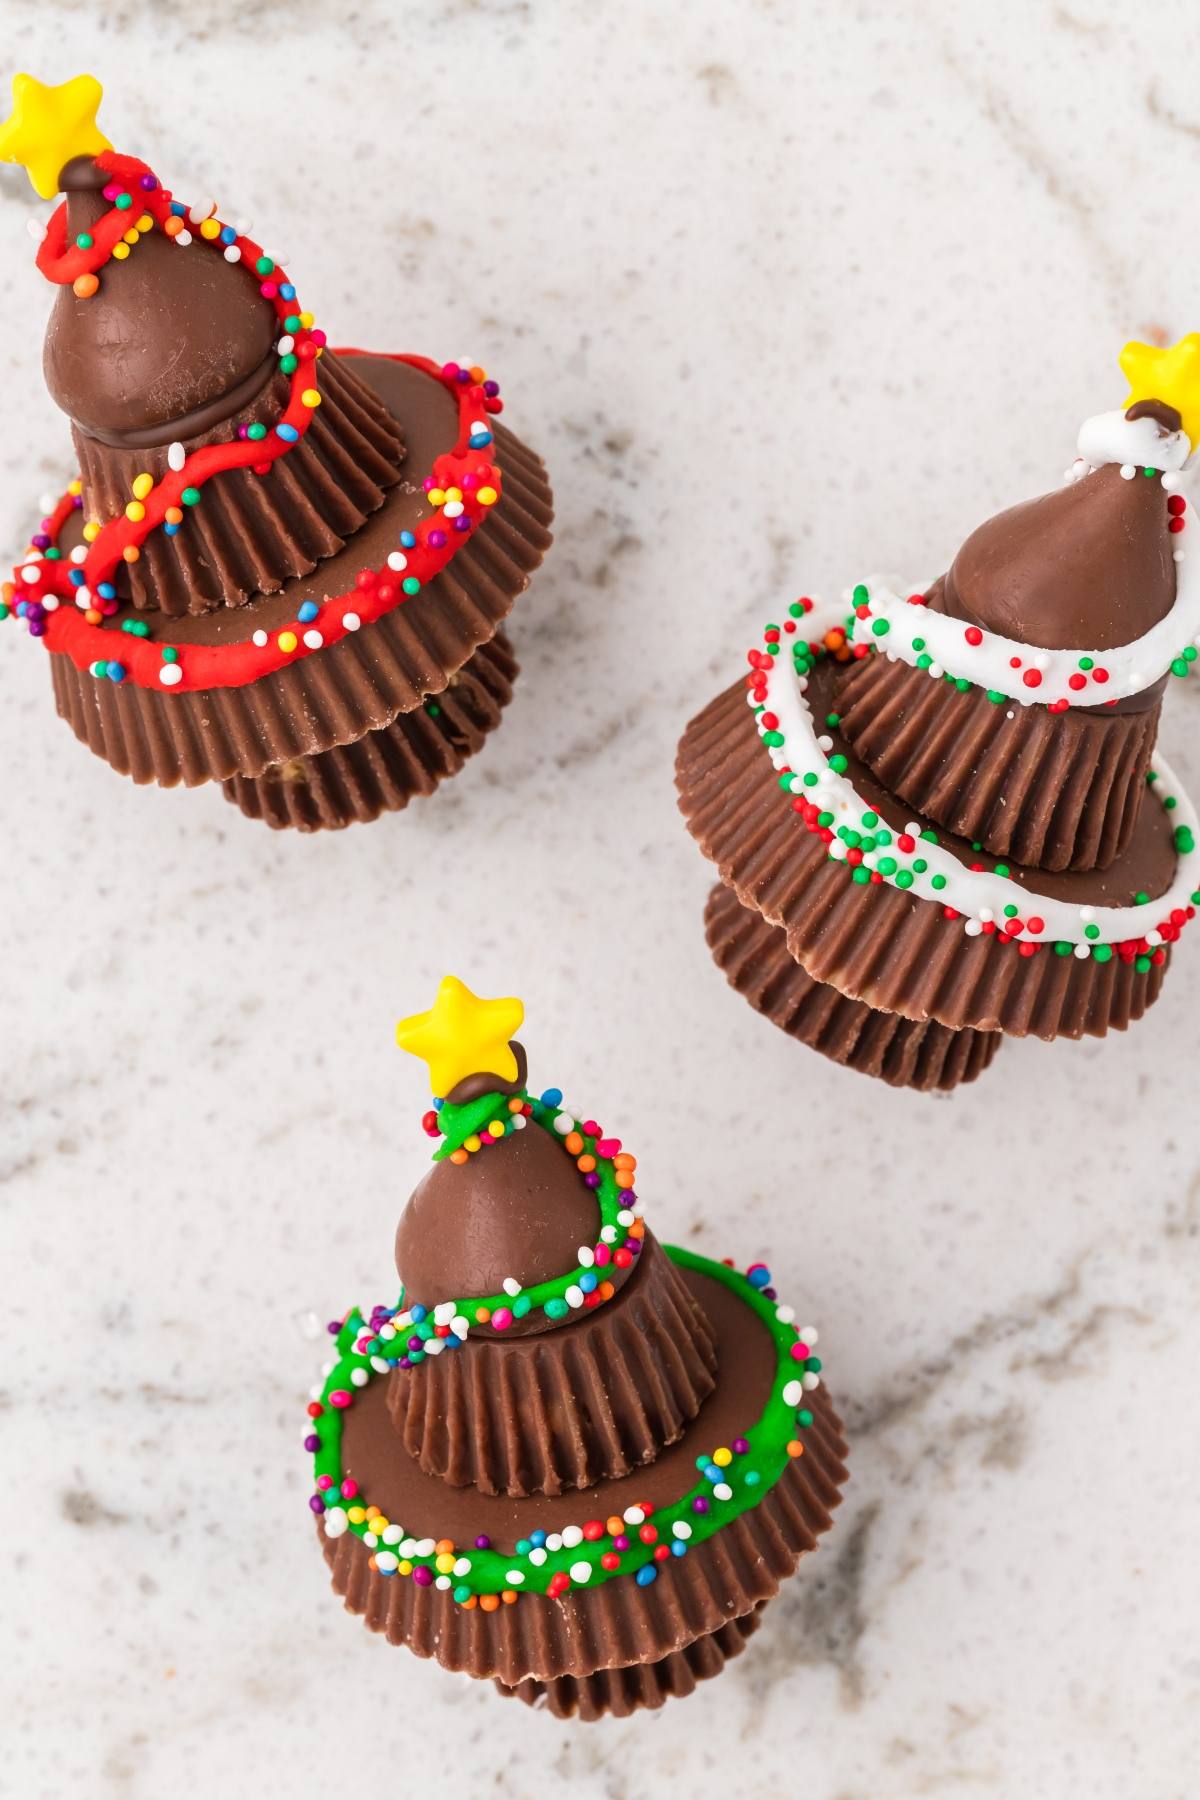
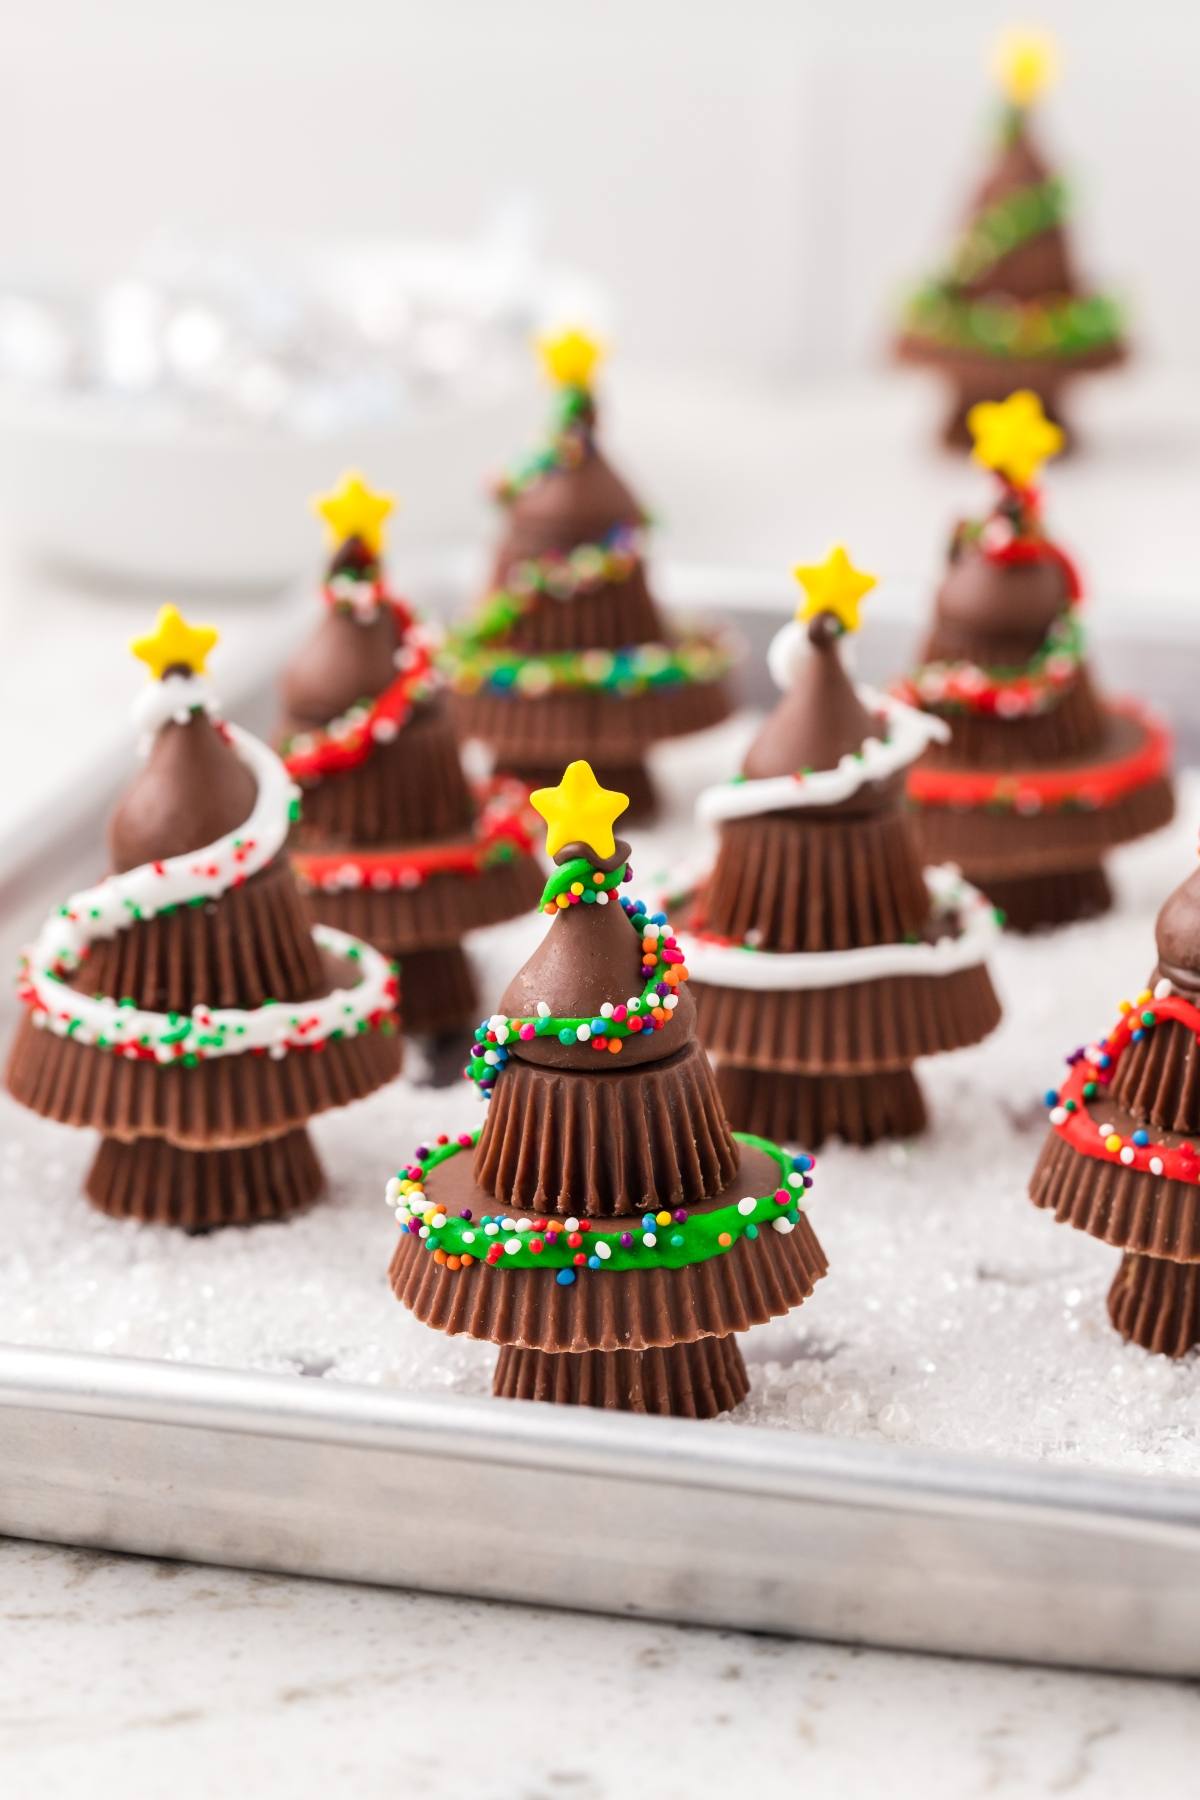
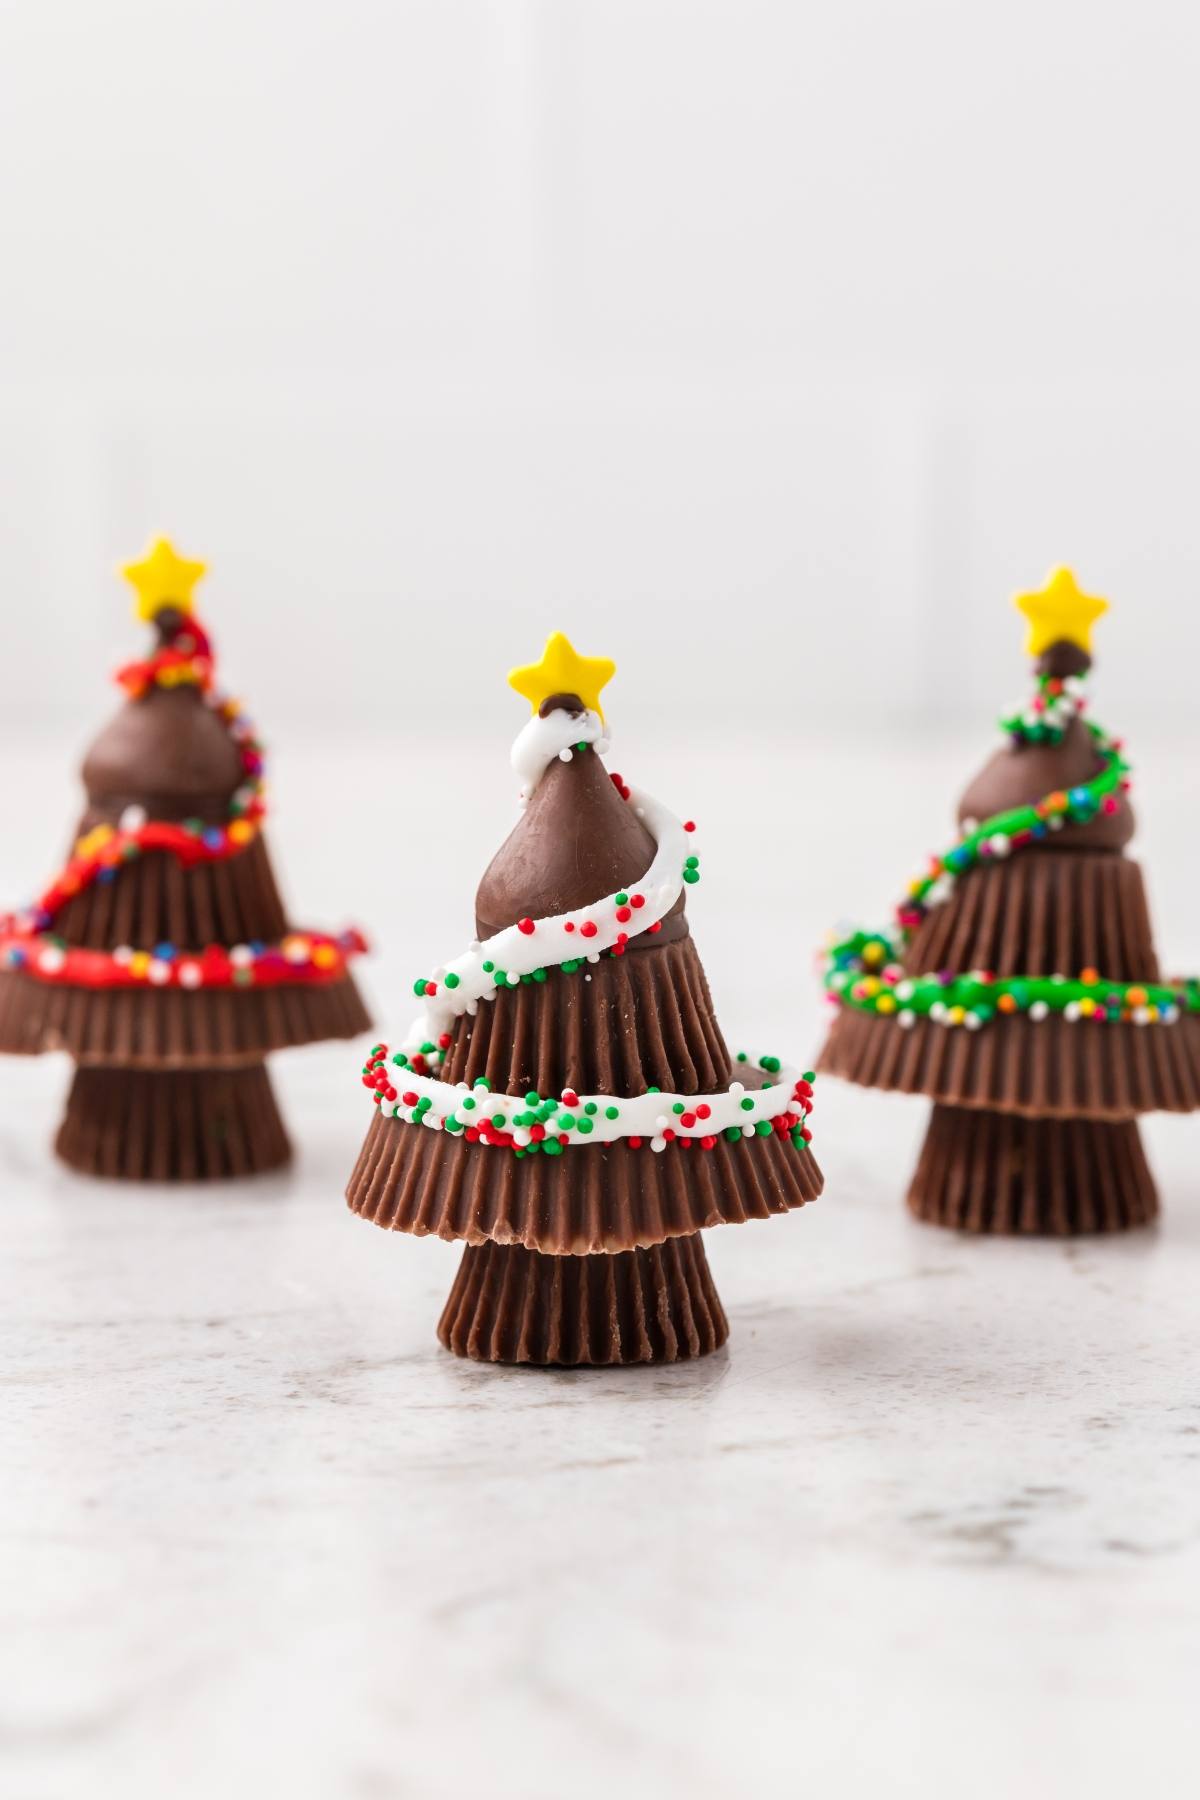
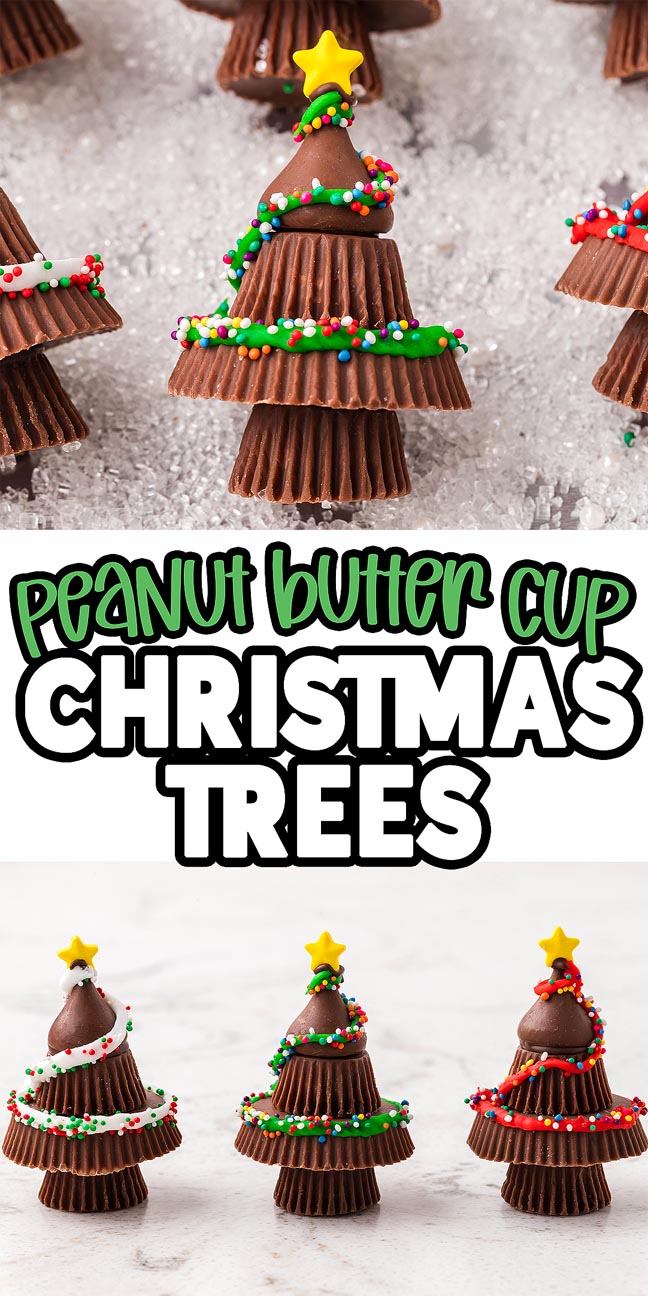
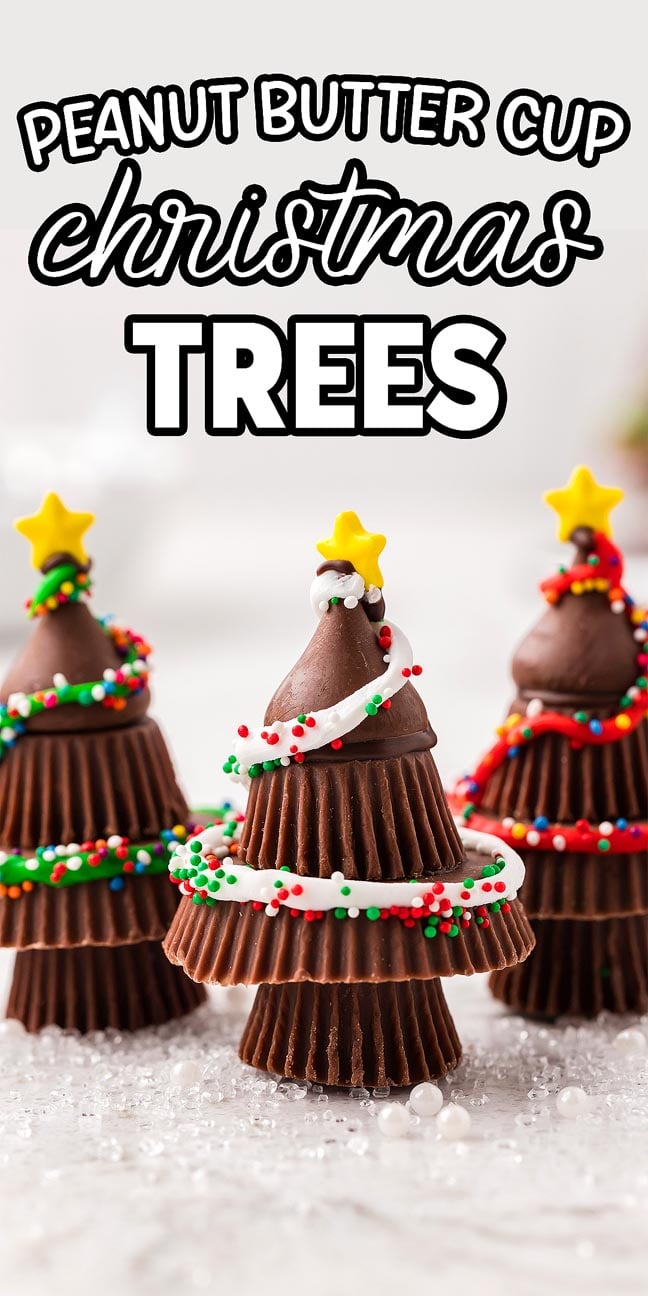
Peanut butter cup Christmas trees turn simple candy into a cute holiday treat with creamy peanut butter, smooth chocolate and playful decorations. Stack mini and original peanut butter cups, finish with a Hershey’s Kiss, then add garlands with icing plus some sprinkles for festive sparkle. There’s no baking required and you’ll find they hold up well on dessert trays or in gift boxes. If you’re a fan of Reese’s flavor and easy projects, these little trees deliver happy, candy-shop energy.
Why You’ll Love It

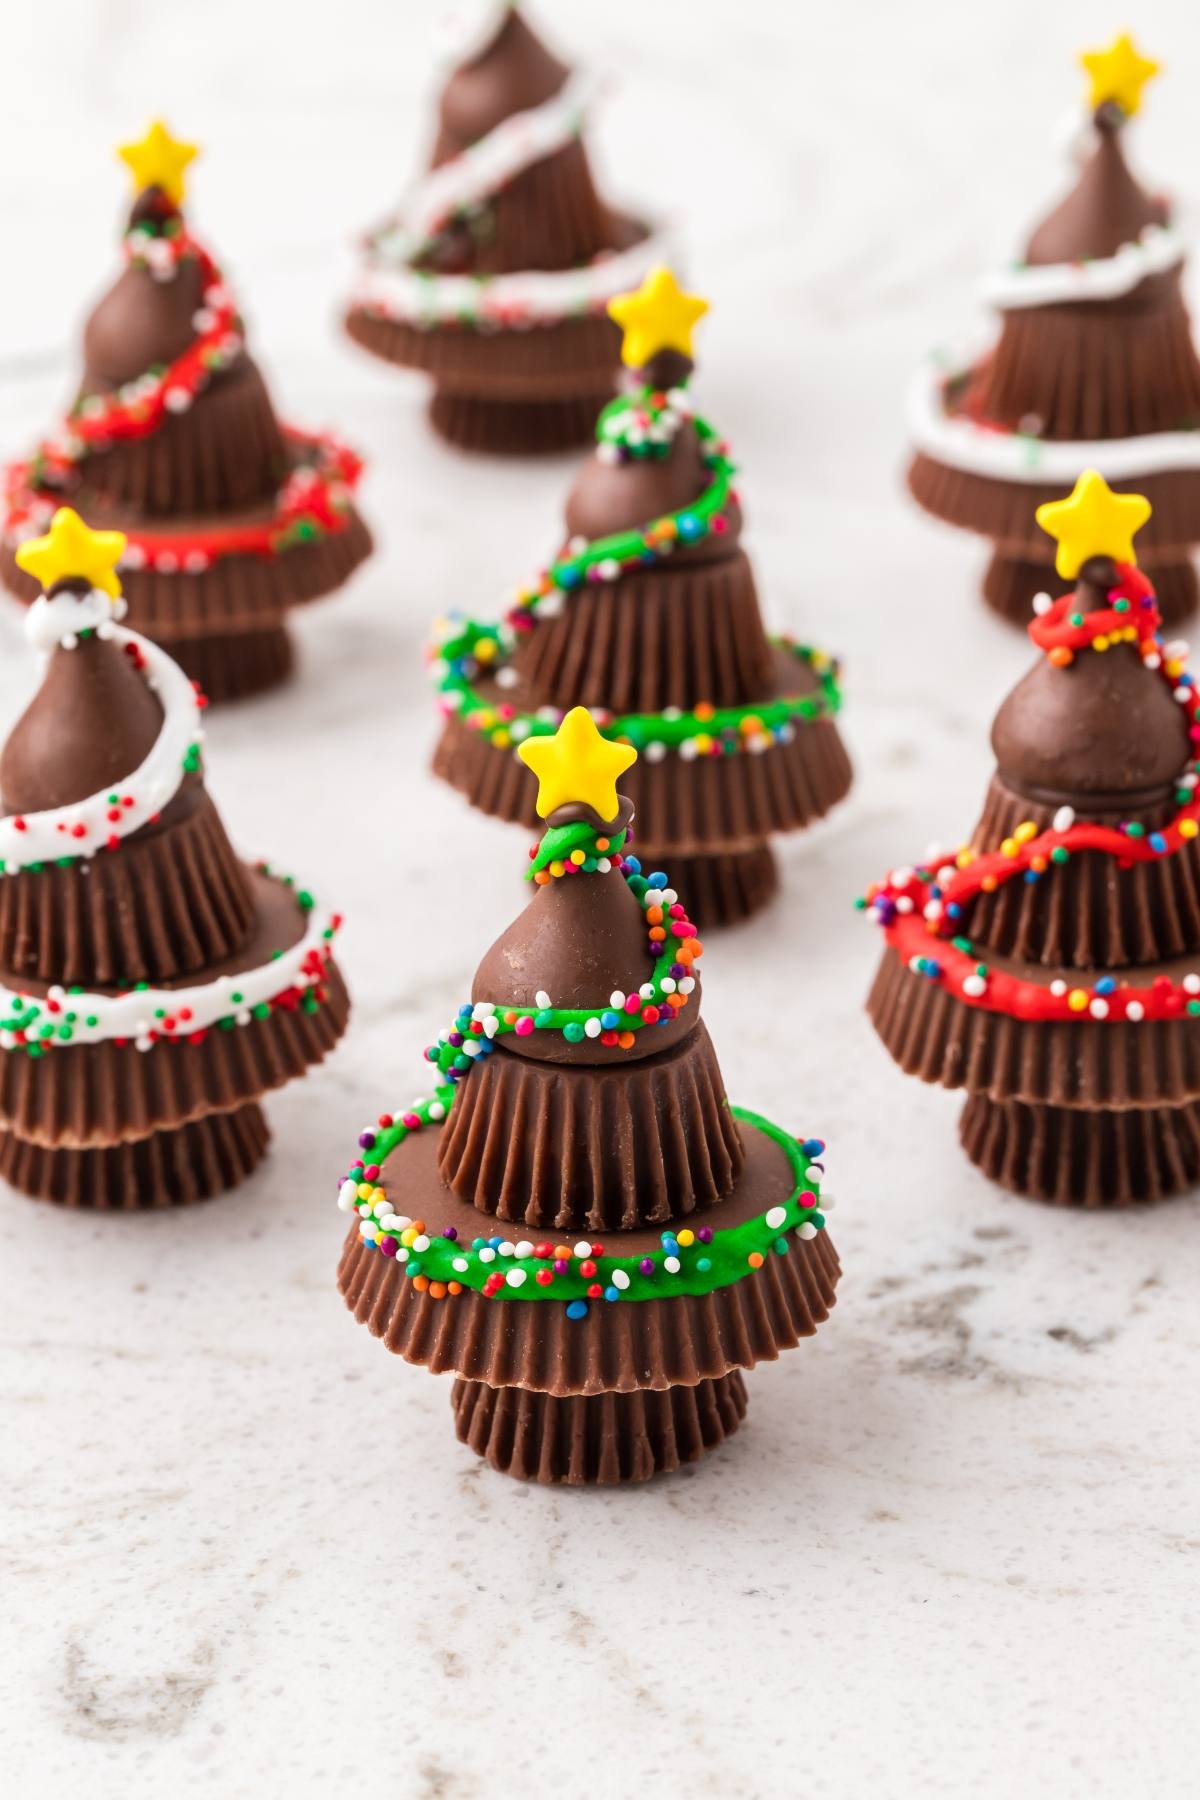
Everyone will enjoy these no-bake peanut butter cup Christmas trees, stacked with candy and finished with icing and sprinkles, for a fun, giftable holiday treat.
Quick to make: Simple stacking with melted chocolate as glue means speedy, reliable results.
Festive look: Swirled icing and sprinkles create bright tree-like detail that pops on platters.
Great for gifting: Sturdy layers travel well in tins or boxes for a party or swap event.
Kid-friendly: No oven, low mess and creative decorating make them a fun kids’ project.
You might also want to make some Christmas cakesicles, Christmas bugles, Christmas coffee and reindeer Rolo pretzels.
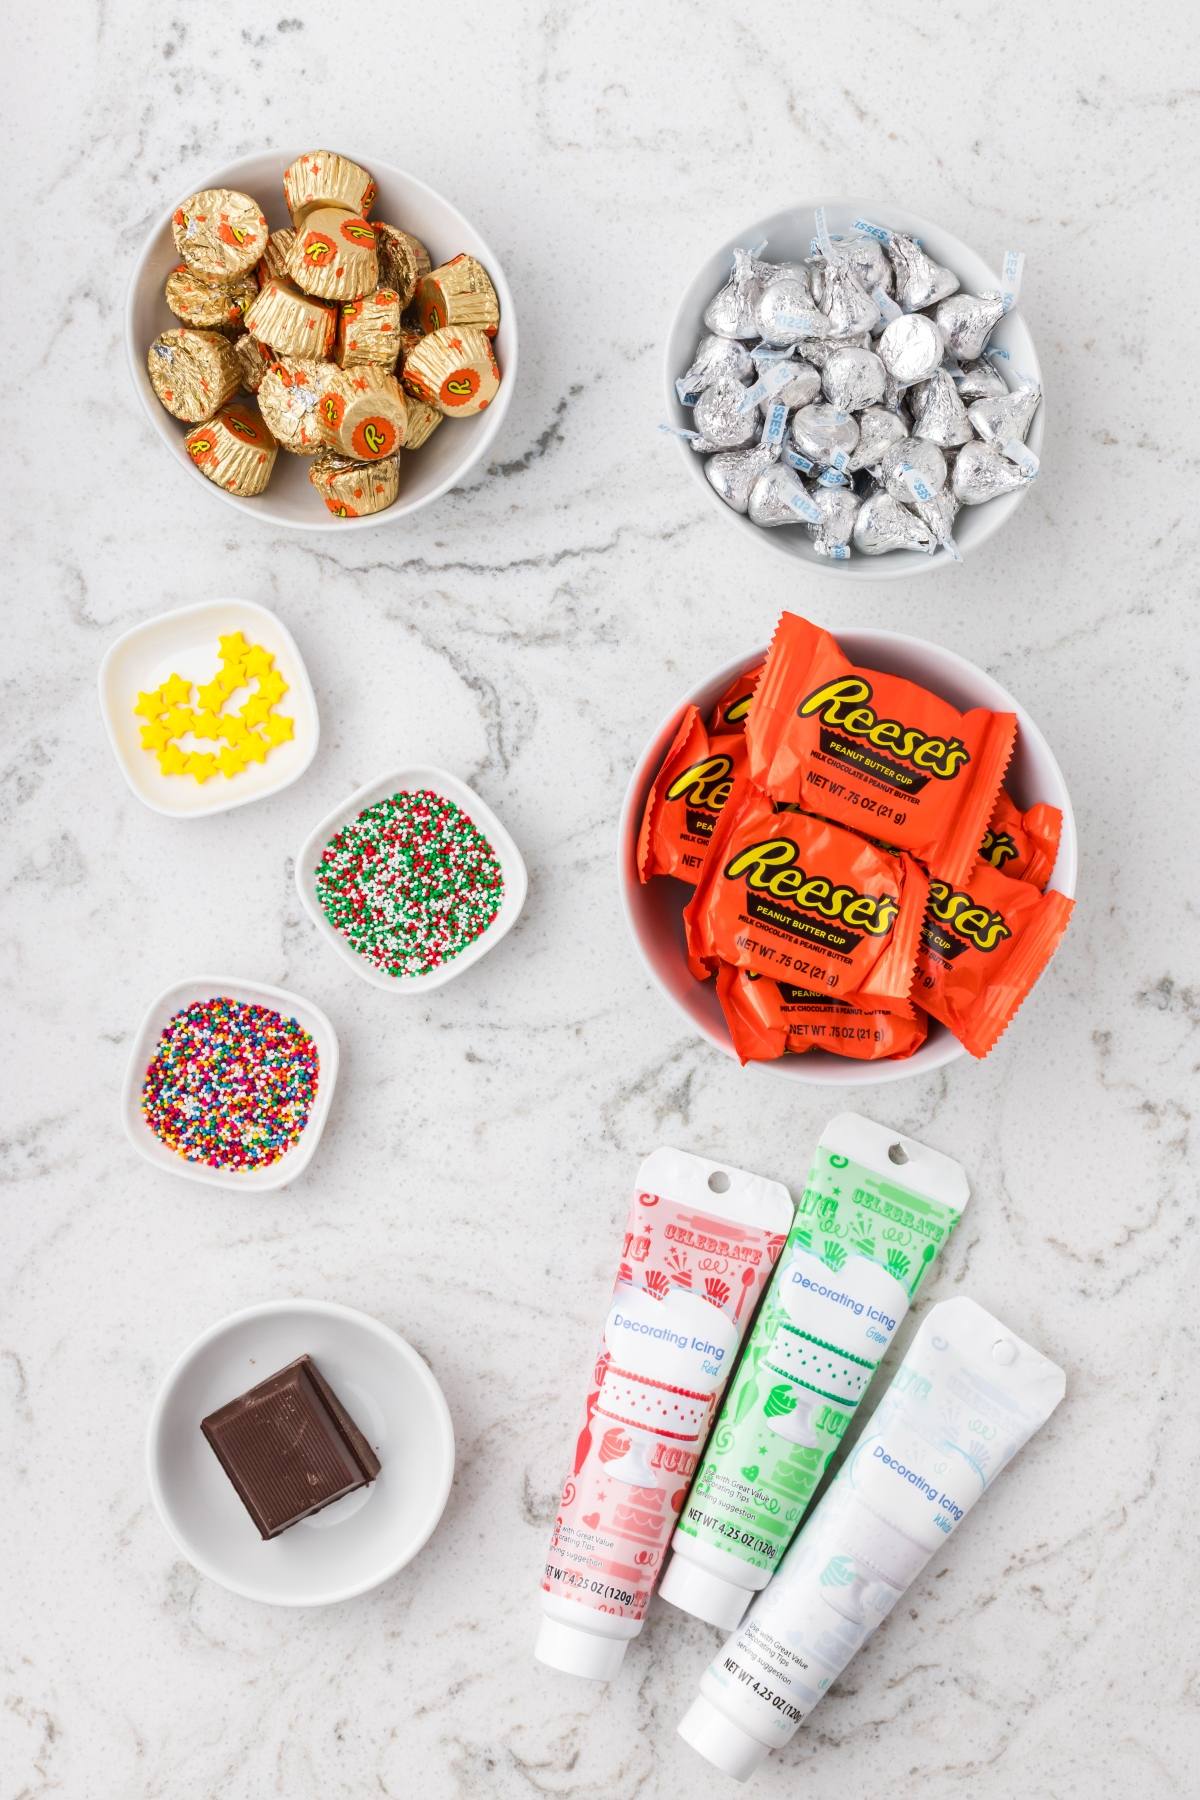
Reese’s Christmas Trees Ingredients
A complete list of ingredients and amounts can be found in the recipe card below.
Chocolate almond bark: Melted for edible glue so layers stay secure.
Mini Reese’s peanut butter cups: Forms base and mid layer for each little tree.
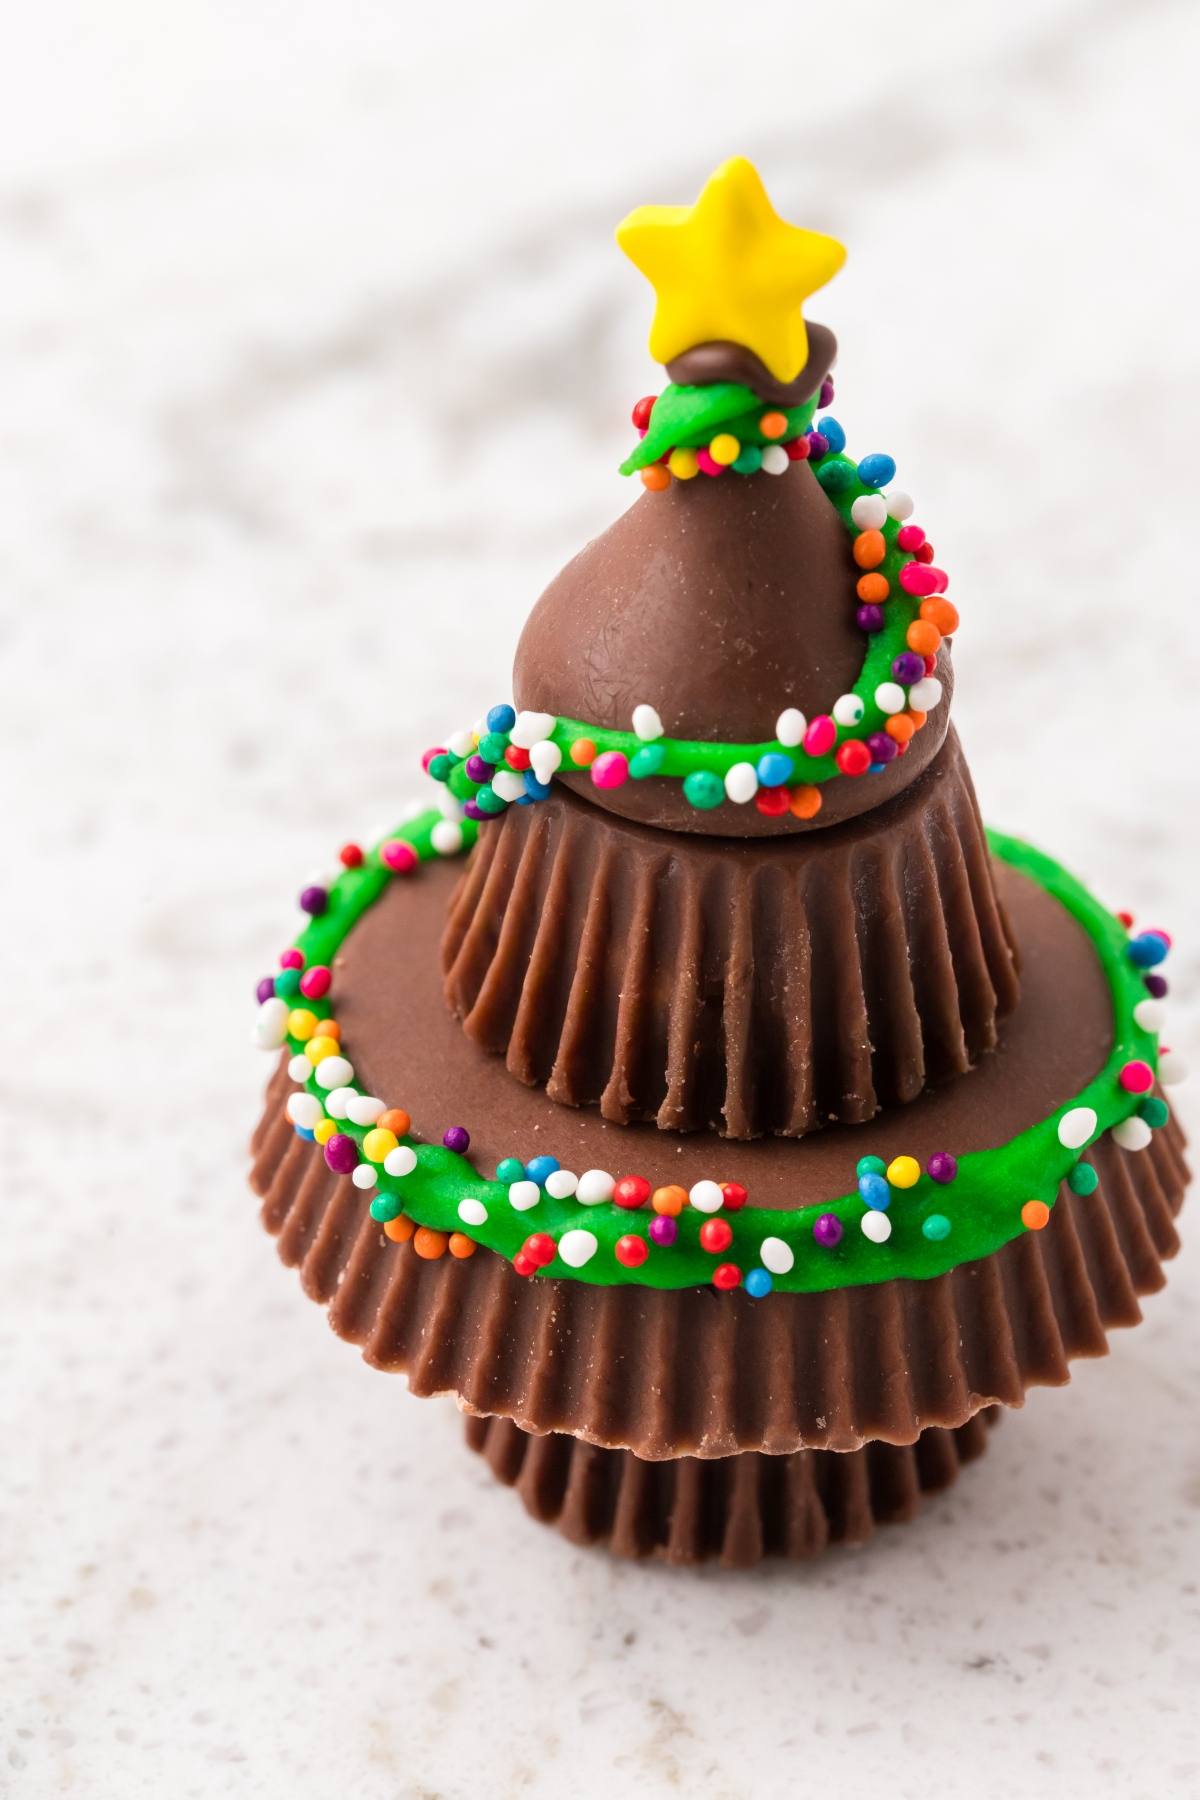
Original Reese’s peanut butter cups: Builds the main body for height and shape.
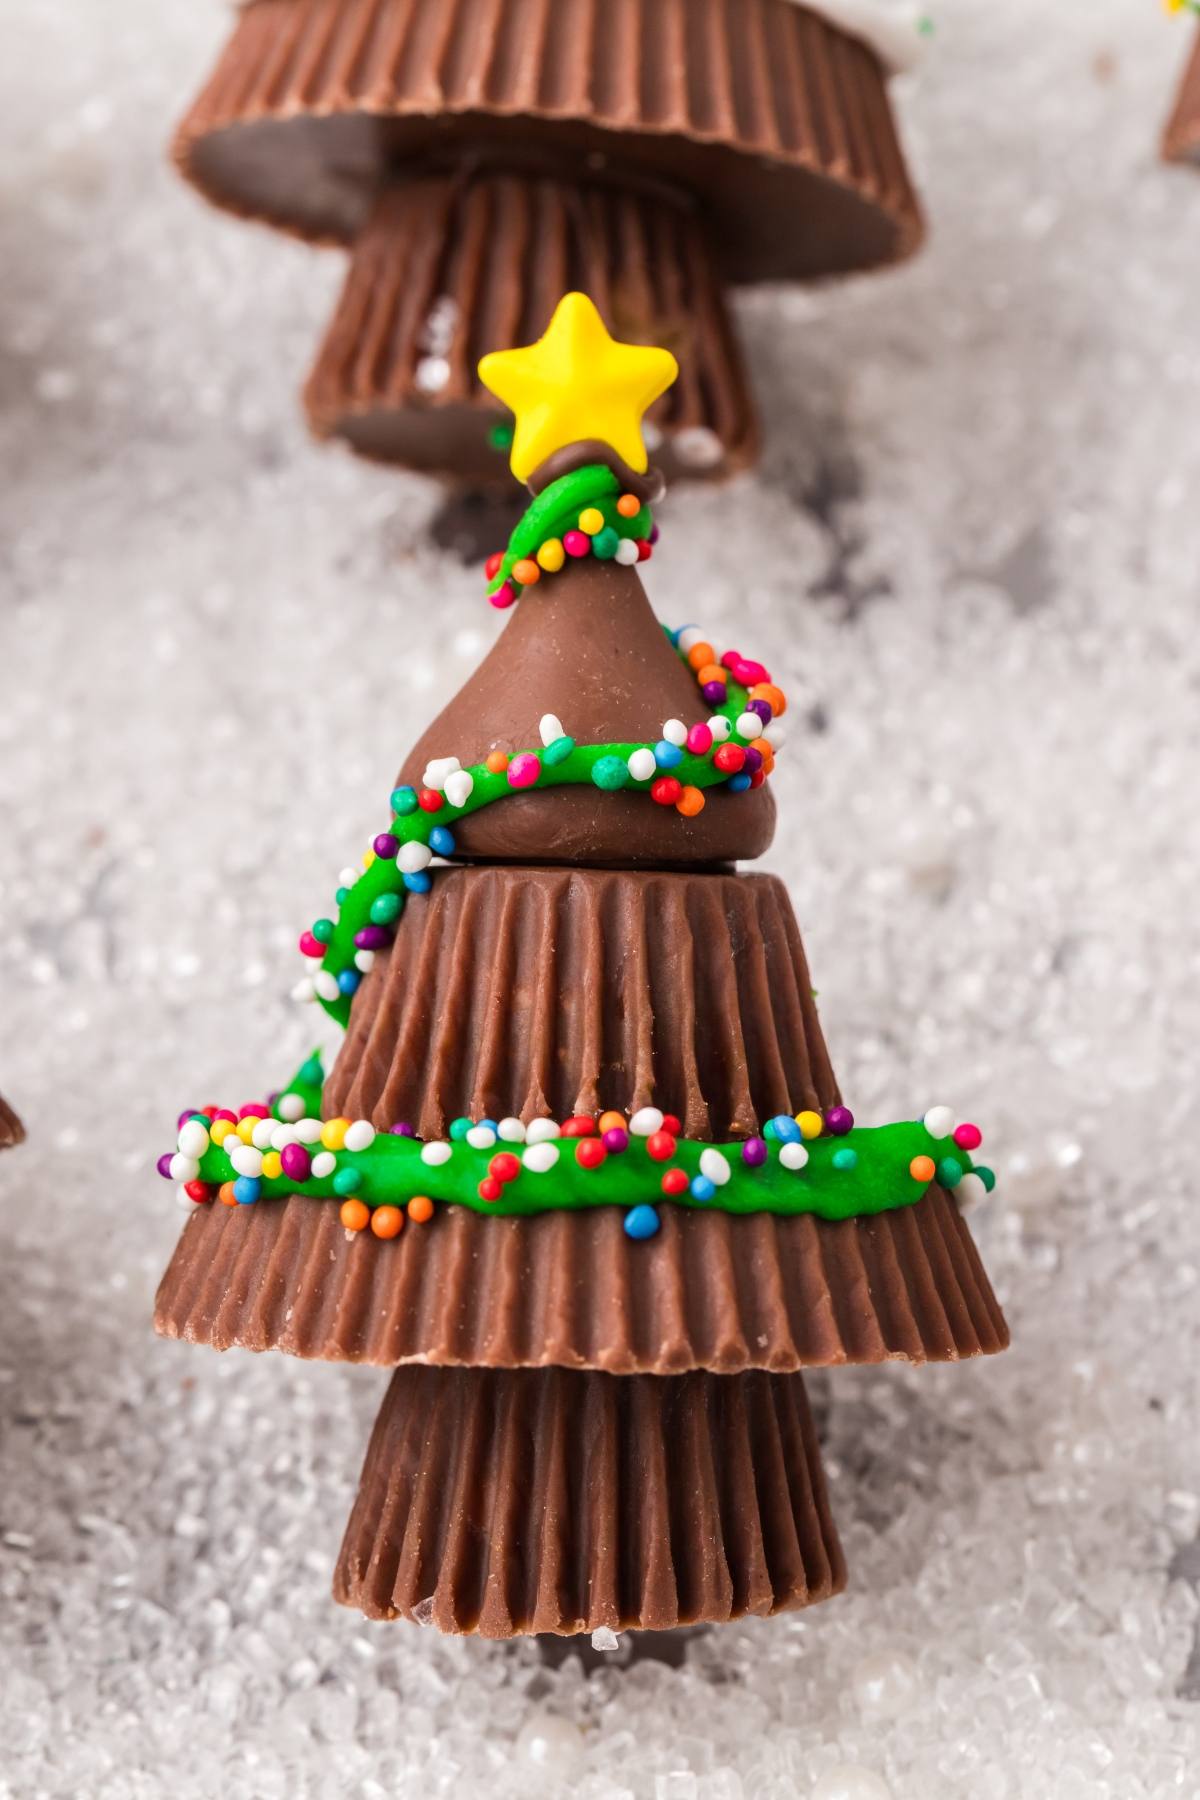
Hershey’s Kisses: Caps the stack to create a neat treetop point.
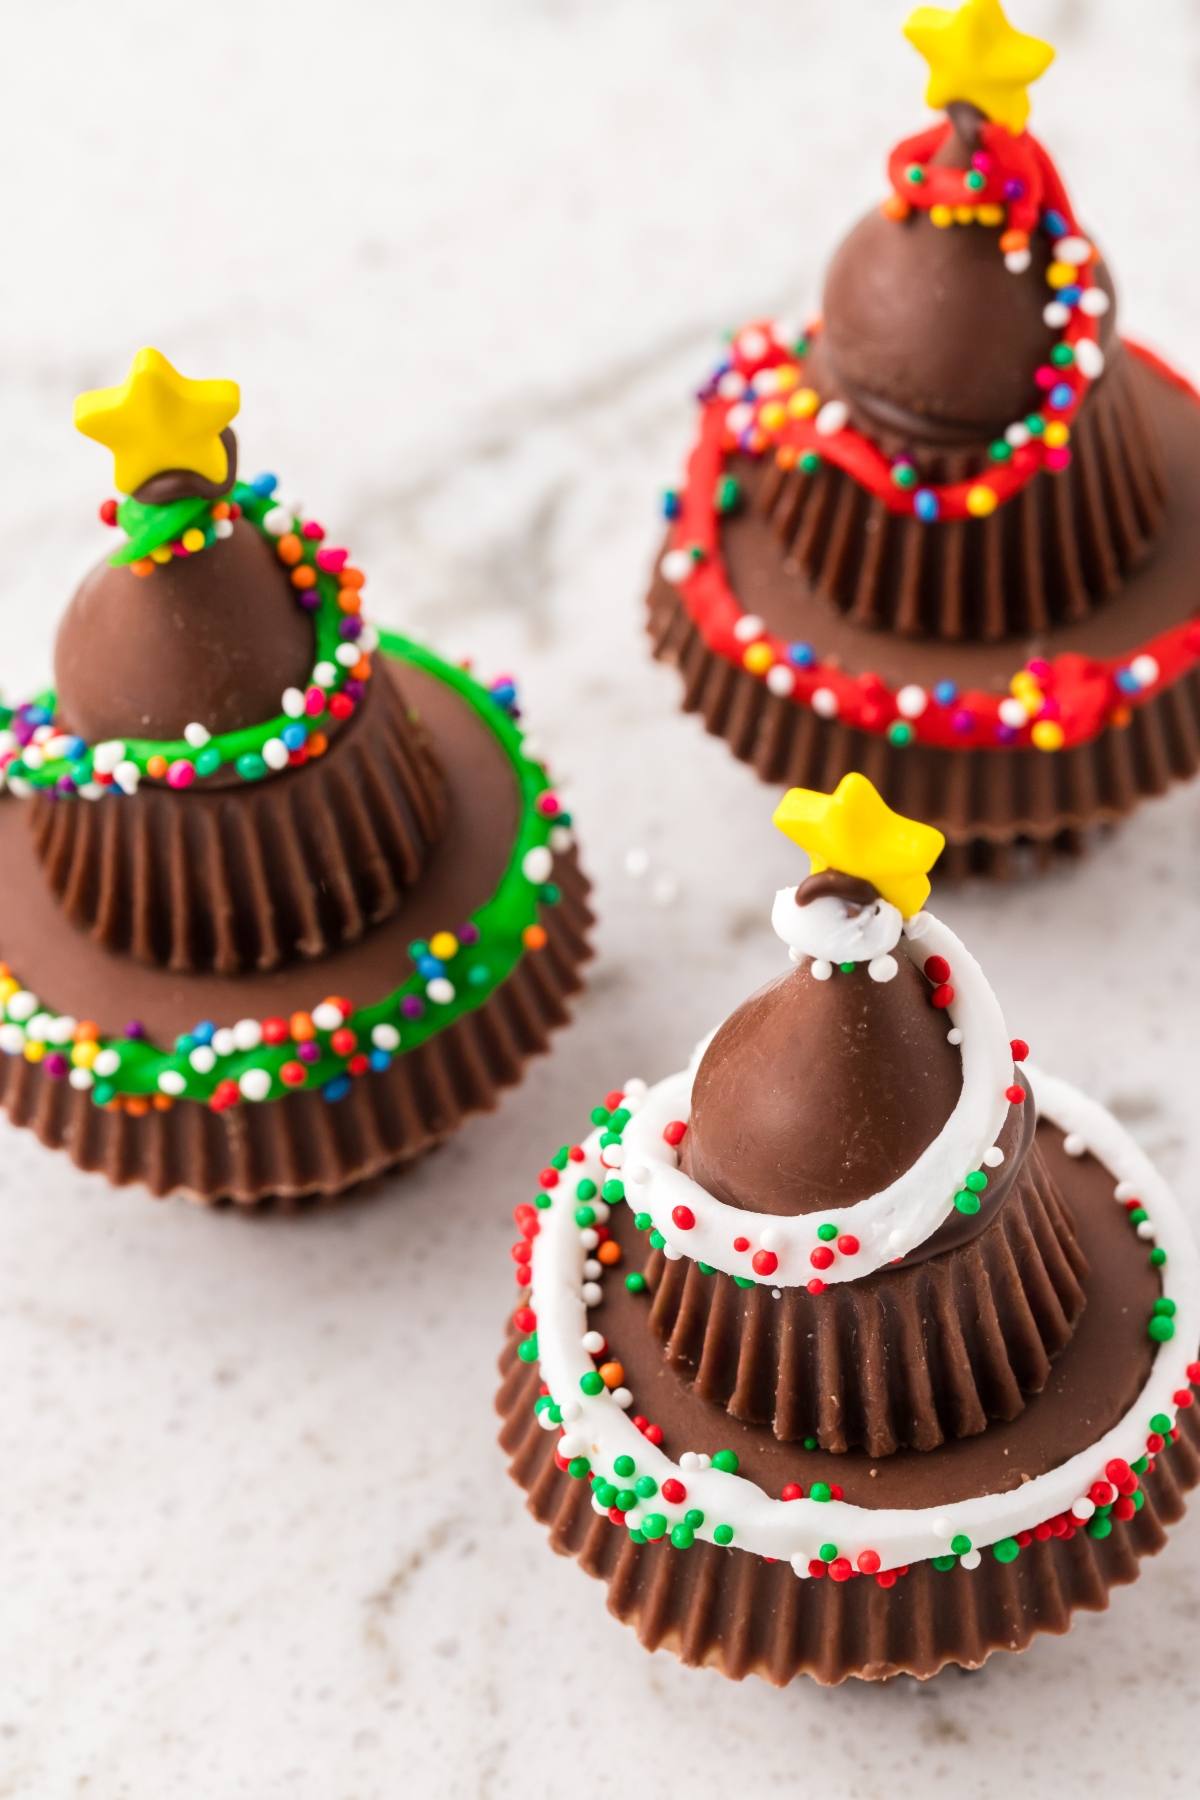
Green decorating icing: Pipes a garland that helps sprinkles adhere.
White decorating icing: Adds light snowy accents and contrast.
Holiday nonpareil sprinkles: Tiny ornaments that stick to fresh icing.
Star sprinkles: Finishes the peak with a classic topper.
How to Make Reese’s Trees
For more detailed instructions with weights and measurements, jump to the printable recipe card.
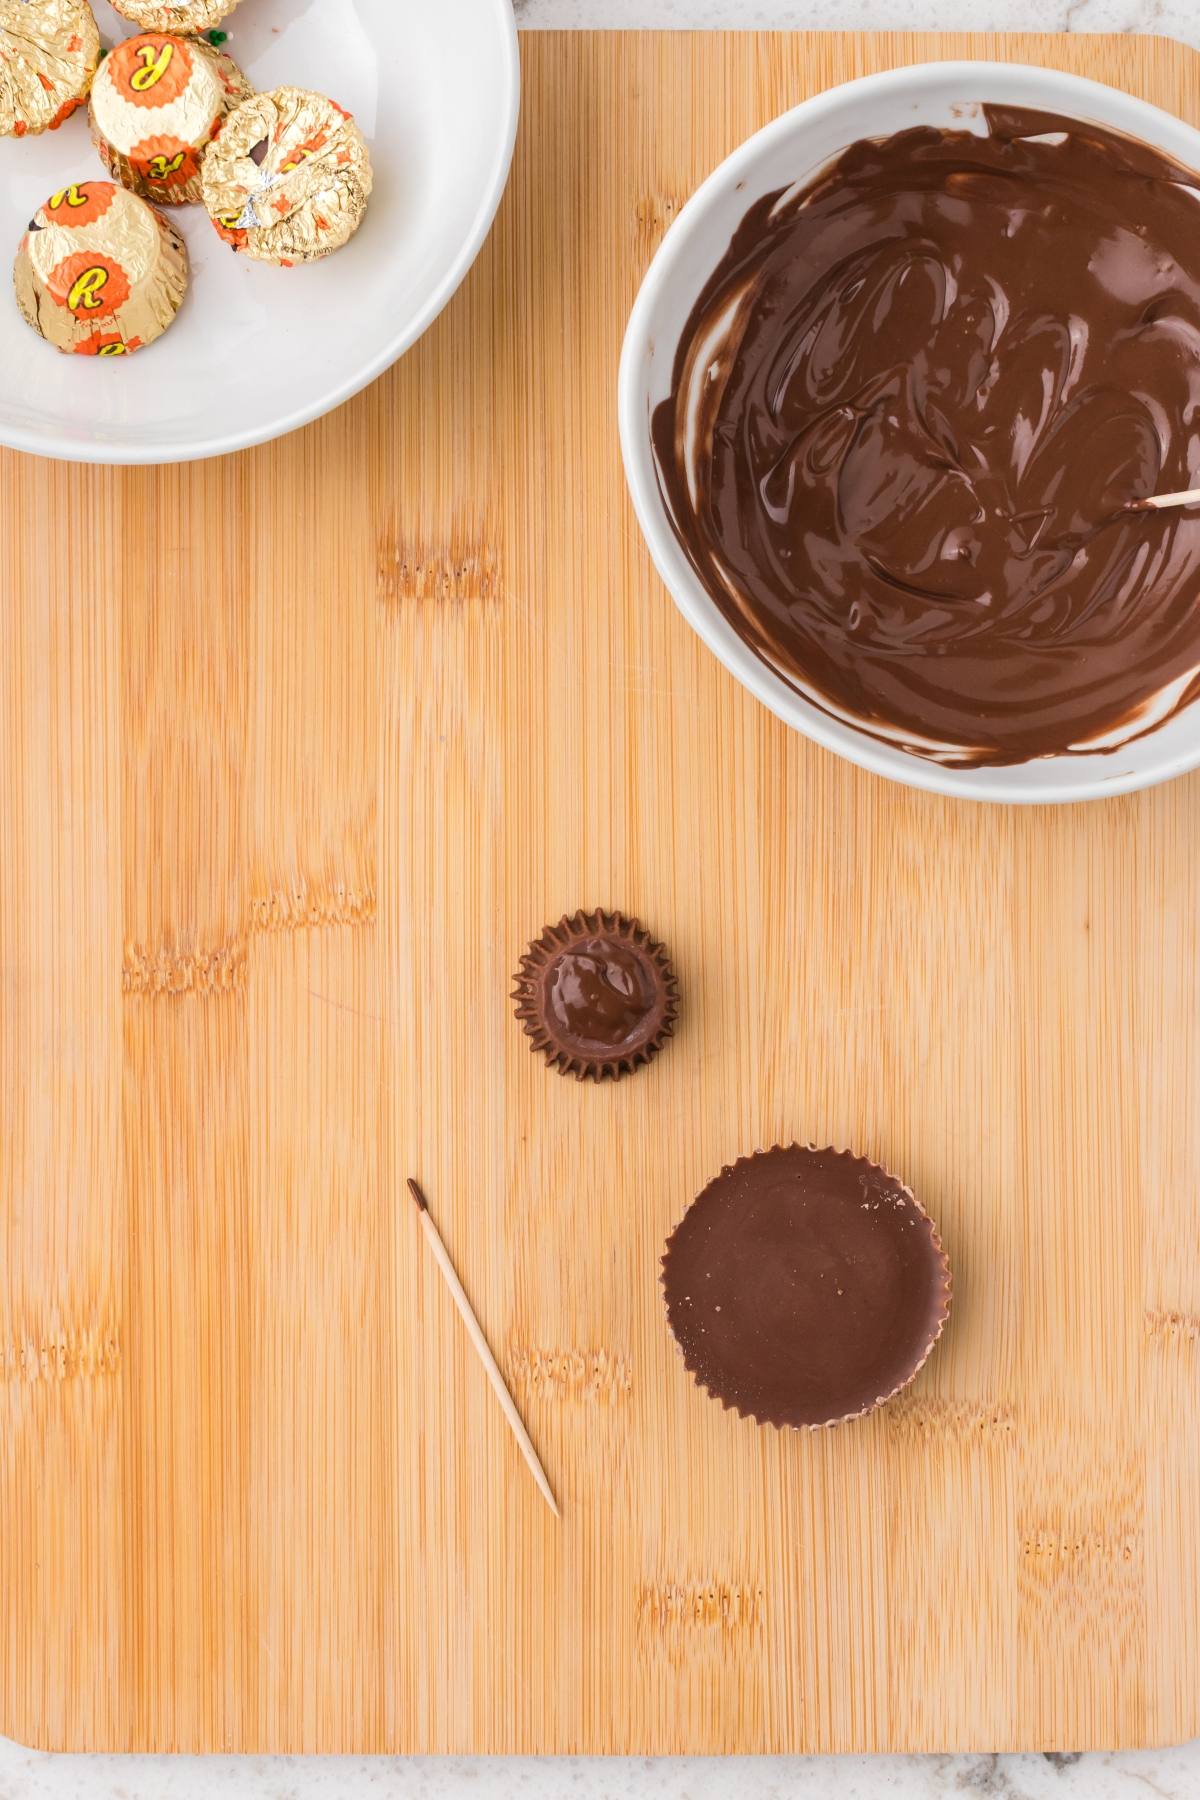
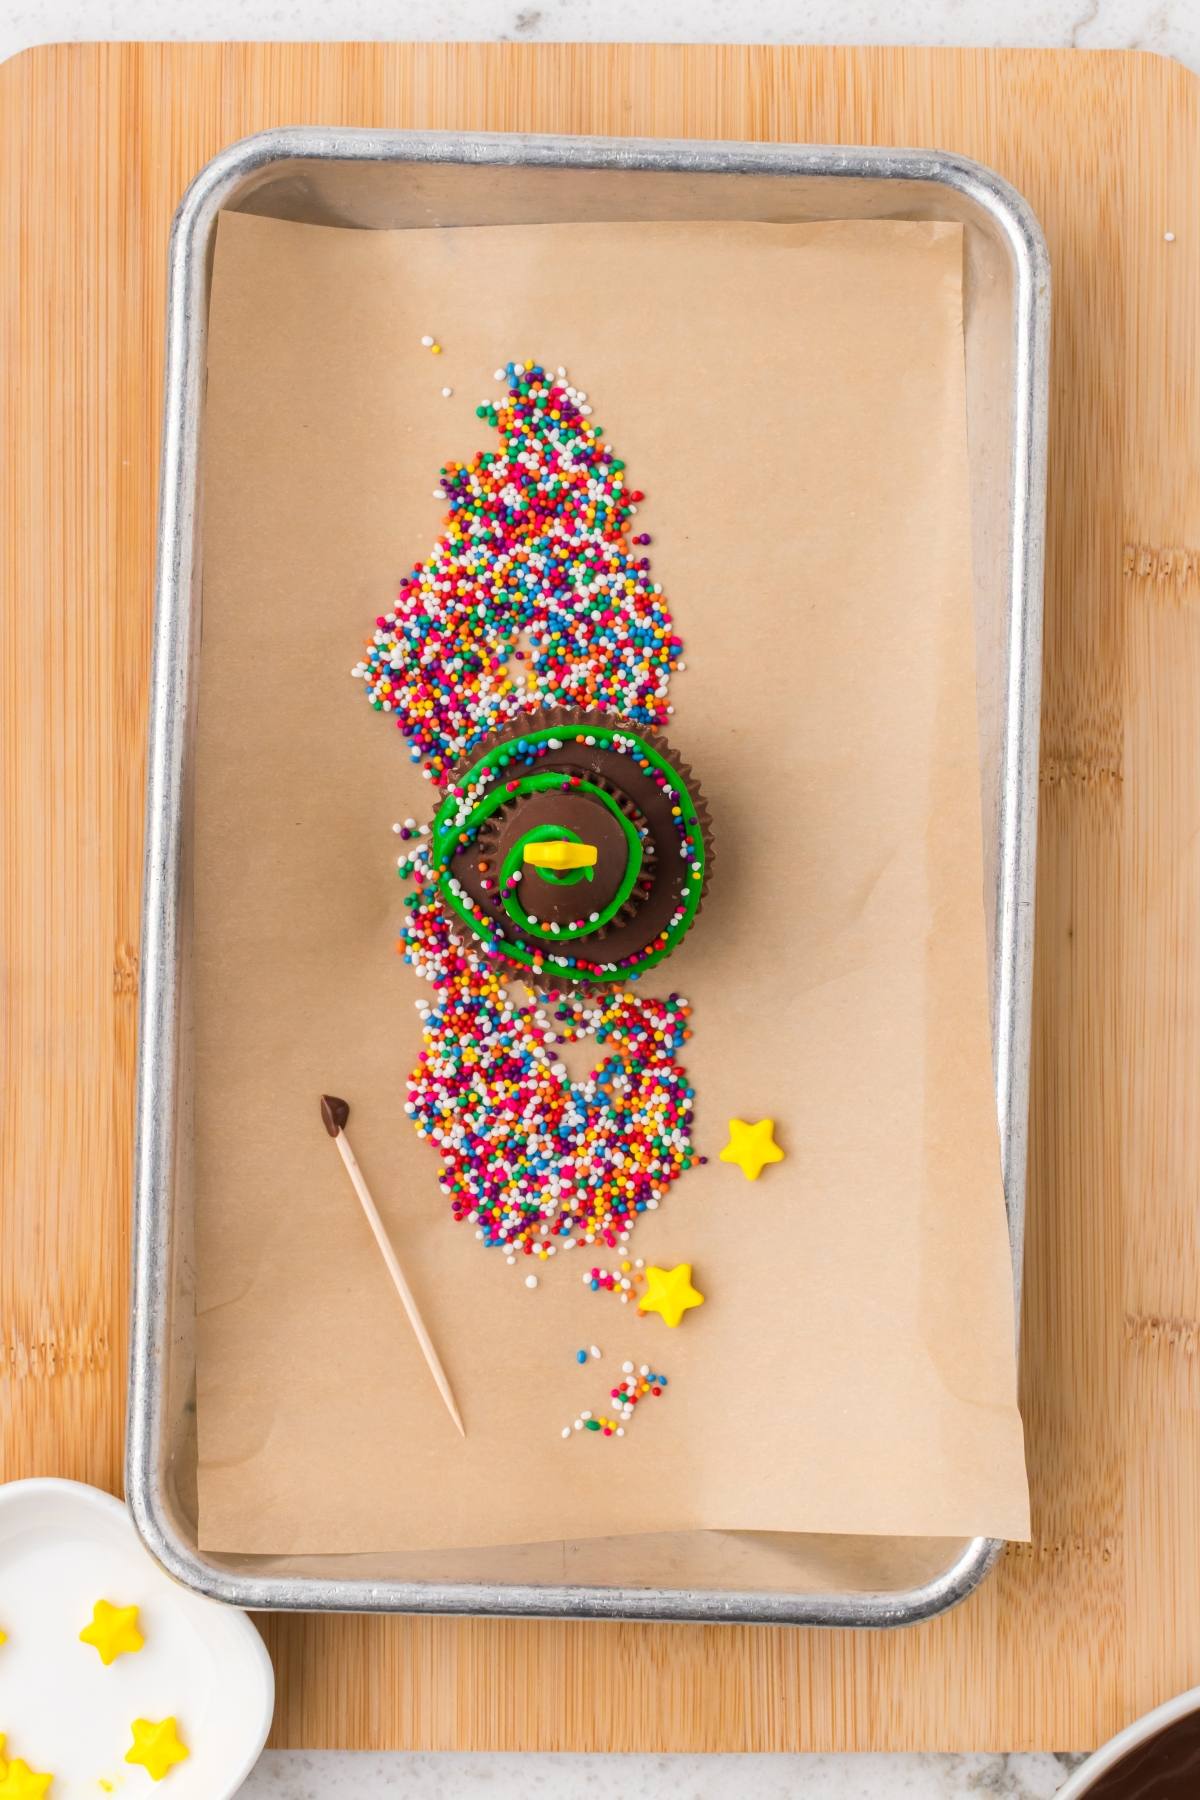
Melt chocolate: Melt almond bark until smooth and glossy, stirring for an even texture.
Prepare tray: Line a sheet with parchment paper and unwrap all candies so assembly stays quick.
Build base: Dab melted chocolate on a mini cup then press an original cup on top until set.
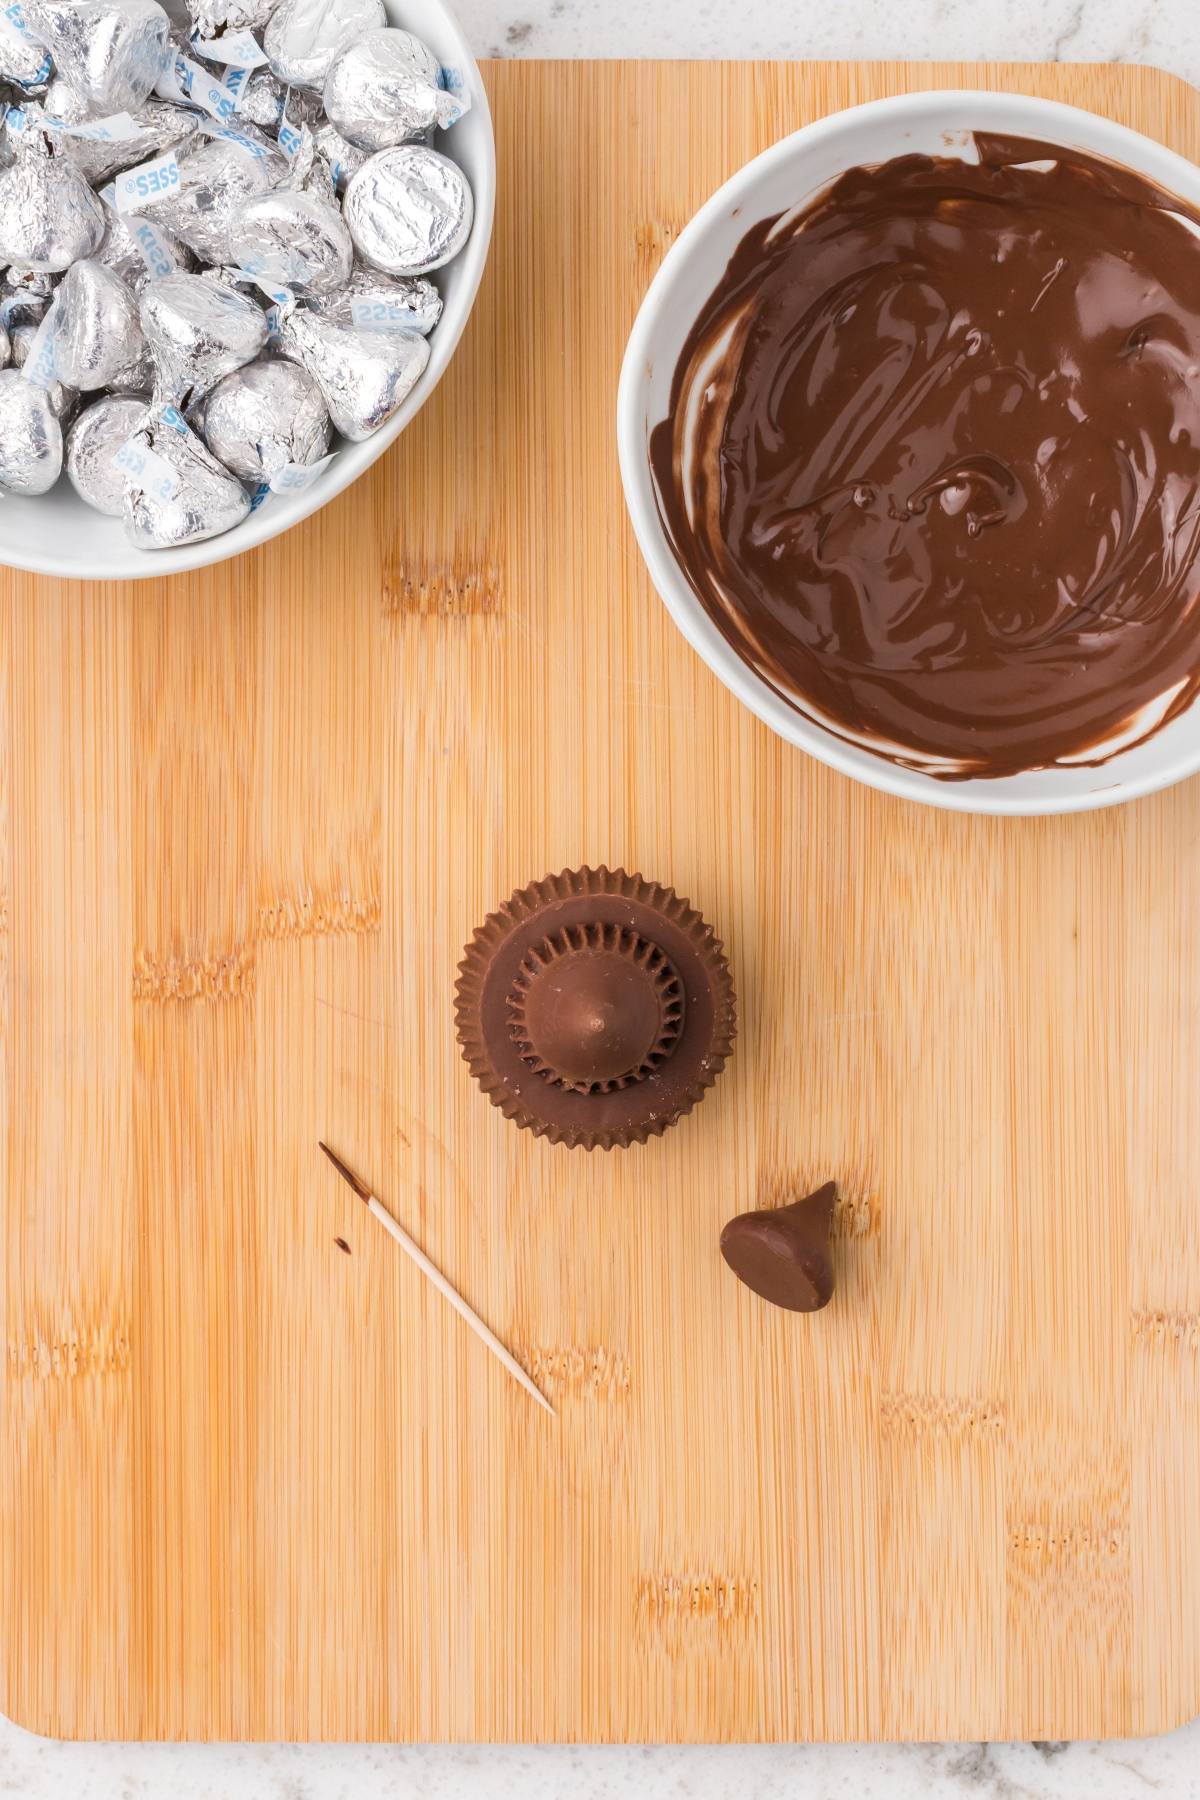
Add middle: Add a small dab press a mini cup on top and keep edges aligned for clean sides.
Top point: Add a dab then press a Hershey’s Kiss on top to be the treetop.
Add star: Touch a star sprinkle to a tiny bit of chocolate and set it on the tip.
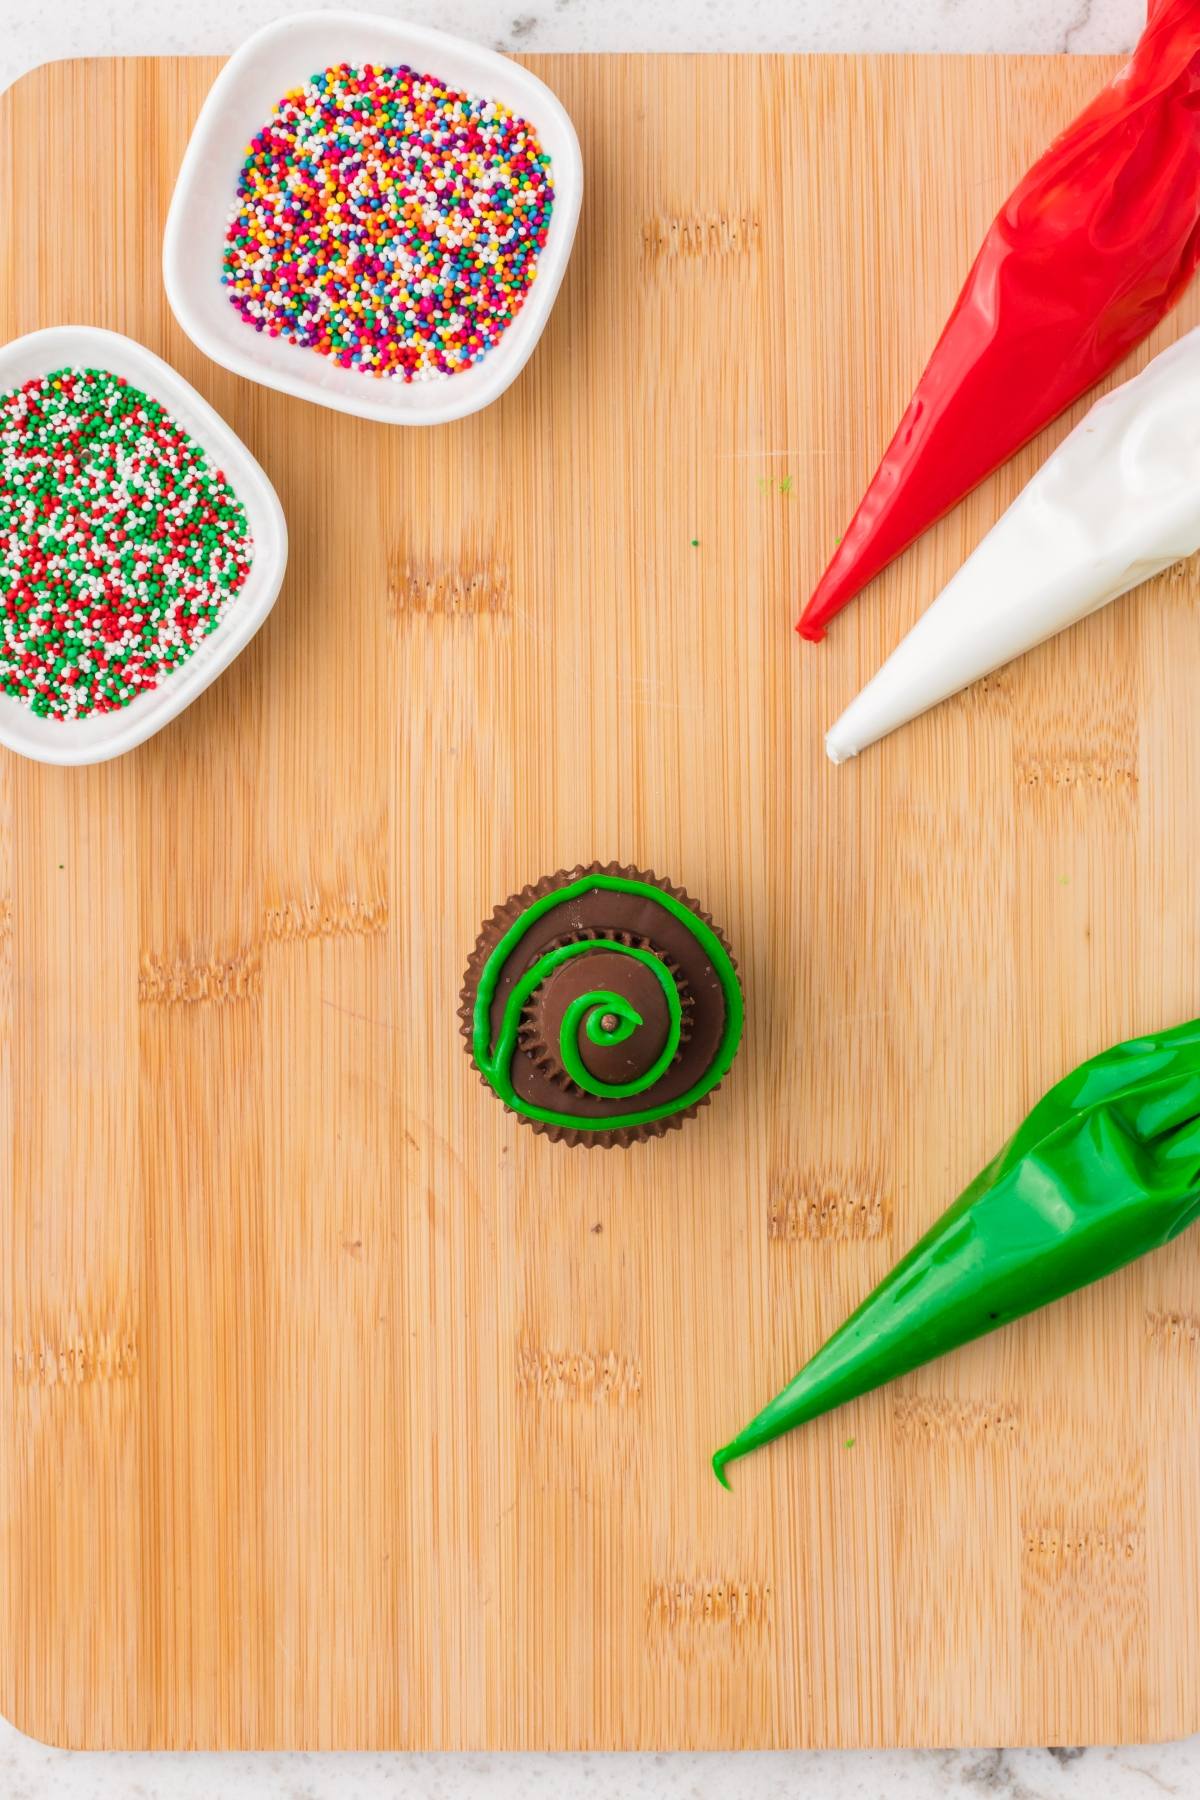
Decorate: Pipe green icing in swirls for garland and dust with sprinkles while the icing is fresh.
Set and serve: Wait until the stacks firm, then move them to a serving platter and enjoy.

Substitutions and Variations
White almond bark: Use for a snowy look with bright contrast. This festive cranberry pistachio white chocolate bark would work to add “snow” to the tree.
Chocolate options: You can use milk or dark chocolate cups instead of the standard ones for a richer or sweeter finish. Any peanut butter cup style works if the sizes stack cleanly.
Gluten-free variation: Most ingredients are naturally gluten-free but always check labels on candy and sprinkles, since some brands add wheat or gluten in coatings.
Colored garland: Swap green for red or gold to match your theme.
Extra sparkle: Add edible glitter or crushed candy canes for crunch.
Serving Suggestions
With a festive drink: Say cheers to Christmas with a Santa’s hat coconut rum cocktail or chocolate cake martini.
With other sweet treats: These marshmallow pops would go nicely with Reece’s trees.
With savory snacks: Pair your delicious Reese’s peanut butter cup Christmas trees with puff pastry Christmas trees and poinsettia focaccia.
Drinks: Enjoy some white Christmas punch or spiced punch on the side!
How to Store
Store: Keep these treats in an airtight container at room temperature for up to 5 days, away from heat and sunlight.
Freeze: Not recommended because the icing and chocolate can crack after thawing.
Top Tips
Stage ingredients: Unwrap everything before melting so stacks go together smoothly.
Keep it fluid: If the chocolate thickens, warm briefly and stir until silky again.
Light pressure: Press gently so edges don’t crack and the layers stay even.
Neat lines: Slightly cool icing if the room is warm, to help control the swirl.
Reese’s Peanut Butter Cup Trees FAQs
Nudge it straight while the chocolate is still soft then let it set undisturbed.
Handle the edges or use food safe gloves when placing layers.
Reese’s Christmas Trees Recipe

Peanut Butter Cup Christmas Trees
Ingredients
- 6 Ounces chocolate almond bark
- 12 mini peanut butter cups, unwrapped
- 12 peanut butter cups, unwrapped
- 12 Hershey Kisses, unwrapped
For Garlands and Details
Instructions
- Place chocolate almond bark in a microwave-safe bowl and microwave according to the package directions, stirring until smooth and glossy.
- Set all the Reese’s peanut butter cups on a parchment-lined baking sheet, keeping them close together for quick assembly.
- Use a toothpick or small spoon to dab the melted almond bark onto the top center of 1 mini Reese’s peanut butter cup, then gently press 1 original Reese’s peanut butter cup on top.
- Hold for 5 to 10 seconds until it begins to set.
- Dab more melted almond bark onto the top center of the newly stacked cup, then add 1 mini Reese’s peanut butter cup on top.
- Hold gently until secure.
- Add a small dab of melted almond bark to the top center of the mini Reese’s cup and place a Hershey’s Kiss on top to form the tree’s point.
- Hold until stable.
- Dip the back of 1 star sprinkle into a tiny amount of melted almond bark, then press it onto the tip of the Hershey’s Kiss.
- Allow to rest for 10 minutes so the “glue” firms.
- Using decorating icing, pipe a loose swirl around the stacked candies to resemble holiday garland, allowing it to wrap from top to bottom gently.
- Before the icing sets, sprinkle holiday nonpareils over the icing so they stick and look like colorful ornaments.
- Allow the trees to sit at room temperature for 10 minutes to firm the icing so the layers stay secure when moving them.
Notes
Keep it fluid: If the chocolate thickens, warm briefly and stir until silky again.
Light pressure: Press gently so edges don’t crack and the layers stay even.
Neat lines: Slightly cool icing if the room is warm, to help control the swirl.
Nutrition
These tasty Christmas tree peanut butter cups bring warmth and color to the season with every bite. The chocolate peanut butter layers taste rich and familiar, while the icing and sprinkles add just enough holiday sparkle. Making them feels playful and creative, and the finished trees always draw attention on a party table. They’re a cheerful reminder that yummy homemade treats can steal the spotlight!
Other Recipes to Try
Bella Bucchiotti
Bella Bucchiotti is a Canadian-based syndicated food, travel, and lifestyle writer, photographer, and creator at xoxoBella. She founded xoxoBella in 2015, where she shares her love for food, dogs, sustainability, fitness, crafts, outdoor adventures, travel, and philanthropy to encourage others to run the extra mile, try new recipes, visit unfamiliar places, and stand for a cause. Bella creates stress-free and family-friendly recipes for weeknight dinners and festive feasts.