This post may contain affiliate links, please see the privacy policy for details.
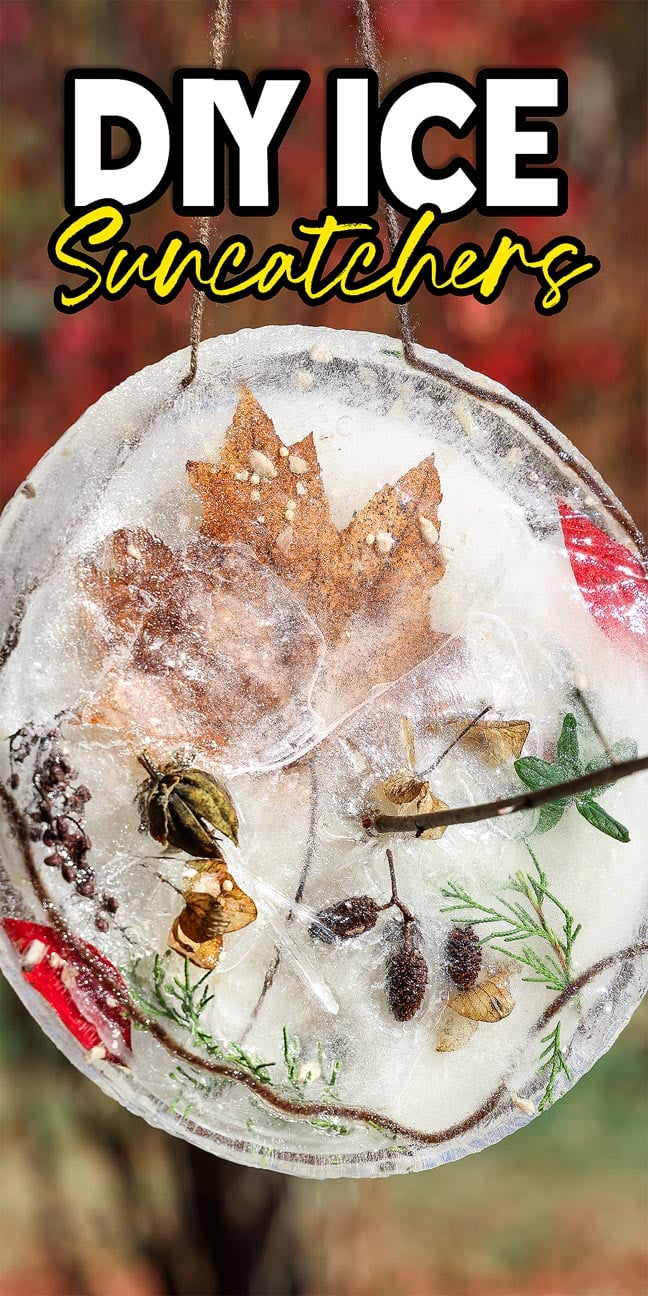
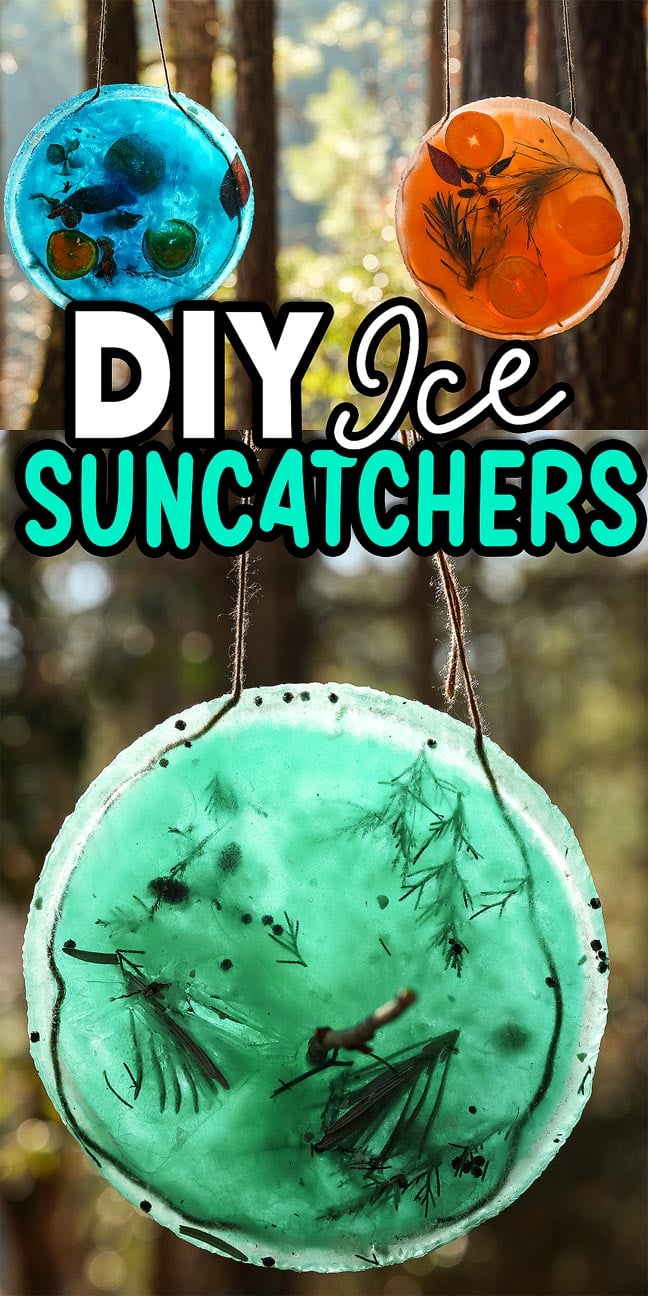
Make winter sparkle with these beautiful DIY ice suncatchers. This simple and creative snow day craft transforms simple materials into frozen art that glows in the winter sunlight. Kids will love gathering winter flora and watching their icy creations form outdoors or in the freezer. With only water, yarn and disposable pie tins, you can craft unique and gorgeous ice ornaments to hang on trees or near a window. It’s an easy, hands-on winter craft for kids that celebrates nature and creativity.
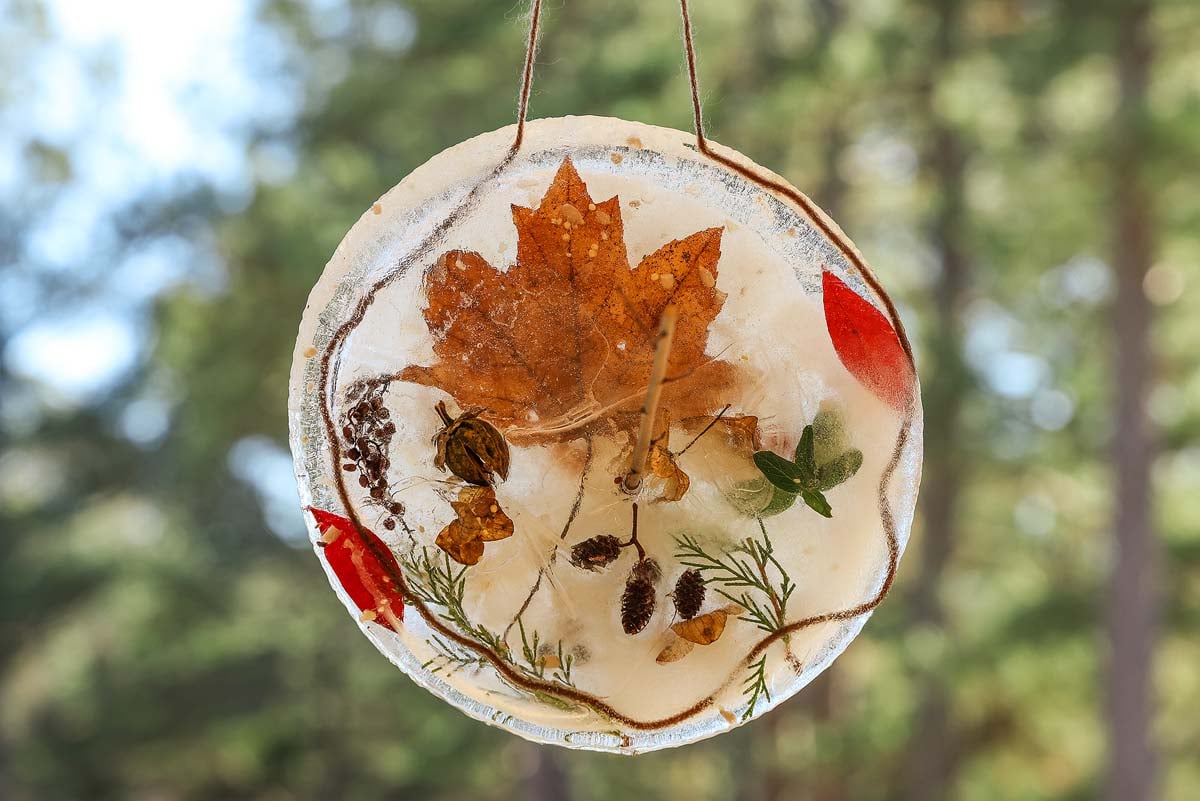
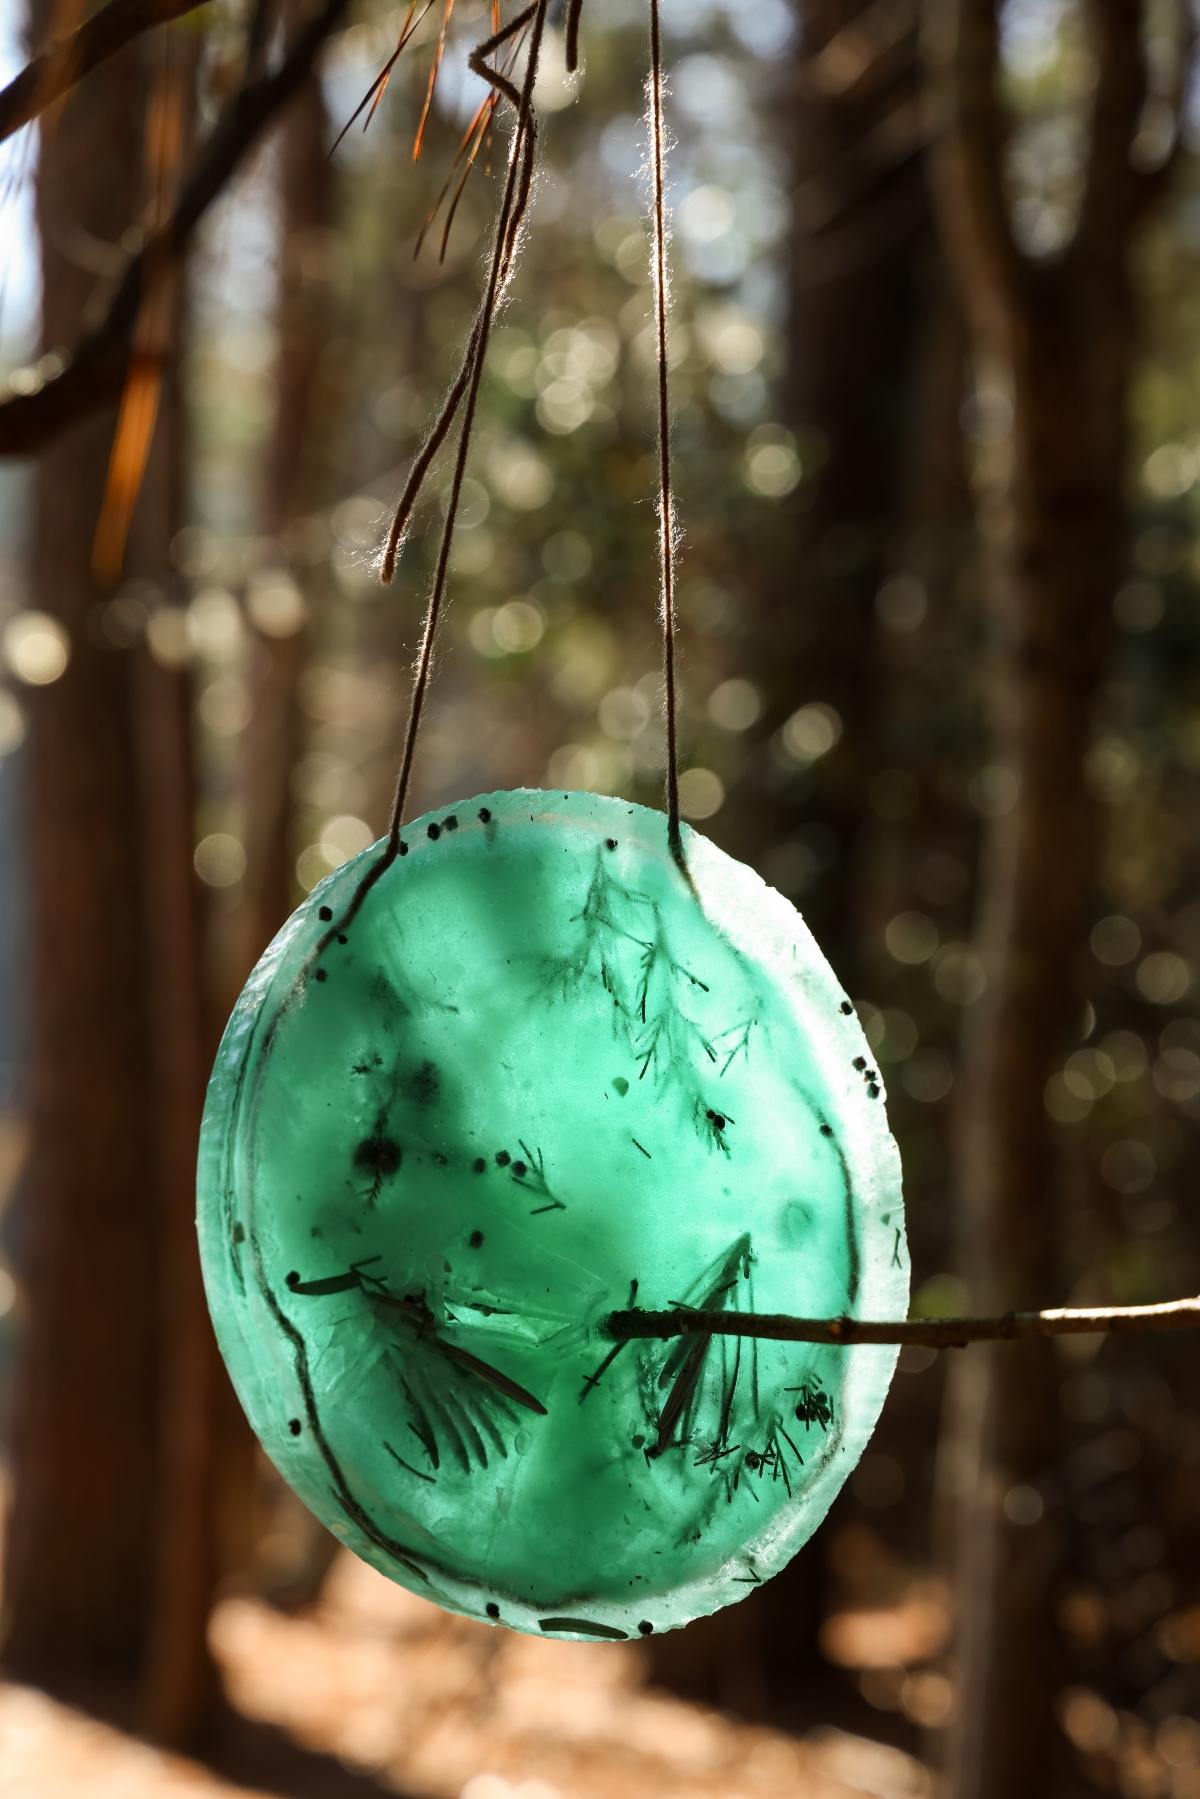
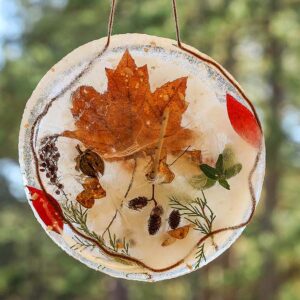
DIY ice suncatchers are a fun winter craft for kids using water, yarn and natural materials to create colorful frozen ornaments that shine and sparkle in the sunlight.
You may also like frozen bubbles, cute pine cone turkeys, a chunky hand knit blanket, ugly Christmas sweater or a Christmas countdown calendar.
Why You’ll Love It
Creative fun: It’s an engaging way to enjoy a snow day with a hands-on project.
Eco-friendly: Uses natural materials from your yard or local park.
Easy setup: Only a few simple supplies needed.
Beautiful results: The finished ice suncatcher looks stunning in the sunshine.
Educational: Teaches kids about freezing, color and nature.
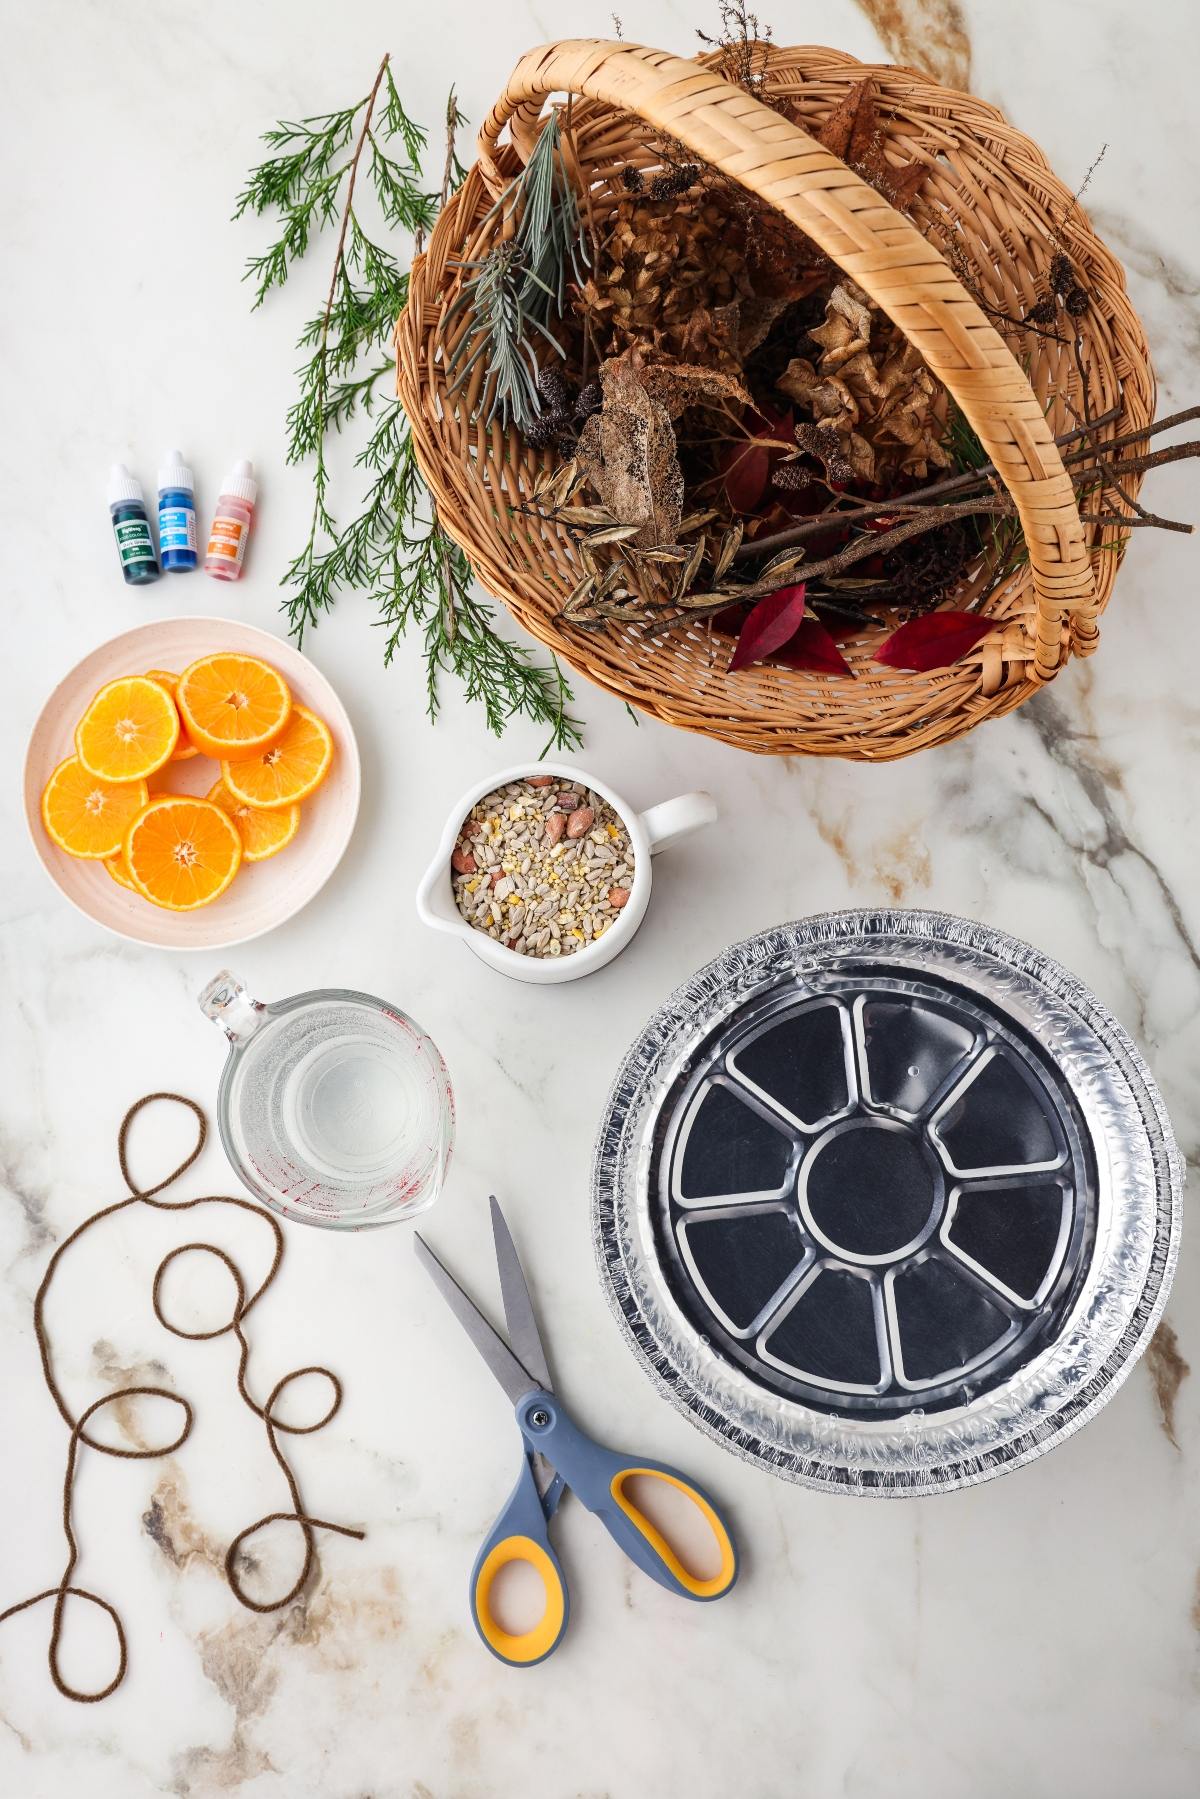
Ice Suncatcher Materials
A complete list of supplies and amounts can be found in the recipe card below.
Disposable pie tins: Use 9-inch tins as molds for freezing.
Water: Forms the base of the ice suncatchers.
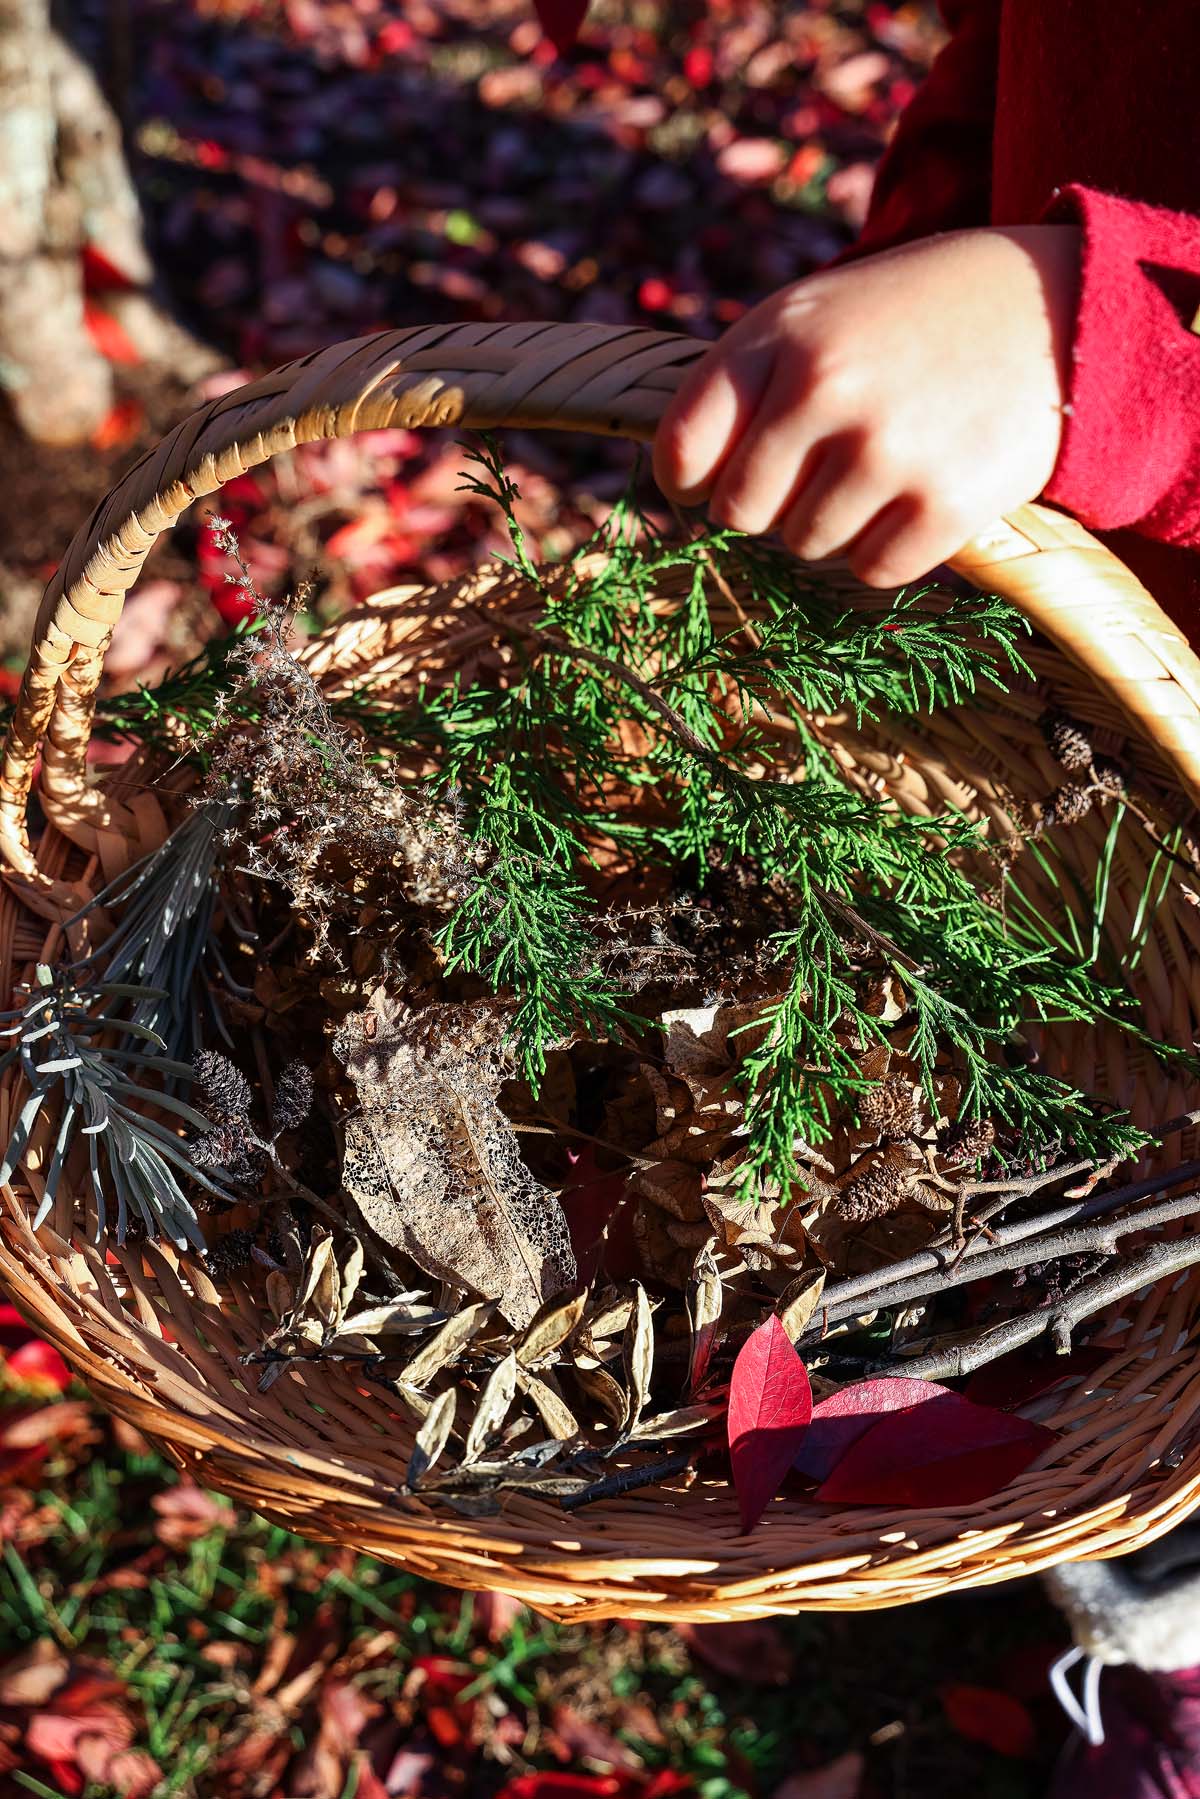
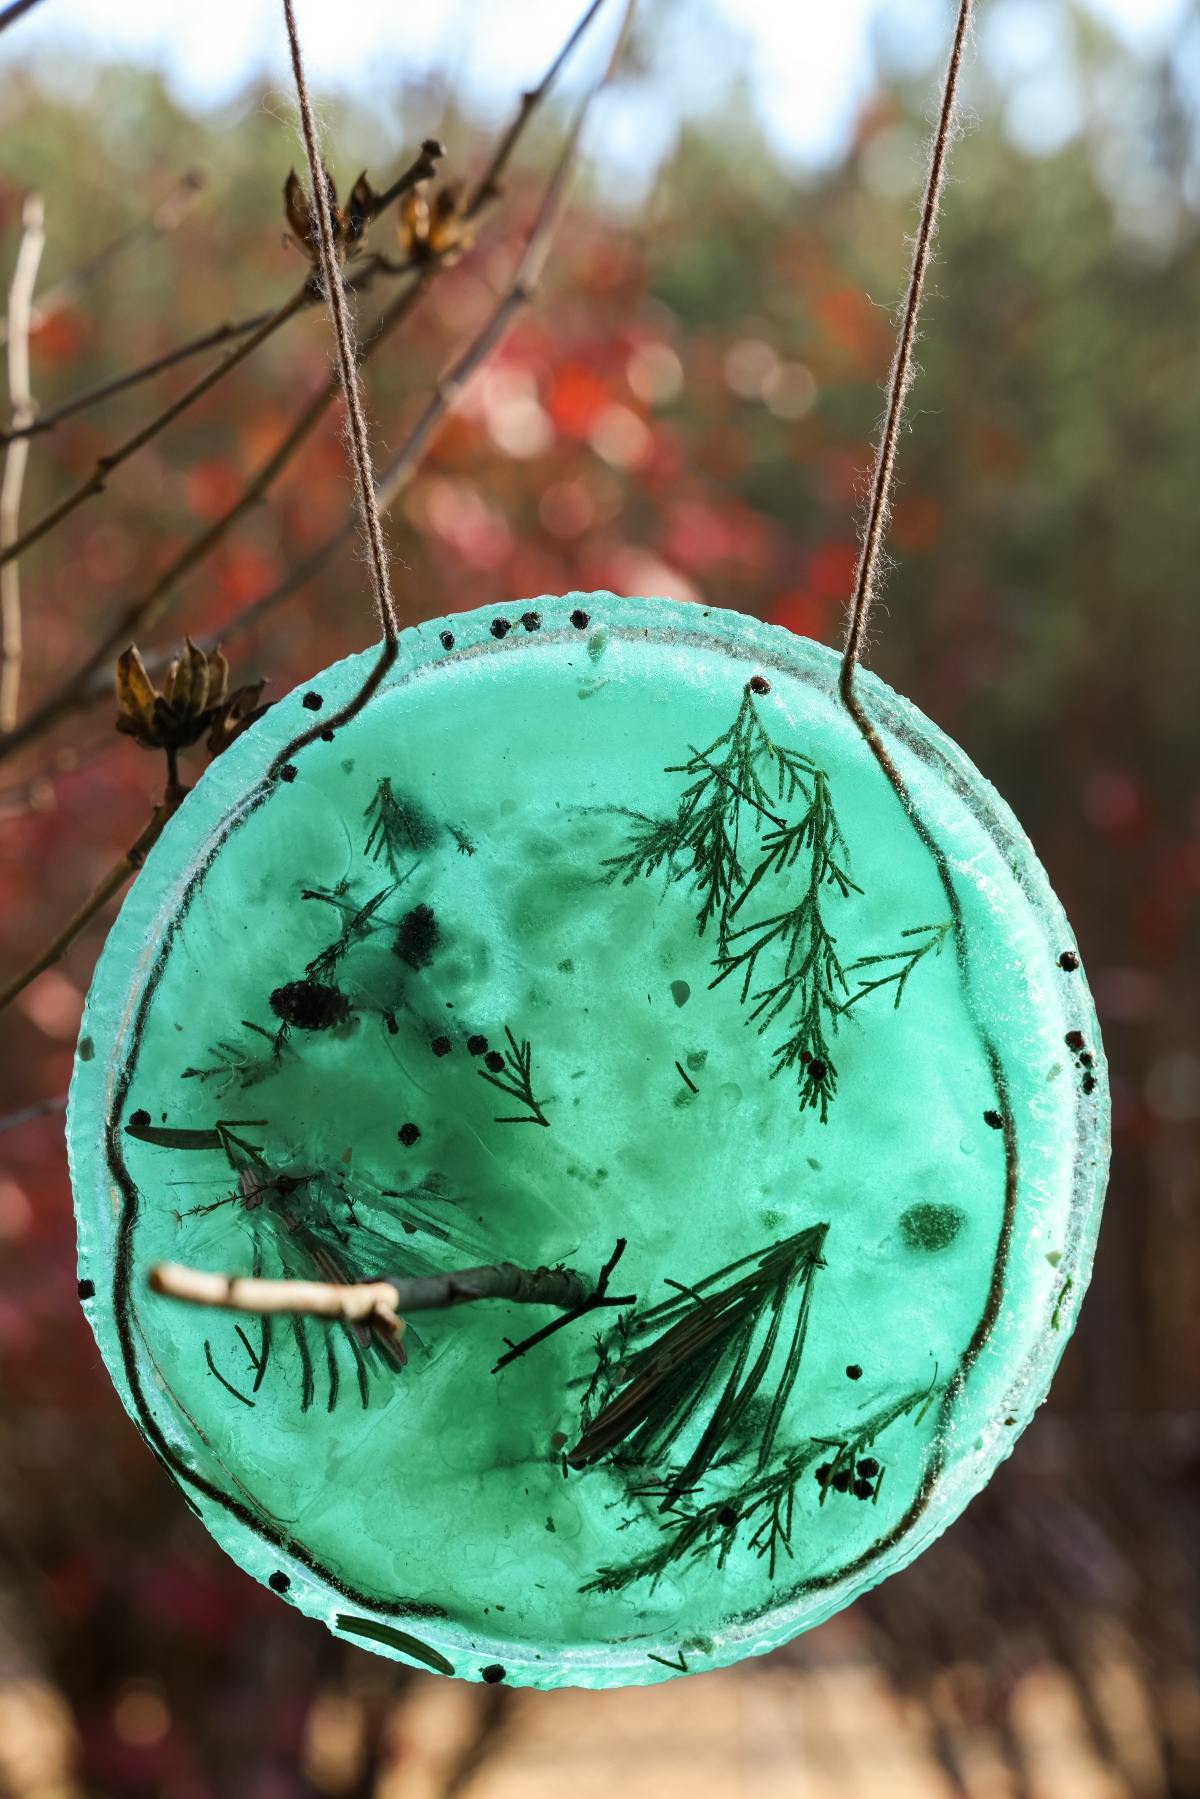
Winter flora: Gather leaves, twigs, berries or pine needles during your nature hunt.
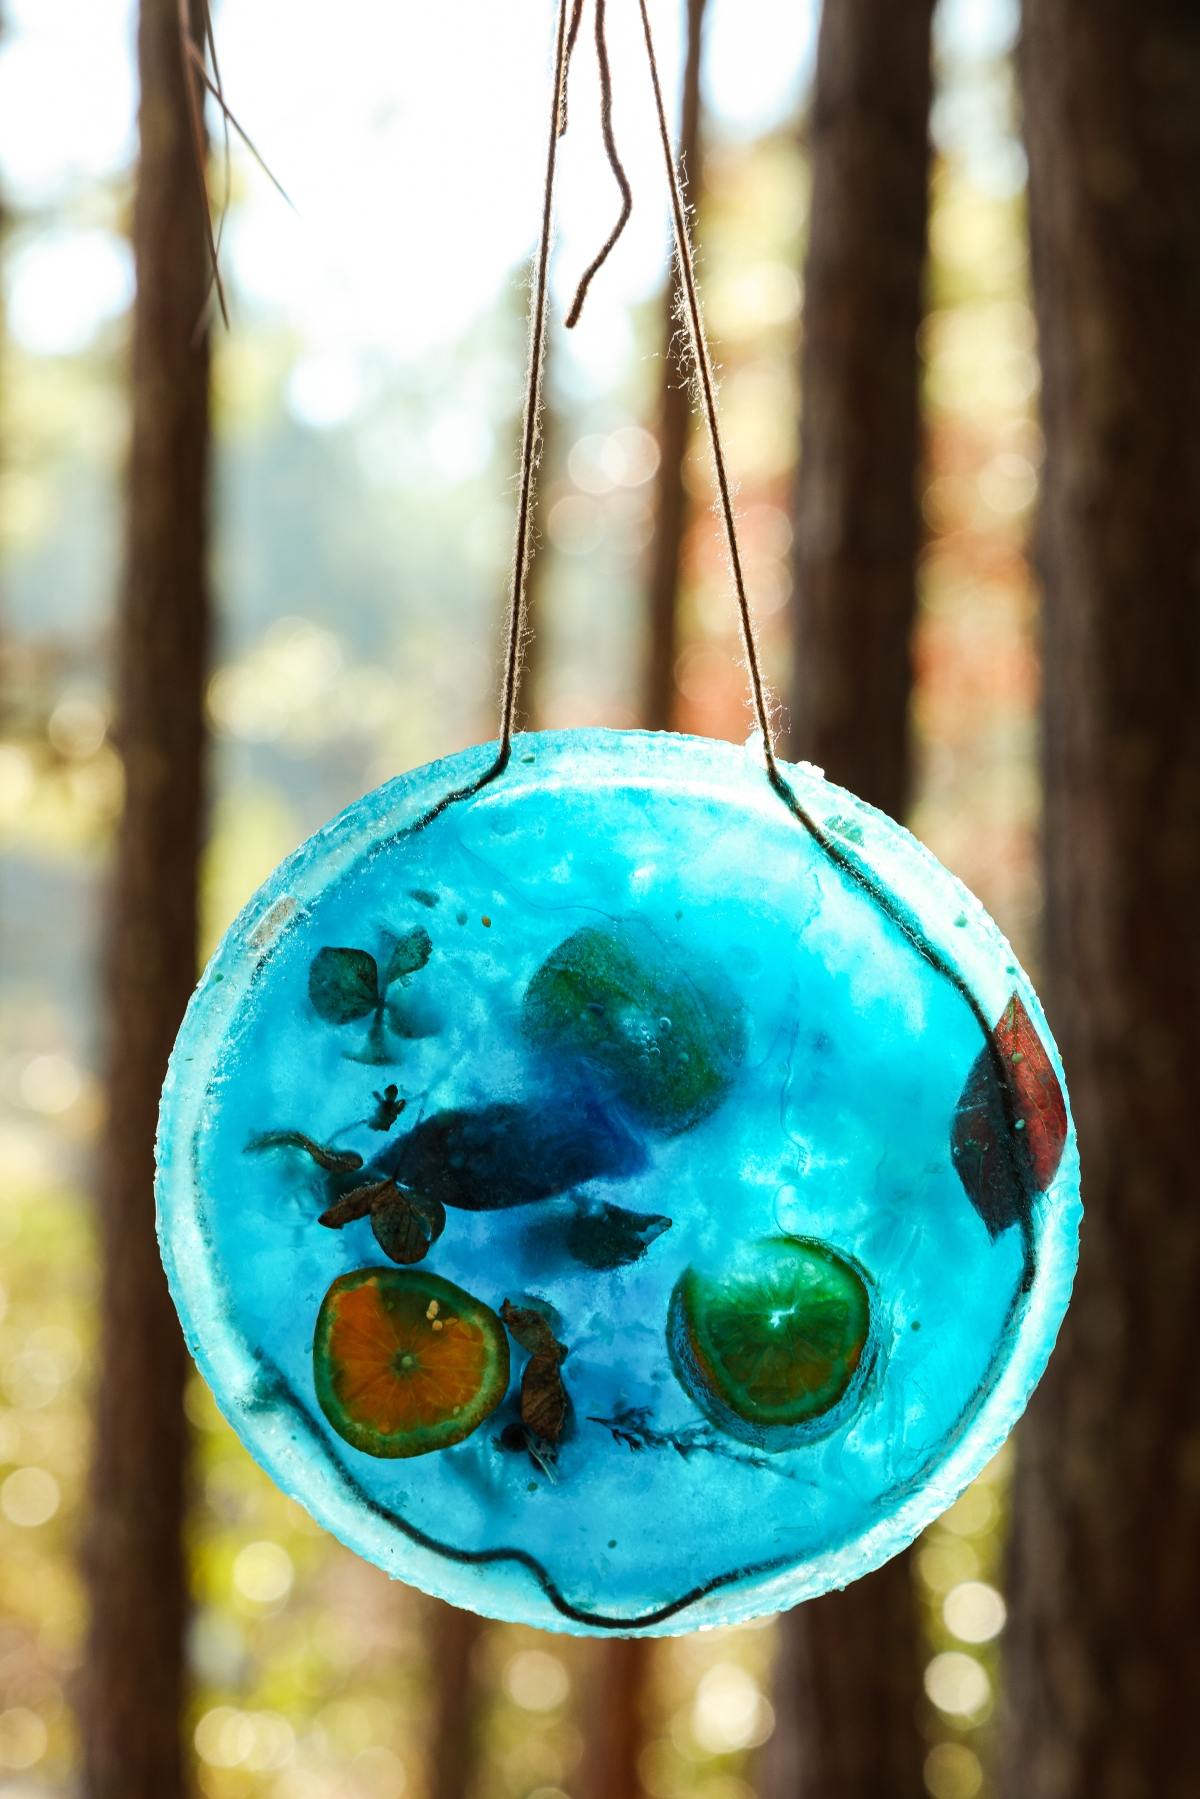
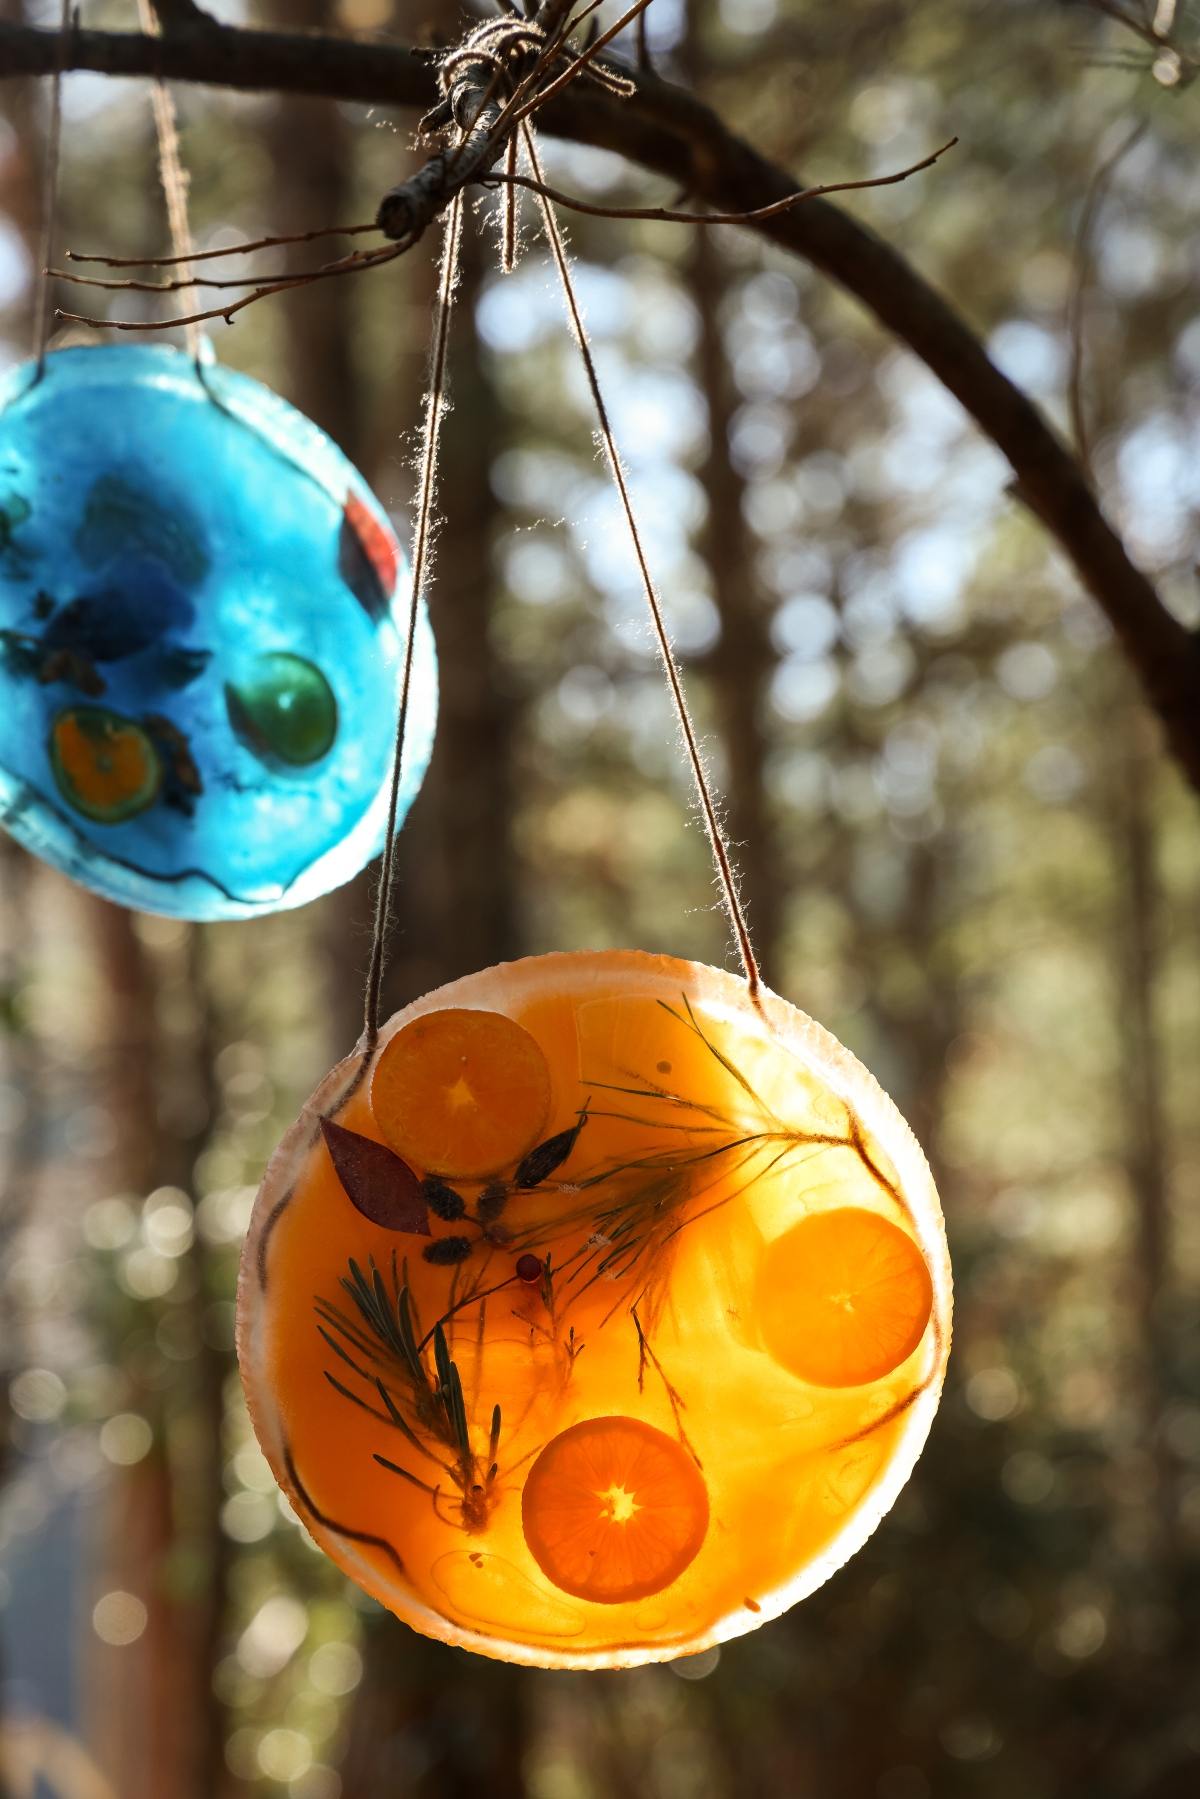
Food coloring: Optional. Just a few drops will add vibrant color to the ice.
Citrus, cranberries and/or nuts: Optional additions to give texture and a festive look.
Bird seed: Also optional. To attract birds once the suncatchers begin to melt.
How to Make a Winter Suncatcher
For more detailed instructions with weights and measurements, jump to the printable recipe card.
Go on a nature hunt: Collect colorful winter flora, small twigs and berries.
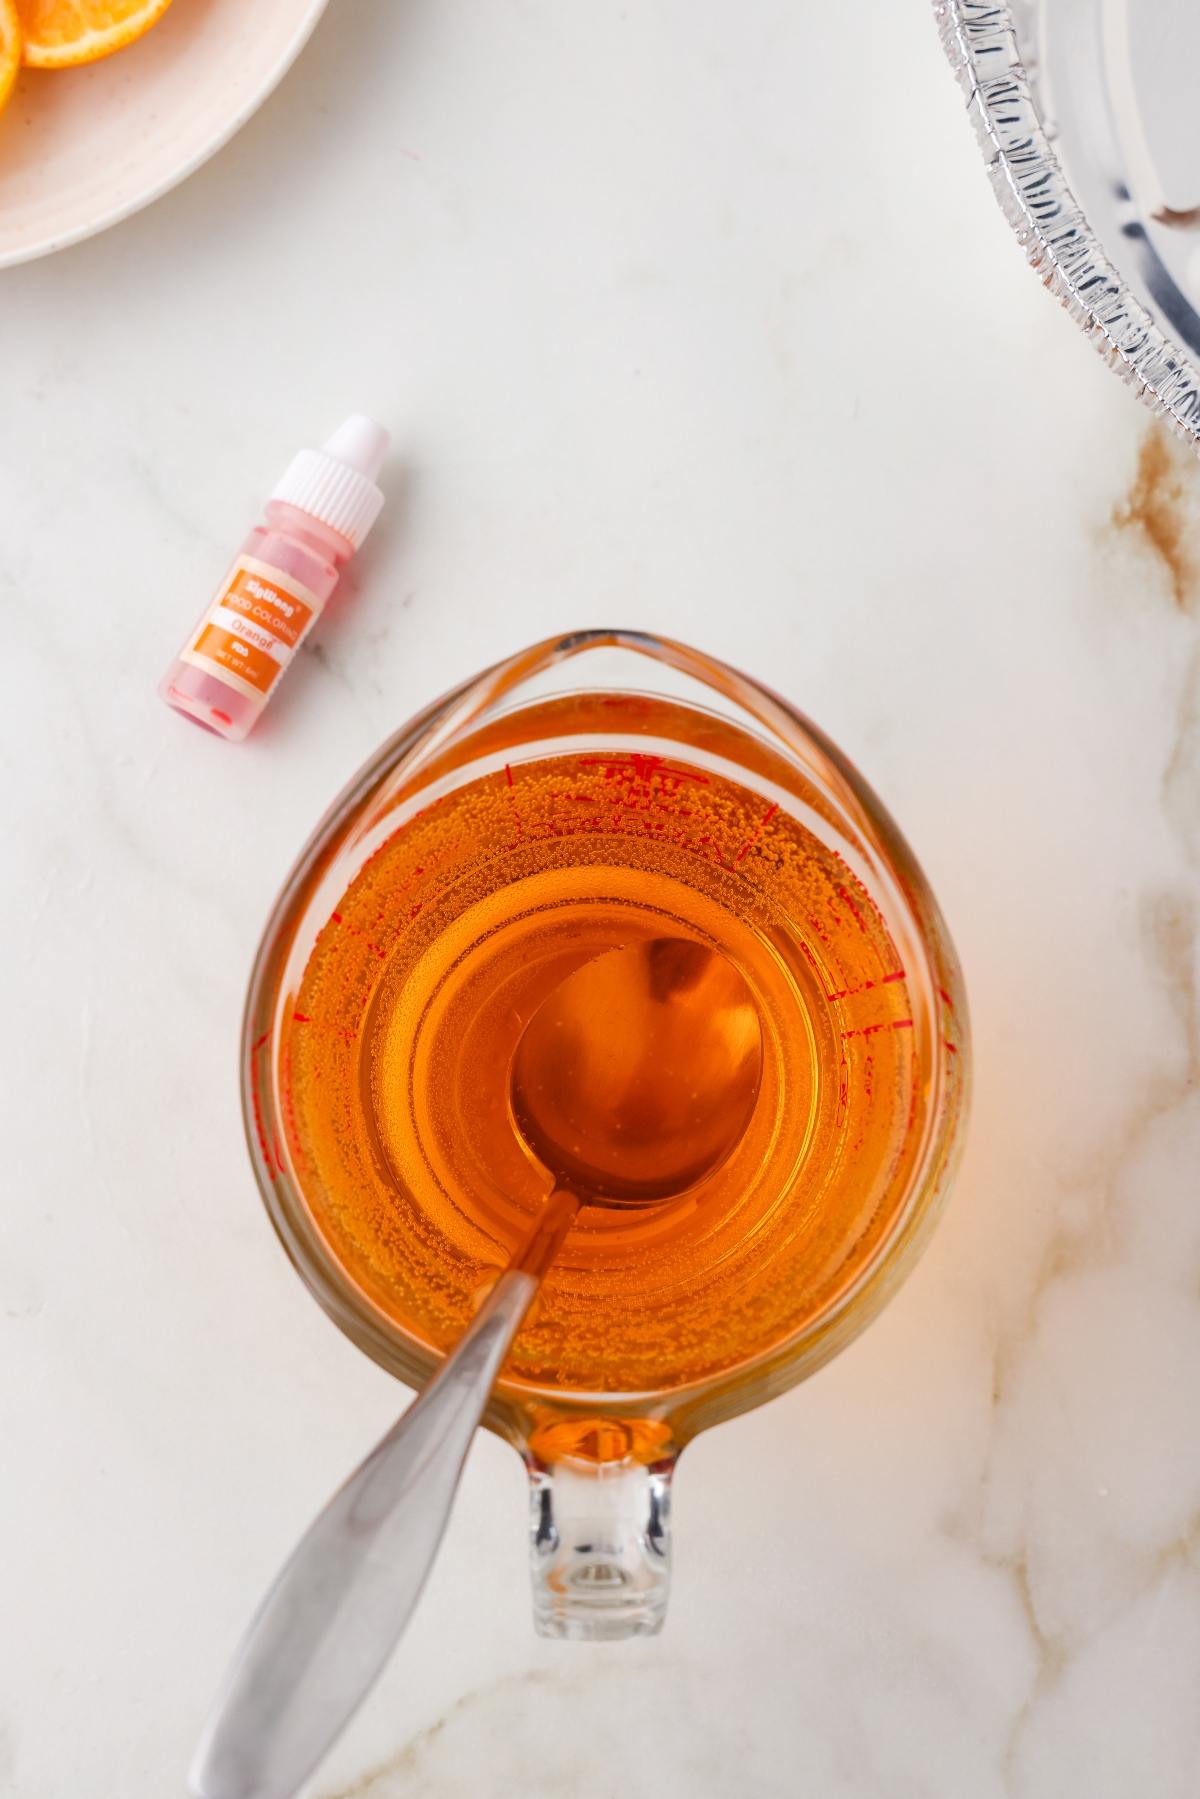
Mix the water: Stir one cup of water with several drops of food coloring.
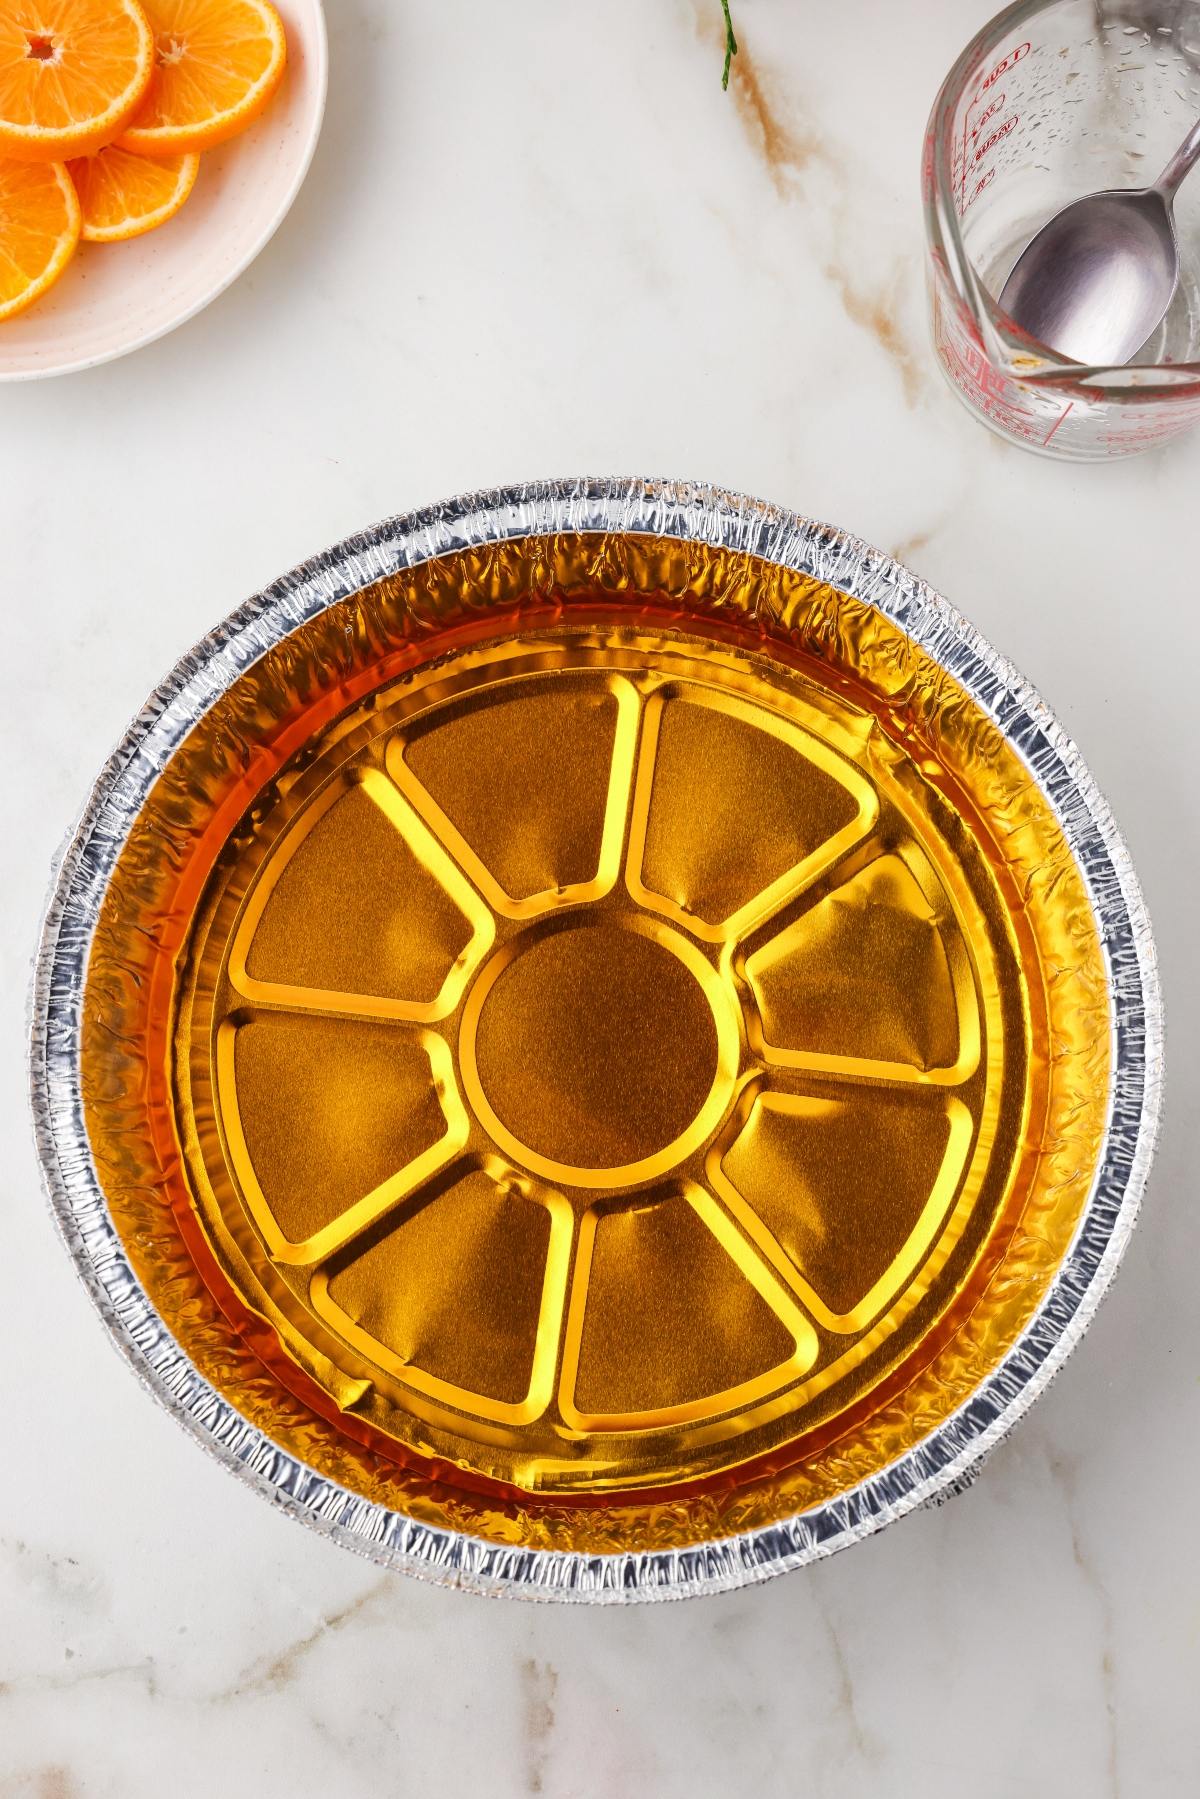
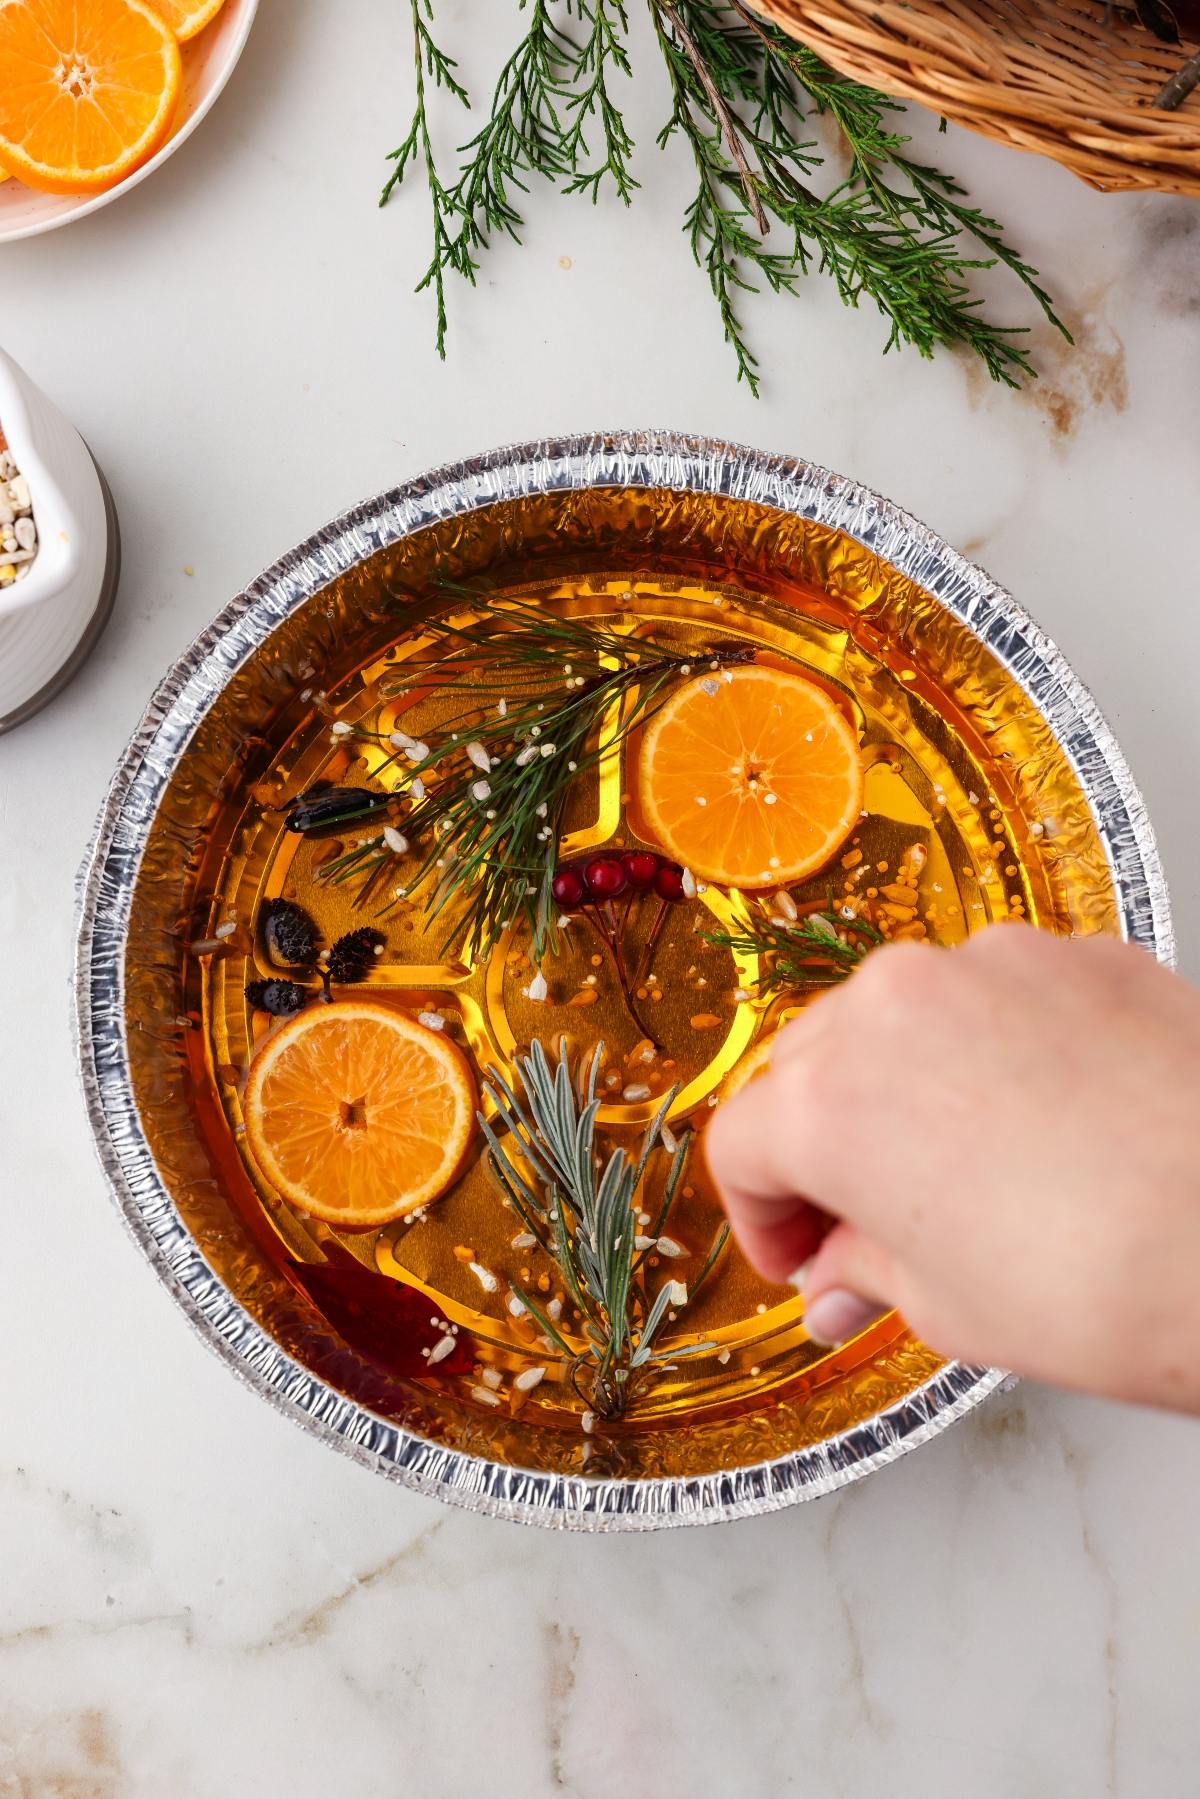
Pour into tins: Add the colored water to each disposable aluminum pie plate.
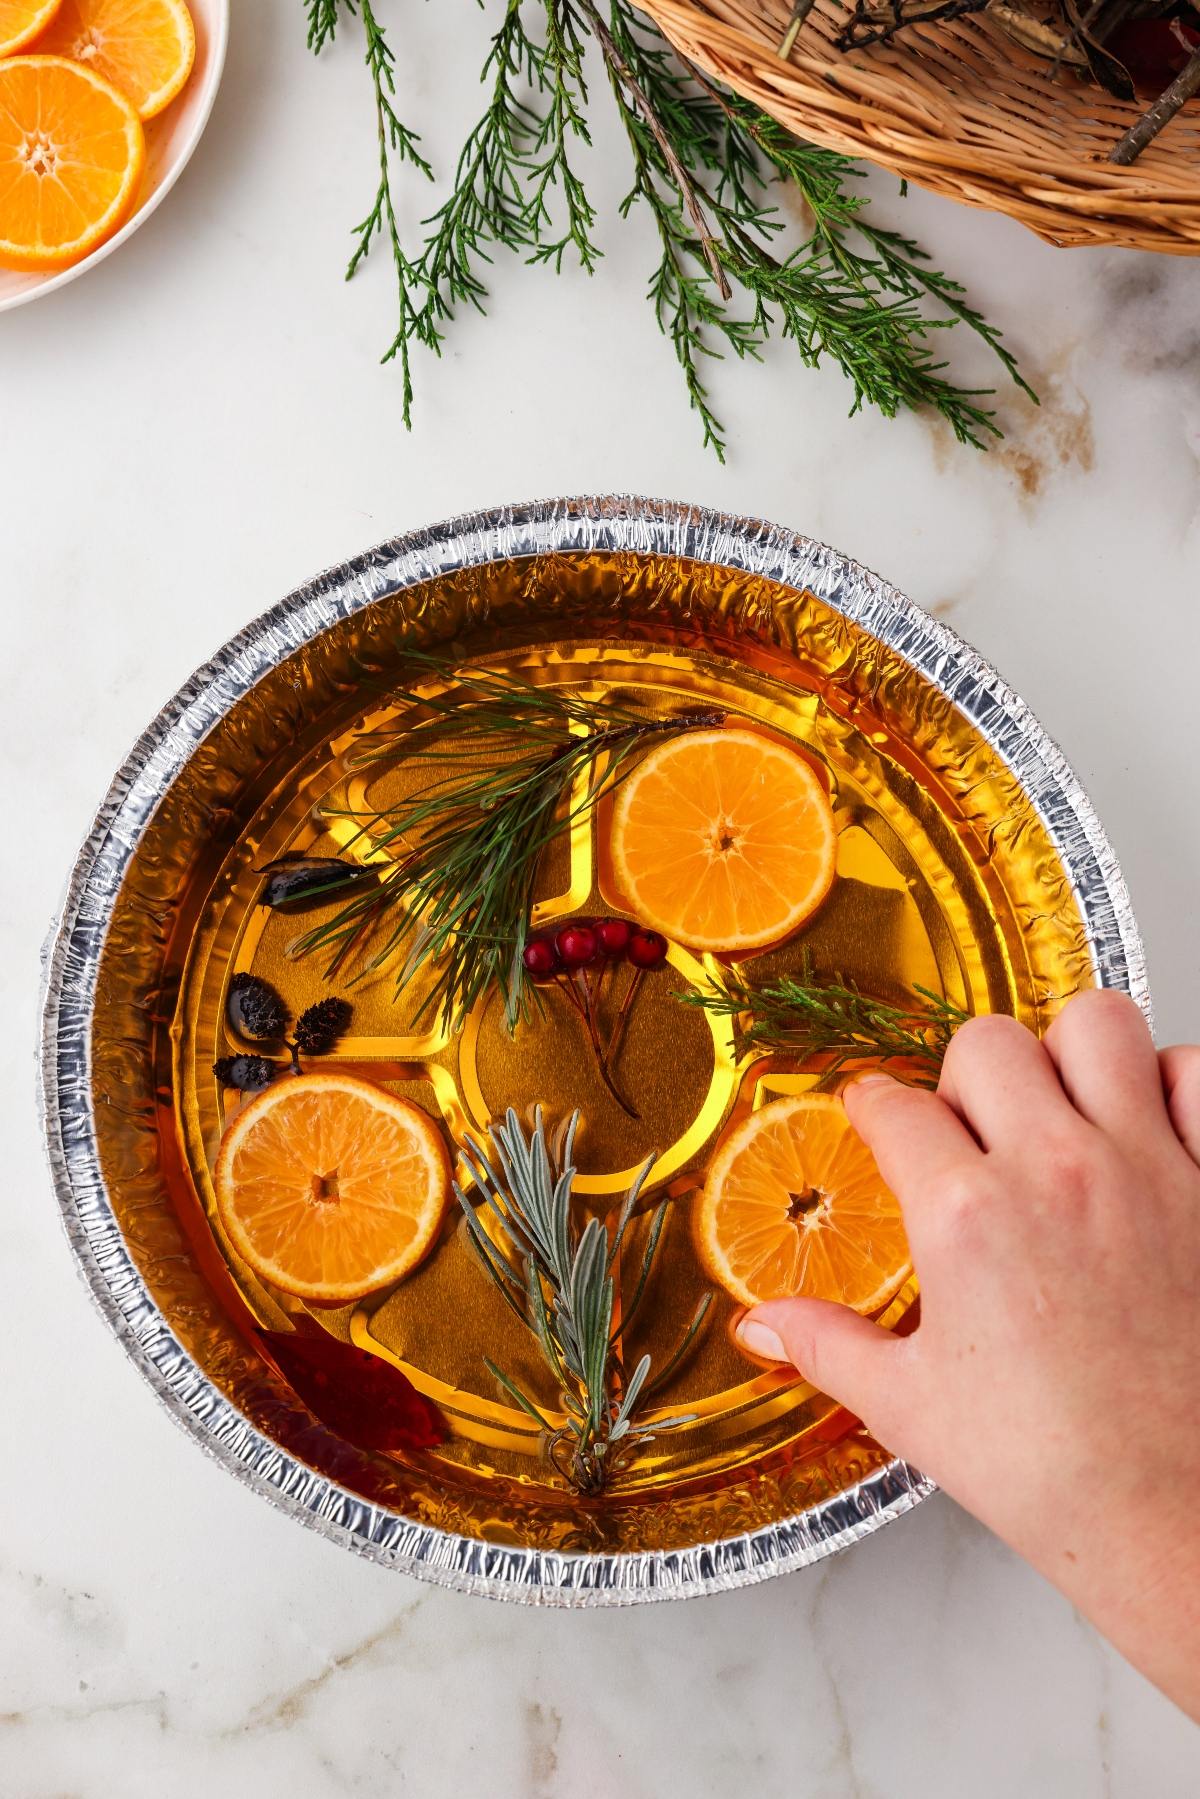
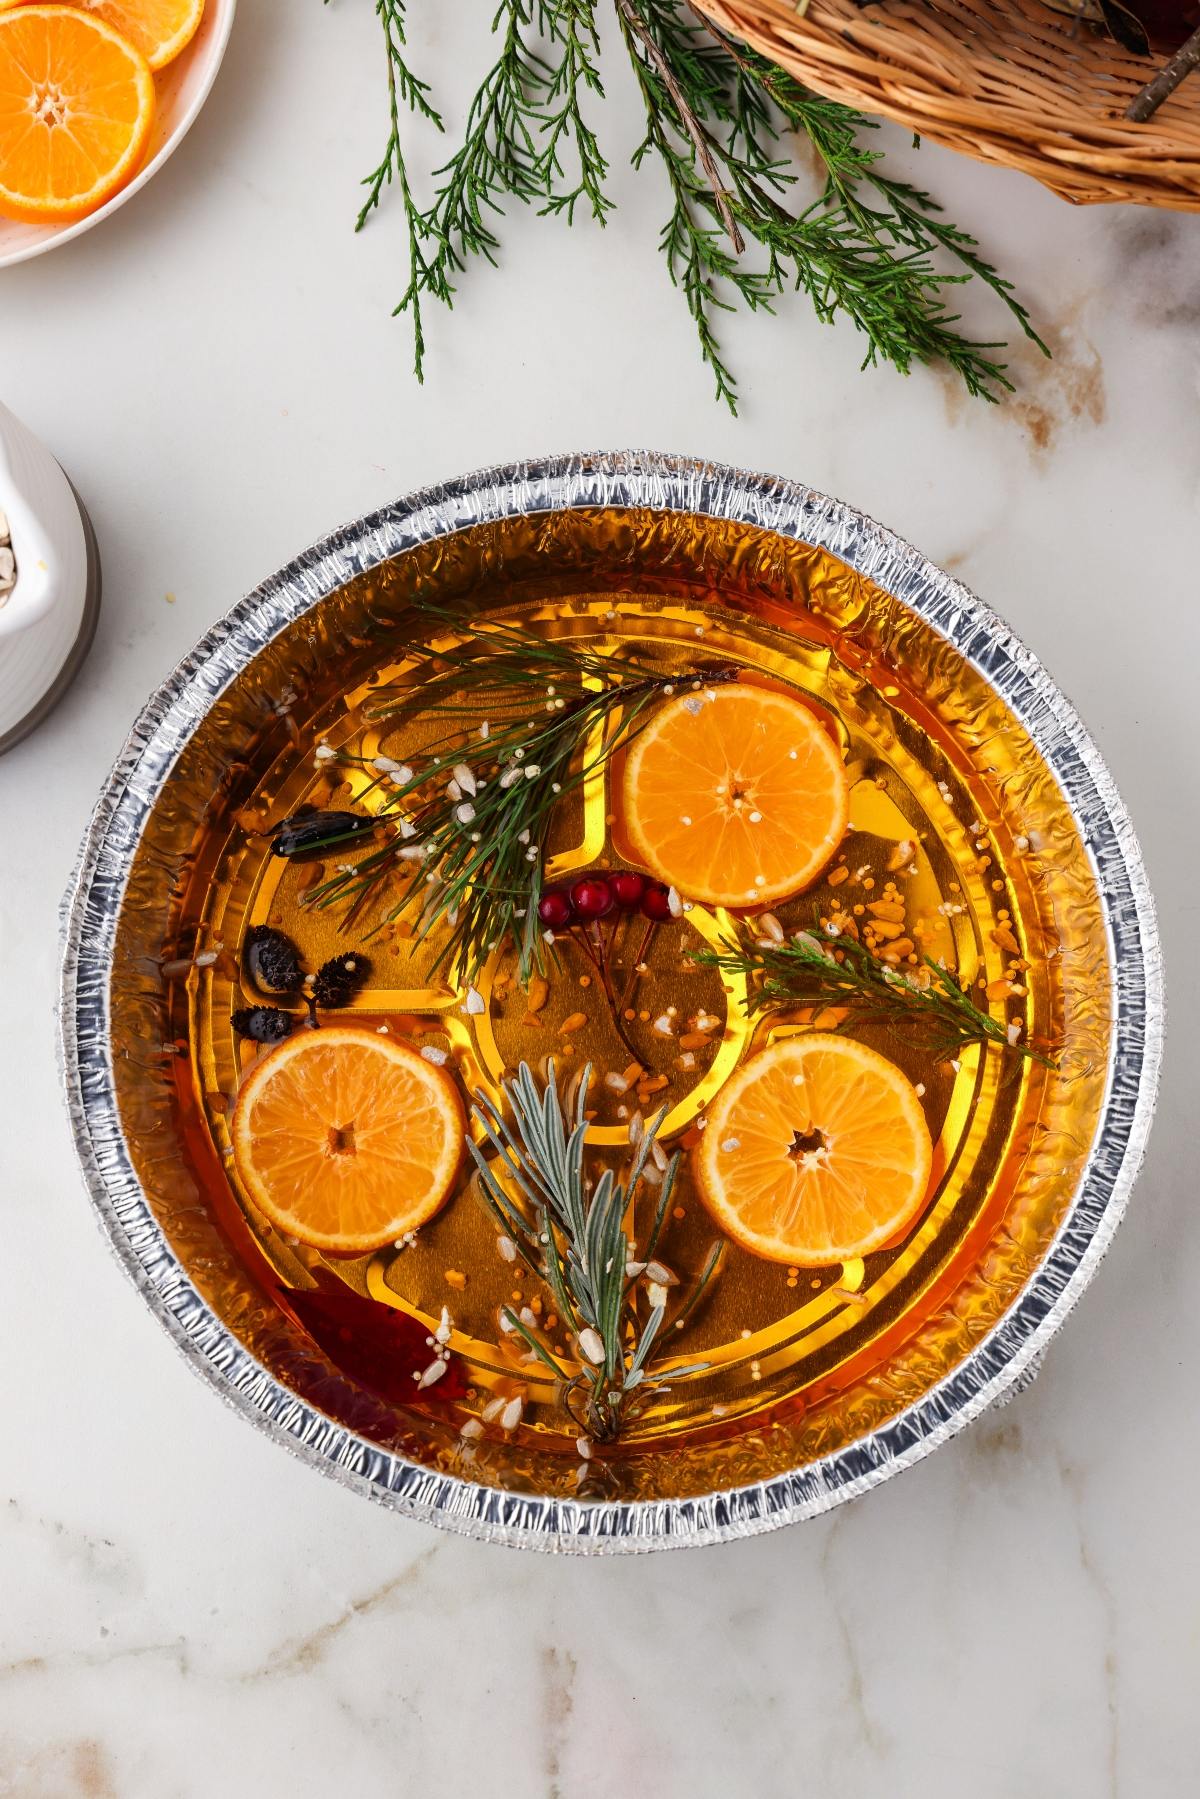
Add decorations: Place winter flora, citrus, nuts or cranberries in the water.
Optional stand: Tape a twig across the tin and poke a small hole to hold it upright if you want a stand.
Add bird seed: Sprinkle bird seed if you’d like to feed local birds.
Freeze: Set the tins outside in freezing weather or in the freezer until solid.
Add hanger: Lay yarn around the rim of the tin and press it into the water to freeze in place.
Refreeze: Return to the cold until the suncatcher is completely frozen solid.
Remove and hang: Pop the ice suncatchers out of the tins and hang them on trees or outside windows.
Substitutions and Variations
Natural dye: Try beet or blueberry juice instead of food coloring for a natural tint.
Bird-friendly version: Add seeds, nuts and fruit slices for wildlife to enjoy.
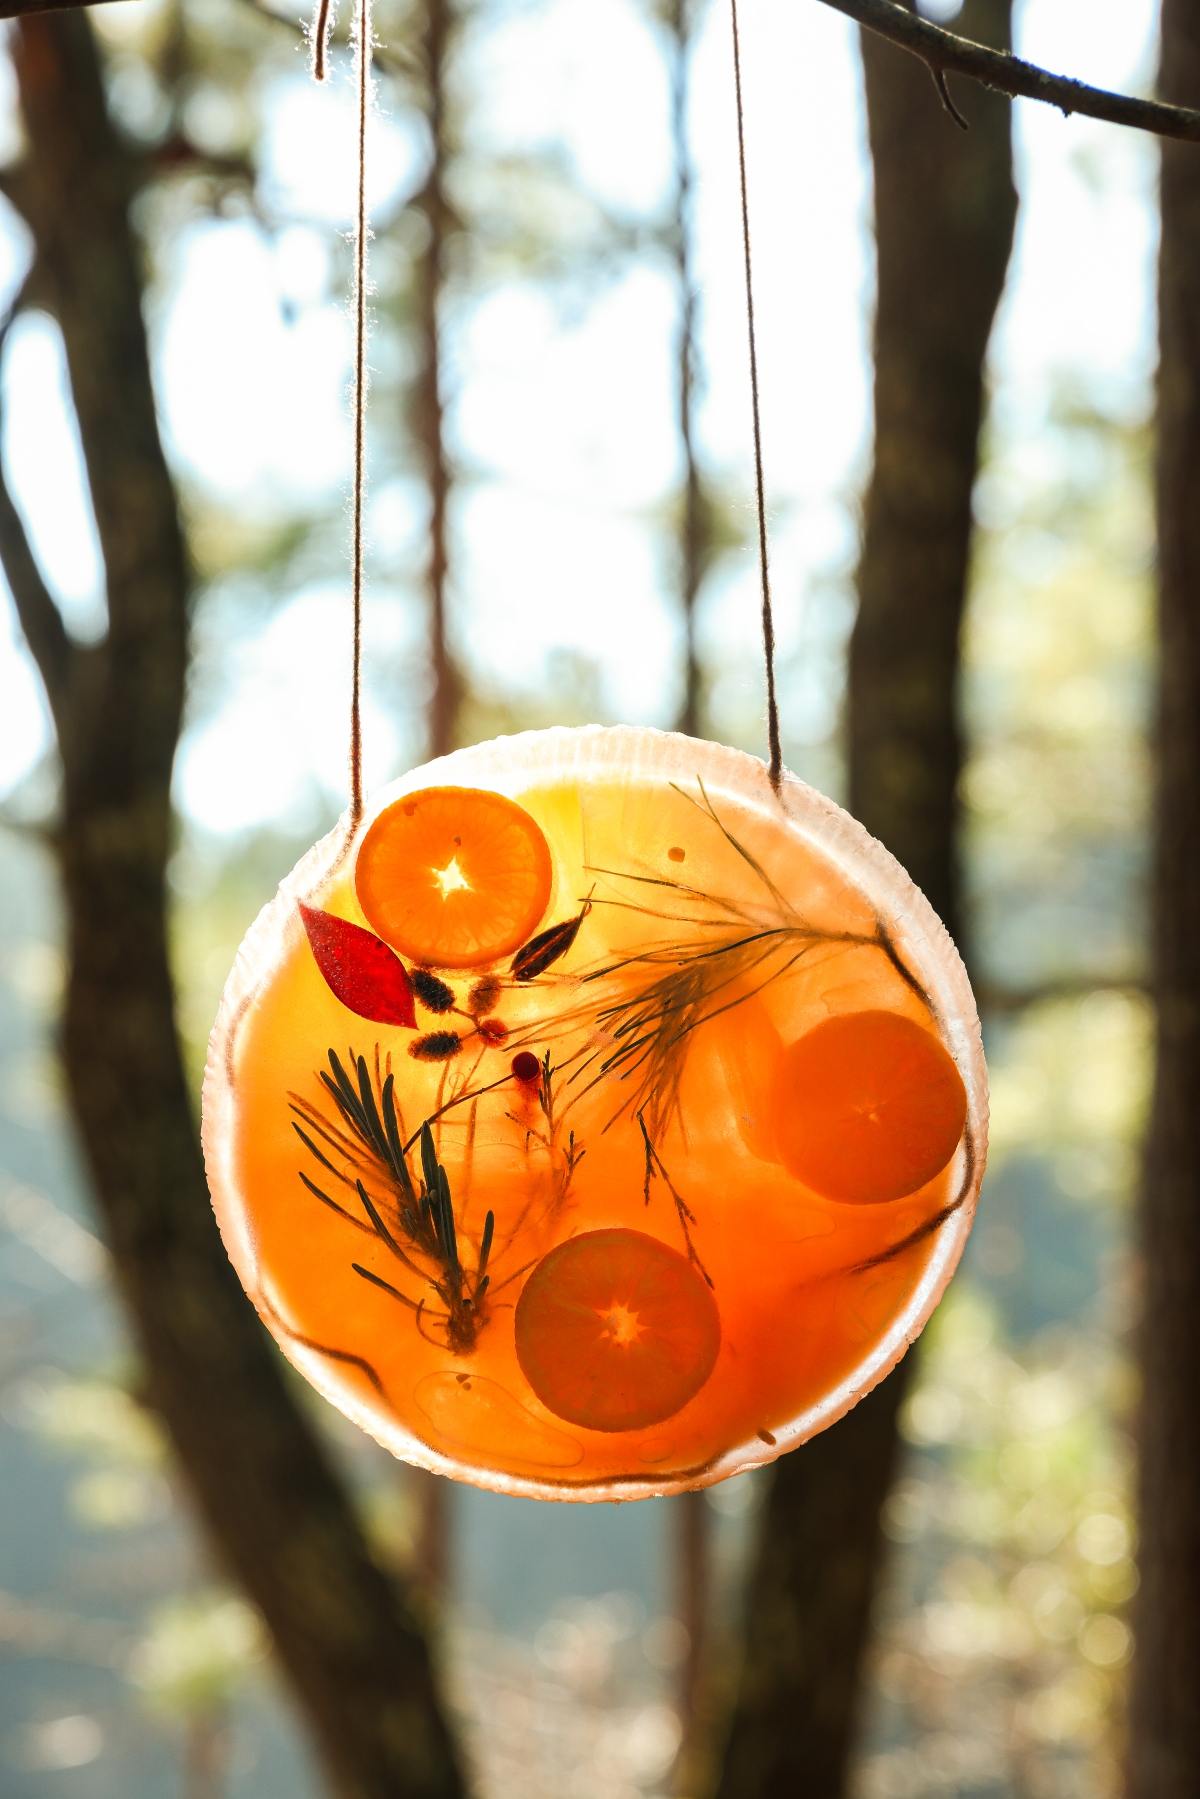
Citrus theme: Use orange or lemon slices for bright color.
Pretty them up: Use colorful ribbon instead of yarn.
Different shapes: You can use any molds or disposable foil containers for different shapes. Consider a wreath-shaped ornament for Christmas or pretty star-shaped ones perhaps.
DIY Ice Suncatcher Display Ideas
Tree branches: Hang ice suncatchers from sturdy branches where sunlight filters through the ice.
Balcony or porch railings: Tie them along railings for a sparkling outdoor display that catches afternoon light.
Bird feeder poles: Hang near feeders so birds can enjoy seeds and visitors can enjoy the view. You might like to snap cute pics and then upload them with fun winter captions!
Garden hooks: Use metal hooks or shepherd’s poles to suspend suncatchers at different heights for visual interest.
Windows: Hang them outside a sunny window to admire the colors from indoors while staying cozy, if you’re more into relaxing by a crackling fireplace than doing outdoor pursuits like skiing or cold water dipping!
How to Store Ice Ornaments
Store: Keep finished suncatchers outdoors in cold weather so they don’t melt too fast. They’ll last as long as the temperature stays below freezing. If kept inside, they’ll melt quickly, so display them outdoors only.
Freeze: You can make them ahead and store them in the freezer until ready to hang.
Top Tips
Check the weather: This craft works best at 20°F or below. The colder it is, the quicker your sun catchers will freeze.
Layer colors: Freeze half the water, then add another colored layer for depth.
Press items down: Make sure decorations are submerged before freezing.
Secure yarn: Press it into the water so it freezes solidly for hanging.
Experiment: Try different shapes by using other freezer-safe containers.

Ice Suncatcher Winter Craft FAQs
Yes, they’ll still look beautiful with natural colors from plants and berries.
Yes, as long as you use bird seed and edible items like fruit and nuts.
Yes, the freezer works perfectly if it isn’t cold enough outdoors and you have freezer space.

DIY Frozen Suncatchers Tutorial
DIY Ice Suncatchers
Equipment
- Yarn
- Spoon
- Tape
Instructions
Go on a Nature Hunt
- Head outside to find beautiful winter flora! You may be surprised by all of the plants that have been left behind from the previous seasons, and by plants that actually grow in the colder months. If you want to make a “stand” for your suncatcher, gather a few small twigs while you’re out. The stand is optional.
Assemble the Suncatchers
- After gathering the winter flora, measure one cup of water and add about 5 drops of food coloring. Mix well.
- Pour the colored water into a pie tin.
- Add winter flora from your nature hunt.
Optional Birdseed
- Sprinkle some birdseed. Birds and squirrels will love the extra treats left behind when these suncatchers begin to melt. You can even make a stand for birds if the temperatures will be freezing for a while so that the birds can land and pick a treat.
Optional Stand
- If you want to add a stand for birds, stretch a piece of tape across the pie tin and poke a tiny hole with your scissors right in the middle. Place a small twig in the hole to let it freeze in place.
Freeze Them
- Once all of your pie tins are filled with one cup of water and decorated with the winter flora, place them outside to freeze for about 2 hours. If it is not yet freezing outside, you can carefully place them in the freezer until they are frozen.
Add the Yarn
- Once the water is frozen, or mostly frozen, add one more cup of colored water to the pie tin. Now, you should have two cups of water total in your pie tin.
- Take the cut end of a skein of yarn and line all around the perimeter of the pie tin. Start at the top (at about 1 o’clock) and go all the way around the tin back up to about 11 o’clock.
- When you have made the two ends as long as you want them back up at the top of the suncatcher, cut the yarn and secure it with a knot. Our yarn measured about 36 inches or so. You can secure the yarn with a piece of tape, but we didn’t find this necessary.
- Press the yarn down into the water so that it is fully submerged in the suncatcher and will freeze in place. This will be the hanger.
Freeze Again
- Place back outside (if it is freezing!) or in the freezer for several hours, or overnight.
Display Them
- When the suncatchers are frozen solid, they will easily pop out of the pie tins! Just give the bottom of the pie tin a gentle pop, and the suncatcher will release.
- Hang the icy suncatchers in a tree branch or on a bird feeder pole – any place where you will see them and see the sun shining through. Hanging them outside a window to observe is also a fun way to enjoy them from the warmth and comfort of indoors!
Notes
Layer colors: Freeze half the water, then add another colored layer for depth.
Press items down: Make sure decorations are submerged before freezing.
Secure yarn: Press it into the water so it freezes solidly for hanging.
Experiment: Try different shapes by using other freezer-safe containers.
DIY ice suncatchers are a fun way to bring the beauty of winter indoors while enjoying nature’s textures and colors. Kids will love watching these beautiful frozen suncatchers sparkle and shine in the sunlight. Whether made outdoors on a snow day or in your freezer, these icy ornaments are sure to add cheer and creativity to your winter days. They’re like mini ice sculptures and no two are identical.
Other Crafts to Try
Bella Bucchiotti
Bella Bucchiotti is a Canadian-based syndicated food, travel, and lifestyle writer, photographer, and creator at xoxoBella. She founded xoxoBella in 2015, where she shares her love for food, dogs, sustainability, fitness, crafts, outdoor adventures, travel, and philanthropy to encourage others to run the extra mile, try new recipes, visit unfamiliar places, and stand for a cause. Bella creates stress-free and family-friendly recipes for weeknight dinners and festive feasts.