This post may contain affiliate links, please see the privacy policy for details.
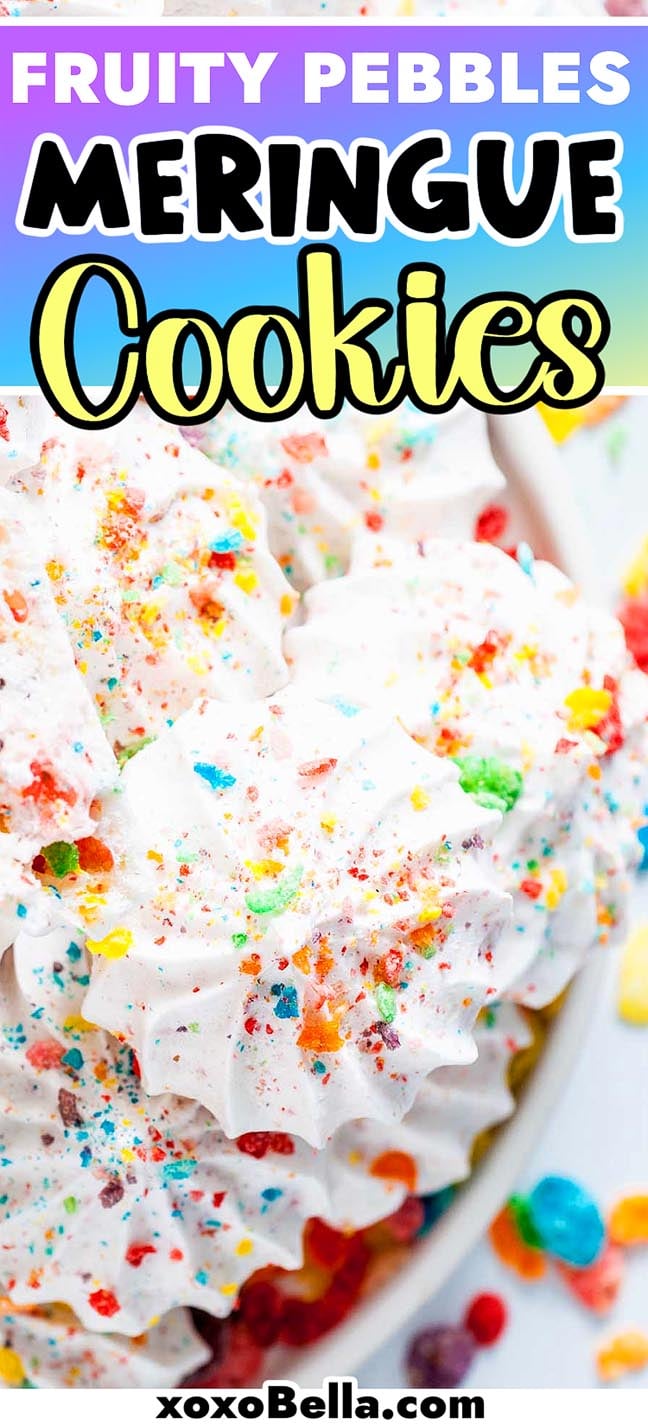
These Fruity Pebbles meringue cookies couldn’t be easier to prepare. They’re a real treat for cereal lovers. So, if this type of cereal is one of your favorites, these sweet and crunchy Fruity Pebbles cookies are going to impress you. If not, you can substitute in Lucky Charms, Rice Krispies, Cinnamon Toast Crunch, or whatever sugary cereal you happen to love, or even experiment with different kinds mixed together. Any cereal would work with the fluffy, sweet meringue cookies to make the kind of treat that’s simply irresistible.

Fruity Pebbles meringue cookies make a change from a plain bowl of cereal. The signature meringue crunch makes these perfect for anyone with a sweet tooth.
If you’re a fan of these you might like to try an air fryer pavlova, frosted Lucky Charms Cookies, or make a holiday cookie box.

Why You’ll Love It
A great sweet treat: This Fruity Pebble meringue kisses recipe pairs your favorite childhood cereals with the gooey stickiness of meringue for a colorful, appealing and indulgent treat.
Easy to make: Once you’ve mixed the ingredients together, you just have to pipe the Fruity Pebbles meringues on a baking tray and cook them in the oven.
Perfect for the kids: Although no cookie-loving adult is going to turn down one of these beauties, they’re especially popular with the kids, so if you’re baking for little ones, this is a great recipe to add to your repertoire.

Fruity Pebbles Meringue Cookies Ingredients
A complete list of ingredients and amounts can be found in the recipe card below.
Egg whites: Create the base structure for the cookies, allowing them to become airy and light.
Granulated sugar: Sweetens the cookies while contributing to a glossy, stiff texture.
Cream of tartar: Stabilizes the egg whites, helping them whip into firm peaks.
Clear vanilla extract: Provides a mild vanilla flavor without altering the color.
Fruity Pebbles cereal: Adds a fun, colorful crunch and fruity flavor, both inside the cookie mixture and as a topping.

How to Make Fruity Pebbles Cookie Meringues
For more detailed instructions with weights and measurements, jump to the printable recipe card.
Prepare the meringue mixture: Use a stand mixer with the whisk attachment or using an electric mixer, beat egg whites and cream of tartar until you see air bubbles and it’s frothy.
Sweeten it: Next beat in the sugar, bit by bit.
Continue beating the mixture: After a few minutes, the batter should begin to form stiff peaks, at which point you can gently fold in the vanilla extract, along with some of the crushed cereal.
Pipe the meringues: Put the meringue mixture in a piping bag or pastry bag and pipe it on to a parchment paper lined baking sheet.
Bake the Fruity Pebble meringues: Give them 1½ hours in a cool oven then turn off the oven and let them sit in there for another couple of hours to cool completely or until the oven’s cooled to room temperature.

Substitutions and Variations
Fruity Pebbles: These will work with any kind of cereal, whether you want to use a fruity cereal or something else. You could even combine for than one.
Food coloring: If your chosen cereal isn’t colorful, you might like to add a couple of drops of food coloring to the batter to make it look pretty.
Gluten-free version: Actually Fruity Pebbles are gluten free already because they’re made with rice rather than wheat. Of course, you can also use a different gluten free cereal if you have another favorite.

Serving Suggestions
As a sweet treat: Enjoy these as a snack or sweet treat at any time of the day, or rustle up a batch for a special occasion. Pair them with any drink you like from an iced lavender matcha latte to a mango a-go-go smoothie.
Make some as a gift: You could make a batch as a gift and maybe make another kind of cookie too, such as kolachy cookies, blueberry pie cookies or chocolate roll cookies.

How to Store Meringues with Fruity Pebbles
Store: Keep the Fruity Pebbles cookies in an airtight container on the countertop or in the fridge and they should stay crisp for a couple of weeks.
Freeze: You can also freeze them in an airtight container or freezer bag for up to 6 months.
Thaw: Defrost overnight in the refrigerator or for an hour or so on the counter.

Top Tips
Whip the egg whites slowly: Begin whipping at medium speed and gradually increase. Slow, steady whipping helps build stable peaks.
Add the sugar gradually: Sprinkle in the sugar a little at a time, taking a couple of minutes to add it all. This helps dissolve the sugar evenly and creates a smooth, glossy mixture.
Crush the cereal finely: Make sure the Fruity Pebbles are broken into tiny bits so they incorporate evenly into the meringue. Larger pieces can weigh it down.
Use a piping bag for uniform shapes: Piping the cookies creates consistent sizes, which helps them bake evenly.
Bake low and slow: The low oven temperature and long baking time help the cookies dry out properly without browning.
Cool in the oven: Allowing the cookies to cool in the oven ensures they finish setting and maintain their crisp texture.

Meringues with Fruity Pebbles FAQs
A good meringue should be light as air and crispy and crumbly in the mouth. Almost seeming to melt on the tongue. The first very important thing to do is make sure the meringue batter forms stiff (not soft) peaks before attempting to pipe it. The second is not to open the oven door at all after putting them in there. Stick with those two tips and your meringues should come out perfectly.
The Milk Bar Life cookbook by Christina Tosi features a meringue recipe, which inspired this easy cookie recipe.


Fruity Pebbles Meringue Cookies
Equipment
- Stand Mixer with Whisk Attachment
- Rolling Pin or Meat Mallet
- Pastry Bag with Large Open Star Tip
Ingredients
- 4 egg whites
- ¾ Cup granulated sugar
- ½ Teaspoon cream of tartar
- ½ Teaspoon vanilla extract, clear
- 1 ¼ Cups Fruity Pebbles cereal
Instructions
- Preheat the oven to 200°F and line a baking sheet with a silicone baking mat or parchment paper.
- In the bowl of a stand mixer fitted with a whisk attachment, combine the egg whites and cream of tartar.
- Begin whipping the egg whites on medium high speed, once they begin to look frothy, very slowly sprinkle in the sugar. The process of adding the sugar should be very slow and gradual, just a tiny bit at a time, it should take you a couple of minutes to do this. Continue to whip until the egg whites can hold a stiff peak and look a bit glossy.
- Add in the clear vanilla extract and whip until combined.
- Put 1 cup of the Fruity Pebbles in a Ziploc bag. Crush the cereal into tiny bits using a rolling pin, flat meat mallet, or your hands. Add the crushed cereal to the egg whites and give one last good mix.
- Scoop the mixture into a large piping bag fitted with a large open star piping tip.
- Pipe the mixture into little swirls or any shape you would like, no larger than about 2” and sprinkle the remaining cereal on top.
- Once all the cookies are prepped, place them into the oven and bake for 1½ hours. After 1½ hours turn the oven off, but do not open the door. Let the cookies sit in the oven for at least 2 more hours or until completely cool.
- Remove from the oven and serve or store in an airtight container.
Notes
Add the sugar gradually: Sprinkle in the sugar a little at a time, taking a couple of minutes to add it all. This helps dissolve the sugar evenly and creates a smooth, glossy mixture.
Crush the cereal finely: Make sure the Fruity Pebbles are broken into tiny bits so they incorporate evenly into the meringue. Larger pieces can weigh it down.
Use a piping bag for uniform shapes: Piping the cookies creates consistent sizes, which helps them bake evenly.
Bake low and slow: The low oven temperature and long baking time help the cookies dry out properly without browning.
Cool in the oven: Allowing the cookies to cool in the oven ensures they finish setting and maintain their crisp texture.
Nutrition


Fruity Pebbles meringue cookies aren’t like any other cookies you’ve ever had. They’re meringue-based, so you can expect them to be light with the perfect amount of chew. The colorful nature of Fruity Pebbles cereal also ensures they look great. If you are a fan of sugary cereals, you will love this Fruity Pebbles cookie recipe.
Other Recipes to Try

Bella Bucchiotti
Bella Bucchiotti is a Canadian-based syndicated food, travel, and lifestyle writer, photographer, and creator at xoxoBella. She founded xoxoBella in 2015, where she shares her love for food, dogs, sustainability, fitness, crafts, outdoor adventures, travel, and philanthropy to encourage others to run the extra mile, try new recipes, visit unfamiliar places, and stand for a cause. Bella creates stress-free and family-friendly recipes for weeknight dinners and festive feasts.


I loved experimenting with different cereals. They turned out perfectly crunchy!
Hi,
Is it possible to exchange the sugar with Splenda? Trying to lower the carbs. Thanks!
I haven’t tried making meringues with Splenda but it could work. I’d recommend adding a pinch of cream of tartar too, to help them stabilize. Let me know how yours come out!
These are the perfect treat for my kids. I think it’ll be great for a kid’s party too!
This one exceeded my expectations! So flavorful! 🙂
PLEASE help me! I would love to make these for Easter, but it seems one important step is missing – are the extra cereal pieces sprinkled on top of the meringues BEFORE or AFTER the cookies are baked? I can’t find that step anywhere in this recipe – thank you in advance for your help!
Hi, I’ve edited the recipe instructions to make it clearer. The pieces are sprinkled on top before baking so they stick to the meringues and stay in place. Enjoy the recipe!
That’s what I thought, but I wanted to make sure before I made them – thank you for your help!
You’re welcome!
Kids helped me make these adorable and festive fruity pebbles meringue cookies! They have so much fun. They turned out sweet and fluffy!
These are such a fun cookie for the kids. They loved sprinkling on the cereal and eating them.
These cookies were so fun to make! My son had a ball and we brought them to a birthday party to share (he has allergies so brings his own treats). All the kids were oohing and aahing! Thanks.
Delish! This was easier to make than I expected, thanks to your step my step instructions and images. I made them to my daughter’s birthday party and we all loved them.
I’ve never made meringue before as I always assumed they would be difficult. But my daughter found these on pinterest and was begging to make them. So we said we would have a go.
THANK YOU!
We had so much fun together in the kitchen and also the recipe was so easy to follow that ours looked just like yours! (That rarely happens for me!)
They were melt in the mouth and so much fun.
Great recipe and great instructions.